I am running into this particular issue and I have not found a satisfactory solution.
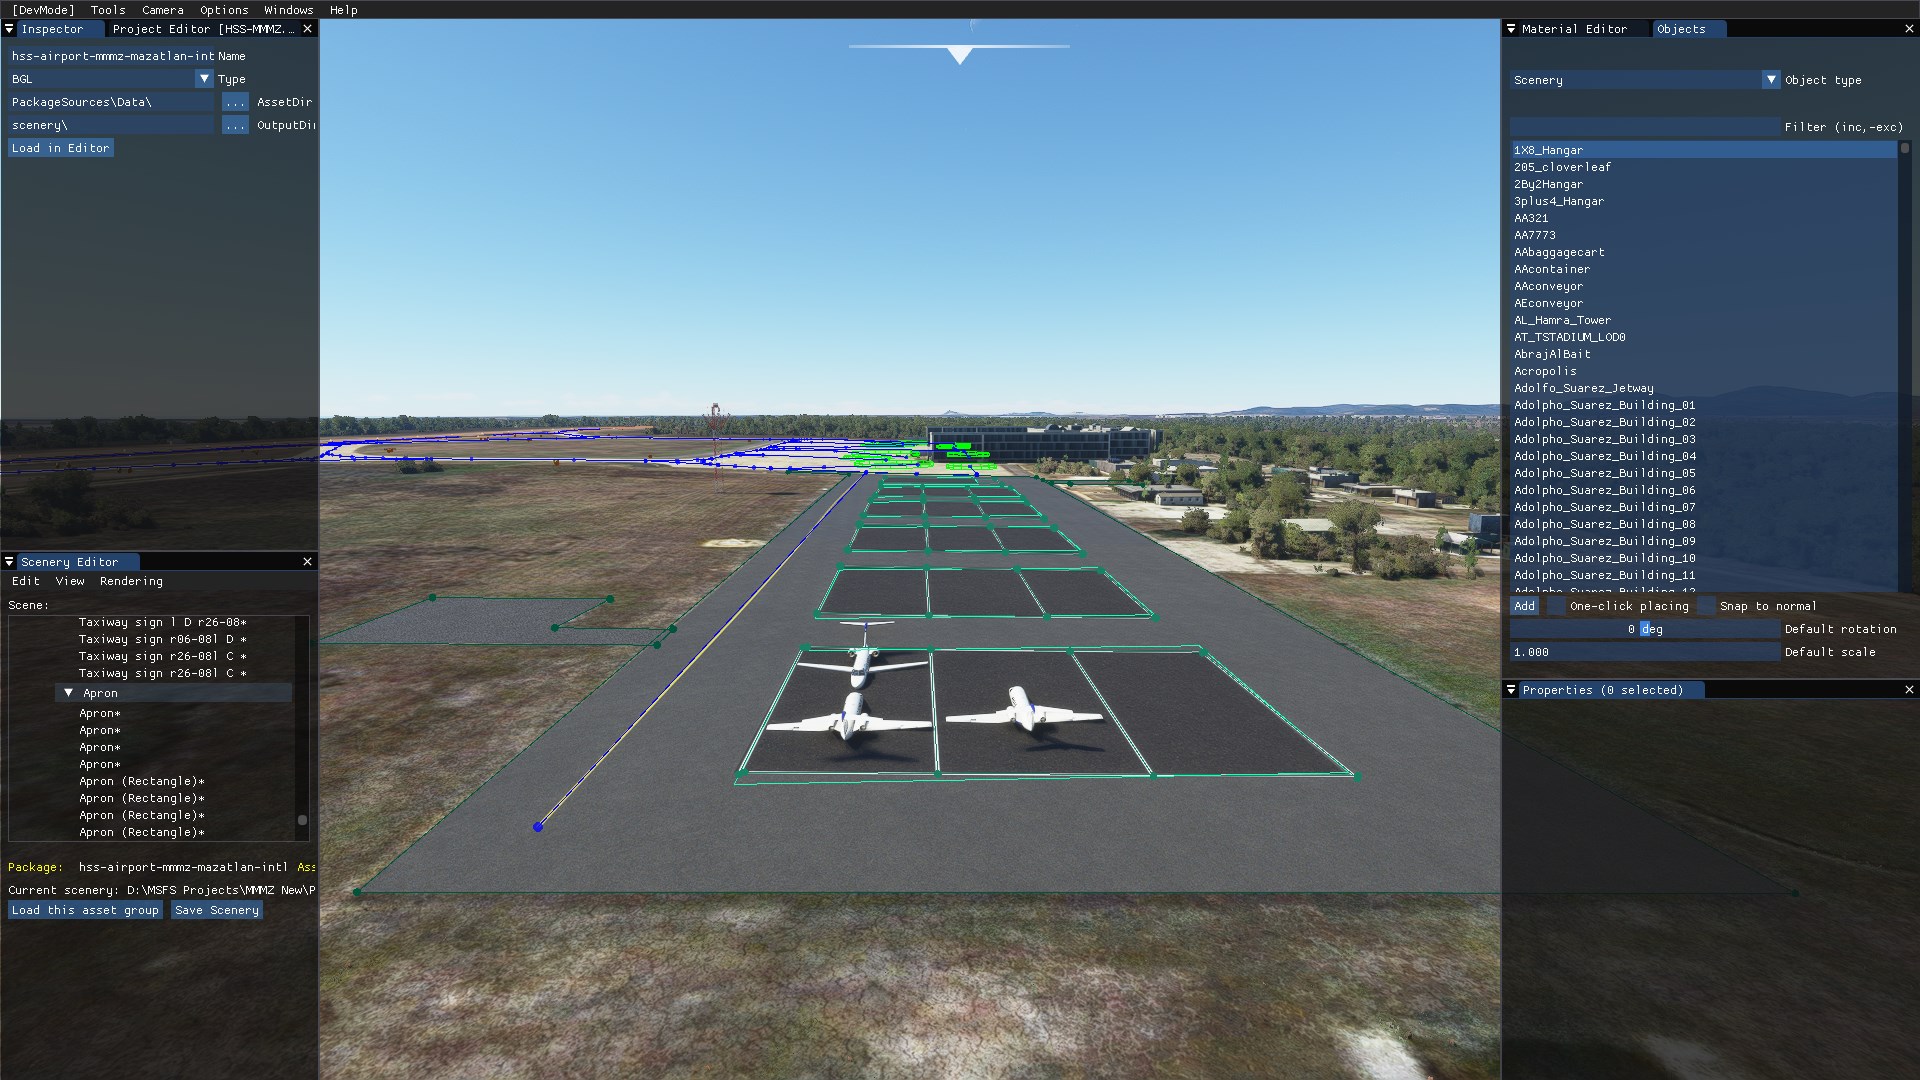
After I am done editing all my taxiway paths, nodes, parking spots, and aprons for the day, I always save my project and then close the sim for the night. For some reason, when I come back, all of these items appear below the surface of the airport, so at first, it seems as if they are misplaced or crooked, but they are just lower than the terrain, and the only way to fix is to select all the different items and “bring them back up”. Has anyone run into this? any suggestions?
The first pic shows the surfaces where they actually belong, the second shows what happens whenever i reload the sim
I have asked about this over on FsDeveloper, but nobody has responded (yet)
(1) Are these routes programmed in by the airport developer ?
or
(2) Are they AI generated within MSFS. ?
I am hoping it’s by AI, that when “fixed” will correct this for most airports.
If it is programmed by hand for each airport, I cannot seeing it being changed for YEARS !!!
or at least, only for some Hand Crafted Airports.
But them SO MANY much ore important things to fix, that stop planes from flying correctly – and it is a “Flight Simulator”, not a “TAXI simulator”
all of these are made by me over a default airport. I am VERY new to this, and so far it has been a little intimidating, but I guess time will tell. How’d you get the purple apron taxi markers? I have only been able to use taxi paths to the gate
When using Aprons, if you overlay one with another you need adjust the priority. So if the apron is drawn below another and you want it to be on top, make sure you check “Force draw above the runway” in the property window while also changing the priority. So, if you have three layers, the bottom should have a 0 priority, the middle a +1 priority and the top a +2 priority. Now if you add another layer but want it just below the top layer, you need to drop the priority down by clicking the minus button.