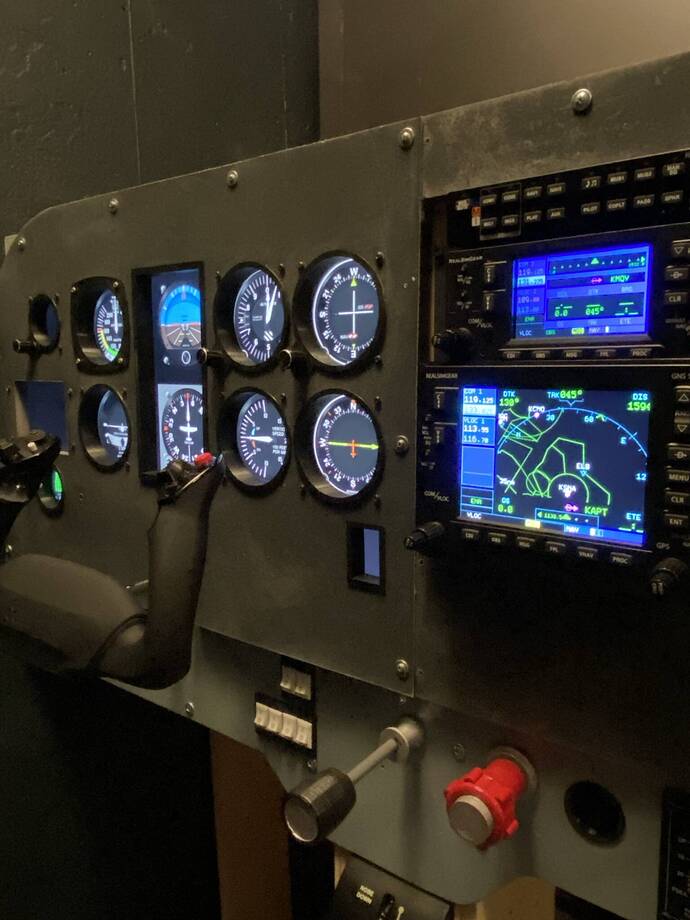
What screen do you use in that gns530?
Waveshare 5 inch TFT LCD Display B 800x480 I changed resolution to 640x480 in windows, drag pop out and ctrl+enter to stretch full screen
Your home cockpit setup is exactly what I am looking for. Do you have any tips/assistance you can offer for me to build my own? I am willing to hire you to build one for me, if possible. I am based in East Coast of USA. Wouldnt let me send you a DM. Thanks
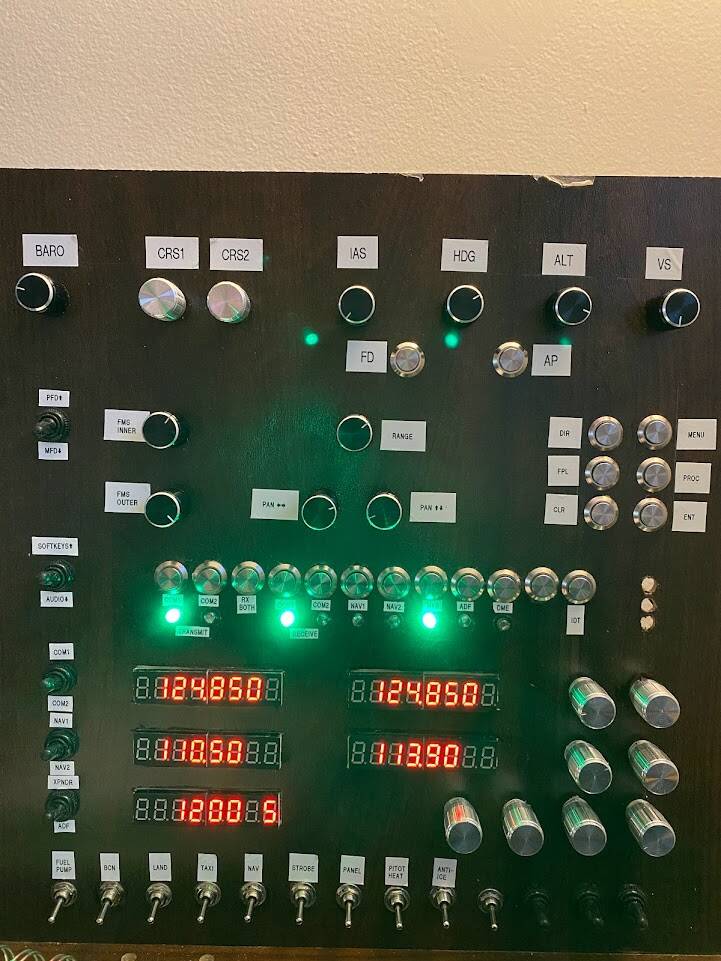
I got fed up with using the mouse to click on buttons in the cockpit, so I built a panel using two Arduino Mega 2560s and Mobiflight. It is a bit rough and ready but very useful. Sorry, it’s not the best picture!
I used 20 KY040 encoders (with integrated push button), 20 separate pushbuttons, 5 double throw toggles, 10 single throw toggles 5 seven segment ‘tubes’ and 9 LEDs.
From top to bottom, the functions are as follows:
- Autopilot panel. This has all the usual functions for a GA autopilot, including knobs for IAS, heading, altitude and VS, two bearings (OBS1 and OBS2) and baro pressure/altimeter. Pressing the knobs activates the respective autopilot mode (IAS->FLC, HDG->heading hold, ALT->alt hold, VS->vertical speed hold, OBS1->NAV and OBS2->Approach). There are pushbuttons to activate AP and FD. When designing the layout I followed the order of the controls in the Airbus MCP, and I have codes the IAS, HDF, ALT and VS pushbuttons so they toggle managed/selected modes when flying the FBW A20N. Makes flying the 'bus very easy!
- Garmin panel. Below the autopilot we have the Garmin panel which is primarily aimed at allowing control of the G1000. There is a toggle to select whether the PFD or MFD is controlled. The two left encoders correspond to the FMS inner and outer knobs (and click for CURSOR). In the middle we have three encoders which do the work of the range knob and the joystick for panning. On the right there is the GPS keypad with DIR, MENU, FPL, PROC, ENT and CLR functions. Immediately below all of this are 12 pushbuttons which are used for the softkeys under the PFD and MFD (or can be switched to audio panel …)
- Audio panel. By moving the toggle to ‘Audio’ the Garmin softkeys are repurposed as an audio panel allowing control of COM1, COM2, VOR1, VOR2, ADF, DME and Marker audio. Spare button #12 is used for transponder ident.
- Radios. Top radio may be switched between COM1 and COM2. Clicking the right knob transfers the frequency from standby to active. Middle radio is the same, but for NAV1 and NAV2. Below this is the transponder (set with four rotary encoders, one per digit). The button clicks on the transponder knobs control the mode: off, standby, on and mode C. Switching the toggle to ‘ADF’ allows the bottom display and knobs to be used to tune NDBs.
- Switch panel. Finally, at the very bottom we have switches for fuel pump, beacon, land, taxi, nav, strobe, panel, pitot heat and anti-ice, plus a few spares.
Most impressive pic of your setup - I am intrigued, can you please clarify what “stands/mountings” you are using for (a) pedals/yoke + throttle quadrant/Logitech Saitek panels + Monitor and paper rack, and (b) keyboard, and (c) FMS and mouse?
I would ideally like to keep my stuff off the desk that has the monitor on it, but can’t work out how to do so - your setup looks exactly what I am after.
Many thanks in advance, Alasdair (aka Flybasher…)
I bought it in Amazon. See below, is the stand with very few adaptations.
Wheel Stand Pro Super Warthog Wheel Stand Compatible with Thrustmaster HOTAS Warthog™ and Saitek Pedals. Pedals/Mouse/Keyboard/Throttles not Included
Honeycomb alpha and bravo with saitek panels attached. The keyboard is a logitech k480. Pedals thrustmaster on the stand. The FMS is an ipad pro with aviaserver McDU for Aerosoft CRJ 700. The side tables are regular small tables (my wife does not know i am using)
Hi pilotbanker - thanks v much for the info.
Will go away and look further into this, as it does look good for me.
DIY gets you just what you want. Nicely done.
It is a bit of a mess at the moment, but here is my cockpit, set up for the FBW A20N right now.
- Home-made autopilot / Garmin / radios / switches panel on the right, powered by Mobiflight
- Honeycomb Bravo
- CH yoke from a million years ago
- CH pedals
- Android tablet for MCDU
- I also use the laptop screen for the pop-out displays (PFD and ND, or two G1000 displays, depending on the aircraft.)
- Also using head tracking with Open Track + Beam on the iPhone
This reminds me of how I started expanding on my setup many years ago.
I started with a little switch box with 20 switches and LED’s connected to a Desktop Aviator interface.
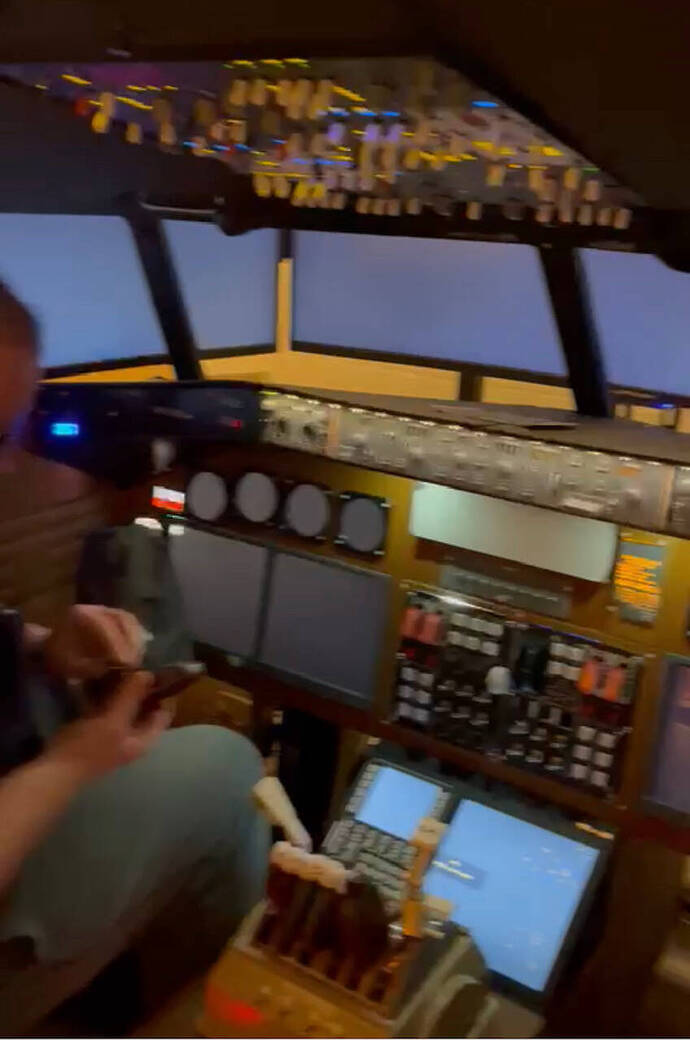
Now I have a home built cockpit (nothing fancy) with an overhead panel and pedestal.
It shows what you can accomplish if you put your mind to it. It doesn’t always have to be expensive. It being functional for your needs is all that matters. And of course the satisfaction of having created it yourself 
Building panels is an addictive hobby within a hobby! I am already planning my third iteration (the one you see above is the second iteration - the first one I did was a simple button box with rotary encoders.) I also need to upgrade the yoke one of these days (Honeycomb Alpha, maybe …)
I get it. I fly in VR, so the visuals aren’t important to me. But trying to use a mouse or (God forbid) keyboard mapping is just too big a PITA.
I just finished turning my Saitek yoke in to a FFB unit. Just finishing doing the same thing to my Saitek Combat Pedals. While the yoke was a combo of a MSFFB2 stick and the Saitek yoke; the FFB for the pedals is homegrown. I’m already redesigning both from scratch without the Saitek parts. I don’t even have 10 hours flight time with them yet!
Hi Everyone.
As soon as i know, how to delet the 3d Cockpit in MSFS i post some better pictures.
Regards from Switzerland.
Hi Tommy, please find here a very good instruction from Nils, who shows, of how to change the view.
For me, it works too, I fly GA with G1000 (2x Ipads via Simionic)
Best regards to Switzerland from the South of Germany,
Alex
Hi Alex
Thanks for that. I knew that vid. But i can’t enter in the script. I really don’t know why!
Regards
Tommy
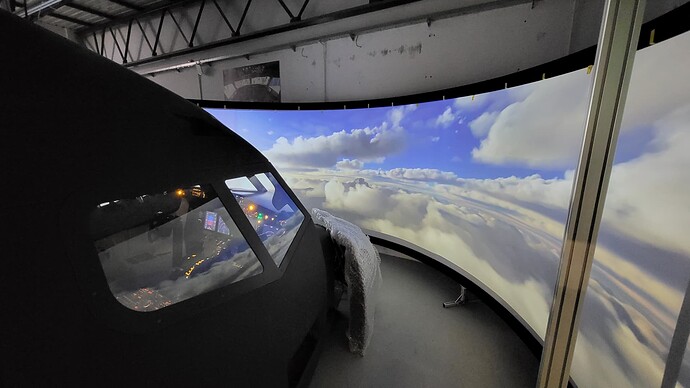
wonderful, except of this ugly stretching. I wonder if we will ever get a real 180 degree view in this game


