So I ran “USB Firmware Updater v726” from Brunner and re-installed CLS2Sim v5.7.3. Looks like the re-install helped.
1 Like
Glad to hear you got it sorted - finally got my hands on the sim and looks like it works for me.
Hi all, I’ve recently brought a Brunner yoke (Mark II) and using MSFS24. A complete and utter newbie and have not yet fiddled with the software to make my own profiles, but are there any good example profiles I can download from the forum you’d recommend for say a basic plane, like the Cesena 152/172. I want to see what the brunner can do… and have not yet found a great example. Any recommendations? Making me a little underwhelmed so far with the fabulously engineered yoke!
I pushlished quite a few profiles in Brunner’s “Profile Cloud” but only for the CLSE MK2 Rudder Pedals and the CLSE MK2 Joystick combination. I have yet to buy the MKII Yoke and would update plane profiles that have yokes once I got the hardware. Maybe you want to base your efforts on one of those.
2 Likes
On a more mechanical angle, how have you attached it to your desk? I understand they still don’t supply their own mounting bracket.
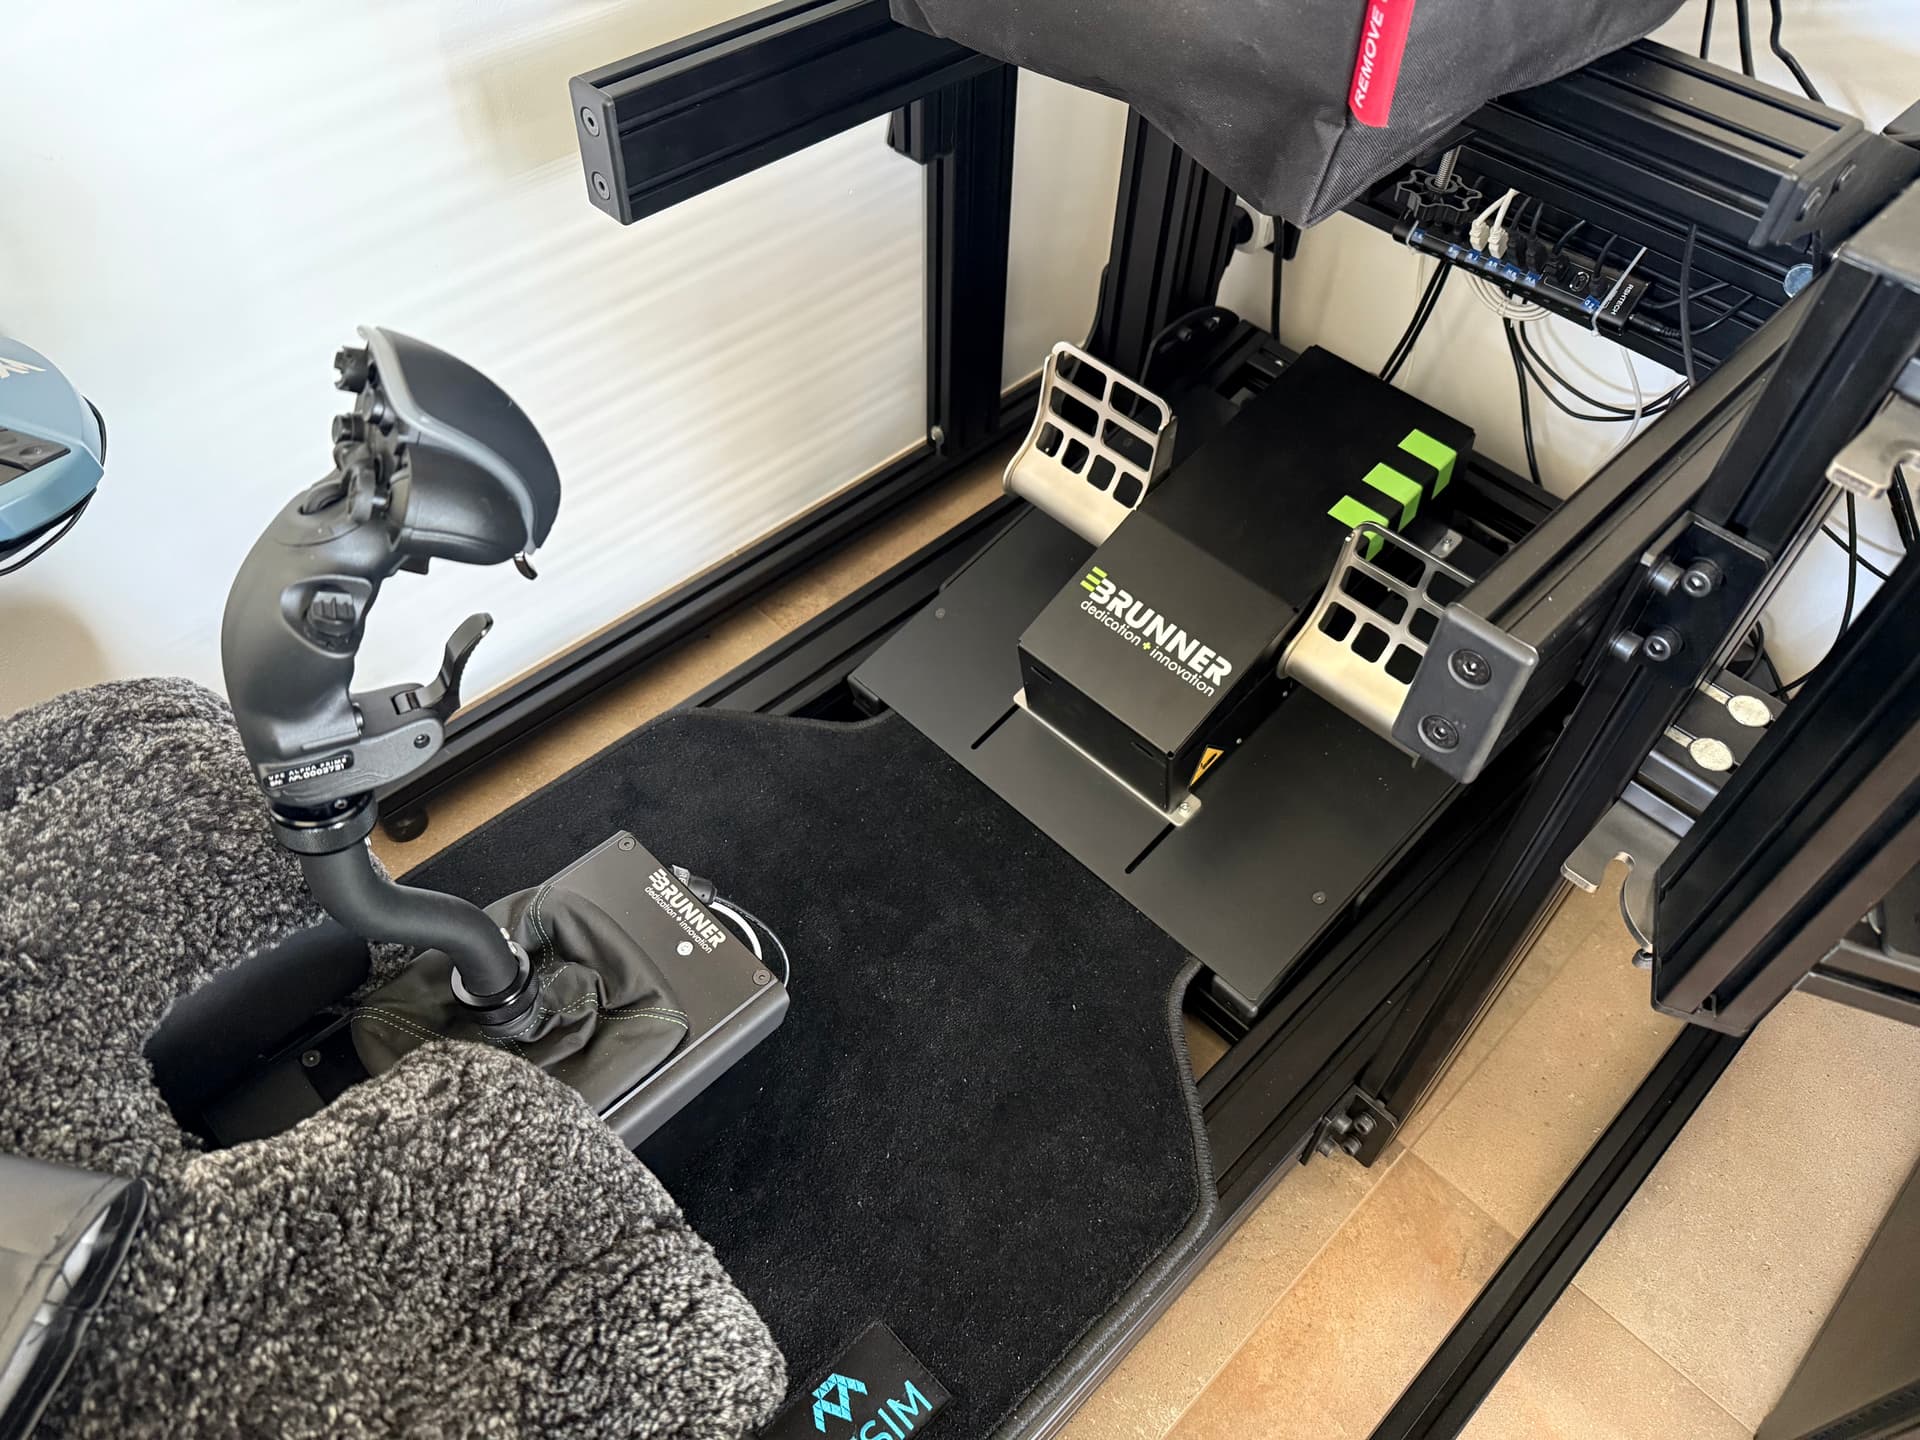
https://www.monster.tech provides amazing components to build all kinds of cockpits but it’s on the premium / pricey end of affairs. The mounting options for the MKII Joystick and Rudder Pedals are amazing. This is how my current setup looks like:


1 Like
I use a pair of small D clamps that I got at Home Depot for a few dollars each. On my yoke there are metal tabs on the yoke that can be used to clamp down to my desk.
1 Like
I have mine fitted to a custom build 80x20 extrusion, so I could easily fit it with 4 small bolts and it’s rock solid. I would advise small small D clamps which may work to clamp the front of the unit, or bolt it directly to a small piece of plywood or MDF and make a small lip/overhang that can be clamped or fitted to a desk.
1 Like
Yes, those sound like good options. Mount the yoke to something else, then mount that to your desk instead. I’ve looked at those yokes for years now, but the one problem always seems to come in the form of a question “What profile should I use?”, and it seems like a case of garbage in, garbage out. Unless you have flown a given plane in real life, how do you know what feels realistic or not? Trust others who have, and have made their own profiles would seem to be the only logical answer.
Due to health problems and the need to get implemented my cockpit with a total of 5 monitors, each with a resolution of 3840x2160 and 6 Instrument panels I have finally my Bruner NLG-E NG yoke is fully operational after Brunner linked into my PC fixing the cause why I had not been able to usae it.
I must highlite the top support given to me by Brunner. This alone is a justification for buying a Brunner product.
2 Likes
I’ve got the Brunner yoke and pedals on a wish list, but I need to save more to afford, maybe sometime this decade!
How comfortable is that seat, after a couple of hours I mean…? I looked it for a long time online, but most sim / racing seats are not comfortable for me. This one looked like it might be more comfortable, but they all seem to have the seat flat - whereas in a car seat, the horizontal seat part is tilted backwards slightly, to keep you in the seat if you lean back…
About the “MFC-8 Storm Sheep” seat, it’s really comfortable. I am tall but I don’t have any issues even after a couple hours. The sheep skin helps cooling your back as well. You can order it as a standalone chair, the bare seat meant to attach to a sim rig is (still) a custom order but it was well worth it.
1 Like
I bought the CLS-E Mk II earlier, so I’m hoping that turns up in the next week or so.
For mounting it has to be removable as I use my desk for other things including work. For simplicity I’m thinking a couple of lengths of 2040 extrusion, and T-bolts.

The double width of the extrusion will give more surface area for the clamps to bite in to. I’m planning on them being the full depth of my desk so I can clamp them at the front, and the back. The yoke then drops in to place on these two “rails”, and allows for me to slide it back, and forth till I get the depth just right.
That was always one of things I didn’t like about my edge of desk mounted Yoko+, that the yoke protruded from the desk so far. It could easily be set back 6-8 inches. Now I should be able to do that with ease. I was planning on mounting the clamps upside down so there is nothing hanging below the desk to snag my knees on.

Looks a thoughtful improvement and I hope it works well for you. I am still coming to terms with the desktop mounted CLS60 after some nine months… Goodbye keyboard, goodbye ideal monitor distance and in fact, goodbye desk! Once I had accepted that everything, repeat, everything, revolves around the Yoke position and needed changing, you enter the potentially awkward World of how to live and undo your expectations of a normal computing life. Dont worry though, because it is well worth the initial aggravation. I feel like I am sometimes sitting 18 inches in front of a jazz trombonist…
PS Those clamps are great. I have two of them.
1 Like
The plan is for all of this equipment to be easily dismantled for other purposes. That’s what I do with my current Yoko+. The rails made this a little more complicated, but I still see maybe a five minute set up process.
1 Like
I wish you every success here and will watch with great interest ![]() I gave in and use the desktop purely for the sim now and for everyday computing needs swivel left 90 and go for gold on my little lifesaver - a Geekom A7 mini PC which also can run all of my Navigraph, multiplayer comms and the hotline to my bank manager. Please give me a shout if you put any pics up H. There are things here that I can learn here.
I gave in and use the desktop purely for the sim now and for everyday computing needs swivel left 90 and go for gold on my little lifesaver - a Geekom A7 mini PC which also can run all of my Navigraph, multiplayer comms and the hotline to my bank manager. Please give me a shout if you put any pics up H. There are things here that I can learn here.
1 Like
If I had the space for it, or rather accept to devote an entire room for the sim, I’d get once of those 6DOF motion rigs., but sadly I have to use the same computer for everything, including working from home.
The plan is to have the 2040 800mm extrusion mounted by 4 clamps, two at the back, two at the front. 40mm wide felt trips protect the full length of the underside of the extrusion so it doesn’t damage my desk. Using 4 of those strips for joining extrusion length together, these will be permanently mounted to the extrusion by grub screws. This will aid with perfectly lining the yoke up each time so it’s always in the right place. 20mm gap in between screw holes in the front brackets perfectly lines up with the joining strips. The back slot looks like it might be fit the 30mm gap for the rear strips. To bolt the clamp to the rails I’ve bought a bunch of these clamping levers. They have an inbuilt ratchet system so would be very quick to clamp the yoke down in place when I have it situated over the holes. Set up should be a few minutes.
I accidentally ordered 4 strips of 2040 rather than 2, but may not return those as they may be useful for other things. I’m thinking a possible length run left to right along the front of the desk for mounting avionics.
Regarding the feel of the plastic yoke handle, that is going to be a bit of a come down from my all metal Yoko+, but I wonder if you could find a replacement material to wrap the yoke in to make it feel better.
Maybe thin leather strips, kind of like binding a tennis racquet handle? Pimp my yoke anyone?
What about some sort of cycling shop for the inner MAMIL market? (Middle Aged Men In Lycra, for those wondering) They might be useful to talk to as might be the better sports shops (Cricket bats, Tennis Raquets, etc)
Ps Missed your own reference to Tennis, so you are already thinking along the same lines. Equestrian suppliers might be another thought though…
1 Like
Yes, I hadn’t considered genuine, authentic horse hide. ![]()