Here’s template for FBW A32nx experimental version. Printable overlay included in the zip.
https://github.com/blindye/aao_guides/releases/download/fbw_a32nx_exp/FBW_a32nx_exp_xtouchmini.zip
Installation:
- Extract .tmpl file from the zip.
- Load up the FBW in airport
- in AAO Templates → Import template → Choose extracted .tmpl file
- Templates → Apply template to this aircraft → Choose FBW_a32nx_exp_xtouchmini
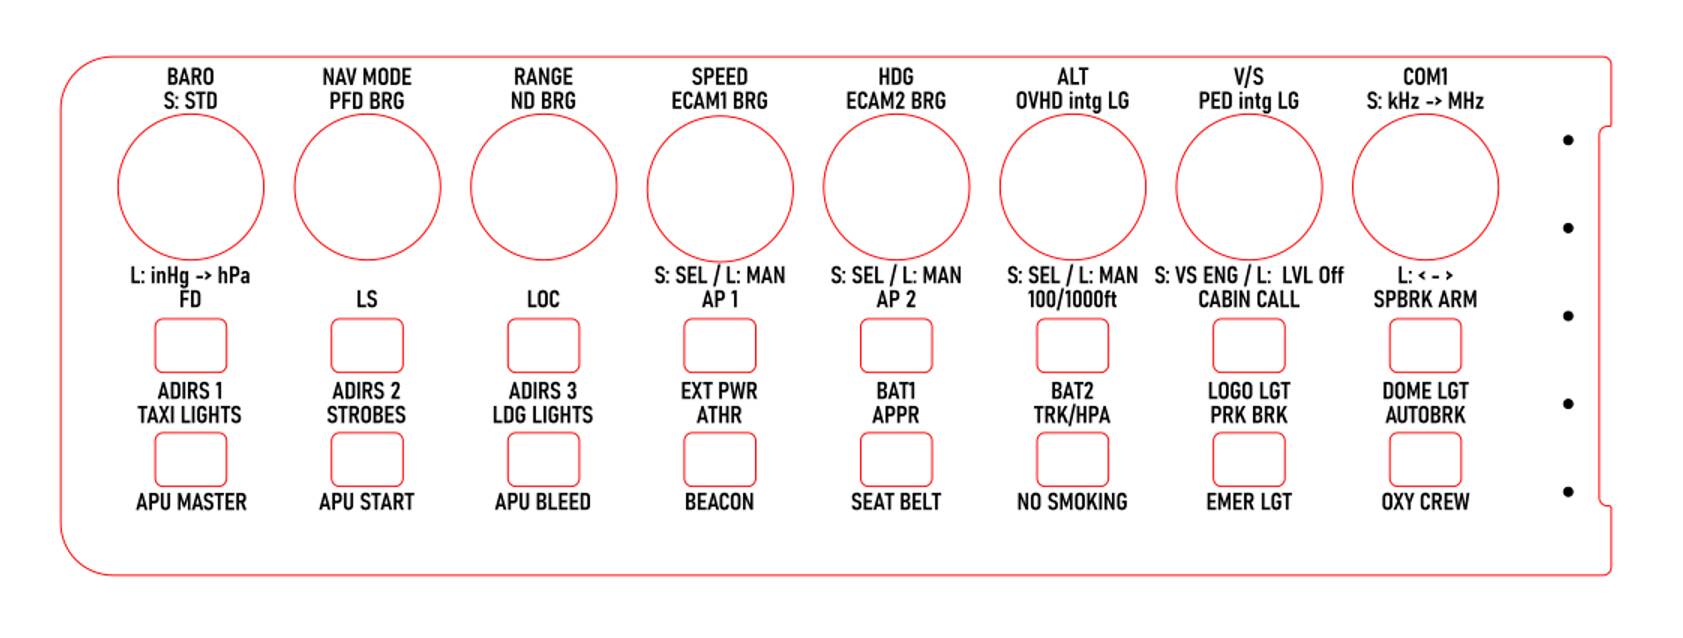
For rotaries Baro and COM works in both layers. A layer functions are above and B layer below for other rotaries (for example NAV MODE is working in A layer and PFD brightness in B layer).
Below rotaries S: SEL means Short press of the rotary is Selected mode, L: MAN means Long press of the rotary is Managed mode.
For buttons text above button is Layer A and text below button is Layer B.
For example first button on top row: Layer A = FD, Layer B = ADIRS 1 knob.
Button below that: Layer A = Taxi lights switch, Layer B = APU Master
Light switches:
Taxi lights switch turns on/off Nose light and RWY Turn lights
Strobes: Off → Auto → Off
LDG Lights: If led is off, first push unrectars landing lights, next push turn on (also turns on TO taxi light) → turn off → turn on etc. When ldg lights are turned off, long push of the button will retract the lights.
Long pressing Cabin call button is T/O Config button, not mentioned in overlay.
Most of the stuff needed before aircraft is moving are in Layer B, and after all preparations are done and you are ready to taxi only Layer A is needed.
All button LEDs should be working correctly.