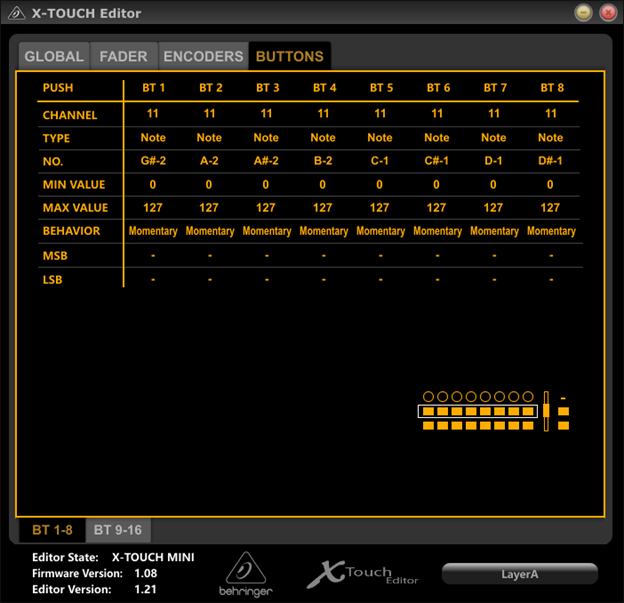
this is how my buttons are set in the X-Touch Editor
still no effect
Are LVars working? For example the default “yoke hide”?
(L:XMLVAR_YokeHidden1, Number)
If they are not, then double check that the AxisAndOhs WASM module is present, enabled and working.
- Present: it must be in your community folder: \Community\lorbysi-content-hooks
- Enabled: the manifest.json file must be present in that folder (=not renamed or something)
- Working: when you are sitting in the cockpit, go to “Scripting → Read LVars from sim” in AAO. It should run for a while and then complete with “LVars read”.
1 Like
Indeed, the WASM module was missing. So I copied the content-hooks folder manually from the installation to the community folder, reloaded AAO and MSFS and it now works with the buttons as described.
Q: could it be that the hooks folder wasn’t copied because the installer is attempting to copy it into the private folder of the user installing AAO? The installer is running as admin while the MSFS is installed as a normal user?
Q: could it be that the hooks folder wasn’t copied because the installer is attempting to copy it into the private folder of the user installing AAO? The installer is running as admin while the MSFS is installed as a normal user?
Or the installer couldn’t figure out where to put it. That can be a bit tricky with MSFS. Are you using the Shop version or Steam?
This one is Windows Store.
Many thanks for taking time for troubleshooting!
This one is Windows Store.
Weird. That usually works. Very strange indeed. Can’t say that this is a common problem though. I always assumed that when people lost the module, that they moved it out themselves before a simulator update, and then forgot to put it back. To be fair, the name of the package is not ideal either…
May be that helps a bit : Garmin G1000 Template for Axis And Ohs and X-Touch Mini » Microsoft Flight Simulator
Yes, thank you, I tried this one, though assigning buttons to HVars feels more straightforward than to scripts.
Hi There !
I remember that @Axisor0 told he got he’s LEDs blinking. Tried also that, but still no success. Can someone have tip how to get it done ? @Axisor0 ? 
Thx ! 
Can someone have tip how to get it done ?
The lighting of the LEDs on the Behringer X-Touch is controlled by the note value that you send via MIDI Out.
0 = off
1 = steady
2 = blinking
Hi
Here are the three states of the Button-LED‘s:
LED ON ==·if{·1·(>MIDI:3:NoteOn:1:1)·}
LED Blink ==·if{·2·(>MIDI:3:NoteOn:1:1)·}
LED OFF == if{·0·(>MIDI:3:NoteOn:1:1)·}
the order of the code is:
velocity (>MIDI:<DeviceId>:<Action>:<channel>:<note>)
so you need to change the velocity (0-1-2) for the LED´s to behave different
Device-ID, Action, and channel always stay the same for all Button-LED´s.
To “talk” to a different LED you have to change the note (0-15).
If you want to change the LED Rings:
Example script:
(A:SPOILERS·ARMED,·Bool)·1·==·if{·28·(>MIDI:3:CC:1:9)·}·els{·27·(>MIDI:3:CC:1:9)·}
in this case when the spoilers are armed the first LED-Ring is blinking, if not all LED´s in the ring are on.
The rings are not controlled via Notes but via CC
==·if{·28·(>MIDI:3:CC:1:9)·}
velocity (>MIDI:<DeviceId>:<Action>:<channel>:<note>)
Velocity:
0 = all LEDsoff
1-13 = LEDs 1(left) – 13(right)on [only 1 LED at a time is on]
14-26 = LEDs 1(left) – 13(right)blinking [only 1 LED at a time is blinking]
27 = all LEDs on
28 = all LEDs blinking
29-127 = ignored
Device-ID, Action and Channel stay the same for all LED-Rings.
Note 9 - 16 are the different LED-Rings
4 Likes


@WinningYard5086 ; I found my old Korg nanokontrol 2 and stumbled upon this thread. Did you ever manage to setup that GitHub repo with notes? Would be nice to be able to look at what you’ve done while I’m not that much of a coder myself.
Besides the actual ‘how does this work’ it’s also more or less a journey for me now to get some inspiration as to what I can actually map to that controller. So many buttons and sliders, but no idea yet what to connect them to 
Hi,
Sorry, no I did not create a GitHub repo for my flightsim notes. I have my work GitHub repos plus my own ones. It is becoming a nightmare managing all the passwords and recovery keys for several GitHub repos. I might do this one of these days but not sure when.
I might try to create a guide within the flightsimulator.com.
Please find my notes:
Install Korg Kontrol Editor. https://www.korg.com/us/support/download/software/0/159/1354/
Install the latest midi drivers for Korg for Windows 10 - https://www.korg.com/us/support/download/product/1/285/
Starting with Korg Kontrol Editor. Run it and see if you can connect to the nanoKontrol2. This should bring up a “map” of the nanoKontrol2 and the Control Channels (CC#)'s.
Make sure “Show only connected devices” is clicked. The ediror must detect the correct device. If not try "For what it is worth I solved the MIDI port problem by going into EDit/Preferences in the Editor (when I finally got it to recognize my nanoKey) I then checked the ‘set MIDI ports’ radio button pressed OK, when back in and deselected ‘set MIDI ports’ manually and it has been fine since. "
From Korg Forums :: View topic - cannot open MIDI port sid=7988ae973eb7139bbc493ff56b923147
This did the trick for me.
Helpful utilities
You can run recivemidi to confirm Korg is functioning correctly.
cd to where above two execuatables are sitting.
.\receivemidi.exe list
nanoKONTROL2 1 SLIDER/KNOB
Use sendmidi to turn on/off LEDs
.\sendmidi.exe dev nanoKONTROL2 cc 43 127 // Led on key #43
.\sendmidi.exe dev nanoKONTROL2 cc 43 0 // Led off key #43
I bought some note writing pads from eBay and created these templates. These are for “Cessna grand caravan”. As you will realise at some stage, new templates will be needed when you want to configure a new aircraft to be used with Axis and Ohs. I did manage to find an overlay template for the Korg NanoKontrol2 and the plan is to use a 3d Printing service to print about 5 overlays. Then the life will be little bit easier as I can have several templates depending on what air crafts I fly.

I never managed to get the Axis and Ohs to turn on/off the Leds. Apparently this works with other midi controllers. So I wrote a little Python script to do the job.
Something to be aware of how to configure a rotary dial for example to increase and decrease the altitude. You will need two sets of bindings for the same rotary dial. There are several examples from LorbSI on the thread.
If there are other questions please post them here. I will try to respond. I don’t do flightsim stuff during the week, so just wait for the weekend 
Happy flying.
1 Like
Thanks so much for the quick and elaborate response. I’m going to dive in how this all works hopefully sometime this week. Also thanks for the pictures, good for inspiration!
I’m now (almost) completed with my setup, thanks again for all the help guys and especially Oliver
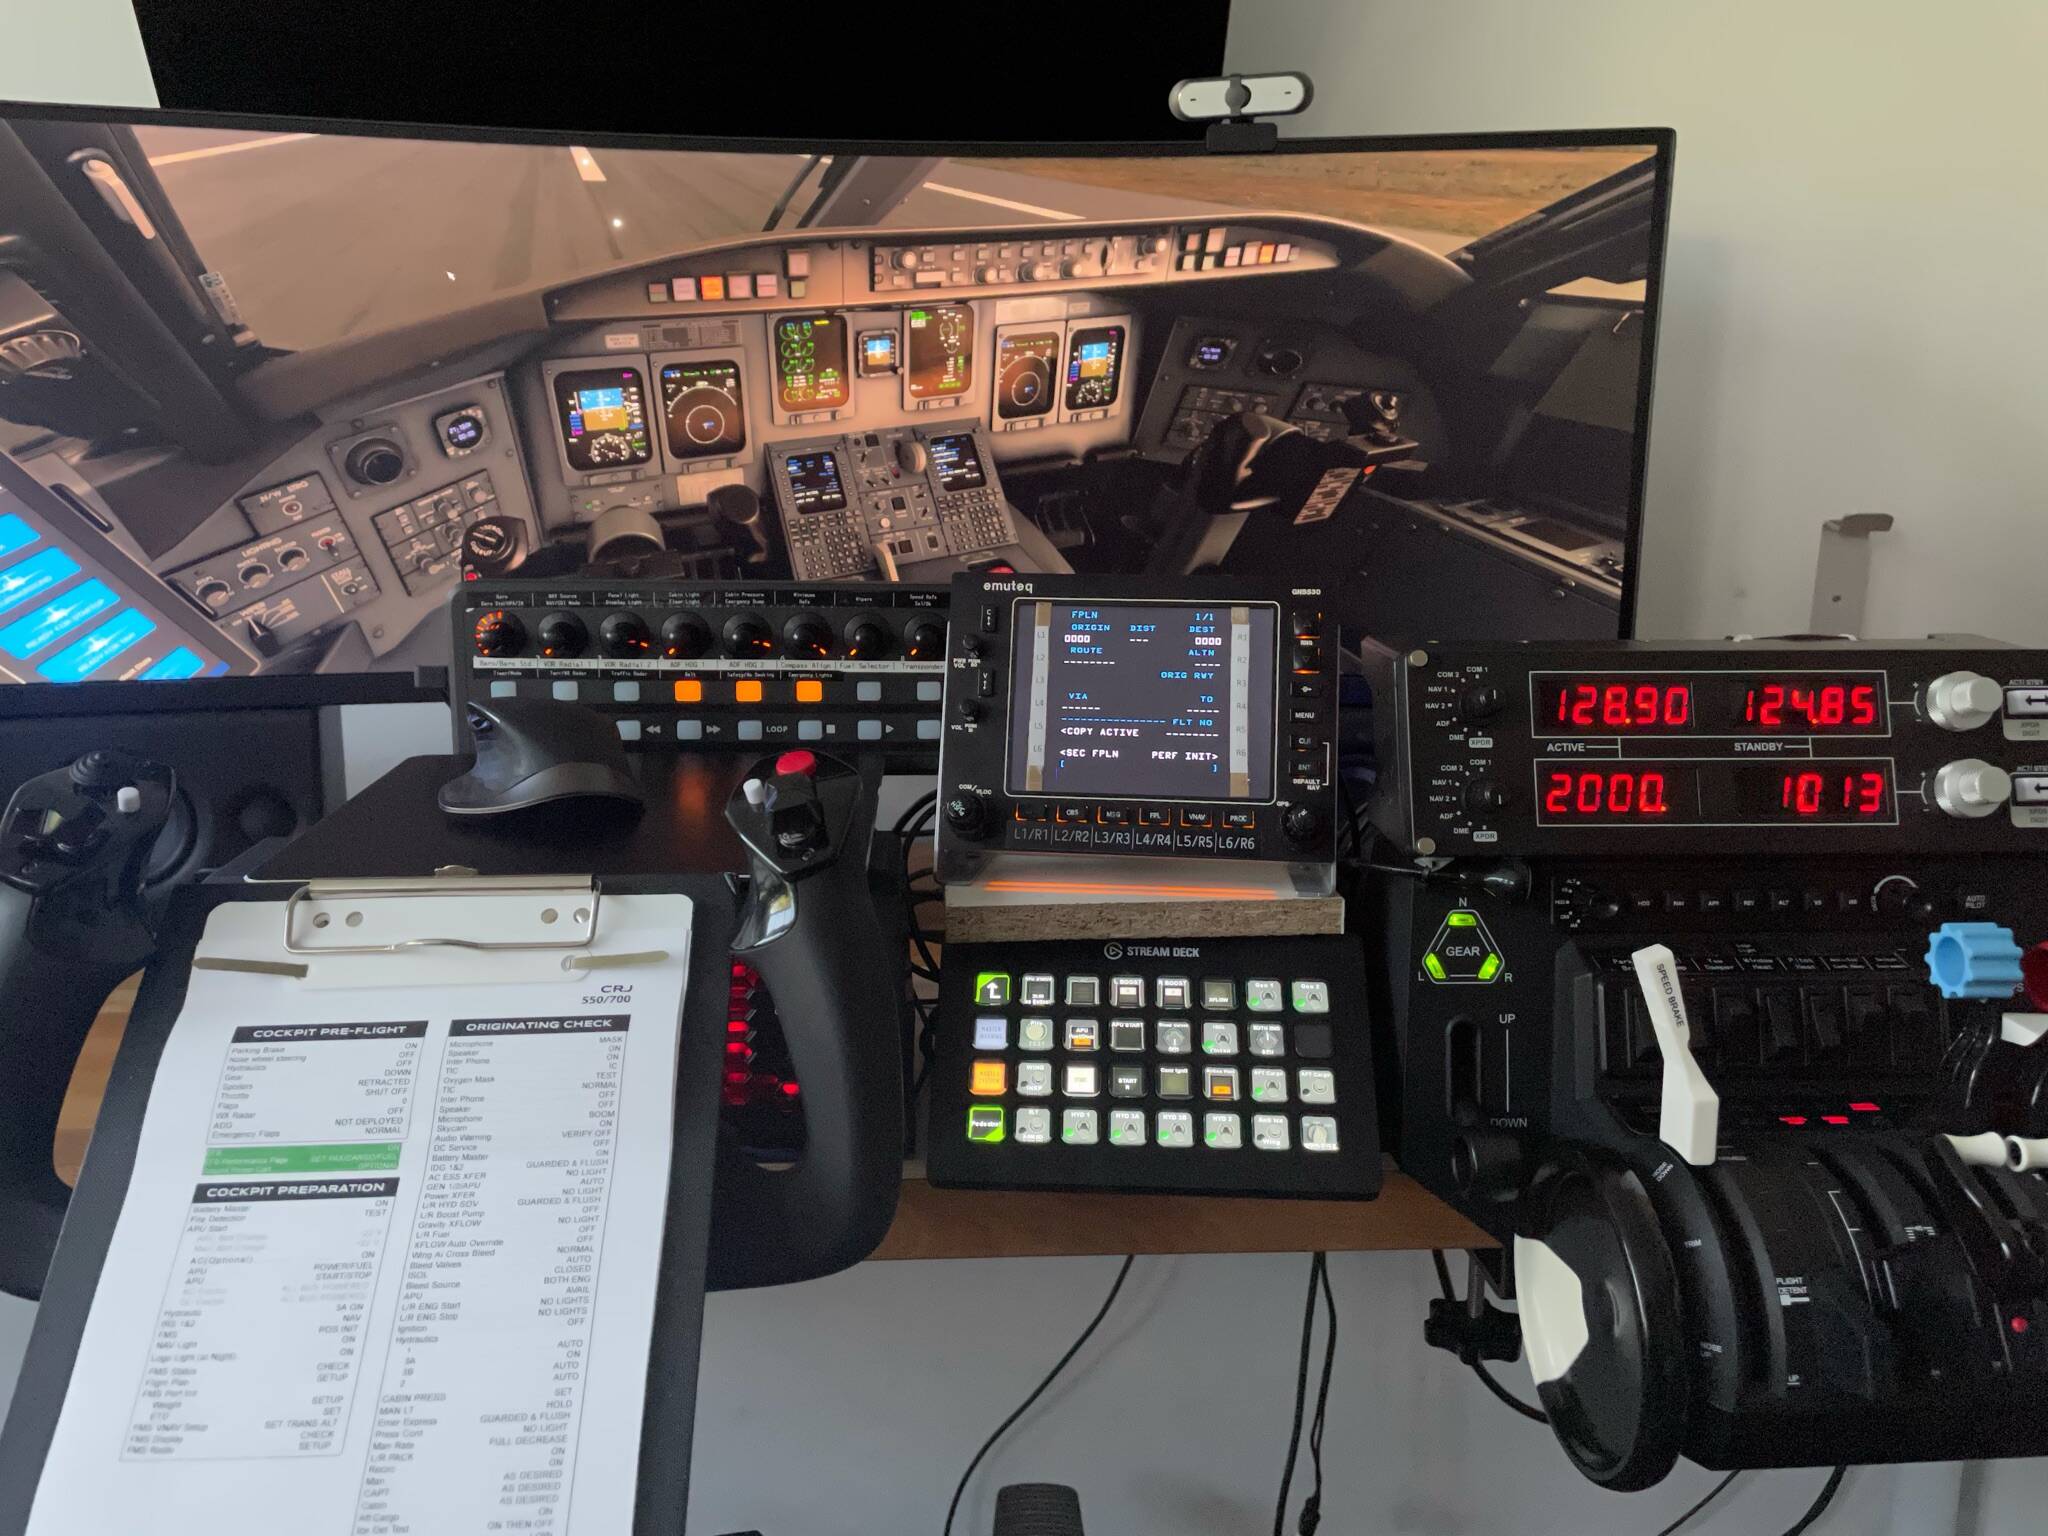
Used Hardware
- Behringer X-Touch Mini
- Emuteq GNS530
- Elgato StreamDeck XL
- Honeycomb Alpha Yoke
- Honeycomb Bravo Throttle
- Saitek/Logitech Radio Panel
- (MFG Crosswind V3 not in picture)
I have decided to share my Aerosoft CRJ Scripts and Templates from my Setup with you so you can maybe build your own if you want 
Other Scripts (WT CJ4, Piper Arrow might be following)
I know my Setup is very special with the Emuteq GNS530, but i now have a GA and Airliner setup all in one Package.
If you have questions feel free to ask.
Special Stuff:
- Working Lights on the X-Touch Mini for Seatbelt, No Smoking and Emergency Lights
- Full Keyboard on Streamdeck for CRJ FMC
- Working 3/4 Way switches with changing position on Streamdeck
- Button Animation in the CRJ
- CRJ EFB Control of Doors via Streamdeck (Does anyone know the LVAR for calling the Ground Power Unit via EFB?)
Link to the github
CRJ AaO Scripts
See you all in the Sky 
3 Likes
I am really interested to purchase this sioftware for my logitech multipanel working with Working Title CJ4 and FBW A320. I didn’t found for the moment a complete set of LVAR commands. Is here someone has succes to create a correct configuration. Someone can share the Multipanel template for CRJ?
logitech multipanel working with Working Title CJ4 and FBW A320.
At the moment that is not really possible with AAO. The Multi Panel interface was made for the default aircraft, and the only option would be to use the MIDI mode. There will be more flexibility regarding the Saitek Panels in the next version of AAO (2.08)
Yes I know, I am aware that need to configure LVAR commands. You provided some commandsmscript of CJ4, mostly for rotary knoob. Is there any possibility to share all complete set of command in one script to import in AAO?
I am aware that need to configure LVAR commands
Not what I meant. In 2.07 some parts of the MP logic are hard coded to the default variables and events, to avoid the “10 degree bug”
A code change in AAO is necessary to get full flexibility on the MP. At the moment you can use MIDI mode on the MP instead, but the display will probably be wrong.
1 Like