Hello folks.
For years across multiple self-built low and mid end PC’s, I’ve been using both versions of the simulator with Ultra-equivalent graphics and beautifully smooth, stutter-free performance. Countless videos out there depicting the best performance settings, how to gain more FPS, etc. and those can all help to a degree but as everyone knows there is no magic bullet that applies to all systems. Or is there? Almost.
Flight simulation is different from other forms of gaming from RPG’s, racing, first person battle, etc. in that movement of an airplane and the world around it is, in real life, smooth. Slow paced, even if you’re flying a fighter jet. So your entire experience requires smooth frame and display. But whether you are using a low end PC or the highest, synchronization is the key to smooth flying. This is where locking your sim’s frame rate correctly is important.
Realistically, no matter what system you are running, for flight simulation you need technically no more than 30fps. But monitors don’t go as low as 30Hz. Generally they minimum at 60Hz. Note: If you have a 120+ Hz monitor, even on high end systems, you realistically do not need 120fps for smooth flight simulation. So in many cases you can cut your monitor’s refresh rate down to 60Hz while simming.
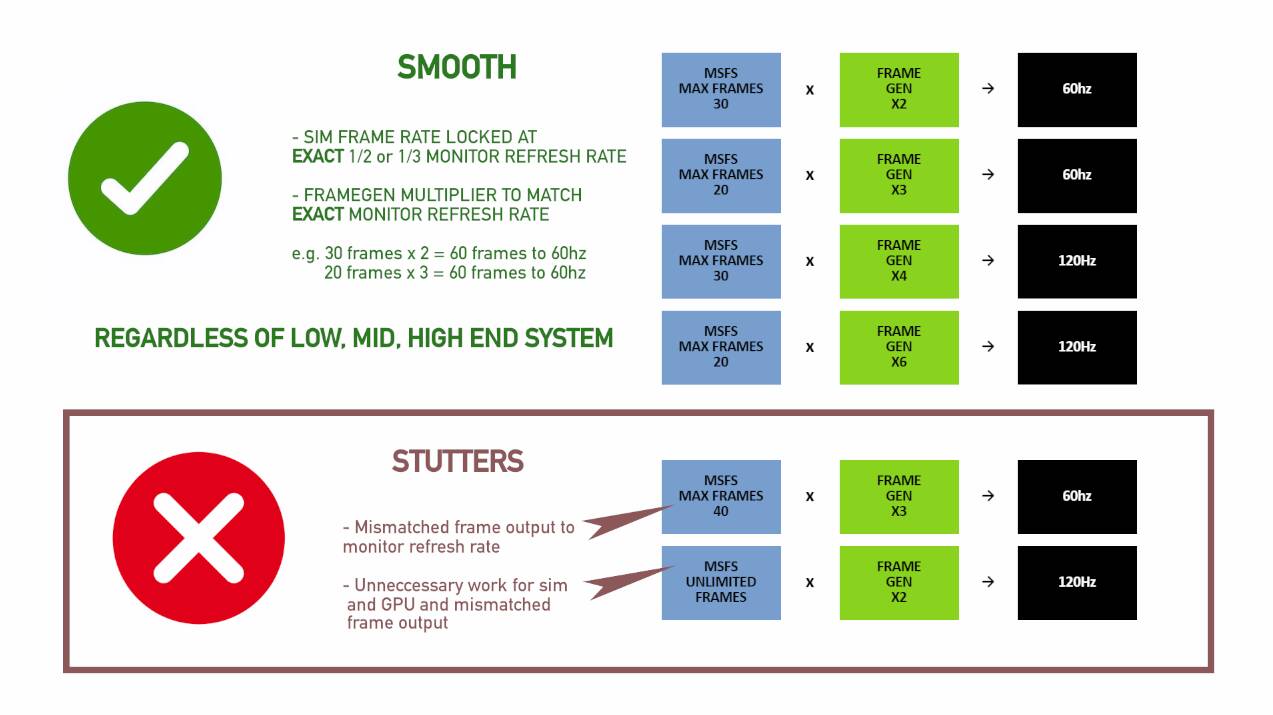
Frame generation is a godsend, but if what it’s multiplying isn’t synchronized, those generated frames are going to amplify any microstutters and frame jumps. So below is how I’ve managed to be happily flying in these simulators on a low-mid tier system without stutters, lag, skips, etc., for years, with Ultra clouds and ultra-equivalent visuals overall, without scaling.
The Goal:
Find the correct FPS lock so your sim runs smoothly, your pacing stays stable, and frame generation doesn’t amplify stutters.
Before getting started, note your monitor’s refresh rate. Keep in mind the whole number, clean divisors of that number. So for instance, if the refresh rate is 60Hz, 20Hz, 30Hz, and 60Hz can all be multiplied by 3, 2, and 1 respectively to get 60Hz. 144Hz? 72Hz, and 36Hz are clean whole number divisors. Keep those numbers in mind as you go through this process.
-
Start Clean
Close MSFS.
Clear your shader cache and rolling cache.
Everything you do here is going to require a clean slate. Any time you change your graphics settings in the sim, it is best to clear your caches.Turn OFF any frame generation for now.
-
Launch MSFS and stay at the main menu.
Don’t load a flight yet.
-
Set your graphics quality to TAA (or if you really prefer DLSS, set it at that. Whatever you think looks the best)
Pick the highest settings your hardware can realistically handle.
You don’t need Ultra everything unless you’re using large resolution like 4K. -
Load into a resource-heavy scenario.
Busy airport + complex aircraft (PMDG, Fenix, etc.).
Ensure the airplane is running fully with all systems. It’s best to be on a runway.
Turn on your traffic, your weather, everything that you want to see when you’re flying.
Let everything settle for a minute. -
Watch your FPS in Dev Mode
Pan around with the camera from the pilot’s seat. Especially look toward very busy things like terminals and AI aircraft as you monitor the FPS. Expect stutters and such. Ignore them for now.
You’re looking for the lowest number you see under the heaviest load you can give it, not the highest.
Make your desired graphics and traffic, wx settings are set at this time. You can adjust them per the excellent settings guides available in the forums. As you make your changes, keep an eye on your FPS.
Now let’s say you have a 60Hz monitor and your system is pumping out 51fps with all your settings the way you want them. That’s actually very good. But you can’t use 60fps as your max frame rate in the sim’s settings, it won’t put out 60. So your next lowest frame rate limit for your monitor’s refresh rate is going to have to be 30. If your FPS dips below 30 while you’re making these changes, reduce your settings until you never see it go below 30fps.
-
Set your max frame rate.
Once your visuals are the way you want them and you know where your framerate floor is, whether it’s half, a third or the full monitor refresh rate, set your sim’s max frame rate to that number. It is very important that you keep it in whole number factors. So if your refresh rate is 60, your floor should be a number that multiplies cleanly to 60, such as 30. Not 31, not 35, 30.
-
Save your settings. Exit the simulator.
-
Clear your shader and rolling caches AGAIN.
The reason for this is your shader caches are going to be built based on the settings you were just adjusting and tweaking, so they aren’t “clean” caches and without clearing them, you will see artifacts and stutters and such, especially with frame gen (and especially if you’re using lossless).
Also ensure your shader cache is set to Unlimited.
-
Relaunch MSFS.
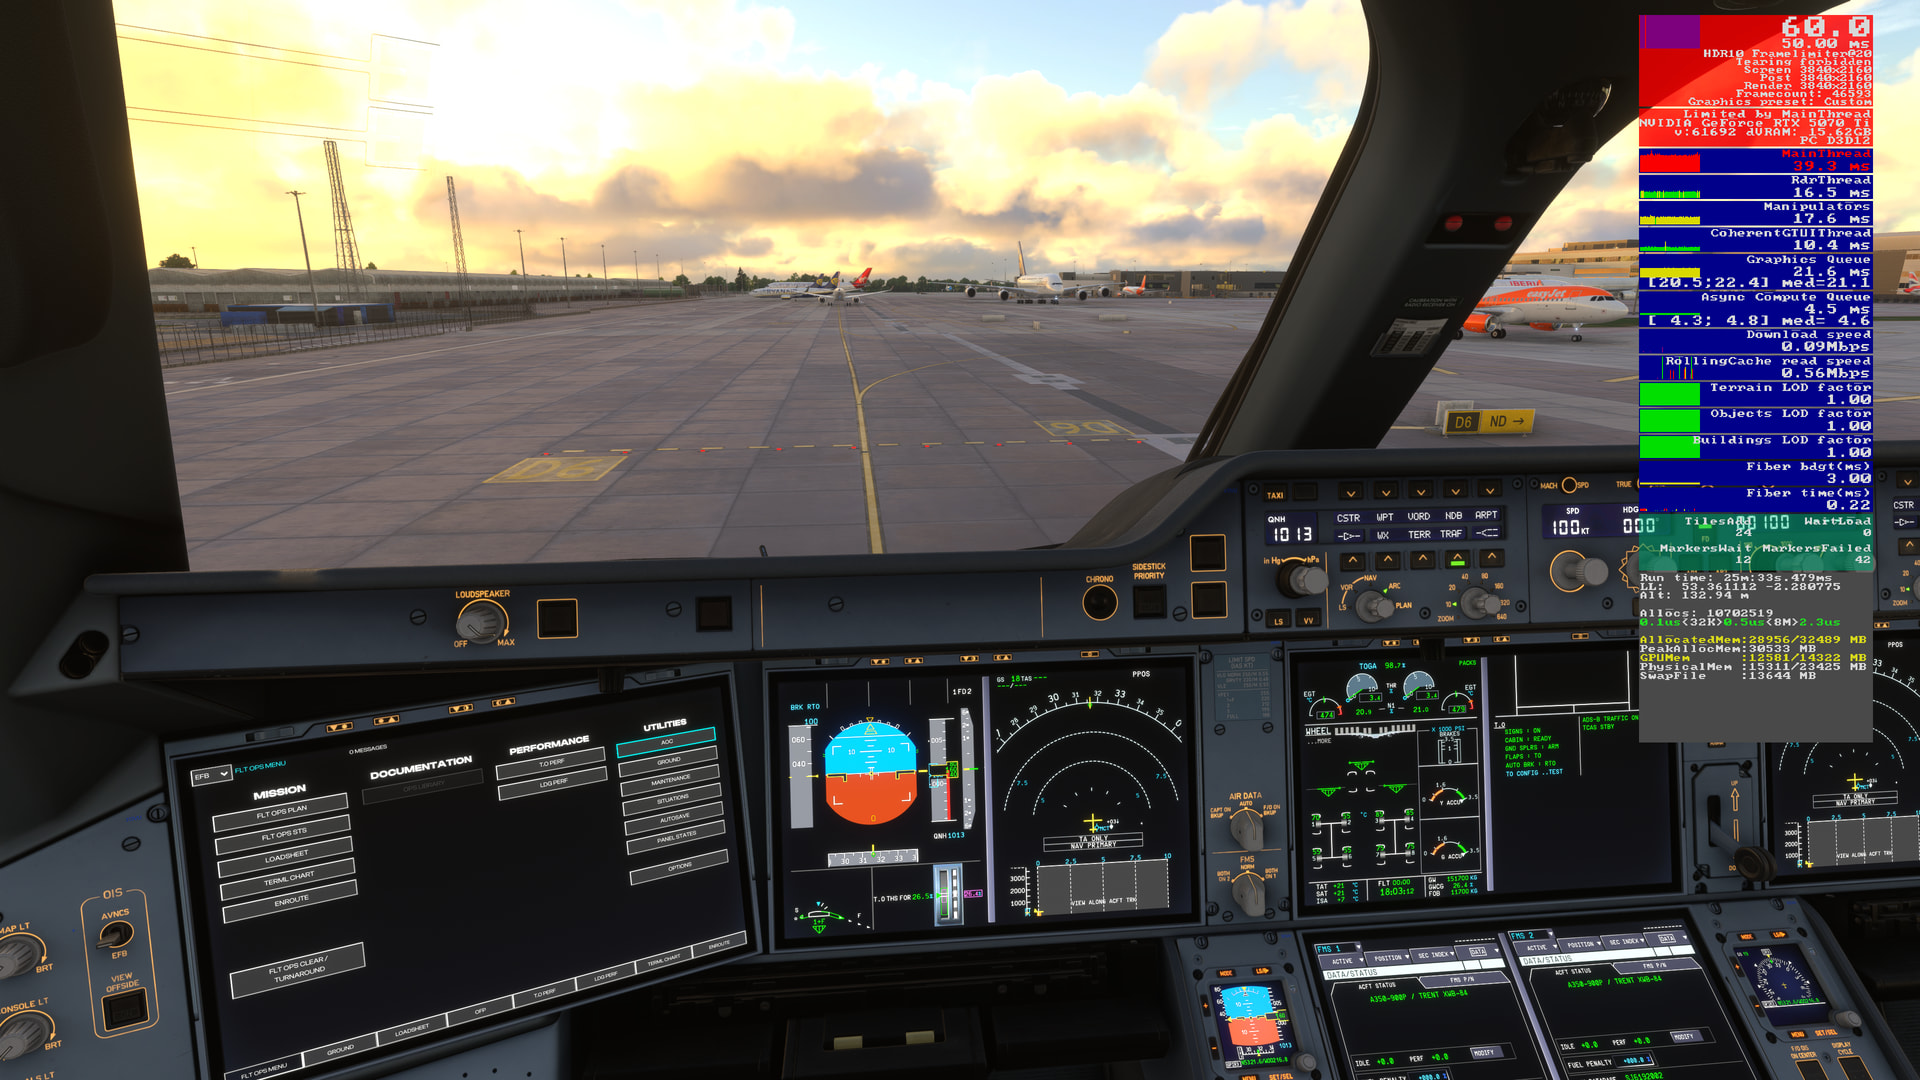
Once you’re at the menu, you’ll see your frame rate at the limit you set, and “Limited by MainThread.”
That’s good — it means the sim is intentionally holding that frame rate. -
Turn on frame generation (FSR, DLSS, LSFG — doesn’t matter)
Set its target to your monitor’s refresh rate, or a multiplier that will target it to your monitor’s refresh rate. Not more, not less. So if you found that your floor is 30fps, and your monitor is 60Hz, your multiplier is 2x. If the best floor you can get is 20fps (like me for instance), your multiplier is 3x.
Match the refresh rate.
-
Load a flight and fly
Now there are indeed other system factors that will affect your performance, such as ReBAR being off in BIOS, HAGS, and all those other system settings that we’ve all come to know about. It’s probably best to get those in order before going through this calibration. One thing to consider is that with higher multipliers comes with higher potential for artifacts and subtle blurring.
I hope this helps some folks tune their sims so that they can enjoy the simulators the way I have been. Happy flying!