Honeycomb Alpha pitch modification

Hey folks, like many of you I found the pitch spring too strong on the Honeycomb Alpha.

So I changed it, this is how.

The modification is entirely reversible. That being said,

!! THIS WILL PROBABLY VOID YOUR WARRANTY !!

The mod is pretty easy, you’ll need a minimum number of tools, some creativity, and some common sense. Take your time and have a think about what you’re doing at each step. I’m not responsible if you wreck something.

Unfortunately I didn’t take a whole lot of pictures but what I have should give you an idea of what needs to be done.

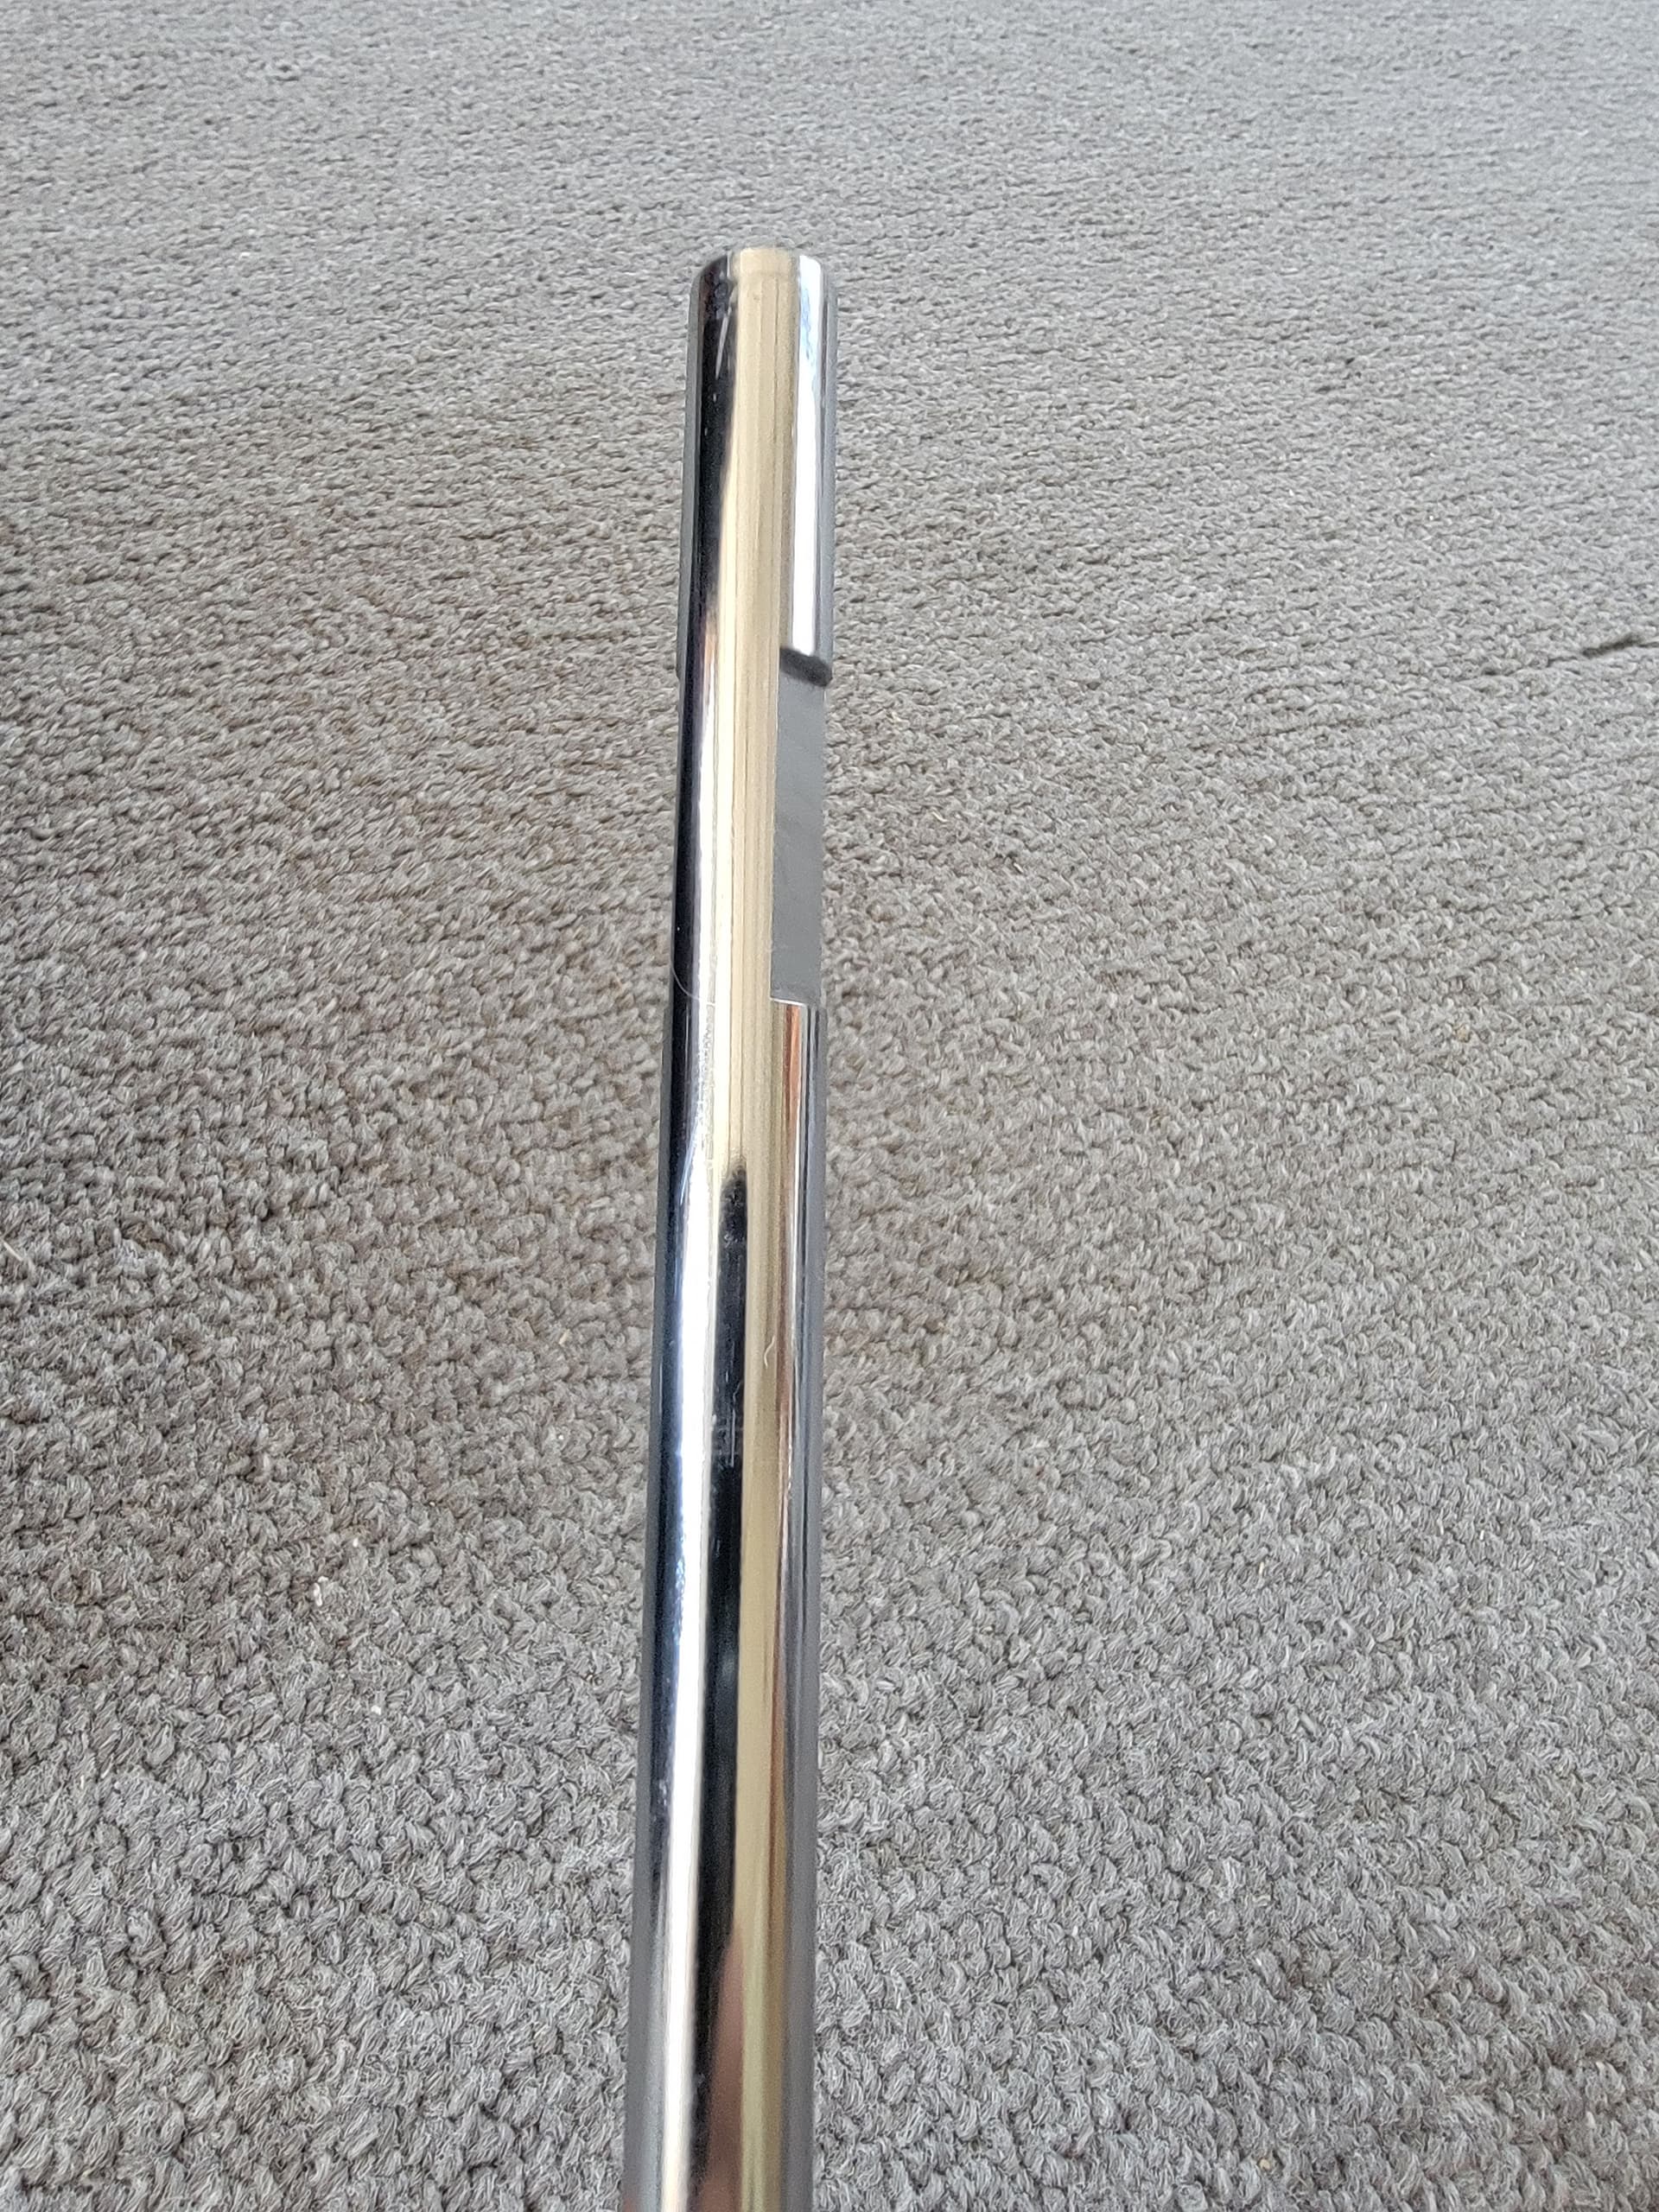
  1. Remove the 8 screws on the bottom that hold the top shell. Put the shell aside. Unplug the chord from the body to the yoke.

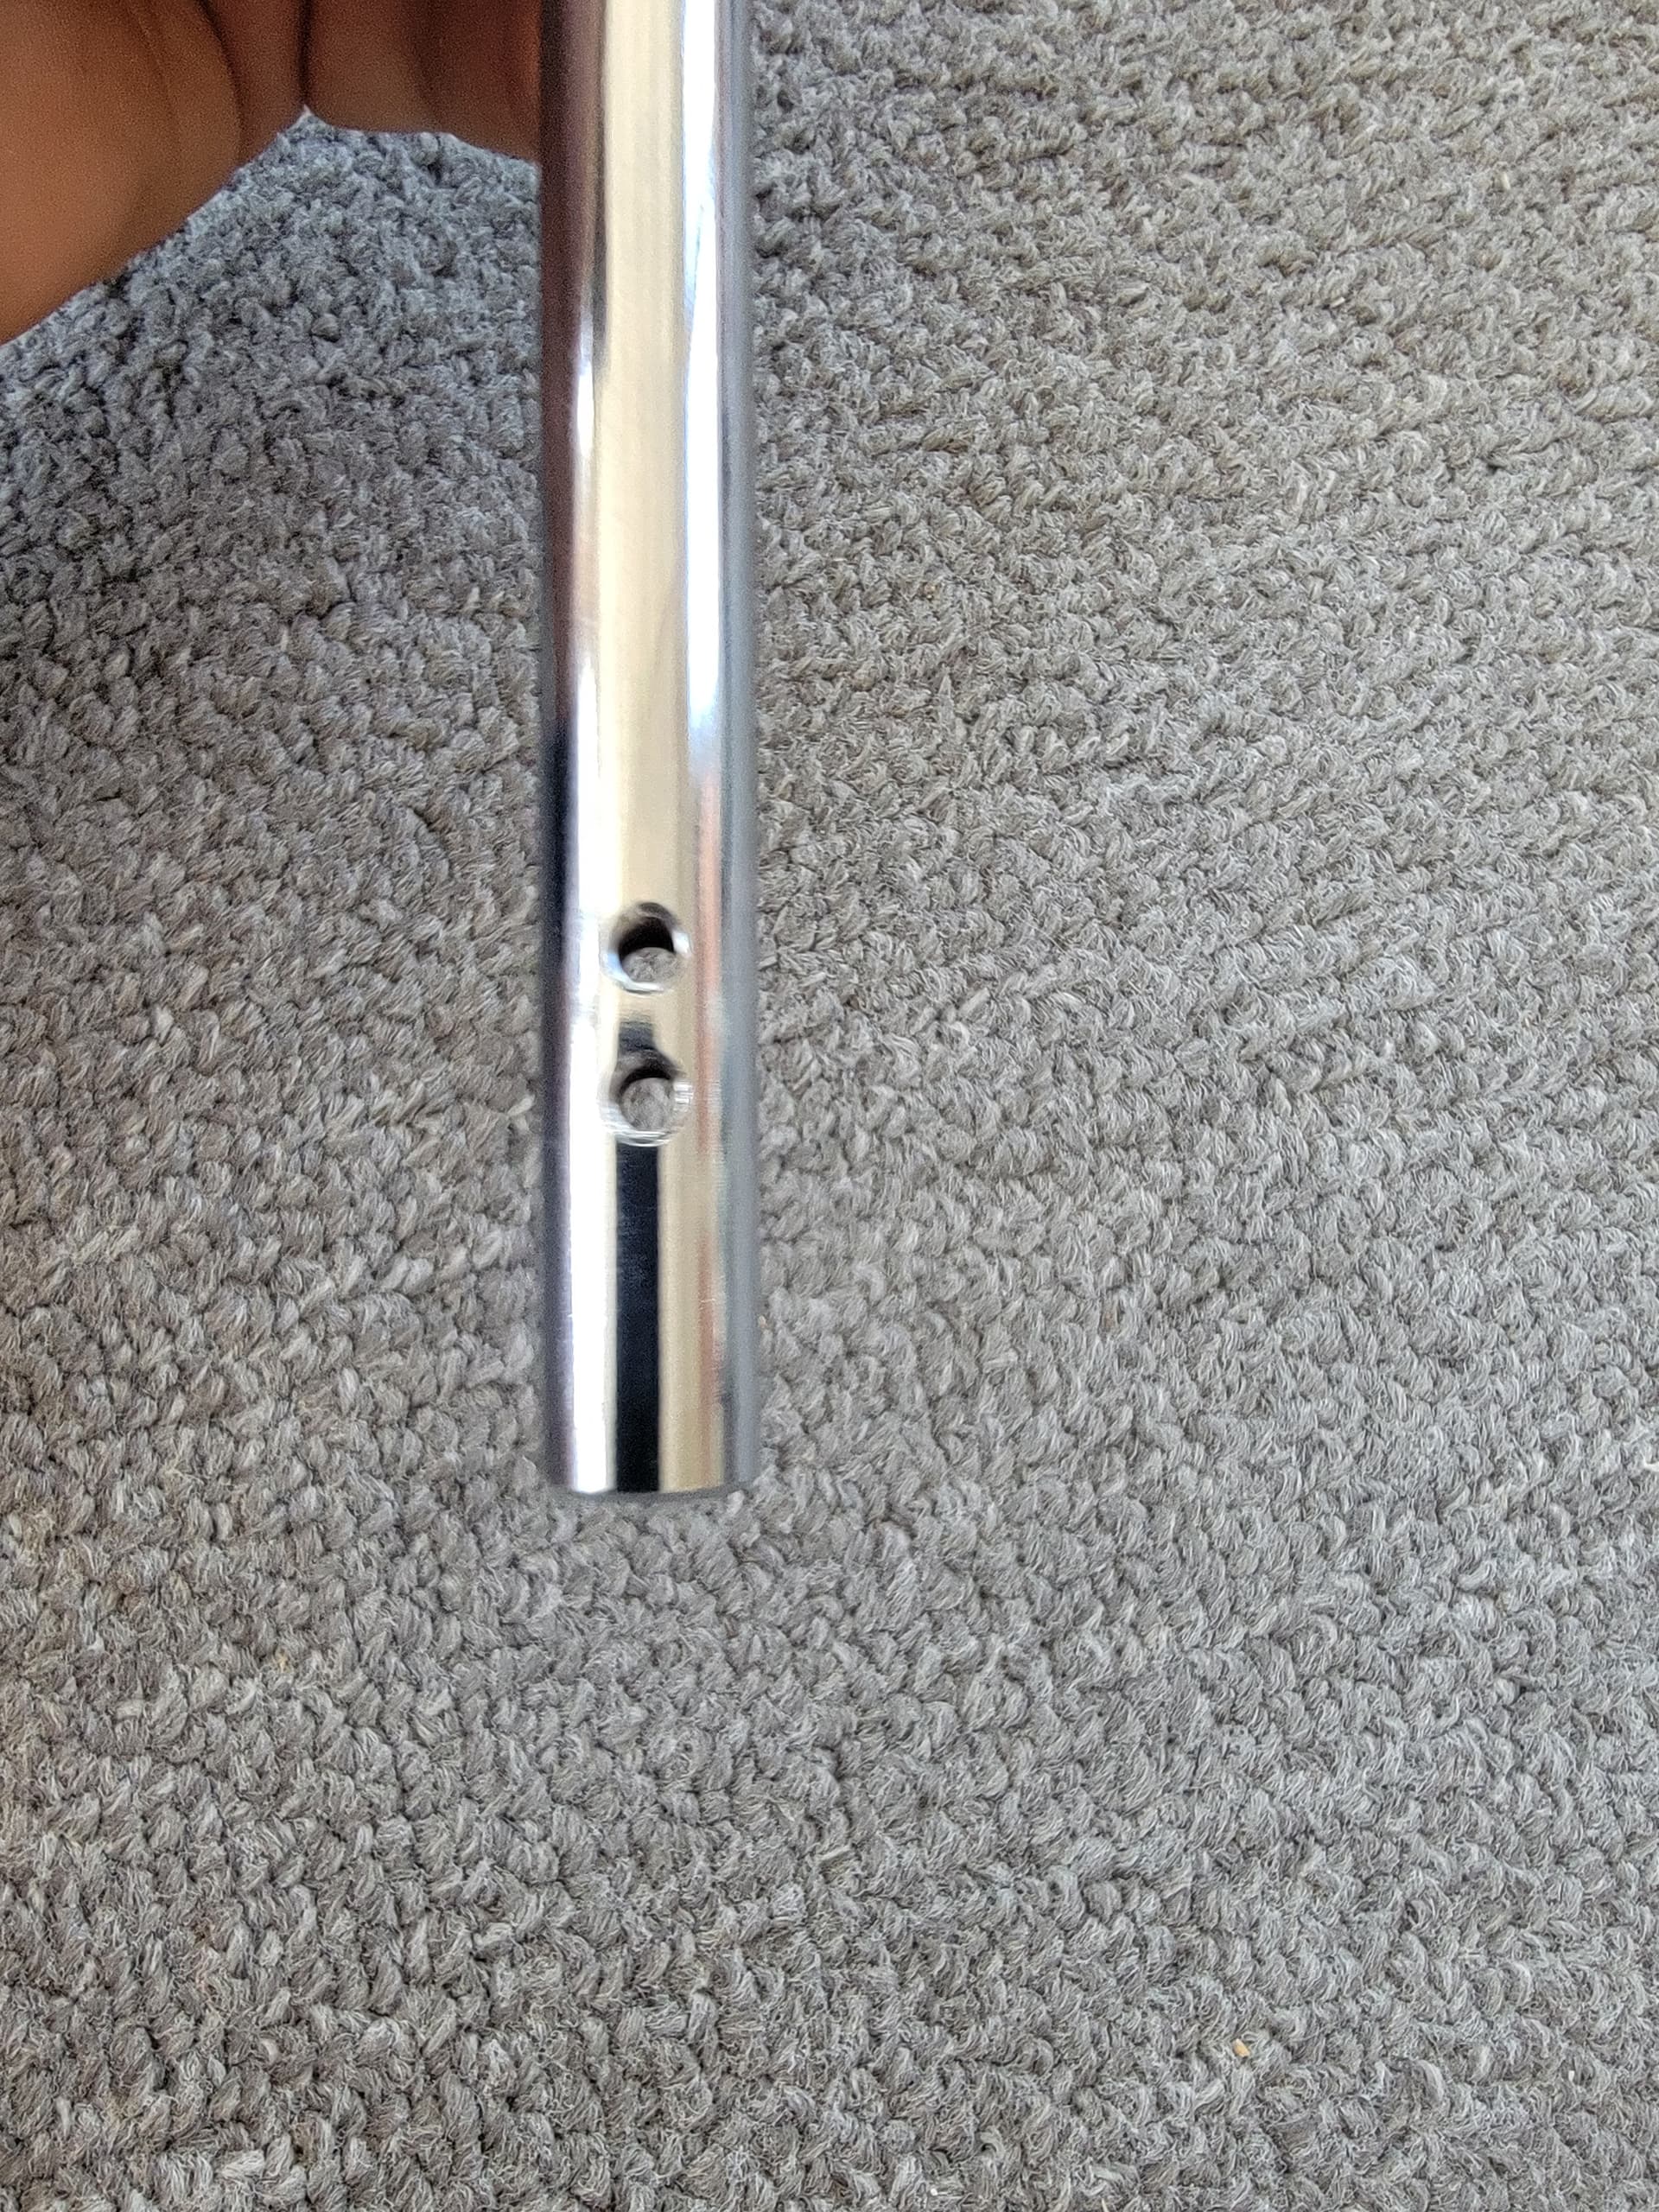
  2. Pop off the cap that covers the yoke mounting flange, remove the two screws, and put the yoke aside.

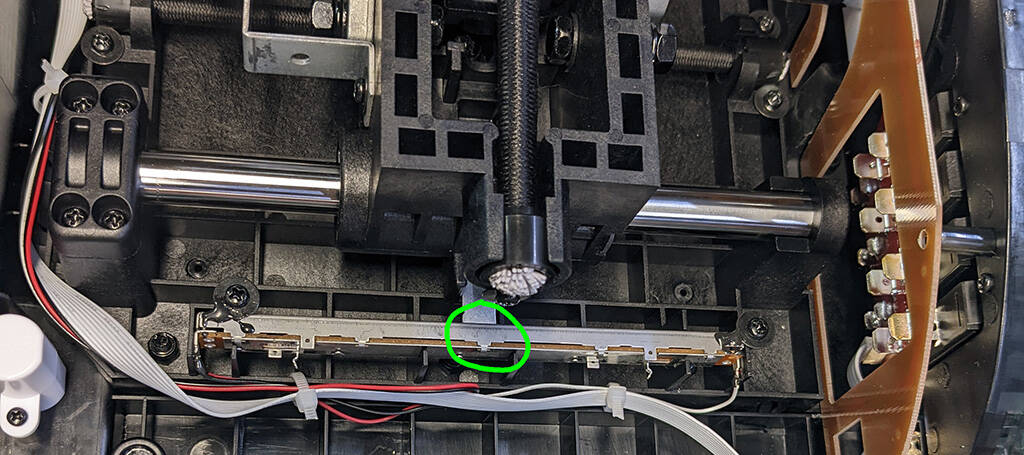
  3. Now you’re looking at the insides of the Alpha. It should be pretty clear how things work. There’s a bungee cord for roll axis, and another bungee underneath the carriage for the pitch.

  1. Take note of the position of the linear potentiometer I’ve circled above. That’s the neutral position for the pitch.

  2. The bungees can be released by removing the retaining screws and washers, then pulling the end caps out of their holders. Release both pitch and roll bungees, but don’t remove them yet.

  1. Remove the LED board (unplug it from the main board). Remove the two screws securing the white bushing and slide that out of the way.

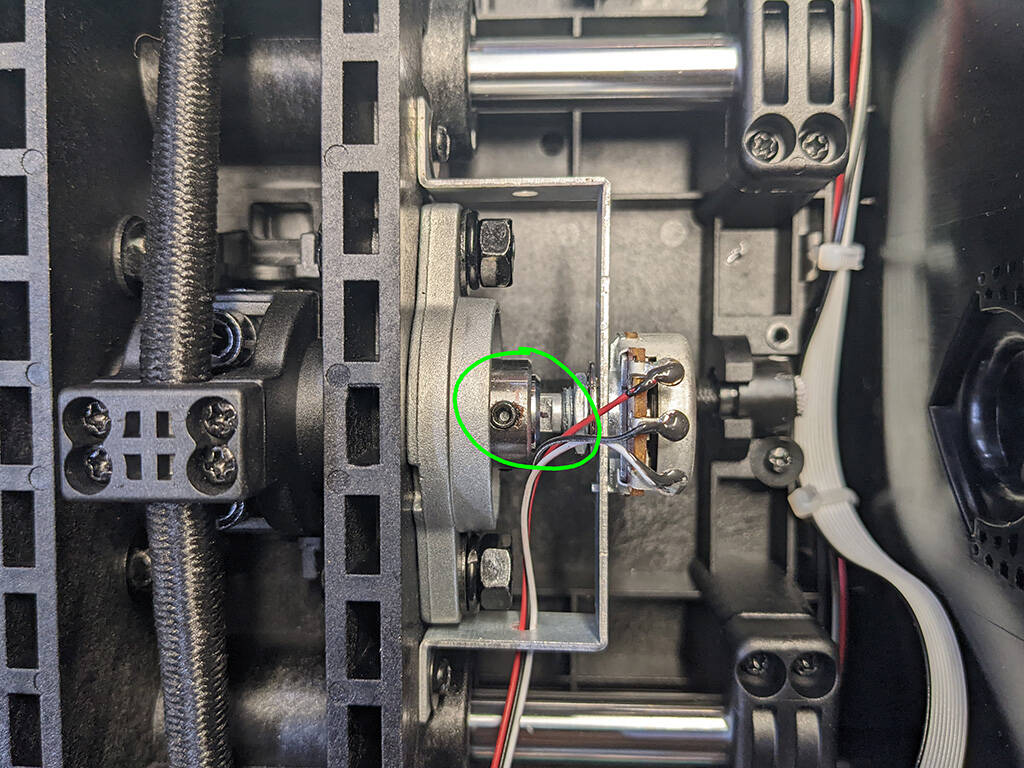
  1. Take note of the orientation of the roll potentiometer. There’s a set screw that holds the pot to the pitch/roll shaft. The screw is held in with red Loctite and can be difficult to remove. You can touch the screw with a hot soldering iron to release the Loctite but I got it free with firm steady pressure. Once that’s done, remove the potentiometer bracket, and unplug it from the main board.

  2. Remove the 4 screws on each of the 3 caps that lock the slider rails.

  3. With the bungees free, the LED board and roll pot removed, that white bushing free, and the rail caps removed, you should be able to lift the carriage up enough to remove the rails. Careful you don’t pull on something that shouldn’t be pulled on, like that tab for the linear pot.

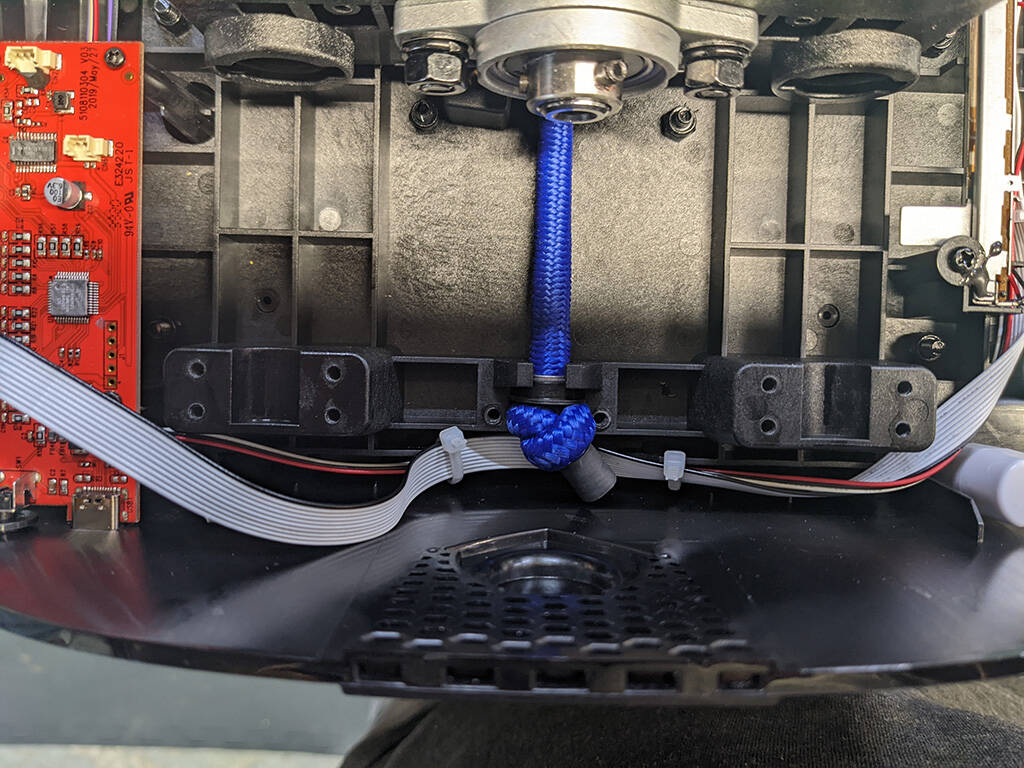
  1. Rotate the roll bungee holder to one side and you’ll see a screw. Using a 4mm ball end hex wrench, you can just get in there and undo that screw. There’s another one on the other side. This will undo the clamp on the bottom that holds the pitch bungee in place.

  2. After a bit of wiggling, you should now have the pitch bungee free! This is what you’ll replace with a softer bungee. Take the bungee to the hardware store and try out some bungees that feel softer than the original. A little goes a long way here so don’t get something too weak.

e802a0d5ac1839d9f84c5fc82e9fd00c--song-quotes-pins

  1. Once you’re back home, cut one end of the new bungee off and add some washers. You’ll have to get creative here as they have to sit in the holders that the original bungee’s caps were seated in. I found a combination of plastic bushings and washers that worked well.

  1. Use knots to secure the washers and match the length of the new bungee to the old. Once you get a length you’re happy with, trim off the ends.

  1. Keep the clamp on the new bungee loose, because you’ll need to center it. Once you get the carriage centered, tighten the clamp. And start re-assembling the Alpha.

  2. Everything goes back together pretty easily, except you might find that the retaining screws and washers don’t hold your new bungee in place. I made some retainers out of some clamps I had laying around:

  1. Double check everything before closing up the Alpha. Make sure everything rolls and slides smoothly, no wires are getting snagged or pulled on, make sure that tab in the linear potentiometer is correctly engaged with the carriage, etc, etc.

  2. One final step when everything is back together: run through the Alpha calibration routine:

YOU’RE DONE

If everything goes well, and you chose correctly for the replacement bungee, you should now have a pitch axis force that more closely matches the roll axis force. If you find that you’re not happy with the results, you can redo the process and either try a different bungee or put the original one back in.

Good luck!

2 Likes

Great Job. I’m surprised that this issue wasn’t addressed in later iterations. I did the similar mod in November 2019 and settled on using a 1/4" ~ 6mm bungee and some bungee shock hooks (I had to break off the hooks to fit the Alpha). It did take a couple of purchases to find the a good compromise between tension and return to center. It had been perfect so far.

The Alpha Yoke is really easy to work on, and I would encourage others to try rottenbk’s guide.

The Alpha is surprisingly easy to work on. Lots of space to work with and everything is pretty intuitively assembled.

Great mod! How is the yoke shaft removed? Would like to extend the shaft to fit the Alpha behind a panel.

That’s some good engineering but what a shame anyone has to do this. The yoke for me has been a huge disappointment between the pitch being way too stiff, clamps being too small for my desk (XL clamps too big) and also losing all of my button functionality on the yoke due to the flawed RJ-45 port design. We shouldn’t have to install bungees and have to solder circuit boards to get a functional yoke. Their Bravo TQ is great (so far) but I ended up having to replace my Alpha yoke with another brand recently…

I got away with not removing the shaft but there’s some smaller set screws on the front and rear bearings of the carriage that clamp the shaft. Once those are removed you should be able to slide the shaft out.

1 Like

I wouldn’t call it a “huge disappointment” but I do know what you mean. Some of the design decisions Honeycomb made seem questionable. I tend to tinker with and modify my stuff anyways so I didn’t mind getting in there and changing the bungee but I do agree that the stiff pitch was an issue that should have been dealt with right at the start.

The RJ45 jack is also a clear weakpoint but so far mine’s been ok.

1 Like

Ok was able to remove the yoke shaft.
Shaft is 11.75 inches long.(29.84cm). Bored out on one end for potentiometer, and chiseled down for roll bungie clamp. Would need it to be 4 inches longer. Could use a coupling on the outside, but if possible would like to avoid that. Where would one go to have a longer shaft made? Thanks


Well, if I was at my old job I would make one myself :smiley:

For something like that you’re probably going to go searching for a machine shop that will do small one-off jobs. Could get pricey unless you know someone who can do you a favour.

Good luck.

1 Like

This looks like a good mod BUT IRL the roll & pitch forces are not always the same. If you are fighting the pitch channel, then your A/C is out of trim. Retrim it until there is only a light pressure on the stick. Also in larger analog A/C the manufacturers go to a lot of trouble to add elevator feel. That is a force that prevents the pilot being able to apply enough force to rapidly move the elevators. On digital,( Airbus etc.) this is done electronically.

Doing this mod wasn’t about making the pitch and roll equal, nor was it about “fighting pitch”, or not knowing what trim does.

I just found the stock pitch force to be a bit too strong, so I made an adjustment. It was an extra hassle when I was using an old unsteady table (a new solid desk fixed that problem). Also, it’s just nicer to have a lighter grip and easier time in pitch when say, coming in to land and managing the throttle lever with one hand.

Elevator feel is still there and there’s certainly still enough resistance to not rapidly pump the elevators like a mad man.

My confusion. I have a very steady desk & do not feel the pitch force being excessive at T/O or manual flying. Although when doing a RNAV or ILS approach when I disconnect the A/P sometimes it seems to be out of trim & quite a bit of force is required to control rate of descent which can become excessive to handle. I trim to reduce the force & use power to control the rate of descent. I can see where the pitch force could be excessive especially near the end of the column travel. A/C mostly is TBM 930.

@ SanMan1: As someone else suggested, you would get a small job shop to do the work. I was a 1st class machinist for over 25 years and what you want will be expensive. It’s not hard to do, but machine shops of that kind base ALL their work on hourly shop rates.

Of course, production shops do the same and in fact ALL machine shops have a base hourly rate, but in small job shops, they’ll charge for every minute it takes to acquire the material, create a print, etc., etc.

The job itself is easy and wouldn’t take long at all. If you supplied the material and drew a reasonably neat, properly illustrated, isometric blueprint, you could cut down the cost substantially. Still, the shop rate would include cutting tools, setup and breakdown times (and many will add tool, coolant, & machine wear predictions).

In 25+ years as a job-shop machinist, I’ve worked in many different machine shops, (and even had a partnership in my own). Machine shops that specialize in repairing and rebuilding Hydraulic systems (i.e., heavy equipment for construction machinery, such as bulldozers, backhoes, etc.), would likely have a scrap yard that they could easily pick out a close match to the size needed.

They would probably be the least expensive shop to hire for the job. Just don’t pressure them with a deadline, (give them a lot of time to do the job in). That way, they can do it between the normal machine setups that usually work with.

I worked for a year with Hannon Hydraulics, which was a job shop just like I described above. In that year’s time, I did a couple of jobs for people on my own time. I would machine the ‘side-job’ from discarded hydraulic pistons that were removed from a dump truck or backhoe.

The case-hardened piston shafts were pitted too deep for reuse and I had no problem getting permission to take the discarded steel. I simply did the machine work during lunch and/or after my shift.

If you can find someone working in a place like that, offer him some money, (start with about $100 and be ready to go up to $250 if necessary).

Trust me, if you ‘formerly request’ the work to be done in a small shop, it’ll easily cost you over $300.
FWIW
Rich

Thank you for this information. I actually scraped the honeycomb idea and purchased a Fulcrum yoke which I am very satified with. Based on your info, I guess it was a wise decision…:laughing:

I am sure that was the reason Honeycomb chosed this solution but for most simmers I think is a wrong one… me included. For me is unusable. I have a long throw Virpil stick just under the Yoke and if I control the plane with it I can be super smooth but with the yoke… is like my 6 years old daughter is playing. Constant fighting for trim combined with such high forces on elevator has very bad consequences in Sim.One is imprecision. Second… is creating a very (imho) bad habit of always trimming the aircraft and not flying the aircraft and when brown matter hits the fan you end up not knowing what is going on.
For me it was the first time flying with a yoke and I understood why most “big planes virtual pilots” are so proud of their skills with the AP and not so much with flying the plane by hand. Because most probably all yokes are this badly designed. LOL.

1 Like

So this is the way I found to be easiest to disassemble the cords and reassemble them once you have them replaced.
At minute 5:35 I said aileron but I meant elevator… I think is obvious but just to be clear.

5 Likes

Thank you! This was way easier than when I did it the first time.
Just changed the cord on my Alpha XPC and the only differance is that you also have to remove the two outer front screws to get the cover off.

1 Like

I went to the extreme. To avoid the unrealistic always-return-to-the-same-neutral-position of spring/bungee cord loaded yokes, I disconnected the pitch bungee altogether.
So now I can fly more like the real life, by operating the elevator via yoke inputs without the need for the unrealistic apply-the-trim-and-smulataneously-go-back-with-the-yoke-to-always-the-same-neutral-position.
I know this is unrealistic in the other way (very weak forces on the elevator control) but I will see how it works in the sim. I would expect issues with applying backward pressure during a turn and the releasing it for straight-and-level.
But I expect it to be better versus the common wrong behaviour of sim pilots of controlling the elevator via trim inputs instead of yoke movements. Trim should be only used to cancel the forces on the yoke, not for actually controlling the plane.
There is still some resistance on the pitch axis due to mechanical drag inside the yoke mechanism. To have bit better balancing of pitch and roll axis I replaced the roll bungee with a much weaker rubber band.

More here:

1 Like

Thank you for your tutorial. Helped me a lot and now fighting against the pitch is over.

What bungee did you use? Tempted to try this.