Alright so we’ve taken our new jet out for some fun, now it’s time to put it back on the ground. You’re going to quickly find out that landing the Hornet is a little bit different than most jets. Traditionally landing a jet comes down to approaching and touching down at the slowest speed safely possible, but in the Hornet everything comes down to approaching and touching down so that the hook at the back of the jet is at the optimal angle to catch the arresting wires on a carrier deck. As such, instead of the jet computing a target airspeed to approach at, it is designed to be flown at a target AoA.
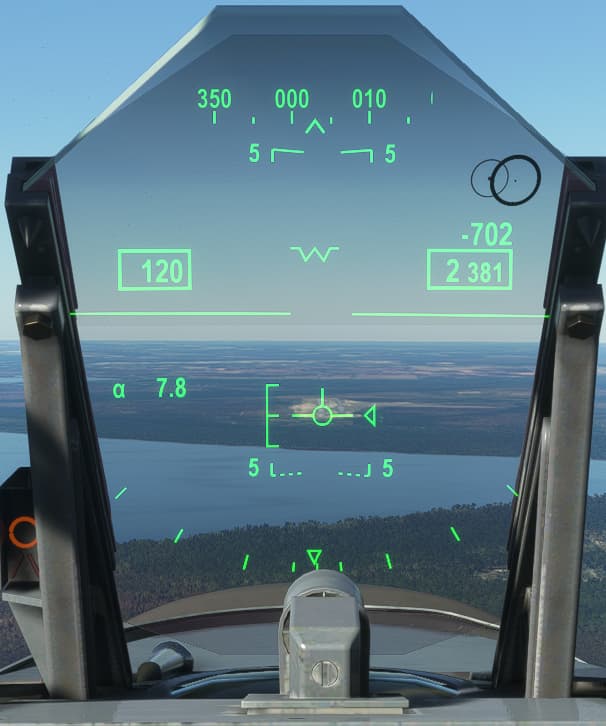
In our simulated jet, On- Speed AoA is approximately 7.5 degrees. Once the landing gear is down and locked, and the flaps are extended to Half or Full, the AFCS changes to Powered Approach ¶ mode. In PA mode the AFCS automatically trims pitch to maintain the target AoA, target AoA is adjusted using the Pitch Trim. To achieve and maintain the correct AoA we are given 2 guides, the AoA Indexer on the left side of the HUD, and the E-Bracket to the left of the Velocity Vector (VVS) inside the HUD. Alongside these guides there is a also a small triangle to the right of the VVS that displays your current airspeed trend. When accelerating it will begin moving above the VVS, the farther it moves the faster your are accelerating. When decelerating it will being moving below the VVS.
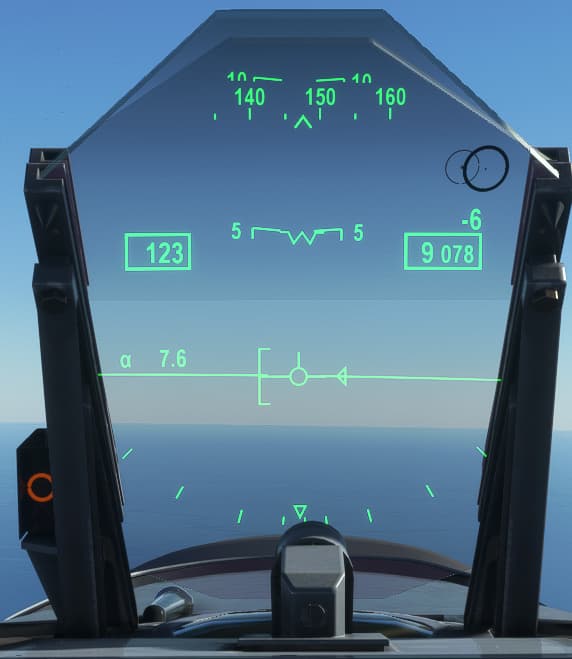
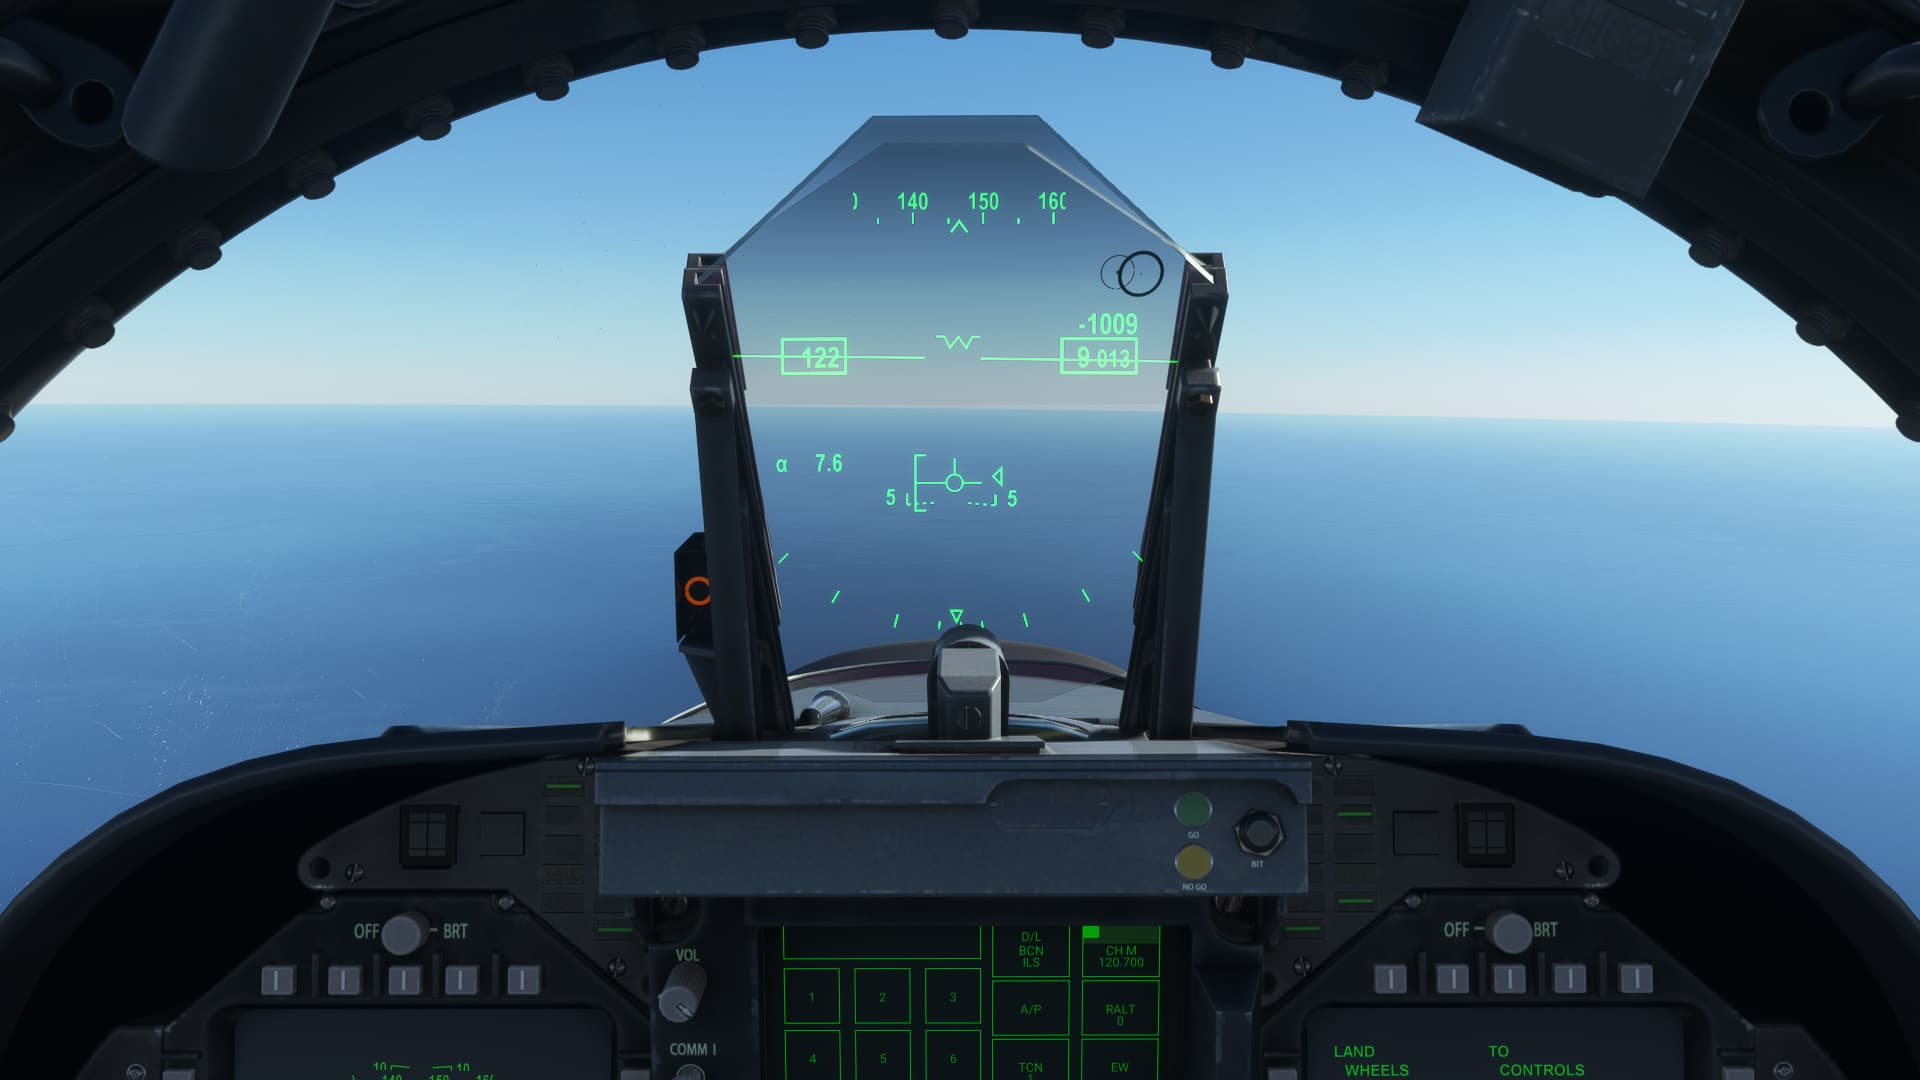
When at the correct onspeed AoA, the Indexer will display an amber Circle, and the VVS will sit at the centre of the E-Bracket
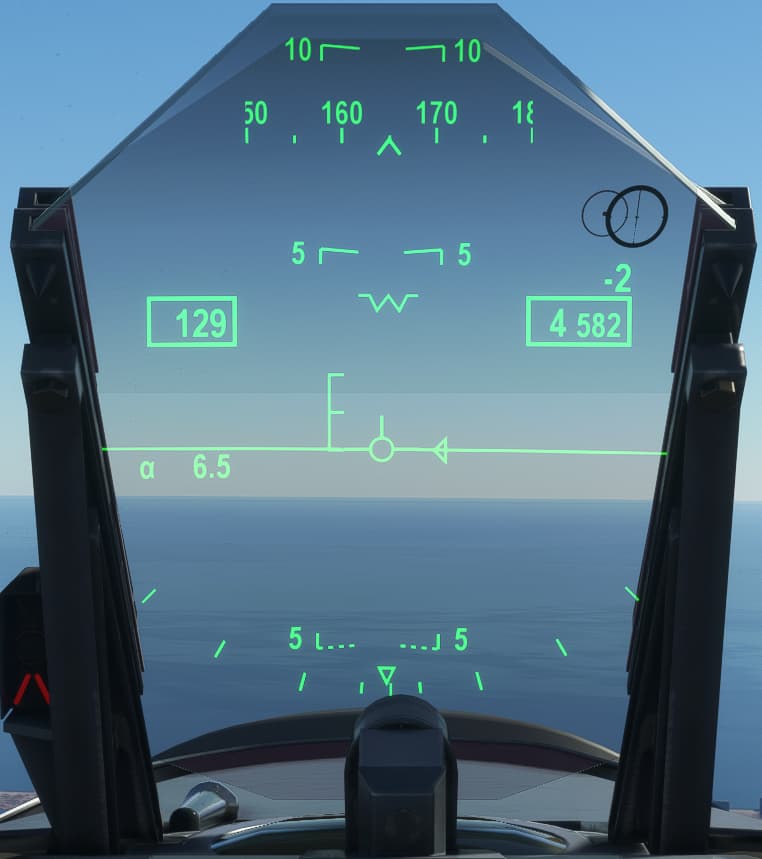
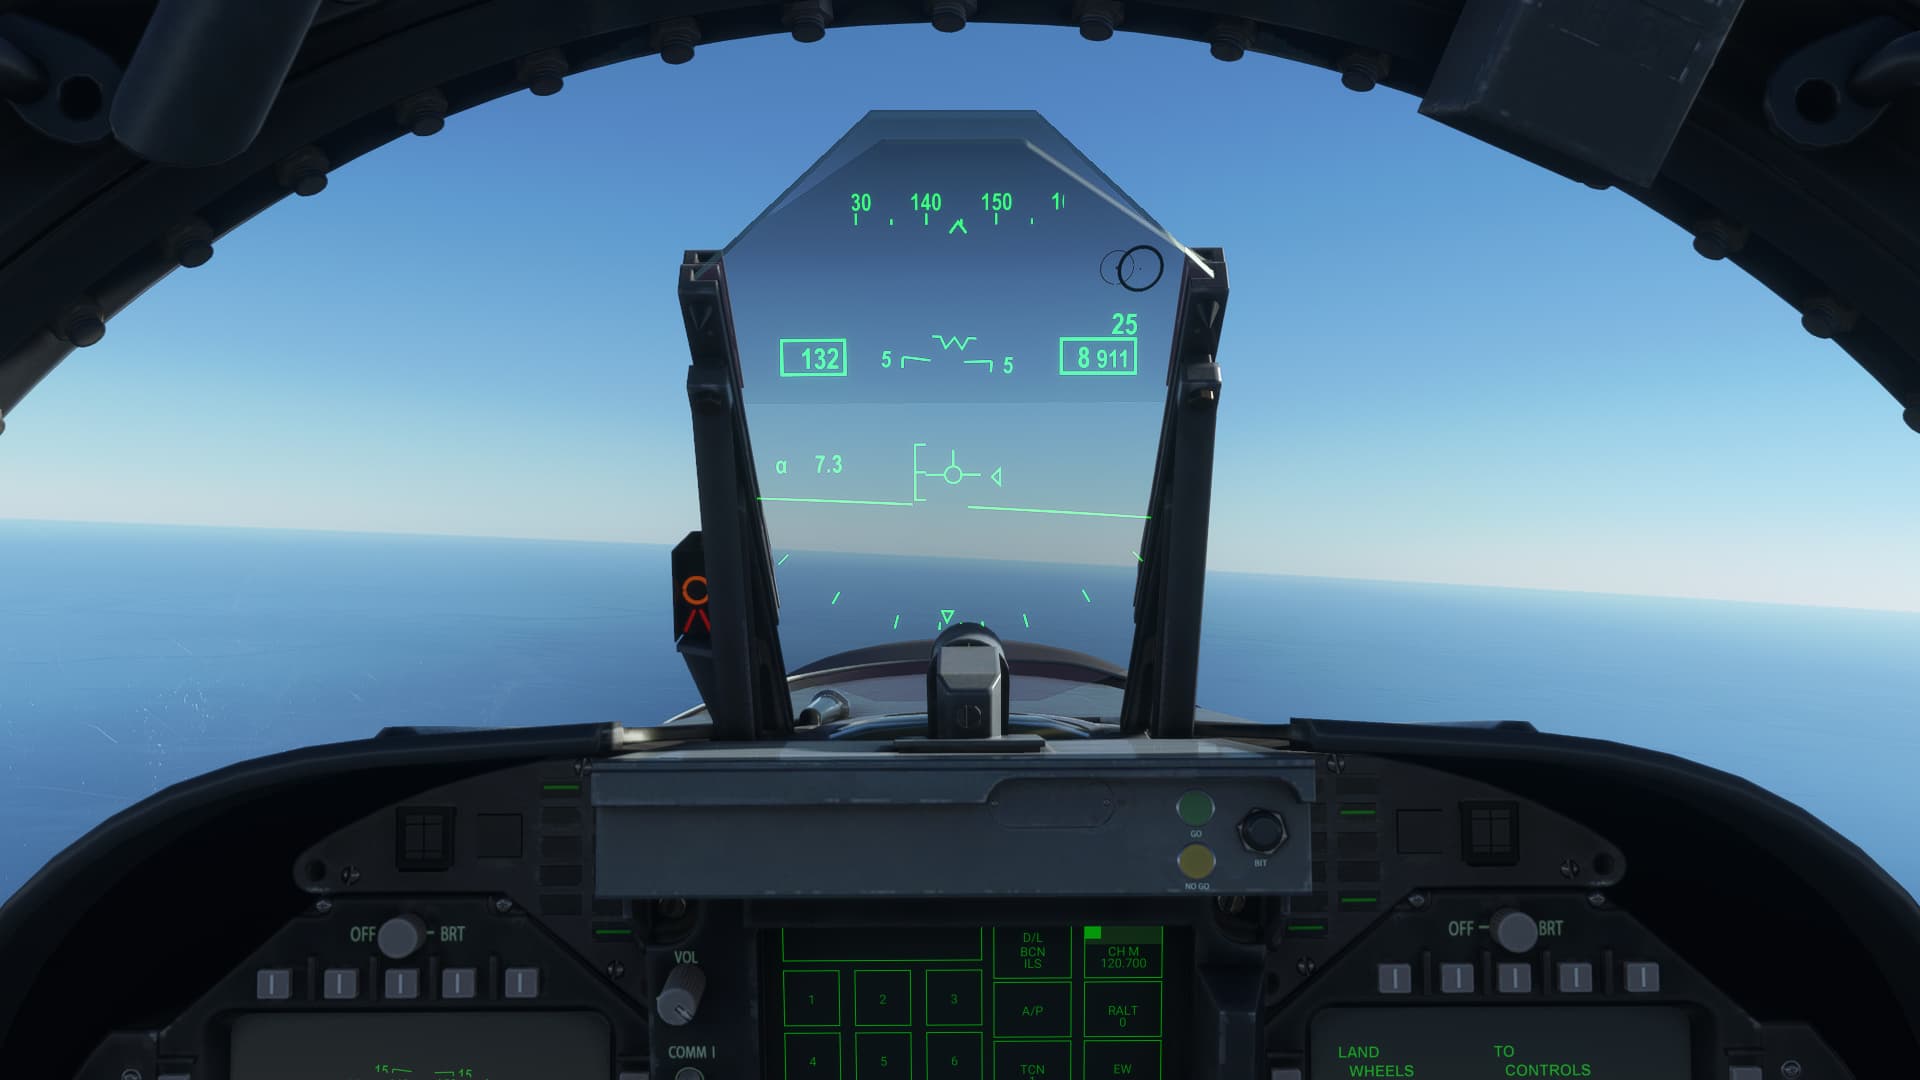
When our AoA is too low, the AoA Indexer will display a red arrow pointing upwards to advise you to increase AoA, and the VVS will sit in the bottom portion of the E-Bracket.
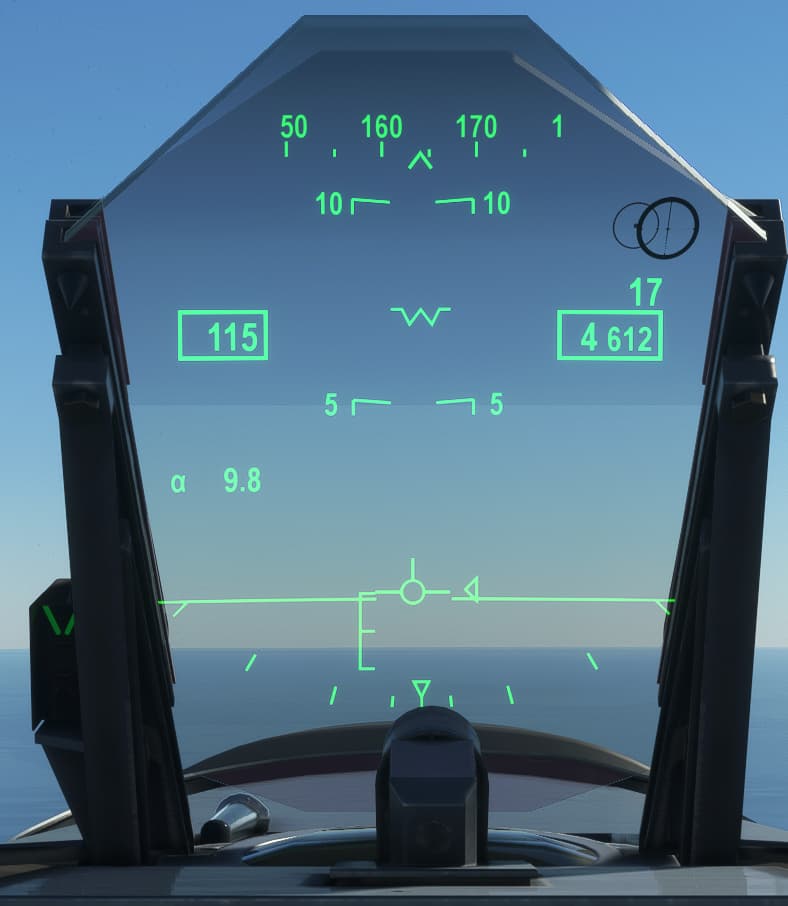
If our AoA becomes too high, the AoA Indexer will display a green arrow pointing downards to advise you to decrease AoA, and the VVS will sit in the top portion of the E-Bracket.
Now let’s start putting this all together, I recommend initially just practicing how the jet responds to PA mode by flying around at around 10,000 ft MSL so you have lot’s of room. We’re going to stabilize the jet in level flight at around 240 knots. We’re going to take this slowly, as you get more confident you can begin using things like the Speed Brake and Overhead Break Turns to speed the process up.
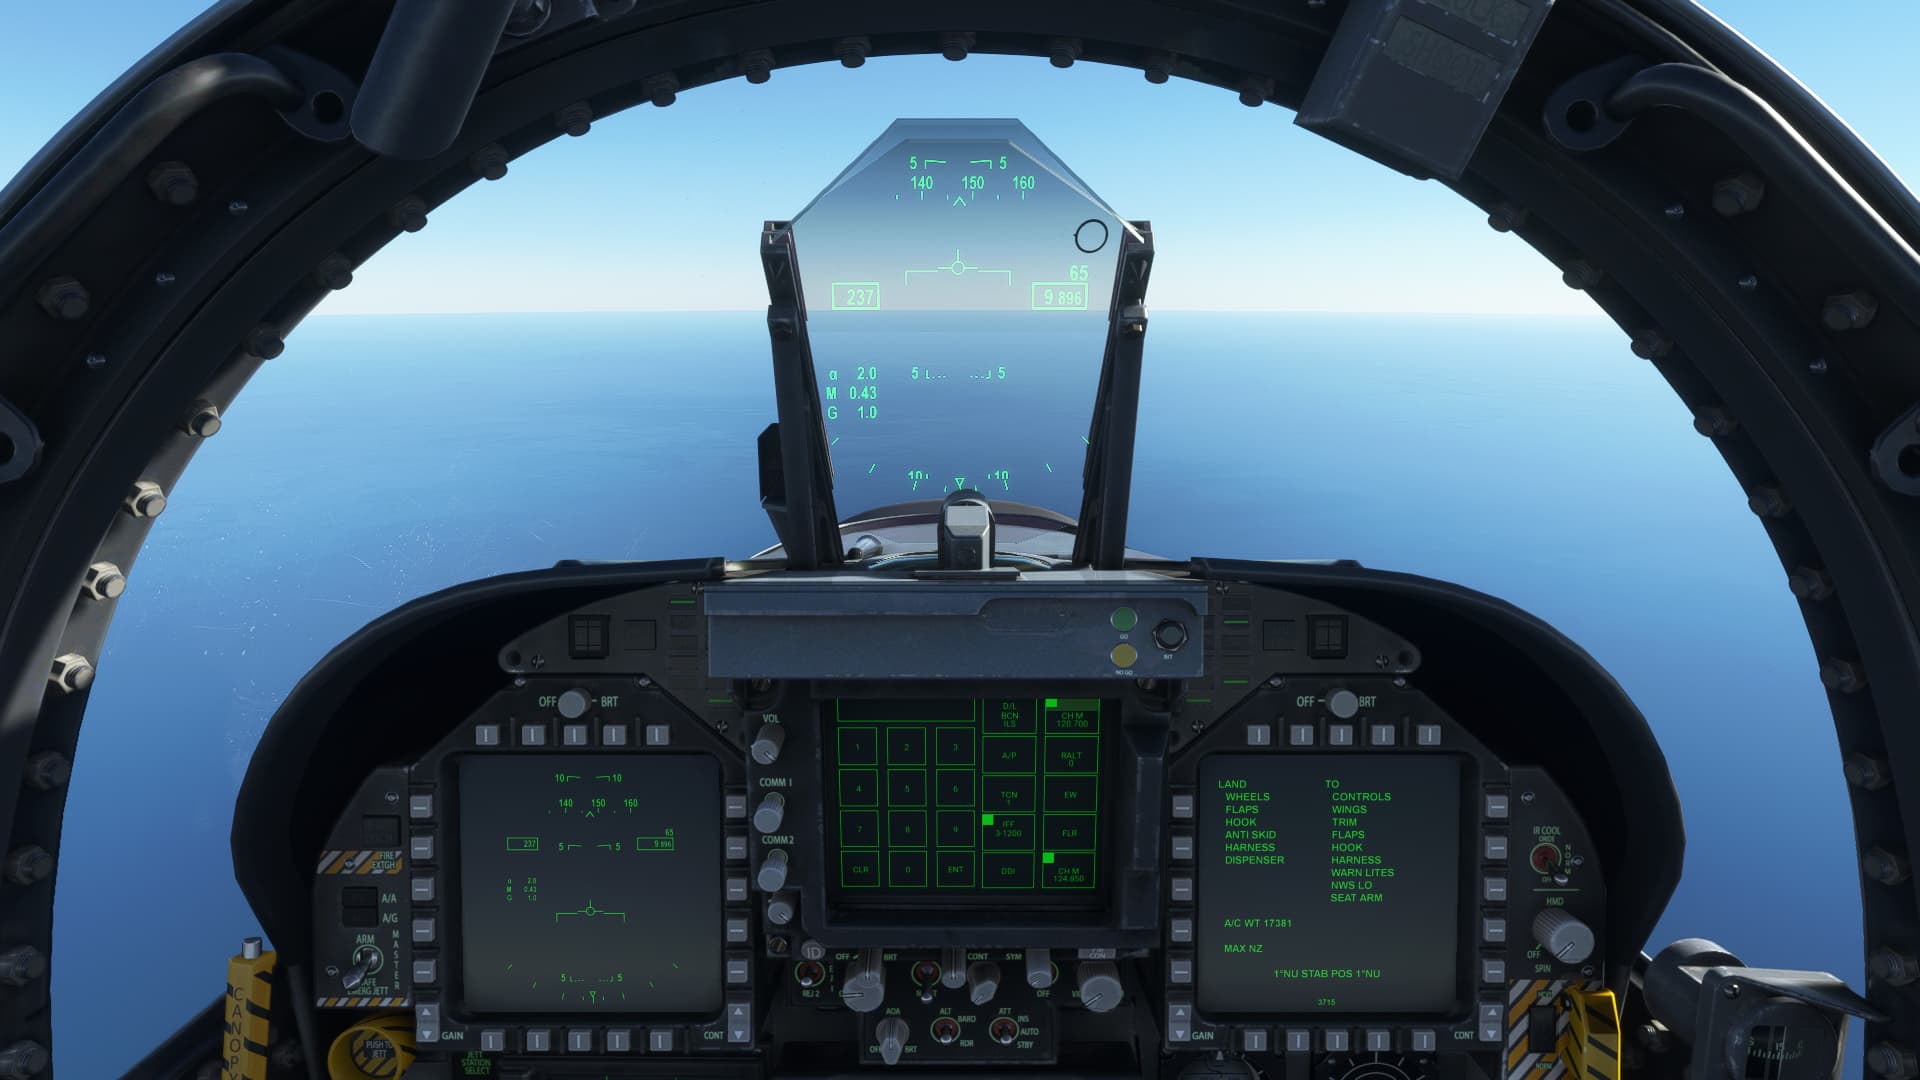
Now we’re going to deploy the landing gear, set flaps to Full, and reduce the throttle to idle. Once the E-Bracket displays, slowly begin adding Nose Up Trim inputs to keep the VVS on the horizon. It decelerates slowly at first, but as you get closer to 160 knots things start to happen faster, so be prepared. There is a bit of delay in the engines spooling back up, so you will also want to start adding throttle as you get closer to 160 knots. Continue adding Trim and throttle as needed until stabilized in level flight at onspeed AoA. The whole process goes roughly like this;
Now, for landing we’re normally at low weights and low speeds, in a jet designed to fly fast with engines to match. You’re going to find you have to be constantly adjusting the throttles to maintain your desired flight path, and it takes very little change in throttle to adjust. For those with Split Throttle setups, this is best accomplished using a process known as “walking the throttles”, Essentially you’re placing your hands on the throttles, and using gentle back and forth motions of your wrist to gradual move one throttle a small bit, then “walking” the other one up to match. It’s had to demonstrate but it looks kind of like this;
Now that we’re established on speed in level flight, you only use the stick for roll inputs, the throttles will effectively control your pitch now via the AFCS.
If you want to pitch up, you add throttle, as the speed increases the jet automatically pitches up to maintain AoA.
The opposite holds true for descending
In the below example, my hands weren’t on the stick at any point.
When completing a turn, the reduction in lift vector means you will need to add power as you enter the turn, and reduce it when exiting the turn. For higher bank angle turns you may need to use the stick to temporarily increase AoA to prevent excessive sink rates and/or Airspeed increases.
Now that we’ve gotten some practice in using PA mode, time to set the jet down. We’re going to perform a long straight in approach to keep things simple. Let’s look at our setup and how to get ourselves stabilized.
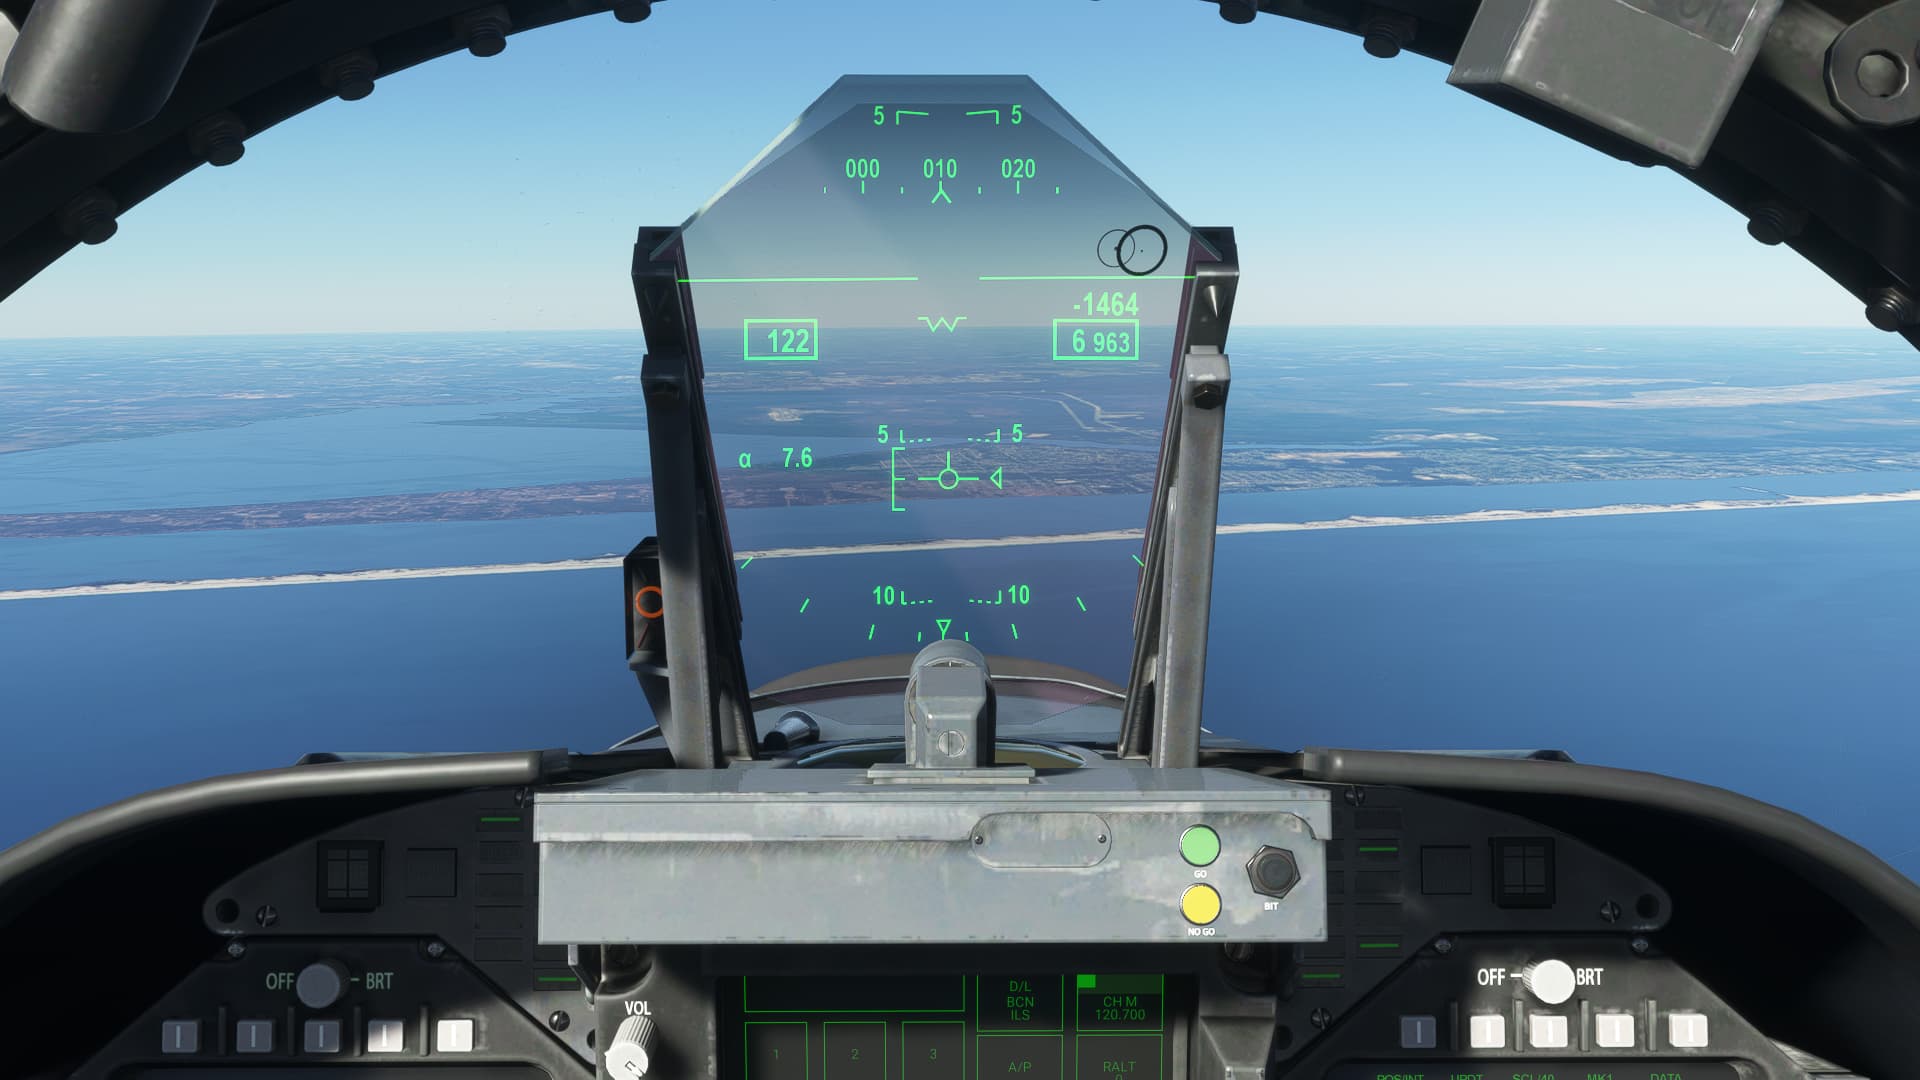
Ideally we want to approach at a 2.5-3 degree glidepath, the easiest way to do that is to have the Runway threshold roughly halfway between the Horizon line and 5 degrees nose down reference lines in the HUD.
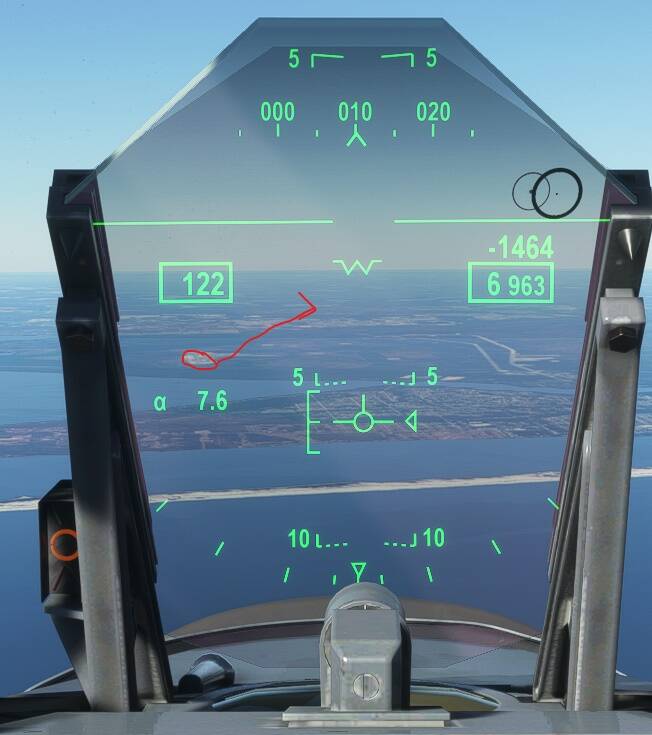
Ok, so we’re left of the centreline, and high. So we’re going to need to turn right to obtain the centreline and maintain a higher descent angle.
Now we’re nicely established, and it’s just a matter of working the throttles to maintain this sight picture all the way down.
Now you can flare if you want to, but since the default is a US Navy livery, we’re planting the jet Navy style. Continue to work the throttles, as you get into the ground effect reduce the throttles to idle to prevent floating, and you should plant the jet at around 400-500 fpm. Engage the speed brakes and toe brakes as needed to slow down.
Disclaimer: I’m a little rusty and my pedals aren’t the greatest, so don’t judge the centreline deviation on touchdown too harshly.

