This guide will walk you through all the steps needed to prepare a flight, from planning the route to aircraft options, and setting the weather. This is a lot, so strap in. And remember - this is a game/sim that is meant to scale to the experience you want - so you can do as much or as little of this as you want. This guide is to help show you those options.
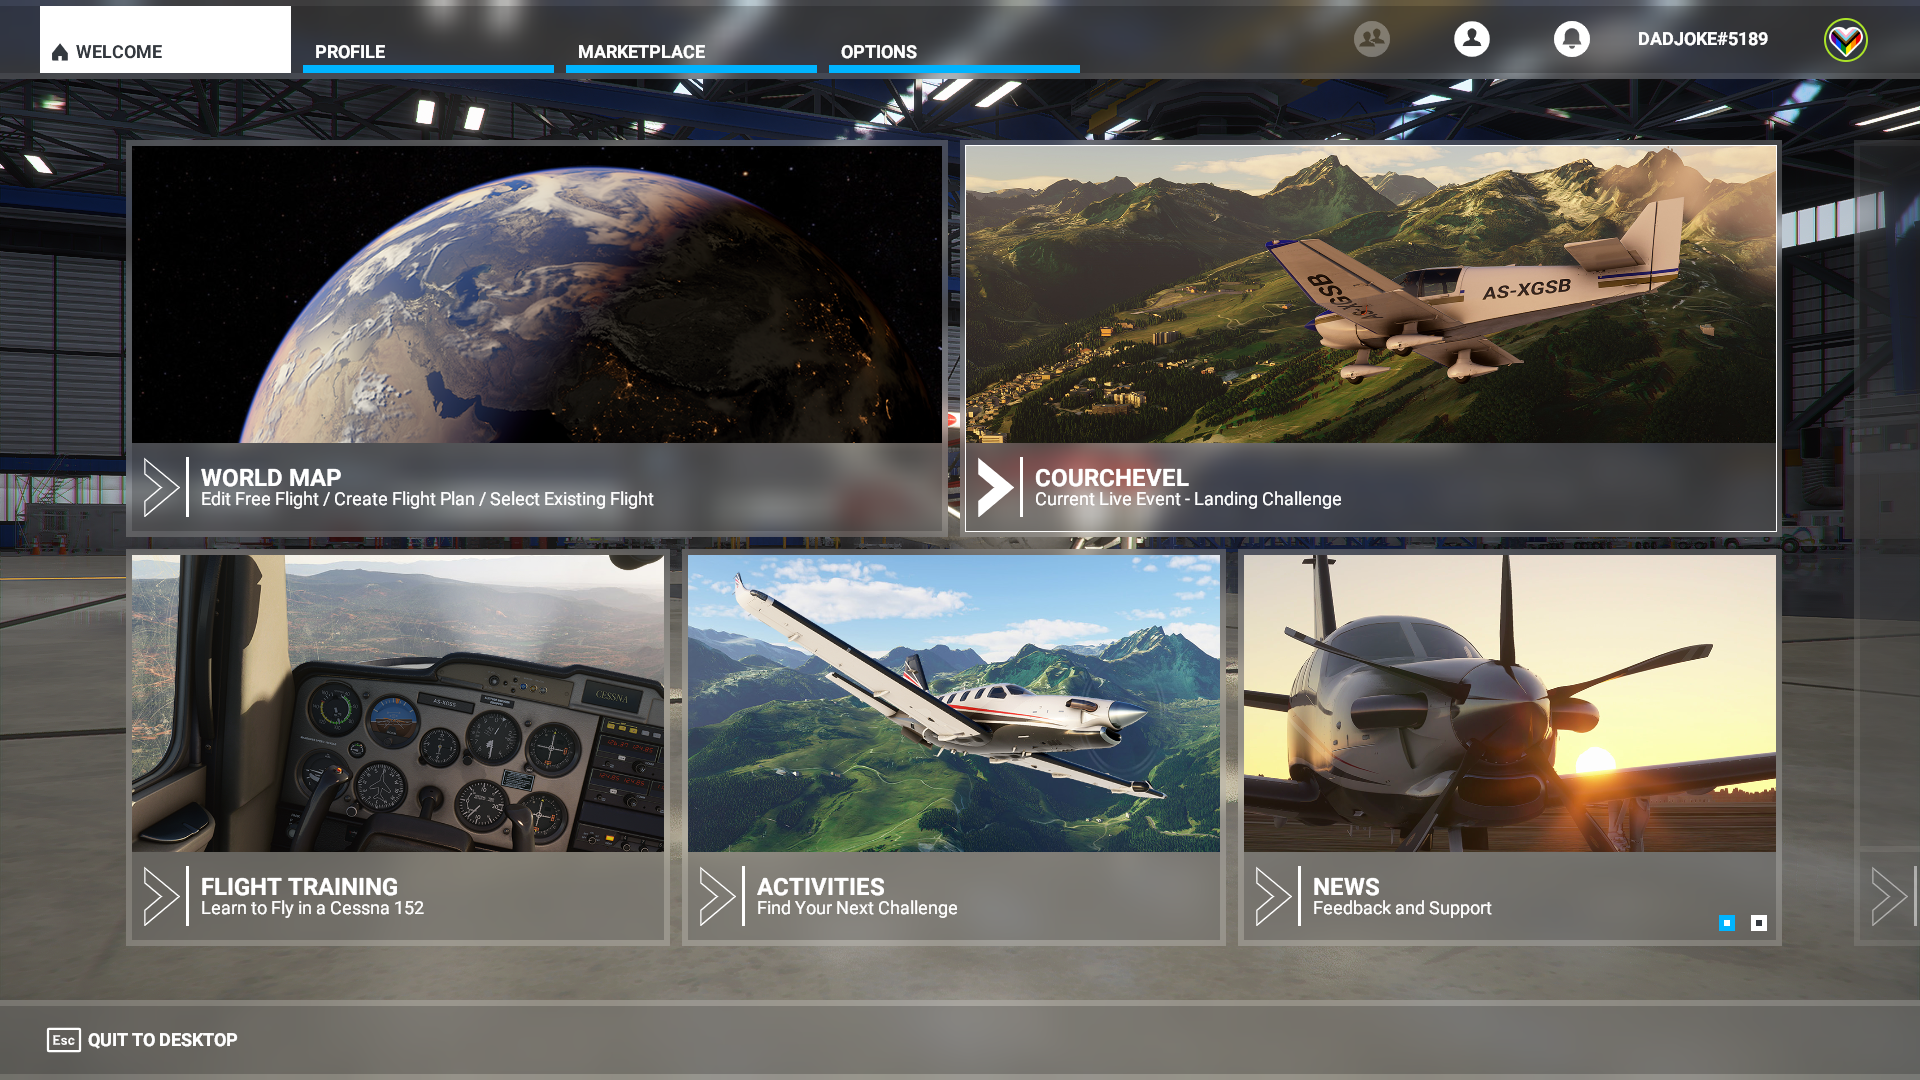
So, you’ve opened the game, downloaded all the content, and you’re ready to hit the skies. Sure, you can jump directly into one of the many landing challenges or bush flights, but if you want to have a higher level of customization in your flight, this is the guide for you.
1. Aircraft, Fuel, and ATC Options
From the Main Menu, we’re going to head into the World Map
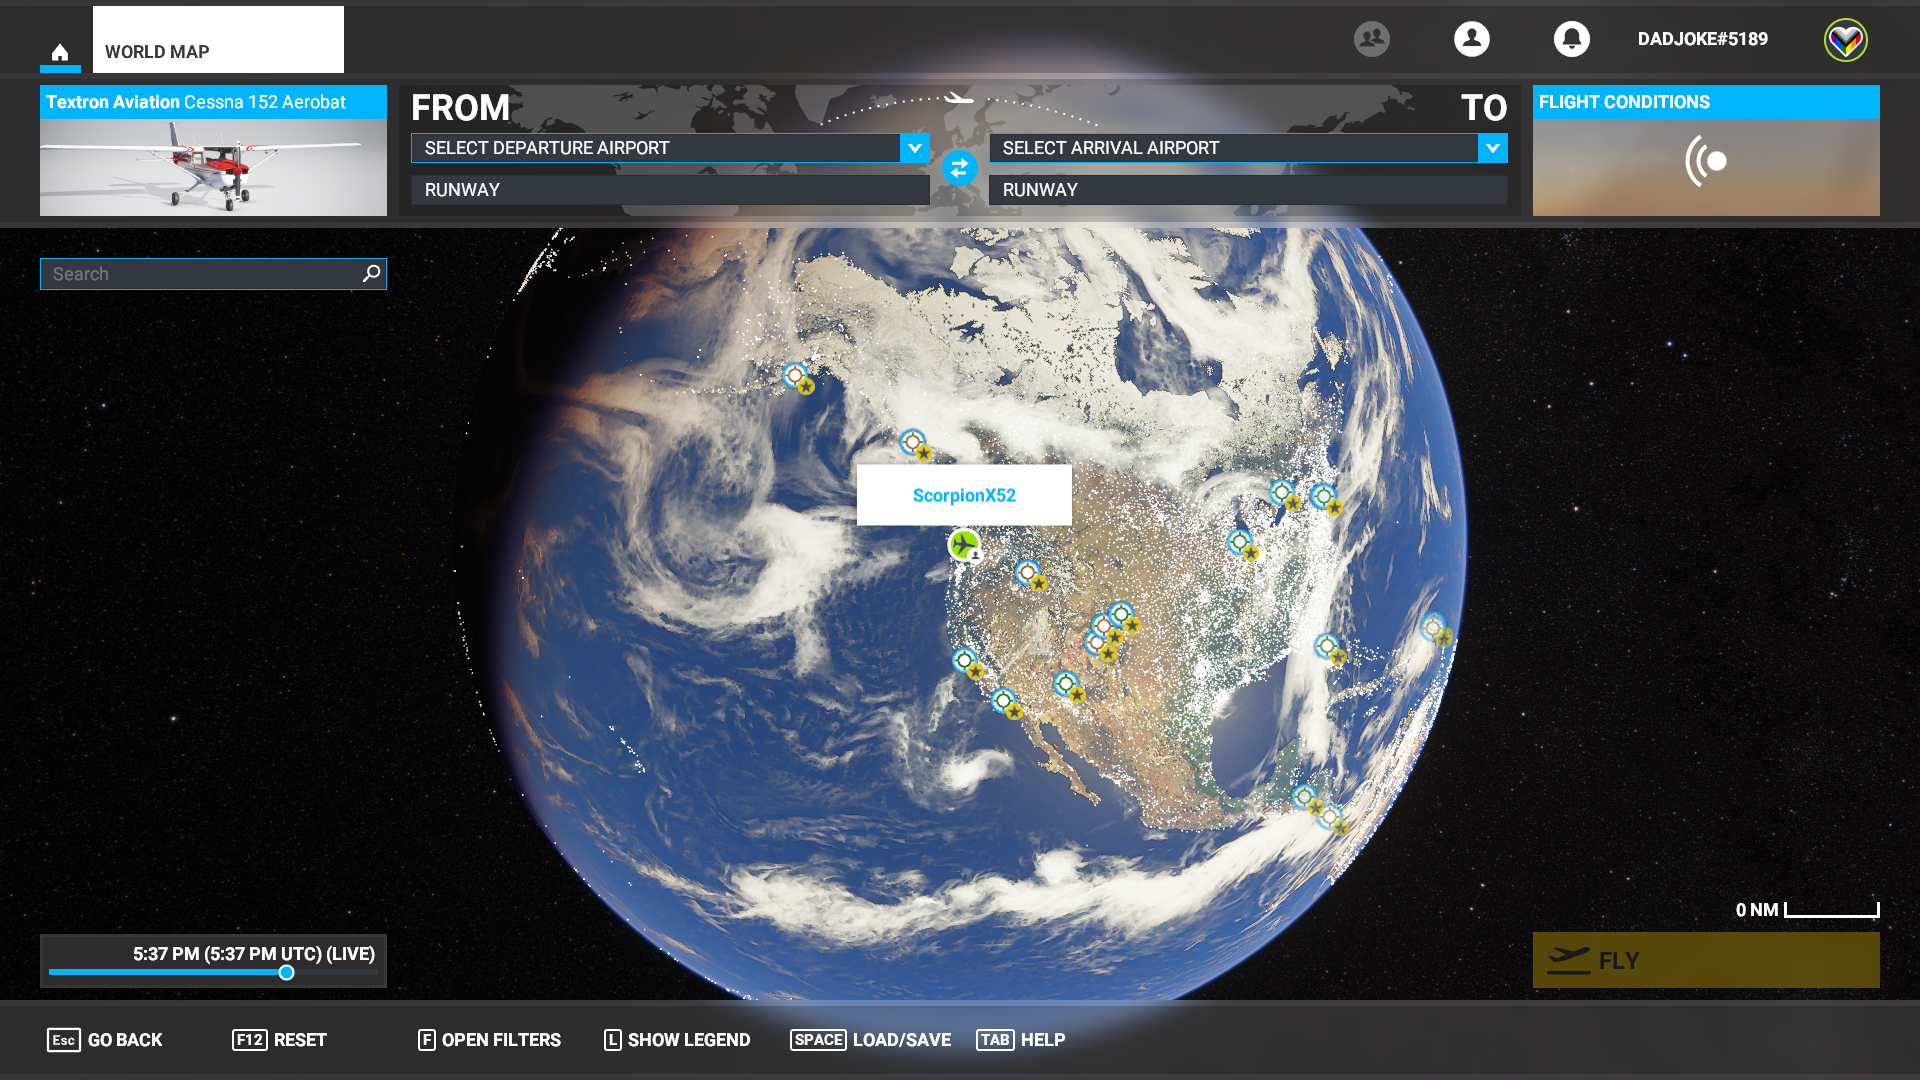
You’ll see the Earth, dotted with Points of Interest, cool airports to take off from, and possibly some friends if you have any online at the time. But what we’re interested in is that photo of the plane in the top left corner.
Click that to get into your airplane selection screen. Like most menus in Flight Simulator, there’s a lot going on here, so I’ll break it down in parts.
Menu Categories
The left side of the screen now has your various categories for this submenu. You’ll use these to navigate from section to section.
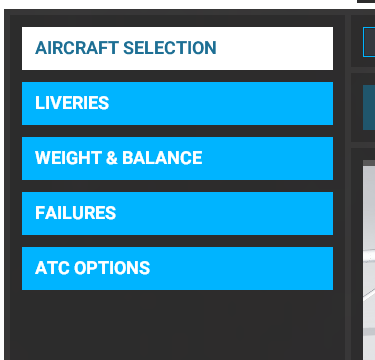
Aircraft Selection
Across the rest of the screen, at the top of the menu, is your search and filtering section. The search bar is used to filter planes with a specific term in their name. You can type “Textron” to see all the Beechcraft and Cessna planes from Textron Aviation, or “Skyhawk” to see just the Cessna 172 variants. As more and more aircraft are added to the game, either by Microsoft or third-parties, this feature will become more and more crucial.
IMPORTANT NOTE - the aircraft shown in these screenshots are from the Premium Deluxe version. Depending on the version you are playing, you may see fewer selections
Below the search bar is a filter selection, where you can limit the planes shown by category. Turboprops are turbine engines (like jet engines) that turn a propeller, resulting in some powerful prop-driven planes. Airlines are what you would expect, standard commercial air travel jets. Jets are regional transit/business jets, and propellers are all of the small general aviation planes.

Below the search and filter bar is your aircraft selection. What you see here is limited by what you searched/filtered above. There is a scroll bar at the bottom and you can use the scroll wheel on your mouse to move left and right to see all the selections. Below the portrait of the plane is the manufacturer and name, with the standard cruise speed (in true airspeed represented in Knots or KTAS), the ceiling or max altitude the plane can safely fly to, how long the plane can fly at full fuel load, and how far it can fly on that same load.
You’ll start with a plane selected, and clicking on any other plane will select that one. Hovering your mouse over another plane will change the color of some of the values. This is showing if a spec is better (green), worse (red), or the same (blue).
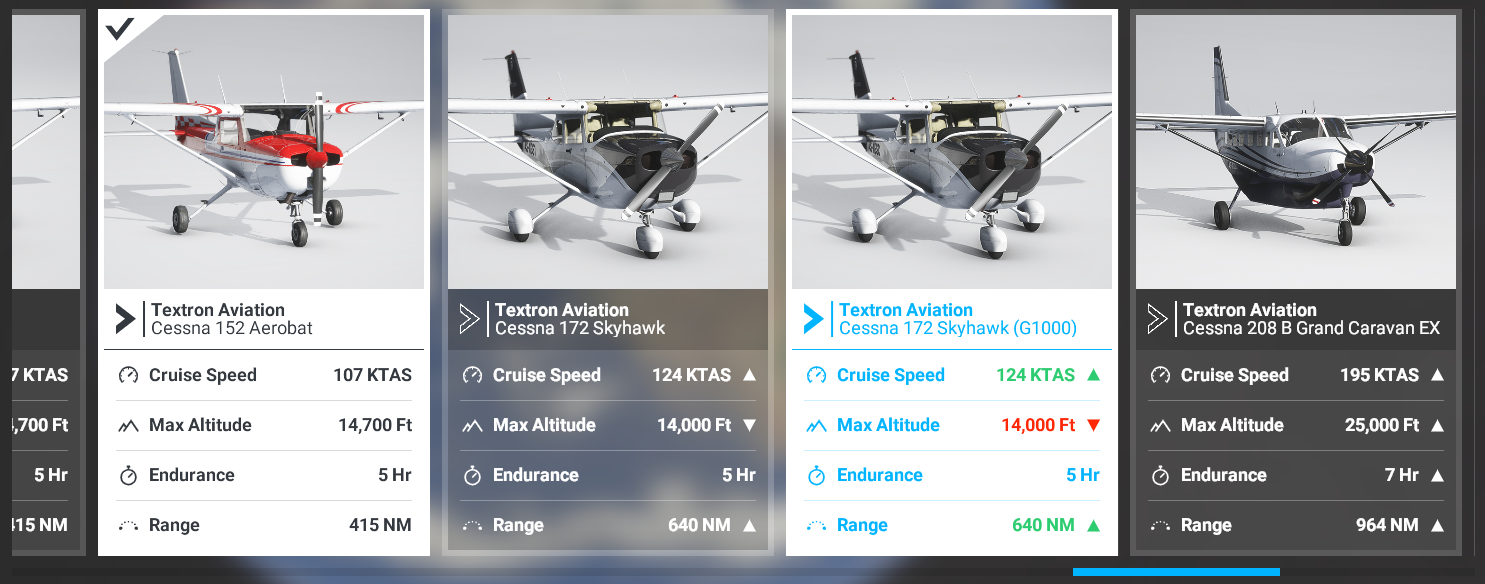
So you’ve selected your aircraft. In this case, I’m using the Cessna 152, as it’s a classic training plane and the lack of GPS or autopilot really forces you to flex your flying skills to get around.
Next category on the left menu is
Liveries
Not much to say here as there aren’t really different liveries that I’ve seen in the game, but when they show up, you’ll be able to pick different paint jobs for your plane here.
Weight and Balance
Here you’ll be able to set the amount of fuel you’ll start with on the plane, and the weight of the people and cargo onboard. The fuel (if you don’t have unlimited fuel set) will determine how long you can stay in the air, and the fuel and payload will both determine the total weight of the plane, which affects flight dynamics. A heavier plane is harder to get into the air and keep it there.
IMPORTANT NOTE - You can change these values at any time in the game! There’s a Weight option in the top menu during a flight, and you can also go to a refueling station at airports to change it if you want a little more realism.
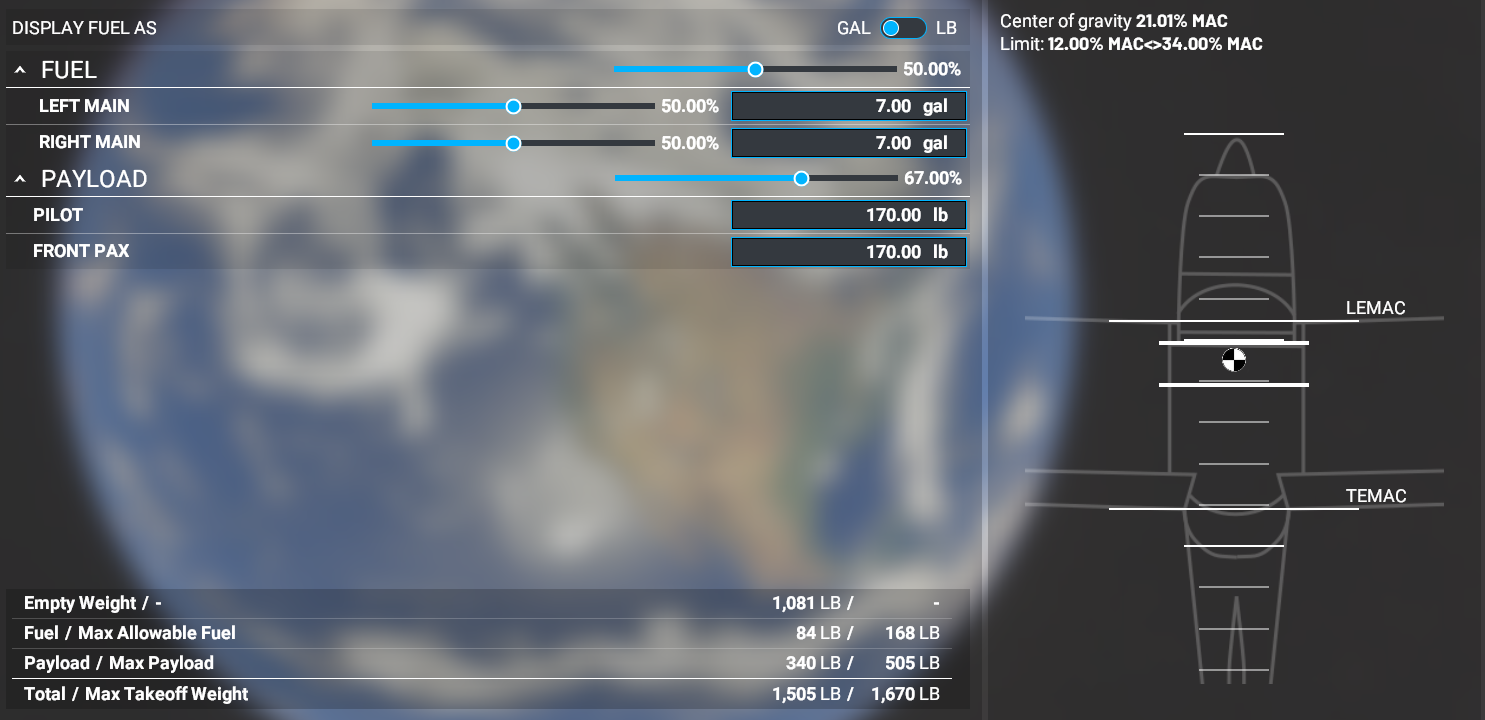
You can adjust the values by typing in an actual amount in the text box, or by moving the sliders. The percentages are relative to the max values, so 100% on the left main fuel tank means that tank would be 100% full, or 75% on the payload slider means you are three-quarters towards your max payload weight. For reference, those values are all shown at the bottom of the screen.
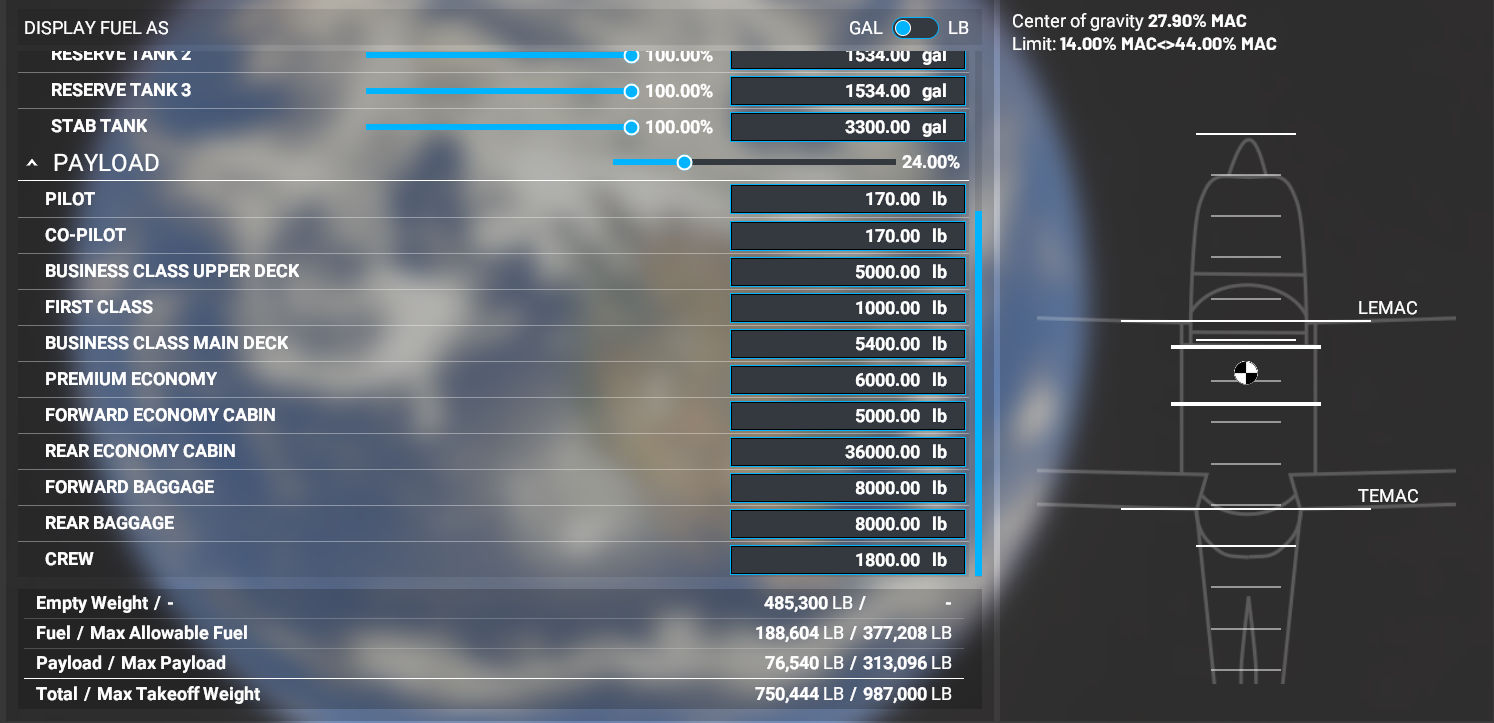
The 172 is a two-seater with no real cargo room, so this is a simple setup, but it can be much more advance. Take a look at the 747-800 Intercontinental:
Here’s the thing though - you don’t have to touch ANY of this. You can ignore this tab altogether and be okay. Some pilots will want to move the fuel from the default 50% for longer flights but leave the payload alone.
The right side of the menu shows the center of balance, which is important for flight dynamics. Too much weight on one side and your plane will want to dip in that direction. Without worrying too much about the technical meanings of the LEMAC and TEMAC, they are basically how far forward or back you have weight without running into a problem. As long as you keep that indicator somewhere in the marked off zone, you’ll be okay. Again, the defaults will work fine here, but you can adjust for realism. For example, I’m much closer to 200lbs than 170, so I change that for the pilot when I fly smaller planes where weight makes a difference.
Failures
I’ll explain this section briefly, as if you are just learning how to set up a flight, you might not want things breaking on you already.
This page allows you to make certain systems in the plane able to fail. Enabling the failure for a component means it CAN fail randomly, and arming the failure means it WILL fail between the time frame you set (which is indicated as min and max time values in minutes). If you want to see what happens when you lose oil pressure in the second half hour of your flight, this is where you set it. If you want to have the possibility of things randomly breaking on your plane, just enable everything and have fun.
ATC Options
This last menu allows you change how the Air Traffic Controllers in the game refer to you. The Tail Number is actually visibly displayed on your plane, although at the moment it does not appear that they show up for multiplayer planes.

(An example of an aircraft tail number)
Your call sign can be a shortened version of your tail number or the name you want ATC to call you. You can use just a call sign, or a combination of call sign and flight number. For example, your callsign could be SWA (for Southwest Airlines) and the flight number 1783, or you can set your callsign as a shorted version of your tail number, which is what I do (N7739B to 39B).
If you want the ATC to refer to you as a “heavy” plane, you can turn that on. Traffic controllers use that for larger planes that would create additional wake from wings and engines, so other planes can stay farther away, but that doesn’t affect you in game, so it’s mostly a roleplaying thing. And you can choose whether or not to display your tail number on the plane.
And there you have it, you have your plane ready to fly - now click the picture of your plane in the top left again or press ESC to go back to the world map and we’ll
2. Plan a Flight
Getting around the world map is simple and you have a number of tools to help you find where you want to be. Left Click and drag on the globe to rotate it around, and use your mouse wheel to zoom in and out. Many icons and symbols will show up at certain zoom levels, so if you don’t see something where it’s supposed to be, try zooming in or out.
There’s a search bar on the left, which can be used to search airports or navaids. This won’t help for cities or points of interest.
For example, if you wanted to find Washington Dulles International Airport in Northern Virginia, you could search for KIAD, the airport code, and it’s the only result. Dulles also returns just that one airport. However, IAD or Washington both have Dulles farther down on the list, so if you aren’t specific enough with your search, you may have to scroll a bit in the results to find what you’re looking for. A good tip is to google the airport plus ICAO code.
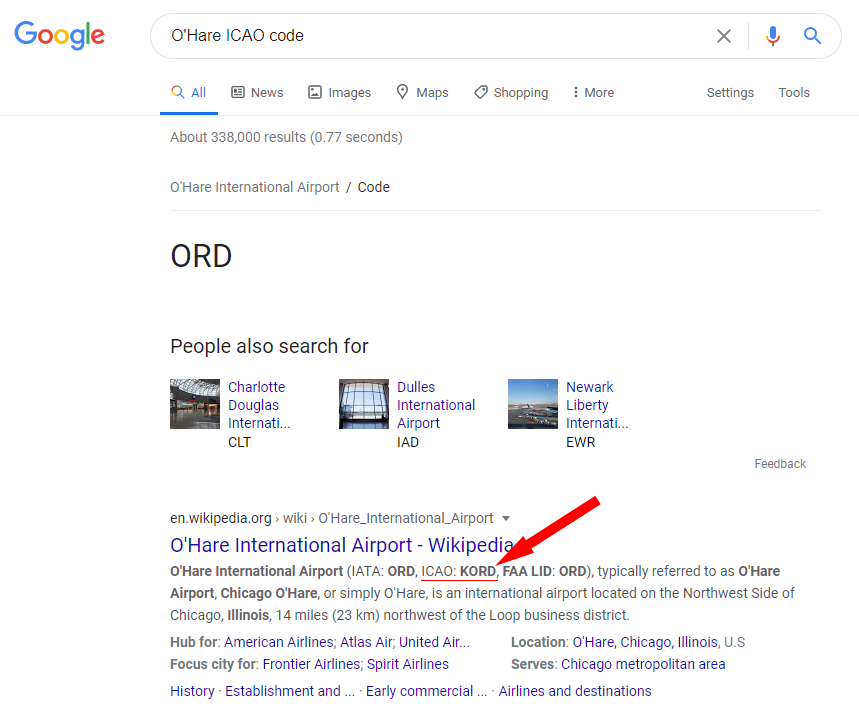
You might have to look at the Wikipedia link for it, but a good helper is that continental US airports have K at the beginning, UK has EG, Germany is ED, China is Z, Australia is Y. There’s a good reference chart here: ICAO airport code - Wikipedia
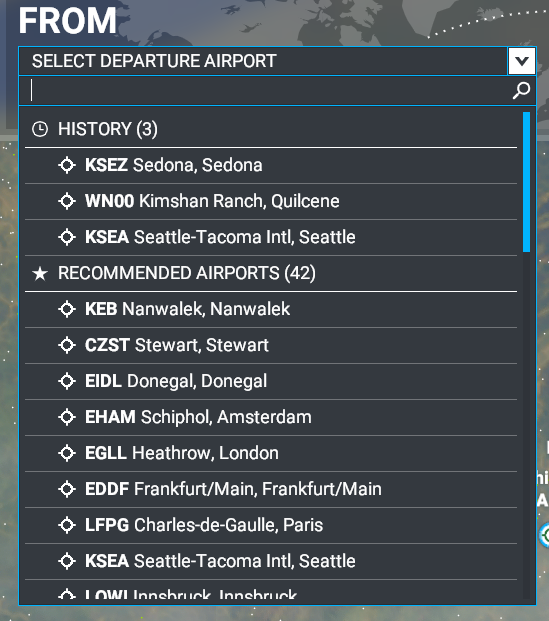
You can also click the drop down that says “SELECT DEPARTURE AIRPORT” at the top. You have a search bar that functions just like the other one, and under that you’ll have the last few airports you used, and a list of recommendations of interesting places to take off from.
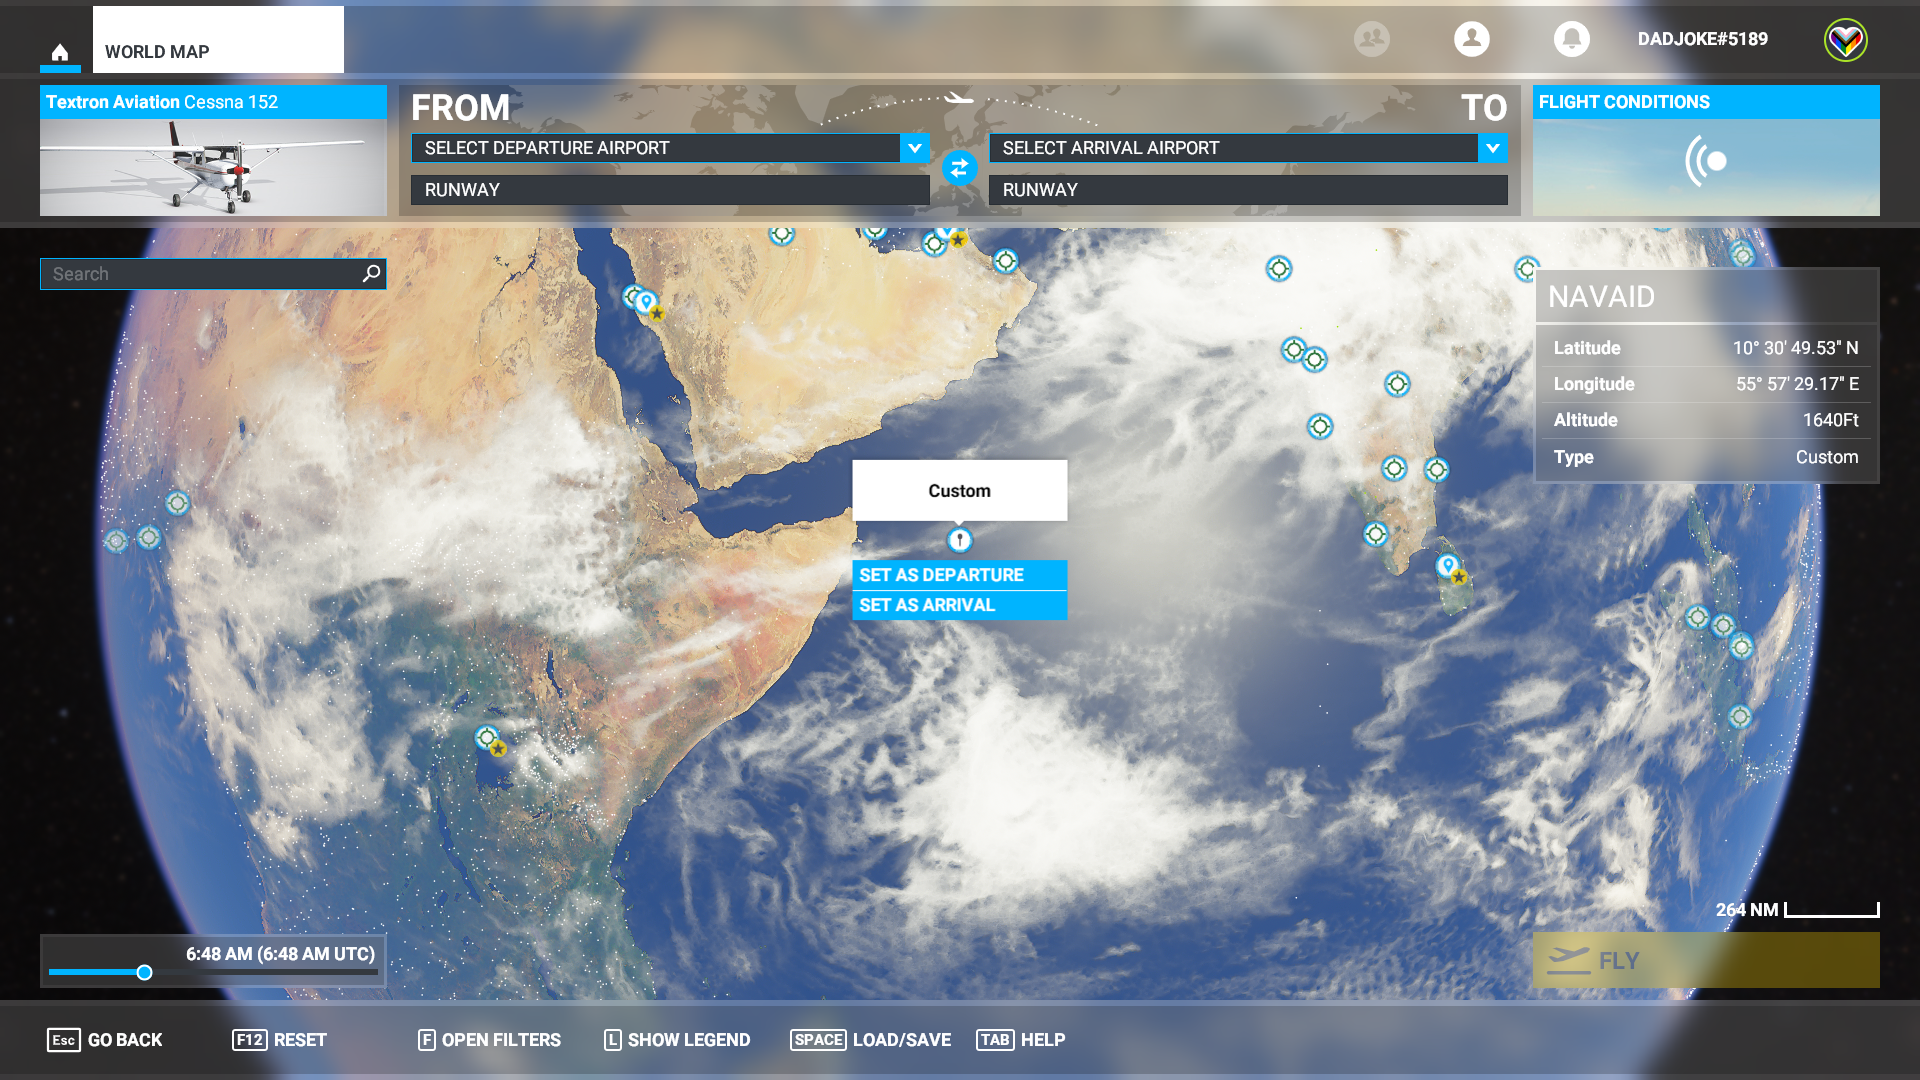
But you don’t have to use the drop down, you can click on any airport, any point of interest, any friend or other plane, or anywhere else on the globe and select “SET AS DEPARTURE” to start your flight there.
Note - if you start from anywhere that’s not an airport, your starting position will be in the air, so be ready to fly!
Here’s something else important:
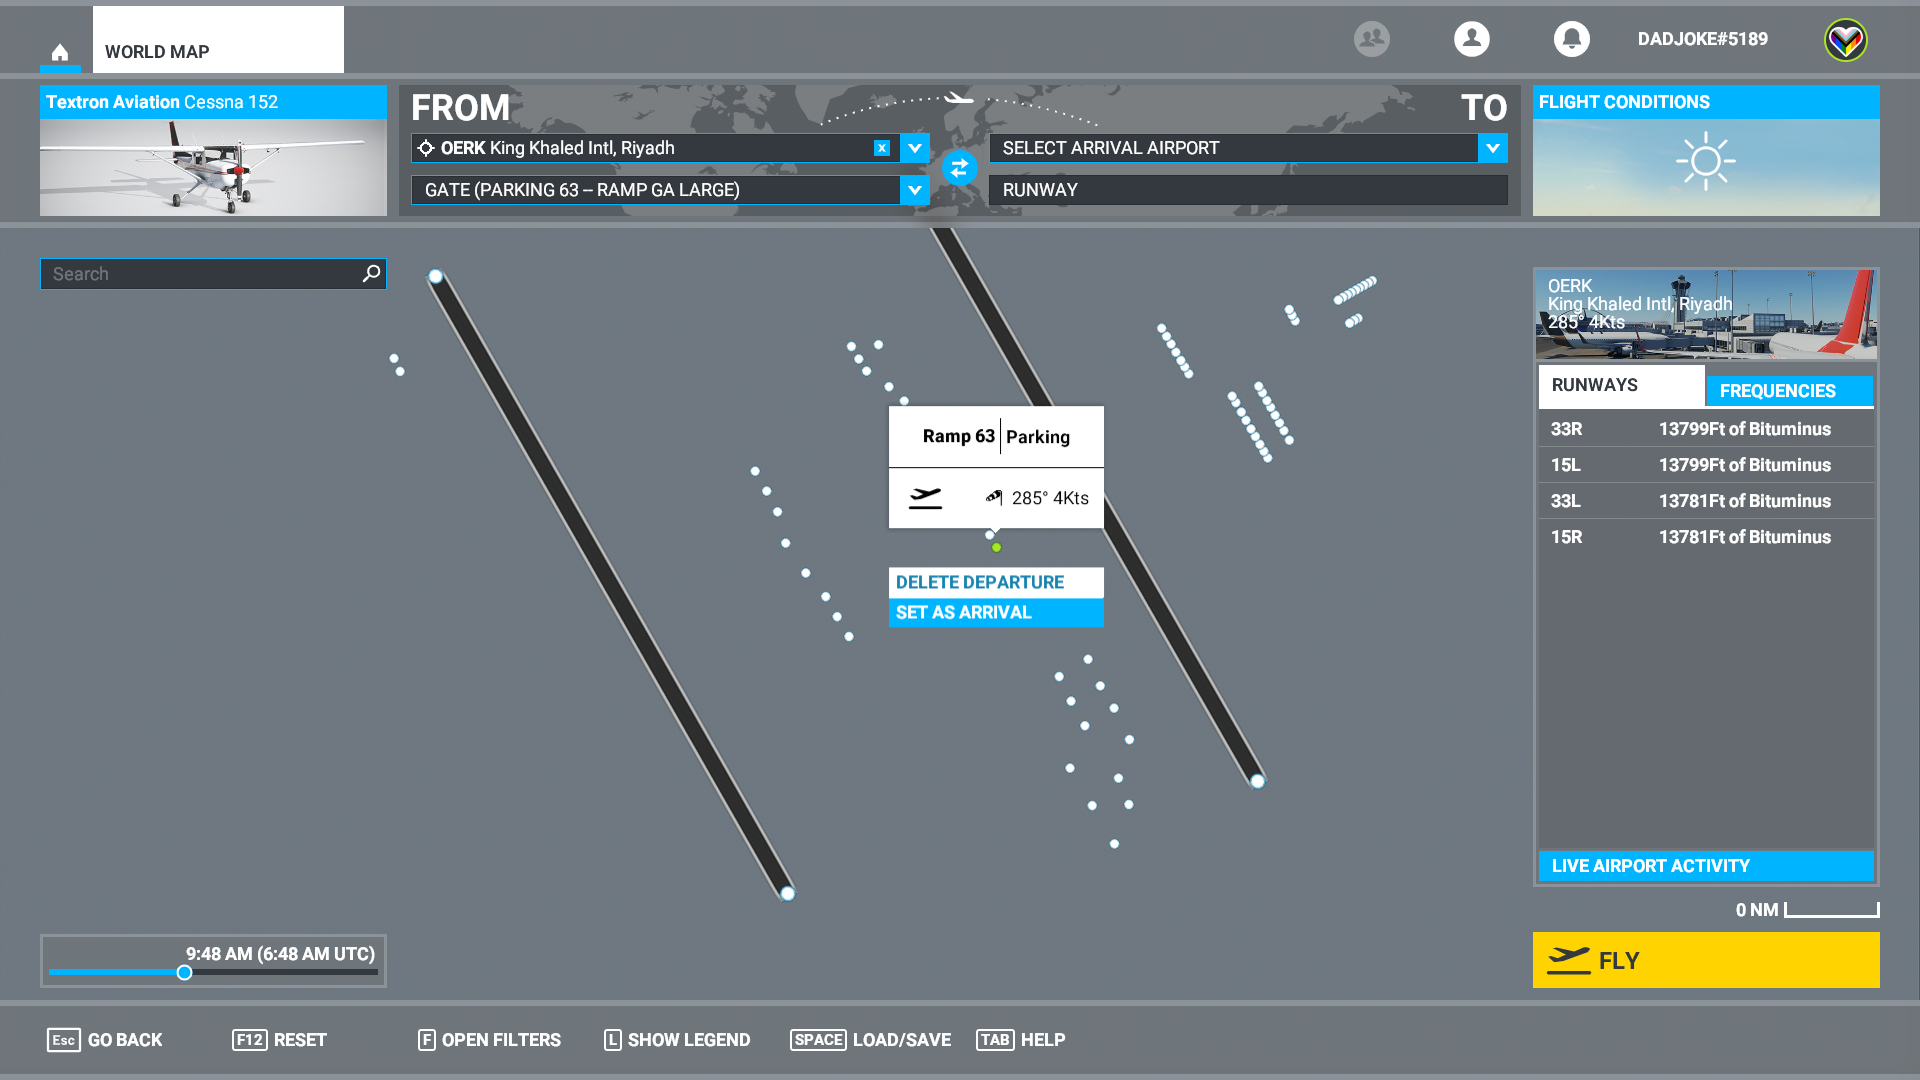
If you select an airport to fly from, it will start you on the active runway, flaps in take-off position, ready to go. You can take off immediately, already having proper ATC clearance from the tower. BUT you can use the drop down under the airport selector, or zoom all the way in to select a parking ramp or gate at an airport. If you do that, you’ll start “cold and dark” - meaning that the airplane will be completely powered down and you’ll have to start it up and taxi to the runway.
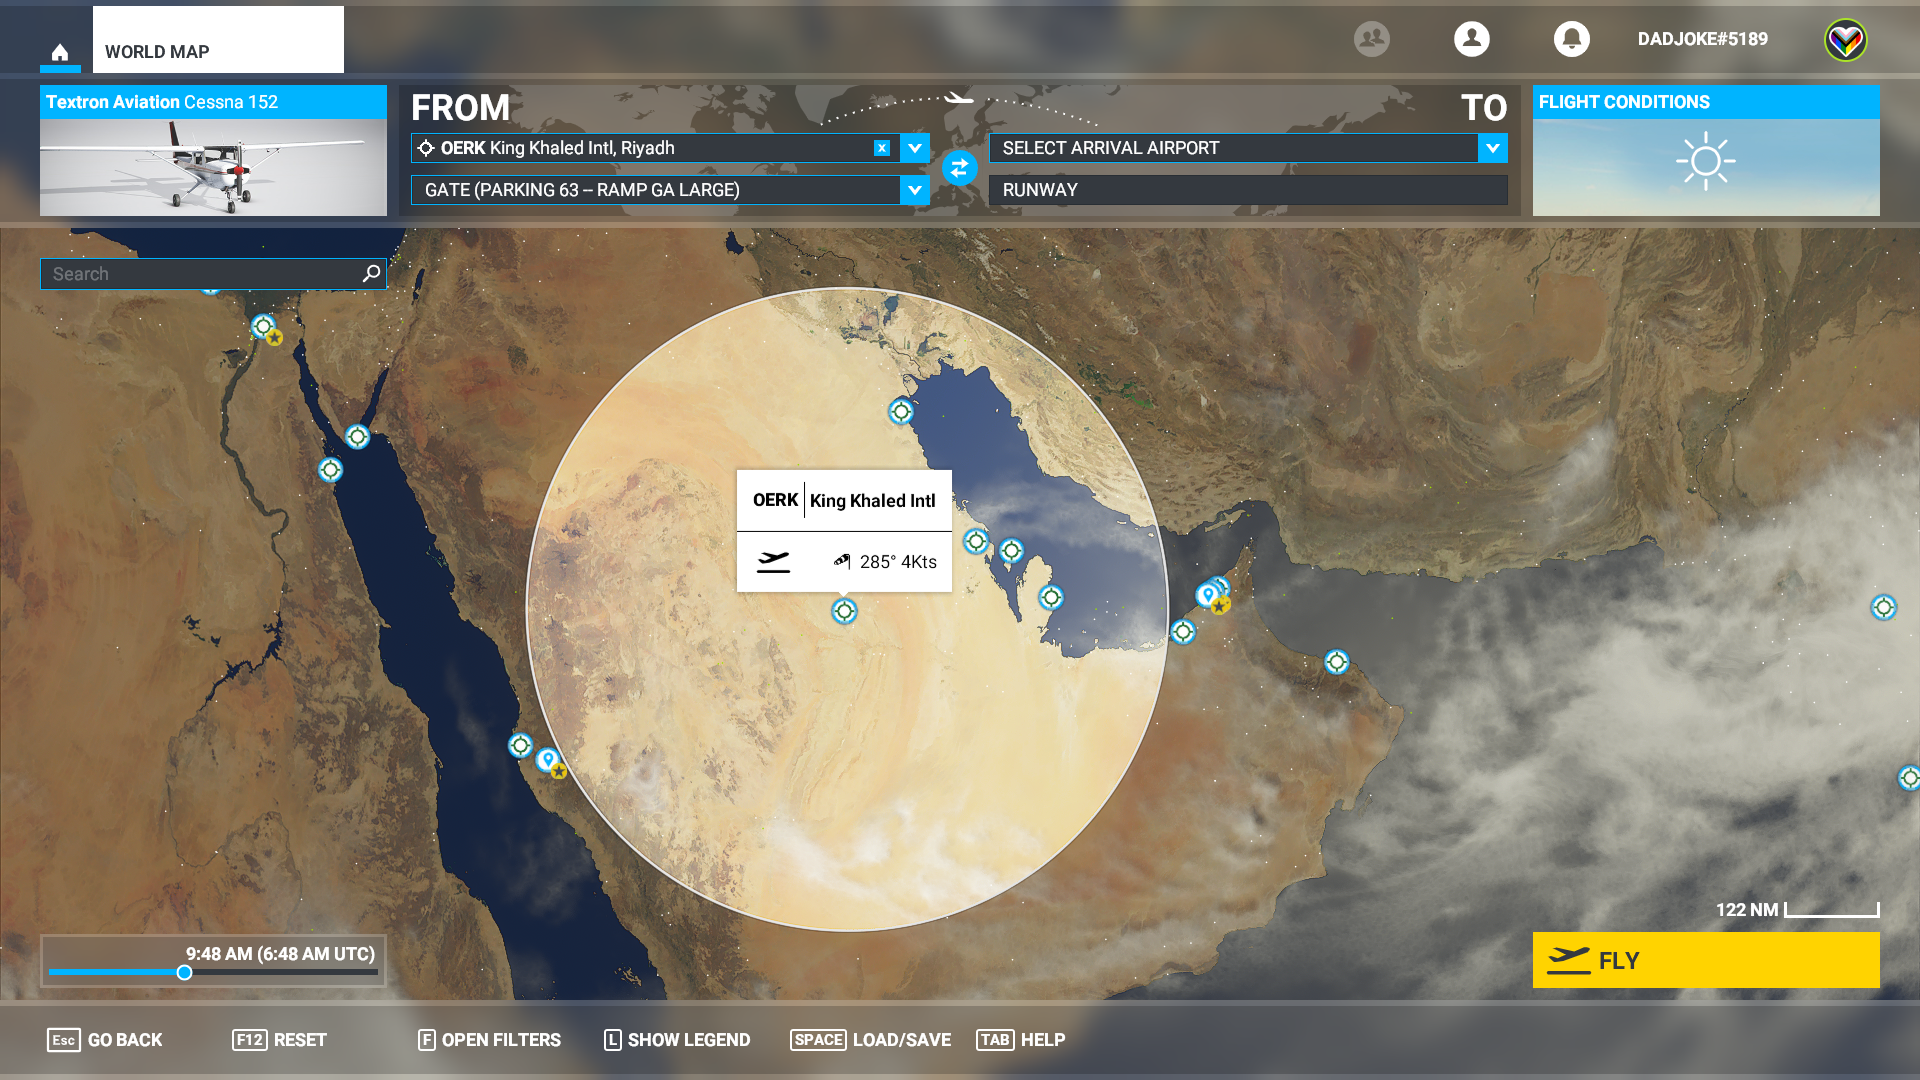
Once you’ve selected your starting location, the map will display a circle around that spot, which indicates the max range of the plane, given it’s current fuel load and weight.
Click on an airport within range and “SET AS ARRIVAL” and you’ll have the beginnings of a flight plan!
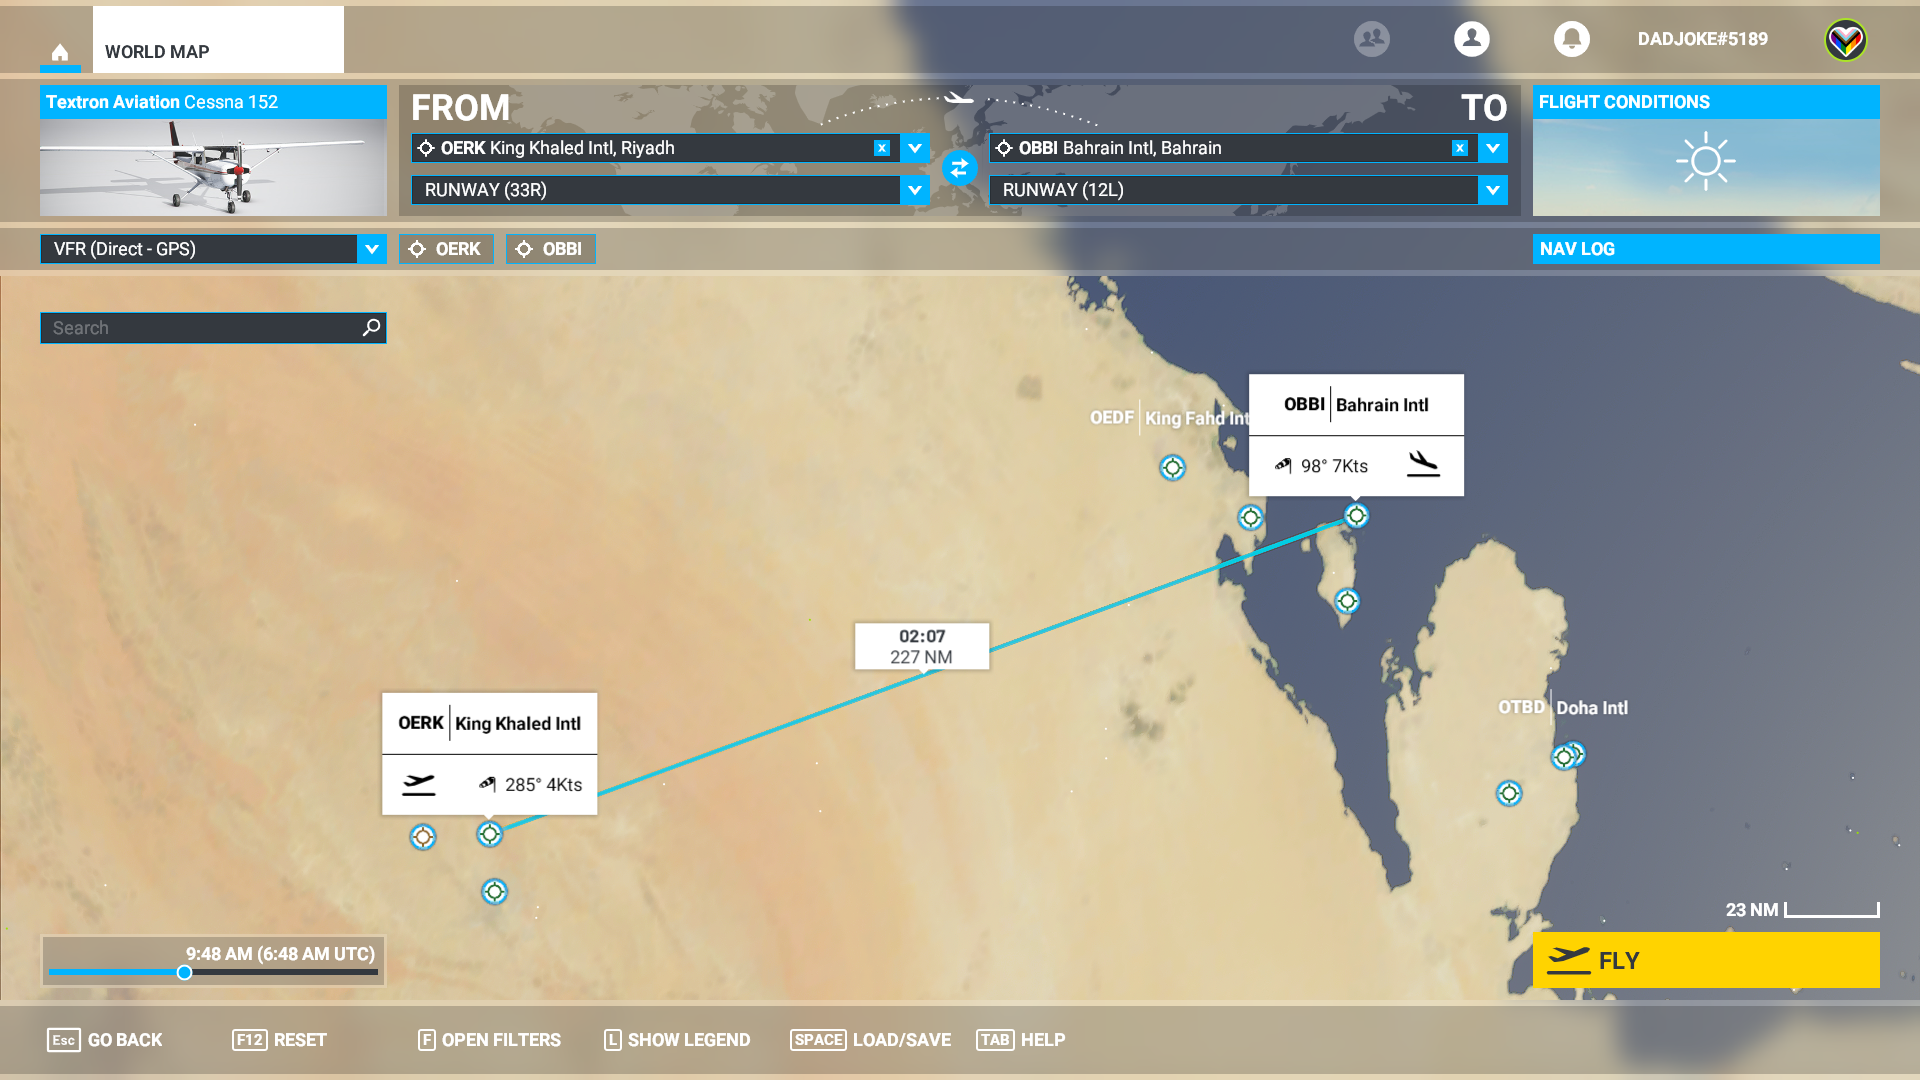
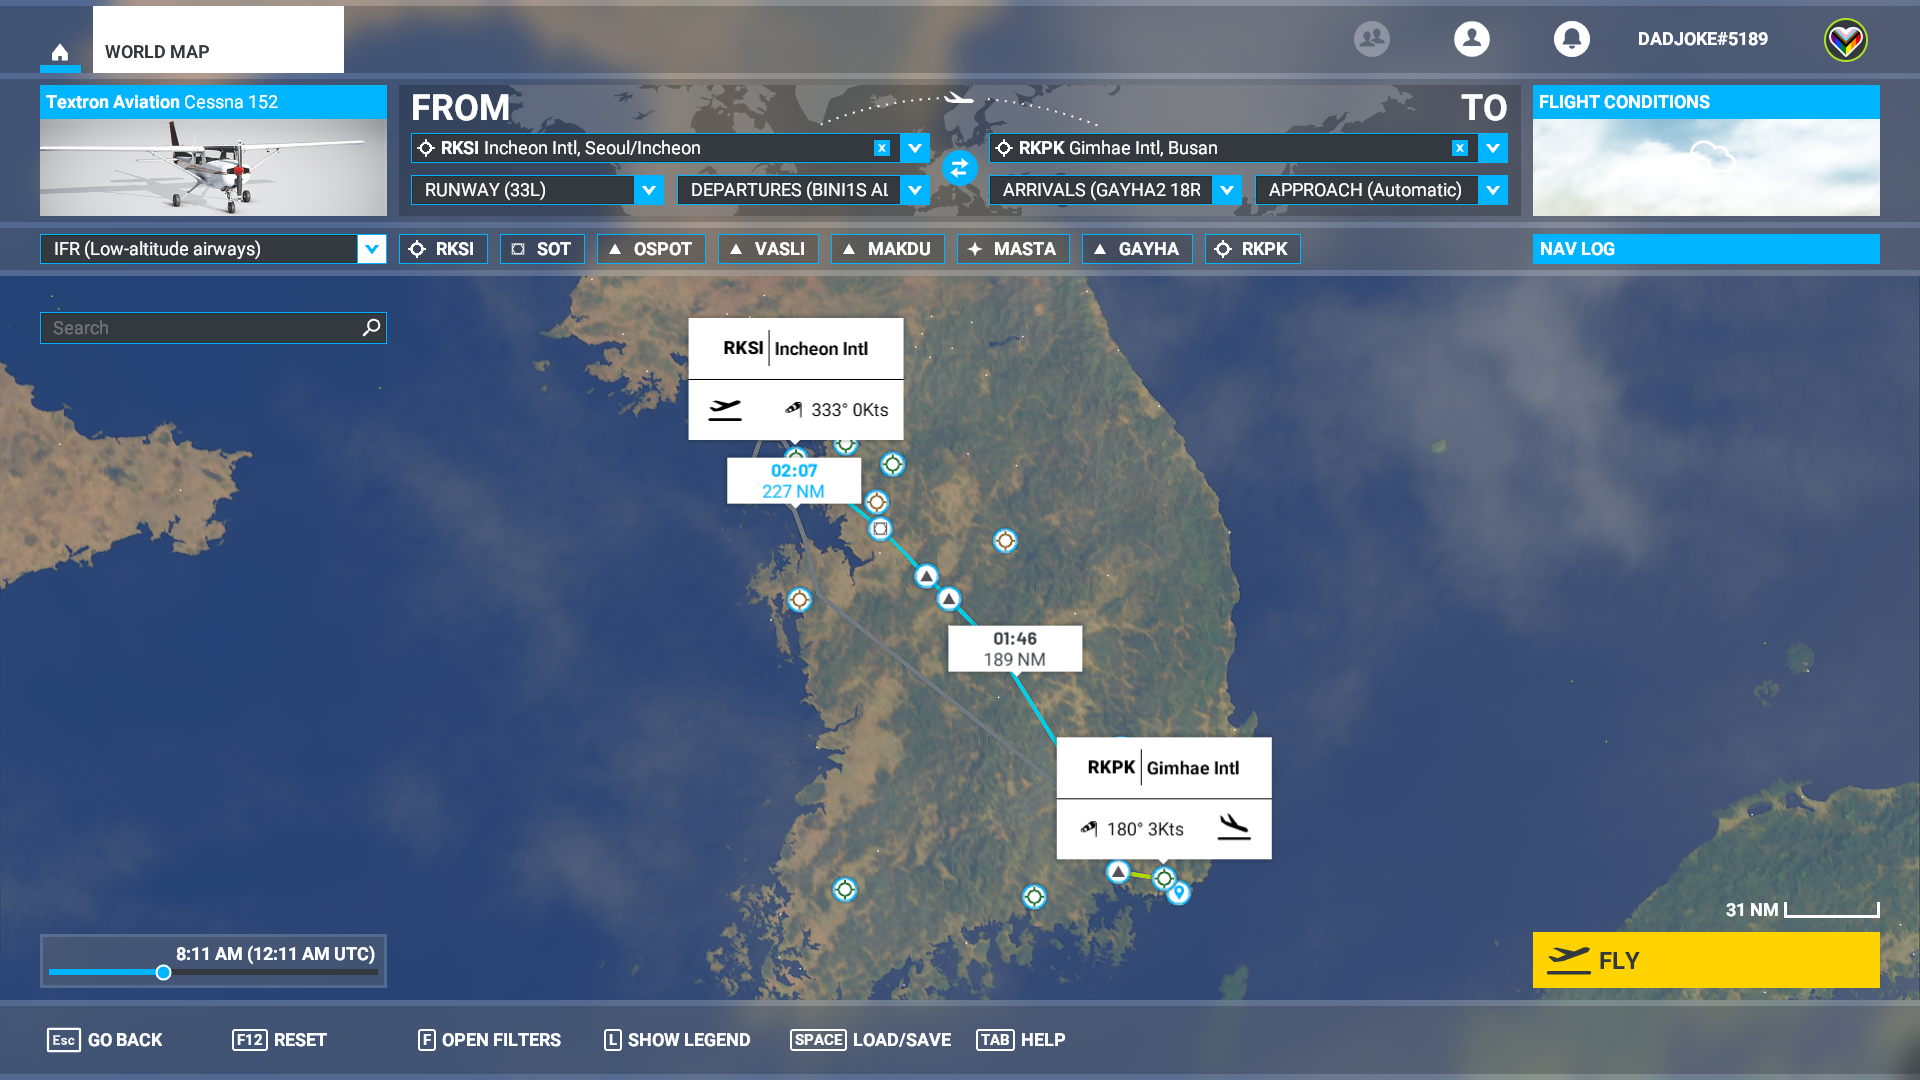
The path indicated will also show you the distance of the flight plan and estimated time it will take you, just like a GPS in your car. And speaking of GPS, when you first create a flight plan, it shows you the direct point-to-point route using GPS. In the top left, under your plane, you’ll see “VFR (Direct - GPS)”. VFR stands for Visual Flight Rules, meaning that you are navigating visually, as opposed to IFR, or Instrument Flight Rules, which means using the instruments on a plane to fly a specific path through the sky. You can change that to “VFR (VOR to VOR)” which uses omnidirectional radio beacons that you navigate to with your NAV radios, like they used to do before GPS systems and RNAV. Or you can create an ILS flight plan using low or high altitude airways. These are a series of waypoints and RNAV fixes that create virtual highways in the skies. These paths provide familiarity to pilots who can travel the same routes over and over, but also creates some order for immense amount of traffic that ATC have to deal with. In the game, you can pick whatever you want - it will only impact how you deal with the ATC.
You will also sometimes see multiple choices for your route. You can select an alternate by clicking on it. The blue highlighted route is your selected one.
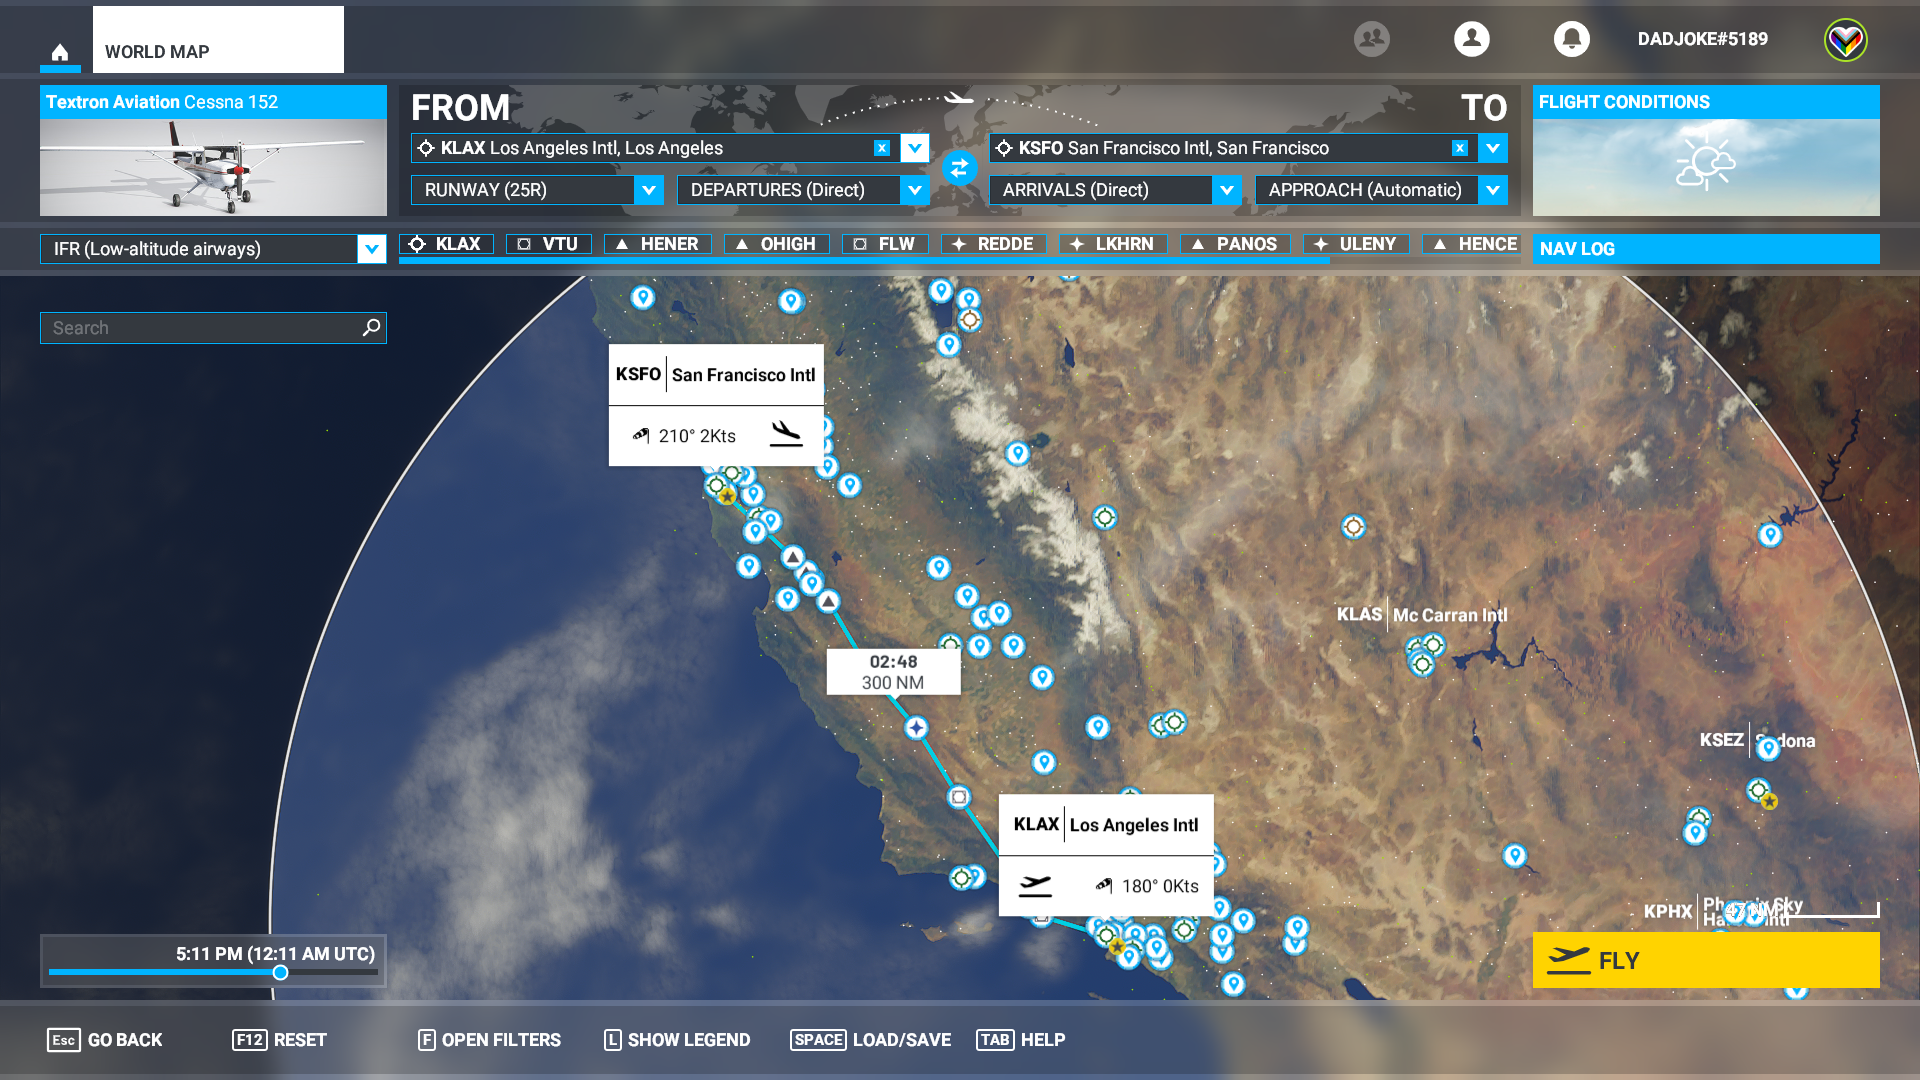
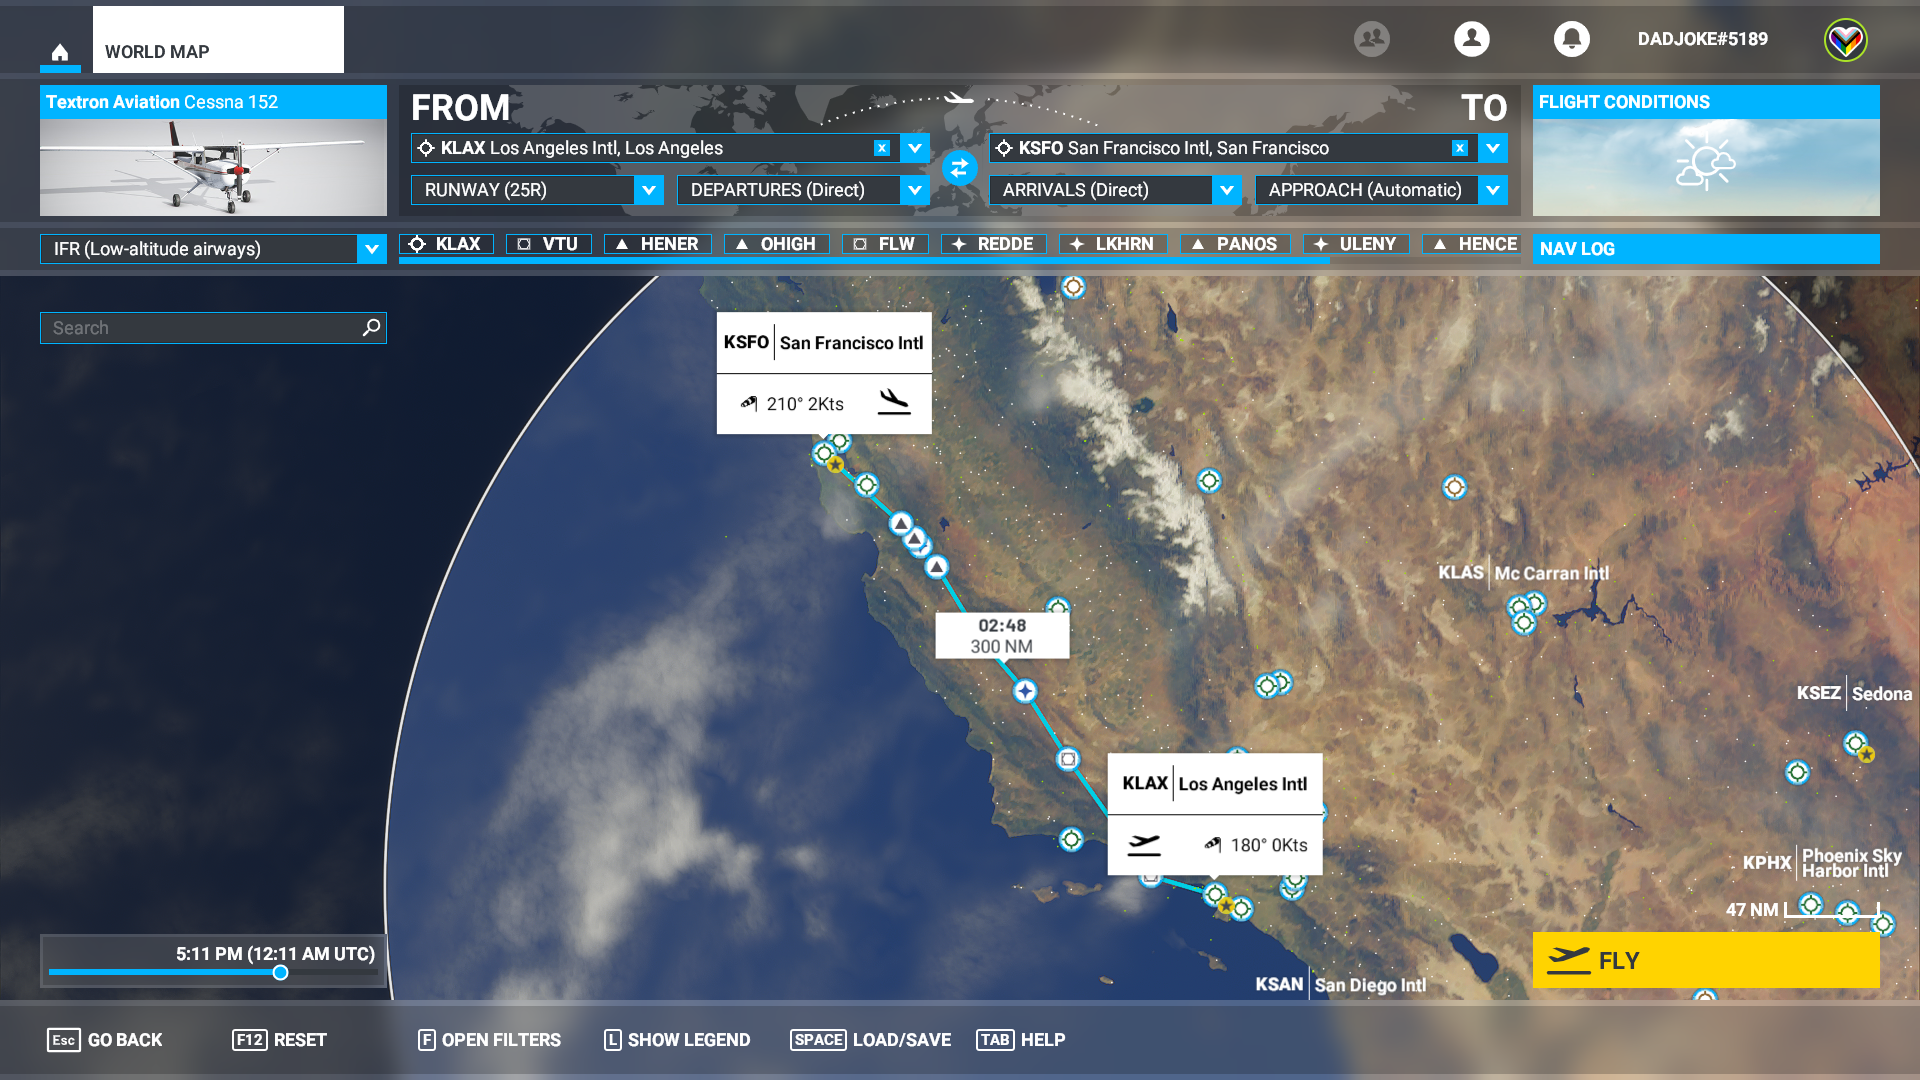
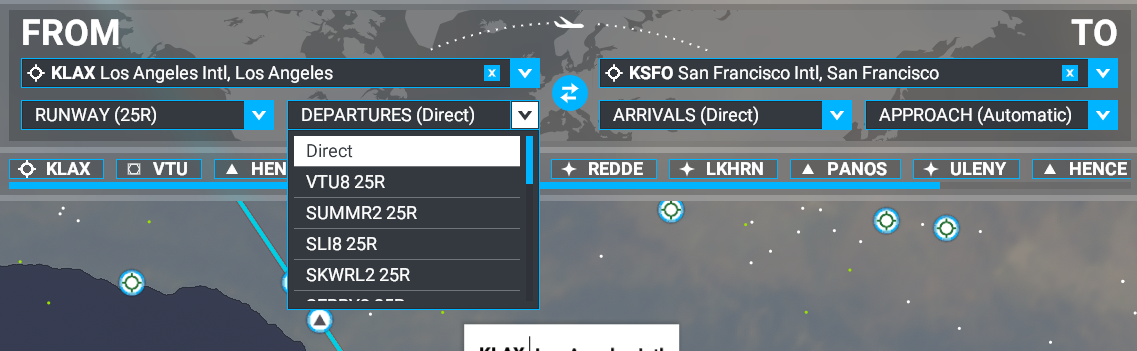
Let’s detour for a second and go back to the Los Angeles to San Francisco flight. There’s a LOT of clutter on that map, and while we can zoom in or out to get a better look, I want to tell you how to adjust your World Map experience.
Map Filters
Pressing “F” or clicking the “Open Filters” button at the bottom of the screen gives you a list of options you can turn on and off. You can change the look of the map, as well as showing clouds, precipitation, or no weather, wind strength and direction at different levels (high, low, and ground), and you can select which friends, other traffic, airports, points of interest, and airspace information is displayed. Blend mode for the background map shows as satellite until you zoom in to a level where it would be really blurry, and then smoothly fades into a gray IFR map. You can press F12 to reset to defaults and click the Close button to go back to your map.
In this case, simply turning off the three Points of Interest options removes a lot of the clutter and lets us focus on the route.
You may have noticed that you have options now to change the departure, arrival, and approach procedures. This is to customize your flight plan to use the real-world procedures for those airports, and I will leave it to people smarter than me to explain all of that in another guide. For now, just know that you can change those through the drop downs.
You can also click on any part of the flight plan in the list under the airport selection, or on the map, to delete that step in the plan, and you can click on the map to add a point in the plan. The interface is pretty good about figuring out where in the plan it should go, so you shouldn’t have to delete and re-add things too often.
When we are satisfied with our plan, we have one more step before we are ready to fly, and that’s
3. Flight Conditions
There are three elements that Flight Simulator syncs with the real world - time, weather, and traffic. You can set any of these to be locked to the real world values, or customize them yourself.
Say, for example, that you want to fly into Liverpool (and certainly not Manchester) but it’s the middle of the night there and you’re not quite comfortable with night landings yet. You can grab the little bar in the bottom left corner and scrub the time forward or backwards until you’ve got the daylight you desire.
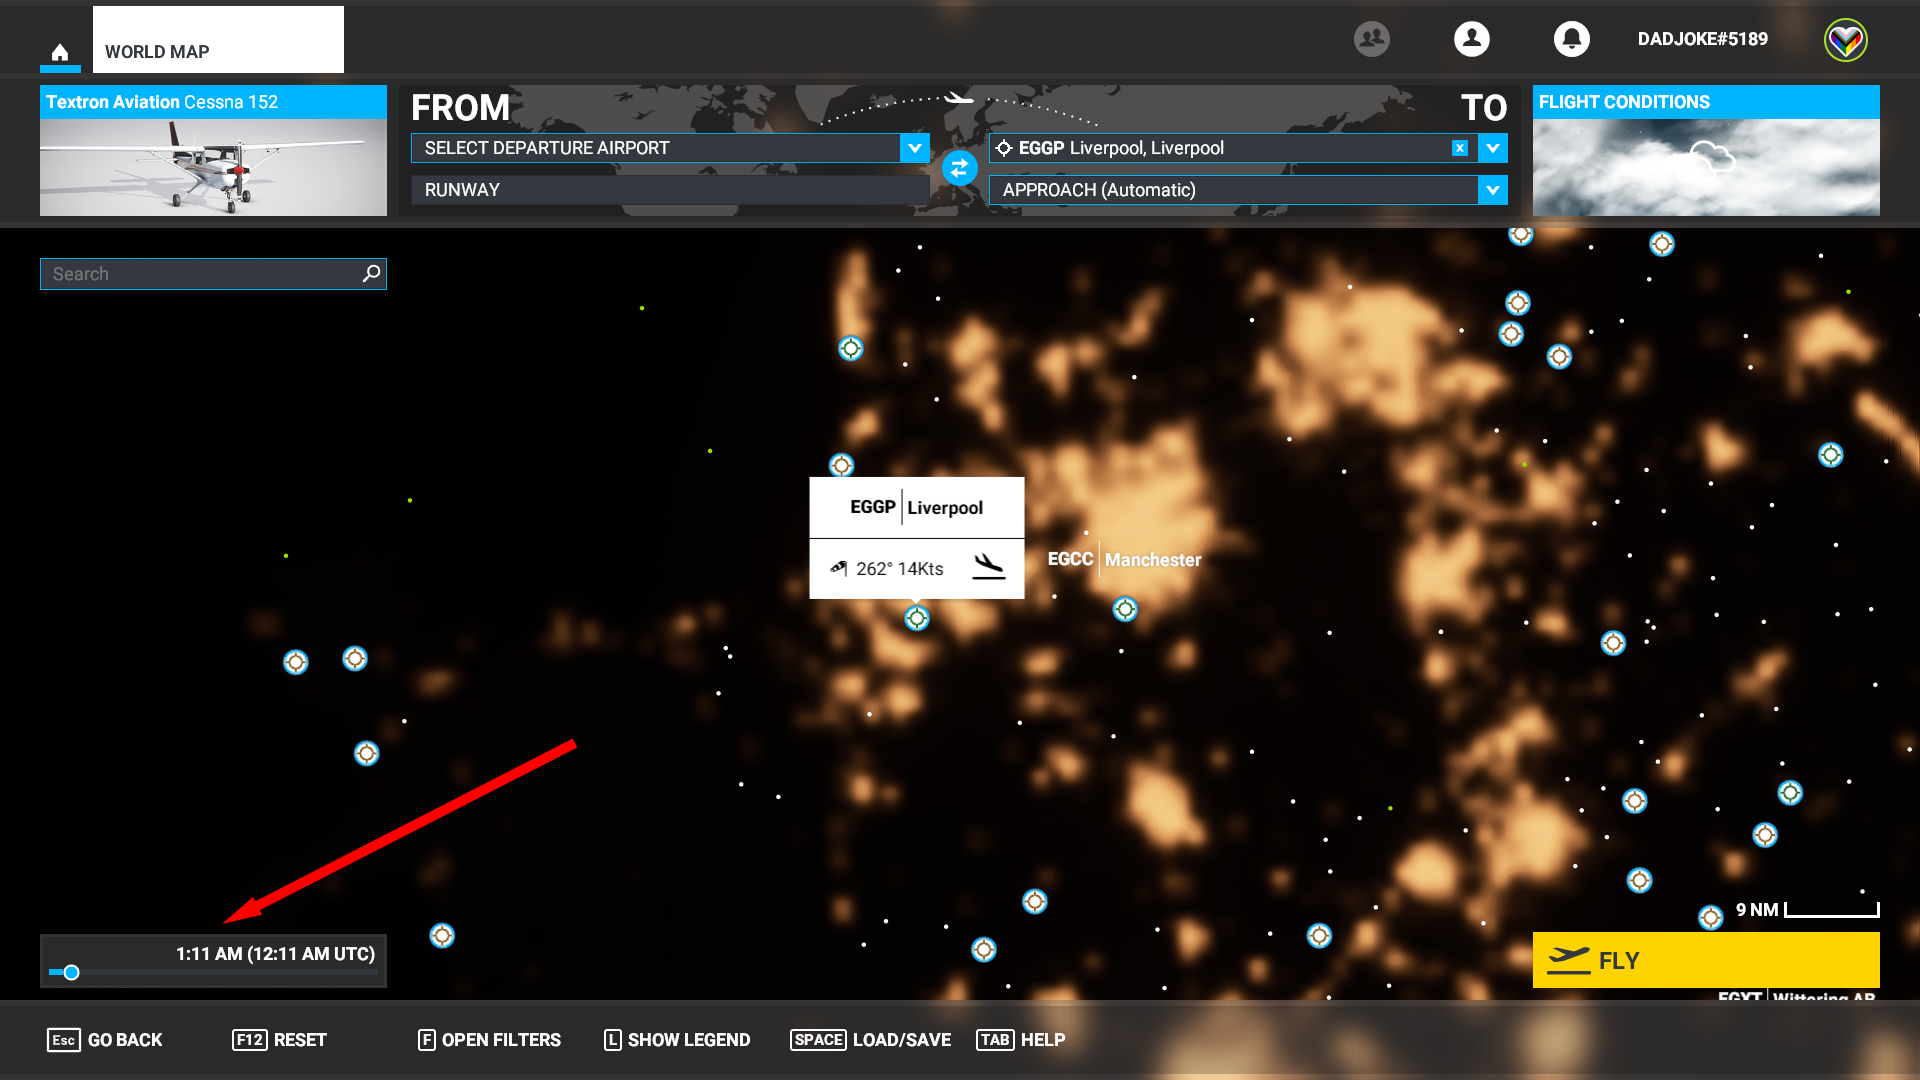
Then we have the Flight Conditions panel in the top right, which is where you will set the most important options for your experience.
Click it and you’ll see something like this:
I’ll go through each option.
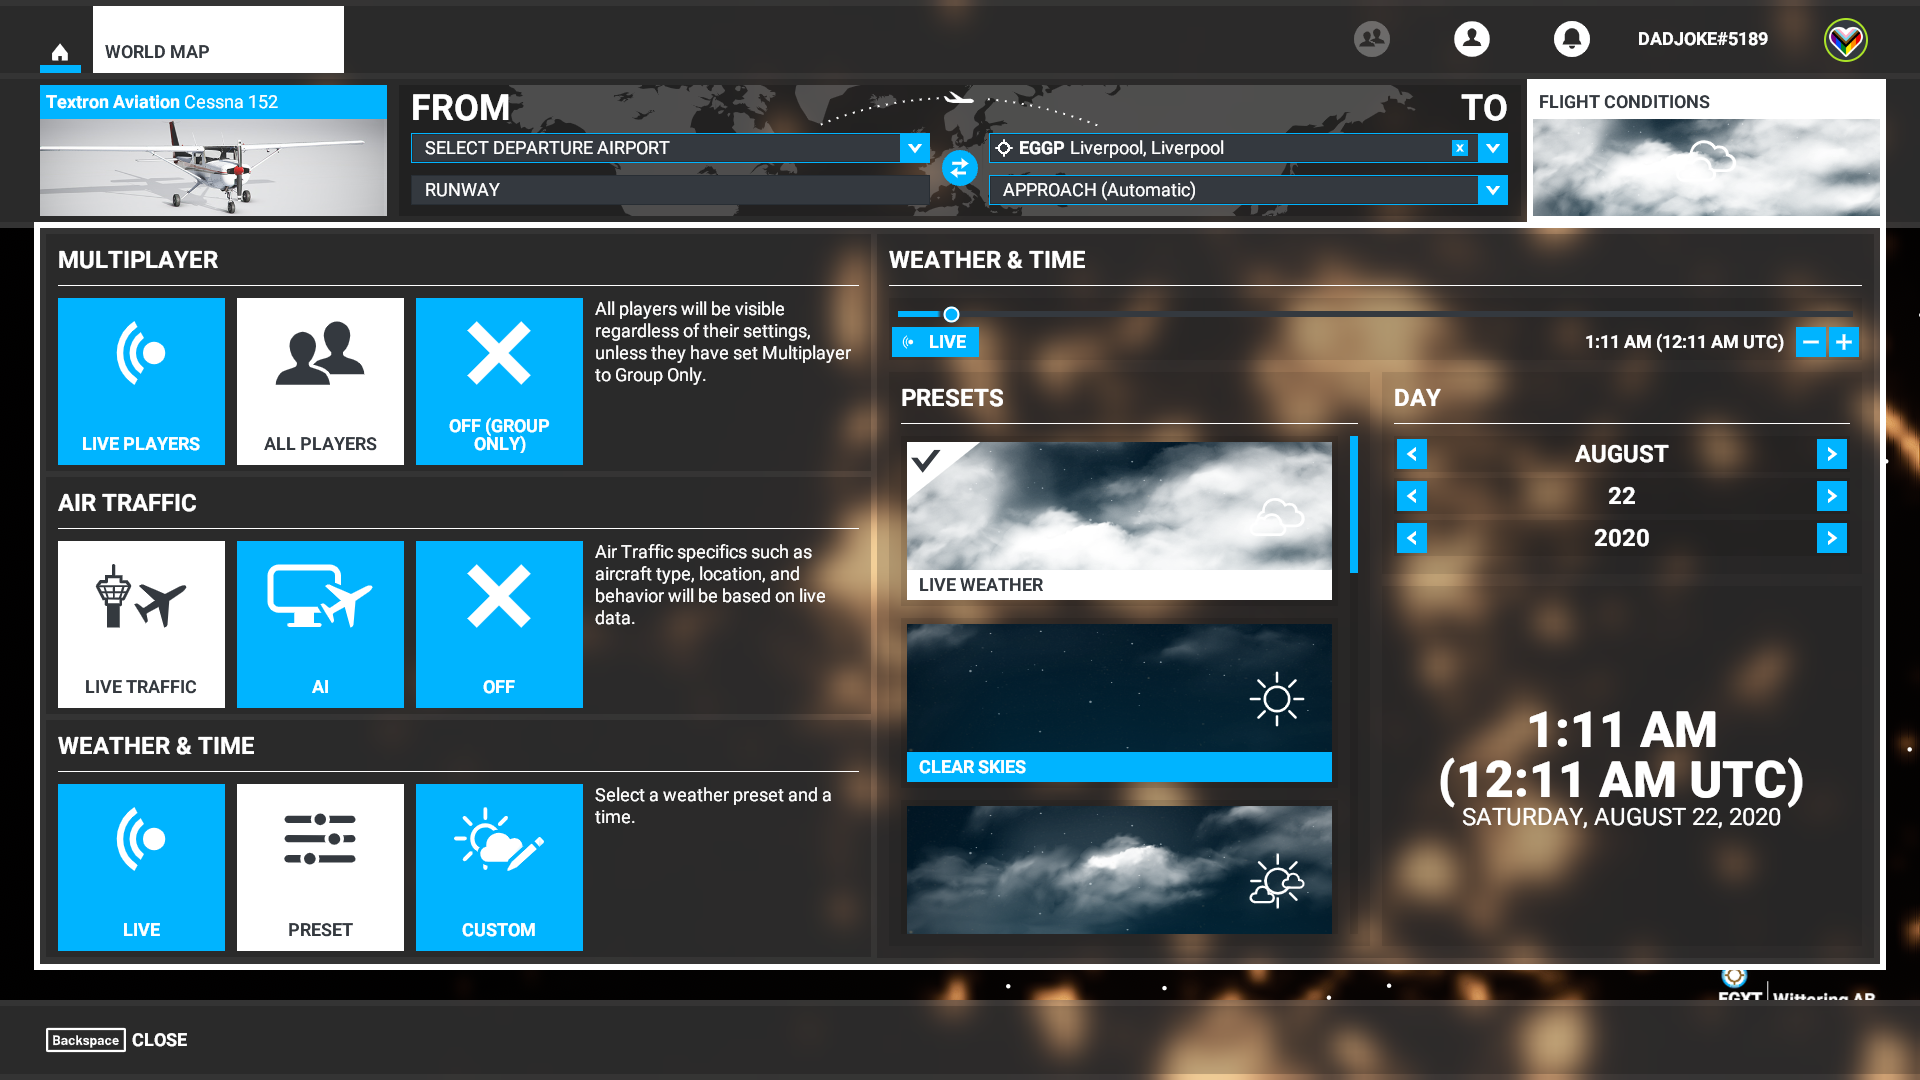
3.1 Multiplayer
This option controls which other Flight Simulator players you will see in the game. As an always-online connected world, you have the option of seeing other players flying around in the world. You can choose to turn this off for maximum realism, as you’ll never see a 747-800 land wingtip first on the taxiway of a small airport when multiplayer is turned off, but I’ve found that the social aspect of the game and getting in on massive group flights, even with the occasional silliness, is part of the grand appeal of Flight Simulator.
- Live Players - this option forces you to use real world time and weather, and only shows you the online players who are also on live time and weather, and who have the same Air Traffic setting as you. It essentially allows for max realism by only showing you people who are in the exact same scenario as you.
- All Players - This shows you ALL online players regardless of other settings. This means you could be flying into an airport through a thunderstorm and heavy winds and the plane next to you is sailing through perfectly calm, clear skies. I’ve been using this to get the maximum multiplayer experience.
- Off - this will not show you ANY multiplayer aircraft unless you have created a group with friends, and then you only see your group.
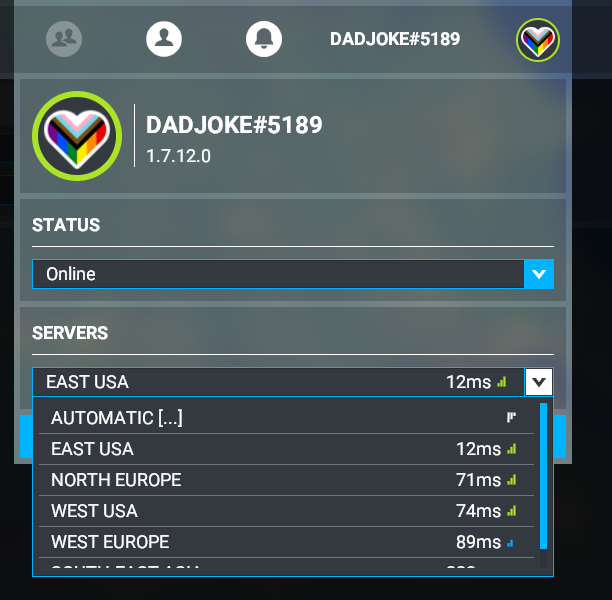
IMPORTANT NOTE TIME! There is one limitation to the multiplayer options - if you click on your gamertag in the top right, you will see a drop down for “Servers”. By default you are on the Automatic option, which puts you on the multiplayer server with the lowest ping. So far, we’ve found that you have to be on the same server as someone to see them in multiplayer, so if you aren’t seeing a friend in-game, try verifying that you’re both on the same server. (Even with that, I’ve found a few instances where it’s taken a few minutes for other traffic to pop in, as if I was disconnected and had to sync back up.)
3.2 Air Traffic
- Live Traffic - this pulls data from actual flights and creates AI planes flying around based on those. It seems a bit delayed from the real world data (you can look at a site like https://flightaware.com/ to compare, but the real flights are there and you get the feel of the kind of traffic from real world airlines. It’s really cool, actually.
- AI - this is like previous versions of flight sim where there are a bunch of preset flight plans, and AI planes travel those flights. You can set the density of these flights in the options.
- Off - no AI. If you combine this with no multiplayer, you will be the only person flying in the whole world, which now that I say it, does sound kinda peaceful.
3.3 Weather and Time
- Live - If you are on “Live Players” in the multiplayer options, you have to use live weather and time. This means the meteorological stations around the place where you are flying, as well as satellites and radar, provide information about cloud layers and type, precipitation, temperatures, humidity, and other values and the sim constructs realistic looking weather from that data. It’s pretty wild how much it gets it right sometimes. This also sets the time to the real world time.
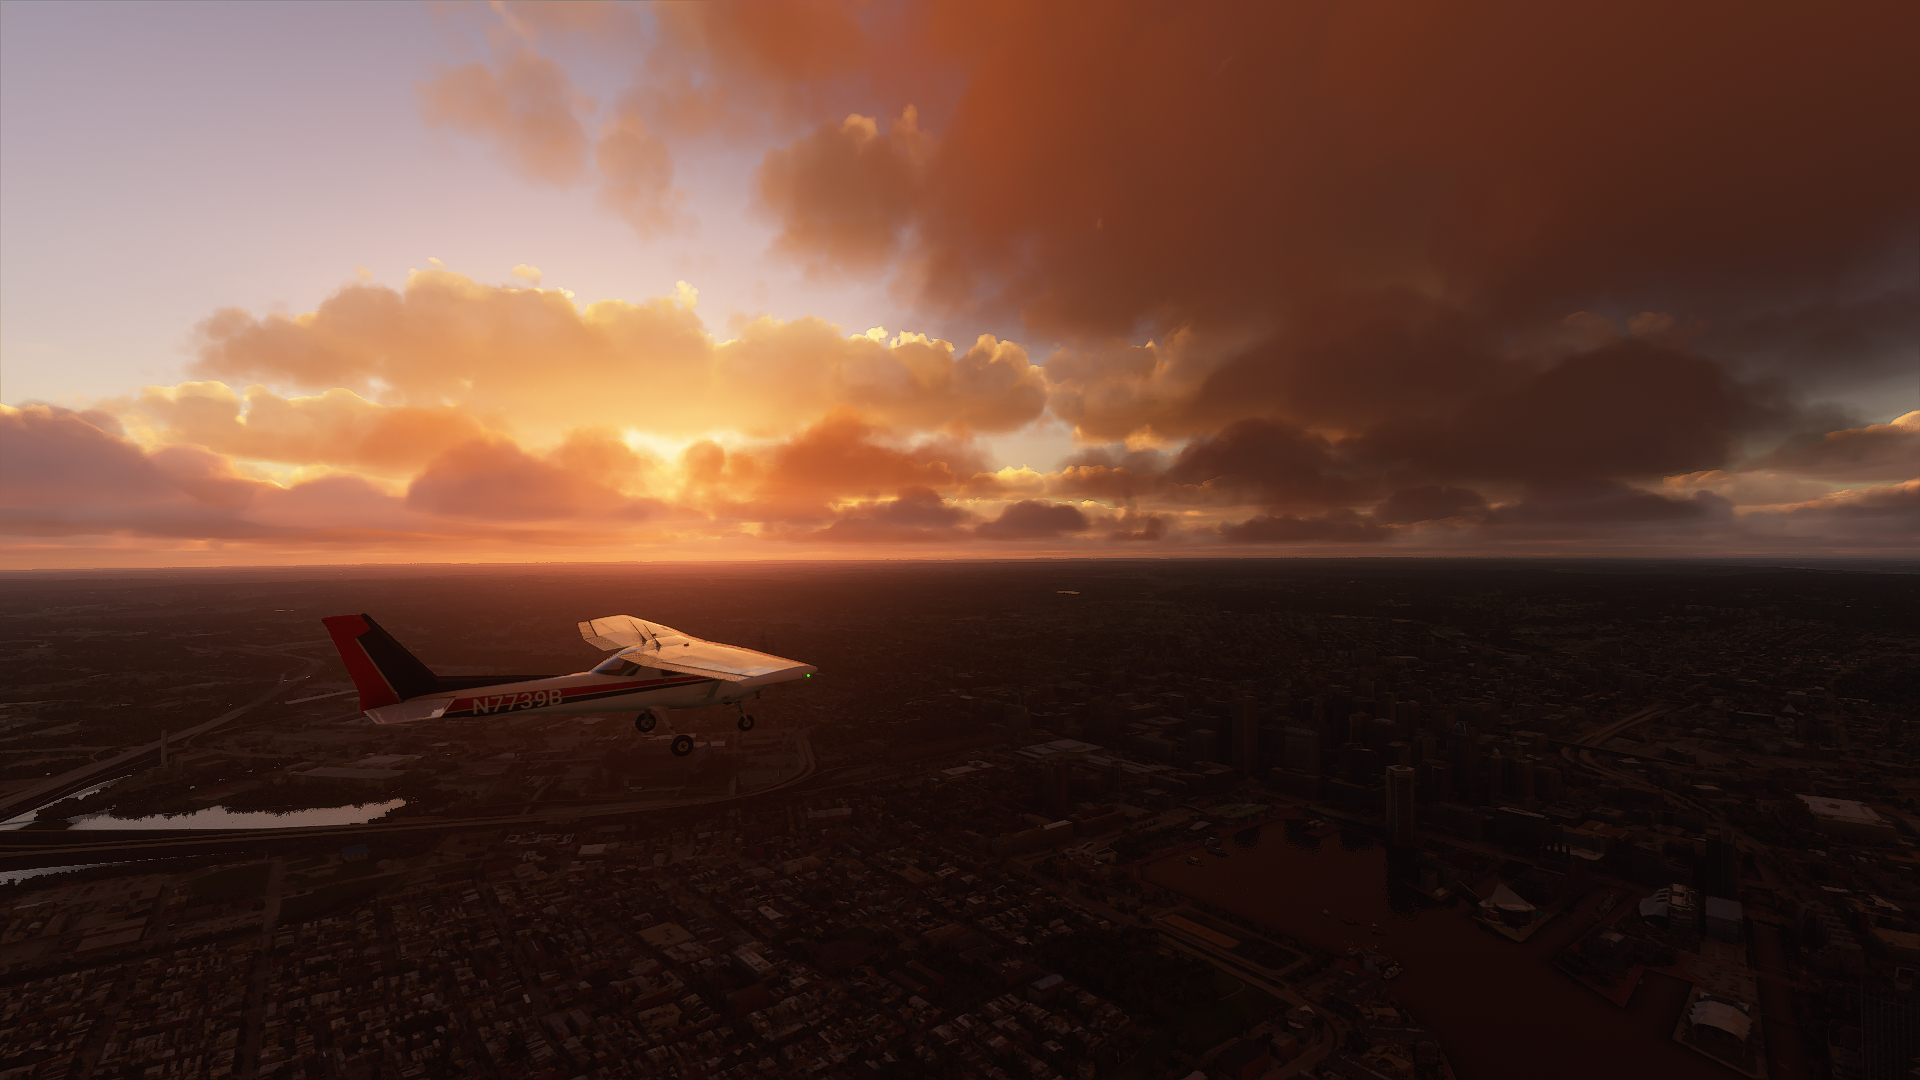
- Preset - this allows you select from a variety of weather types, from clear skies if you don’t want to bother with weather, to heavy storms or snow, and everything in between. I do suggest experiencing Scattered Clouds at sunset sometime. It’s good stuff. If you want Real World Weather, but a different time of day or year, select this option, set the preset to Live Weather, then adjust the time.
- Custom - again, I’ll leave this to smarter people to go deeper on, but it allows you to create your own weather by adjusting cloud layers, wind layers, and various other settings. Aerosol Density, for example, tends to increase the amount of haze or light scattering, and can cause fog effects.
Note about dates and seasons - you have a time slider and a date selector as well. I’ve found that you have to set the time first, then the date, otherwise the date resets when you change the time. Also, there aren’t seasons in the game in terms of different ground textures, but the date does affect the angle/position of the Sun in the sky.
When you have dialed in the perfect settings, press the Close button to get back to the World Map. At this point, there’s only one more step…
4. Fly
Press the big yellow FLY button in the bottom right hand corner and get on your way! I’ll see you in the skies.