Just trying this again now and still not working, always wants to fly north initially
I was able to change the heading as suggested using the “set heading bug” (Ctrl+Ins / Ctrl+Del keybinds respectively) commands and confirmed it was changing using the PMS50 addon
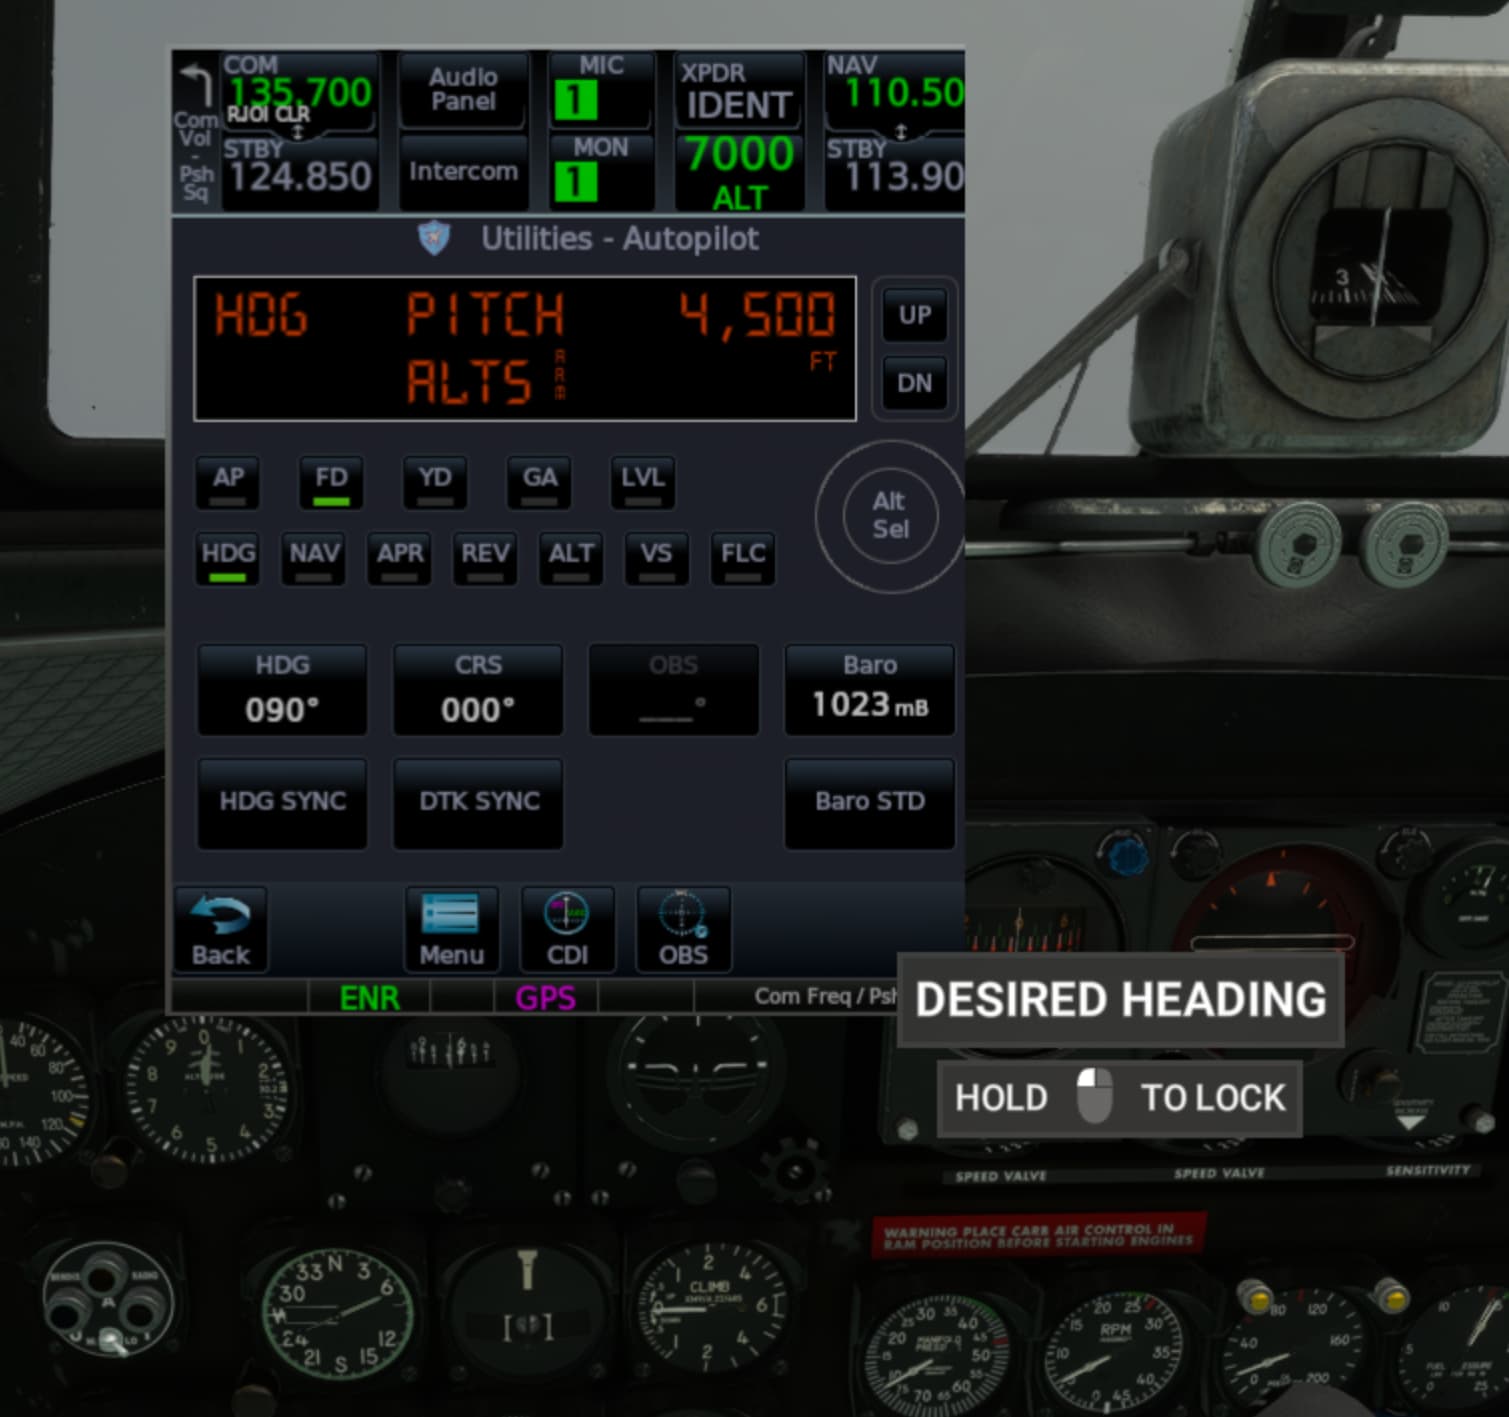
My guess is Asobo never thought to update the desired heading for the GTN530 and it’s intended to simply be used as a pilot guide when flying by hand. Moving the “desired heading” knob is not represented in the popup GTN750 autopilot, unlike when pressing the keybinds.
I reloaded the classic version to confirm and the “desired heading” on the classic compass is not the same as on the one above the radio compass. Changing the classic desired heading knob is updated in the PMS50 popup as confirmation.
Pardon the necro-post, but I’ve just gotten an interest to fly this one. But for the life of me, I can’t find the clickspot to switch the Sperry out for the Garmin pack. Can anyone enlighten me as to where this is?
Edit - disregard… Now you have to switch models, which severely limits your livery selection.
1 Like
to Reply to everyone here. I started flying the DC3 today and when heading didn’t work, I looked around and it seems to change heading using the autopilot, you’ll need to enable the game hub, so you can see the HSI, then use ctrl+Insert and Ctrl+DEL to change the heading. It’s not realistic but it works. Took me a bit to troubleshoot it.
Now, if those keybinds don’t work for you, go to controls and keyboard and look for “Increase Heading Bug” and “Decrease Heading Bug”.
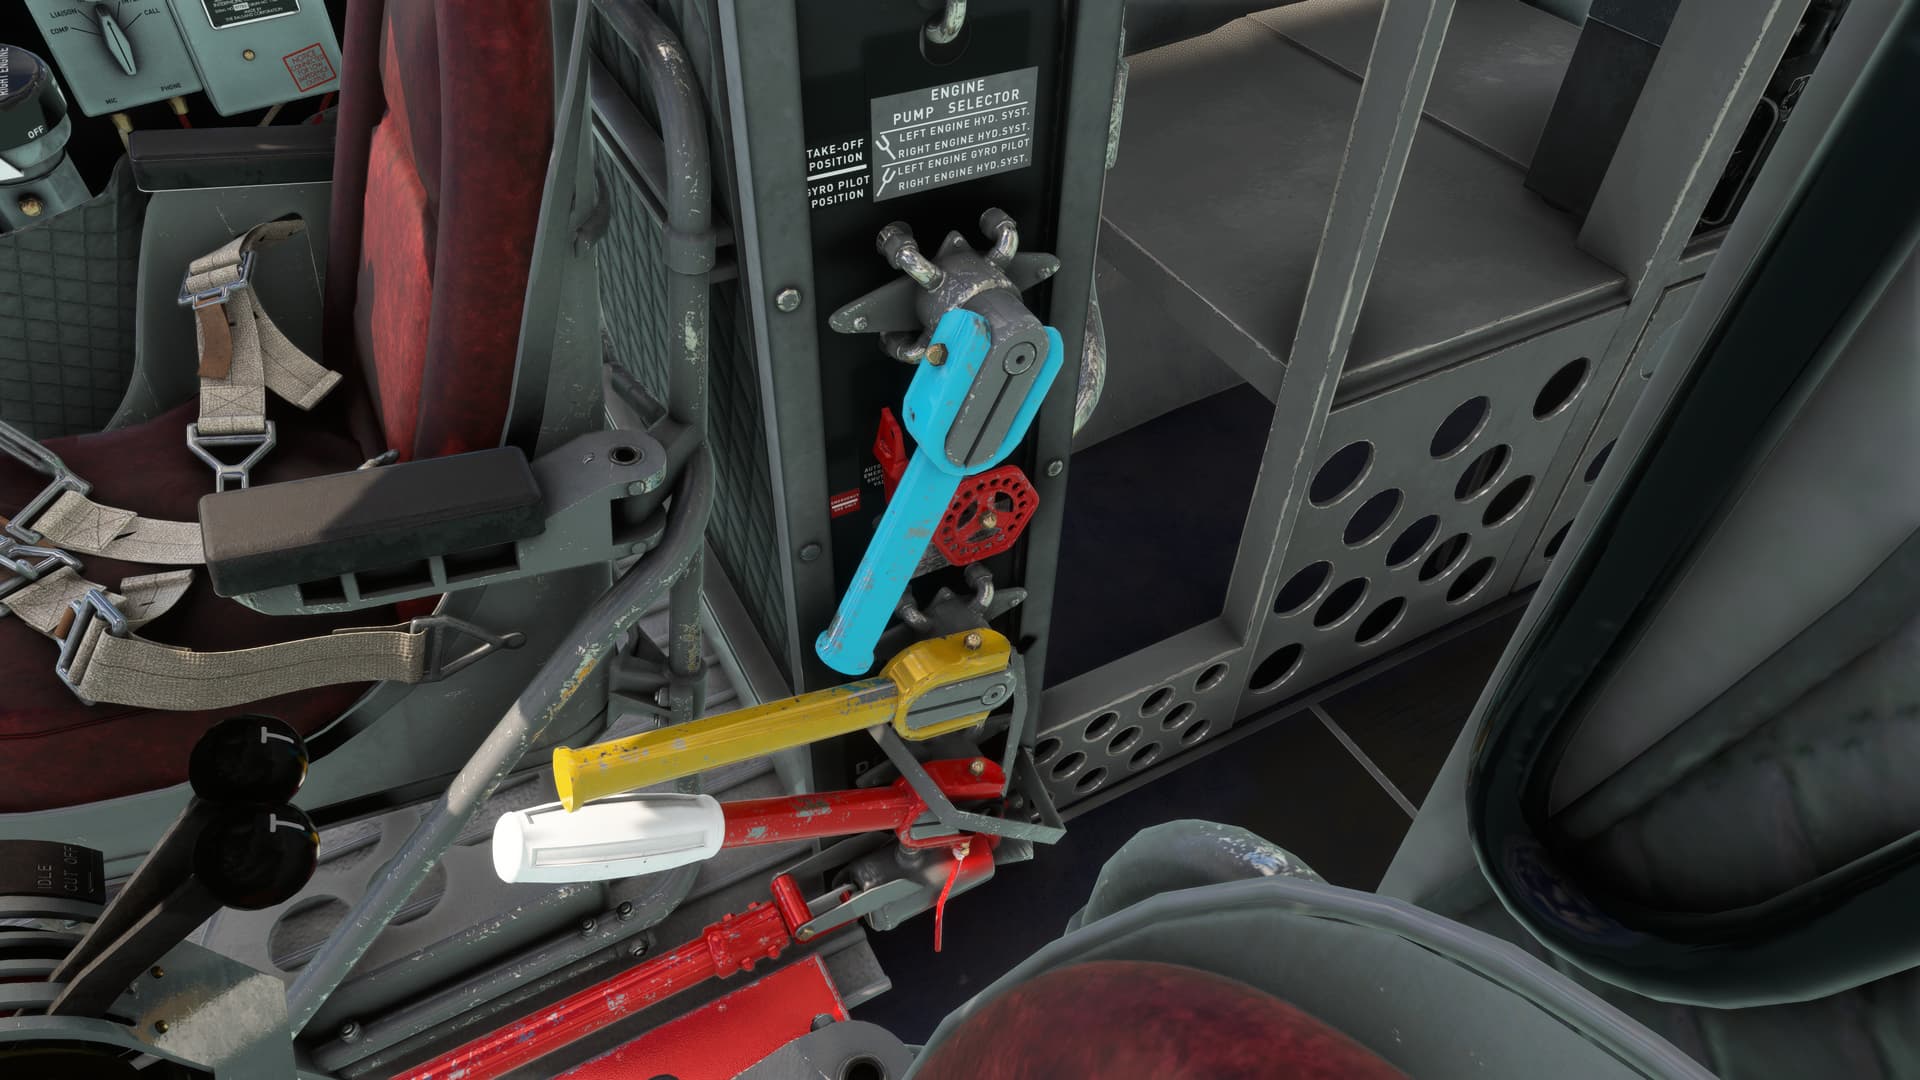
Having successfully flown this marvelous beast a few times now, I can confidently tell you that if you’re flying the Garmin Retrofit cockpit, you don’t need to use keybindings or bring up the HUD. First, make sure the AP will power on by moving the blue hydraulic lever to the forward position as shown here - click, then right-click the handle.
Once you’ve done that, set your desired heading on the gyro compass shown below. You can use a key combo if you want, but the knob works, as does any controller button binding you like. I have a hat switch on my X52 that has elevator trim on the vertical movement and heading bug on the lateral. I haven’t had to change anything for that to work just like it does on every other plane I fly.
Edit Nov 9 24: My method may likely be enabled by using the Duckworks mod available on the .to site:
https://flightsim.to/file/43893/duckworks-dc-3-improvement-mod
1 Like
Are you running any of the DC-3 mods? sPK
This one and a livery:
https://flightsim.to/file/43893/duckworks-dc-3-improvement-mod
From the notes:
- heading select enabled for the retrofitted versions
I also added an edit to my post above.
1 Like
Thank you for this! I didn’t realize that would work. Apparently the default Control settings of the Honeycomb Bravo enables this. Turn the left-hand mode control panel knob to CRS, and twist the right-hand mode control knob in the INCR or DECR direction to set the Heading in degrees. I enabled the HUD to display while in Cockpit camera mode, and in that display I use the HSI display to see what Heading setting I am making.
… But in any case, the way the autopilot works in the DC-3 I’m not using HDG much anymore because with the Autopilot on in VS or Altitude Hold Mode, i.e. not in NAV mode, I can simply hand-fly using ailerons and rudder to turn the airplane on to the desired heading. Once I am on the desired heading, it appears the Autopilot will hold wings level (i.e. as if it is in ROL mode) even though it does not display ROL. It’s not strictly a Heading hold, but if the airplane is trimmed it’s will hold the heading reasonably well, and you simply monitor and adjust using ailerons & rudder if need be.
… And by the way…
- Using OBS functionality in the Retrofit DC-3
Of course, if you want to use the OBS mode in the Autopilot of the DC-3, that uses the NAV1 OBS selector: twist the knob to set the desired OBS bearing in the round gauge at bottom-left of the instrument panel. That gauge is identified as #34 - “ADF-VOR” in the POH document (which is provided with the airplane in MSFS 2020). The switch at the bottom of that gauge switches the Omni-Bearing Selector gauge between NAV1 and NAV2.
As one would expect, when NAV mode is selected on the Autopilot it appears to be slaved to the NAV1 CDI, which is identified as #28 -“Glide Slope Indicator” in the POH provided with the airplane in MSFS 2020 (that gauge has both CDI and GS indicator needles).
The ADF indicator appears to be the one identified as #30 - “Radio Compass” in the POH. However, I believe the POH is in error where it identifies gauge #34 with the ADF.
In the Retro DC-3, the desired ADF frequency is set in the ADF radio tuner, which sits below/forward of the two NAV/COM radio sets that are in the centre overhead panel a bit above the left & right eyebrow panels.