Hi,
is there or will be a possibility to use / attach HTML gauges (not WASM) from an aircraft package (like maybe a PANEL folder?), not from the Official packages? Or any other way to create and use custom made HTML gauges?
regards
ROB
Hi,
is there or will be a possibility to use / attach HTML gauges (not WASM) from an aircraft package (like maybe a PANEL folder?), not from the Official packages? Or any other way to create and use custom made HTML gauges?
regards
ROB
I have no answer, but was wondering this as well – when I tried it a couple SDK versions ago by modifying the wasm gauge sample plane to load my own HTML I just got a solid black screen on my panel. I don’t know if I was using the wrong path, or if it’s impossible, or I was doing something else wrong.
A very minimal (maybe too minimal) instrument looks like this:
<!-- myinstrument.html -->
<script type="text/html" id="MY_INSTRUMENT">
  <!-- all your html goes inside here -->
  <h1>look i'm an instrument</h1>
</script>
<script type="text/html" import-script="myinstrument.js"></script>
// myinstrument.js
'use strict';
class MyInstrument extends BaseInstrument {
  // match id="MY_INSTRUMENT" in html
  get templateID() { return 'MY_INSTRUMENT'; }
  // true if you want people to be able to click and type on the instrument
  get isInteractive() { return false; }
  // i'm not sure what this actually changes but set it to true if its a glass cockpit instrument i guess
  get isGlassCockpit() { return true; }

  connectedCallback() {
    // code here runs when html is mounted
  }

  // runs every frame
  Update() {
    super.Update();
    if (this.CanUpdate()) {
      // code here runs based on the "update frequency" setting in graphics
    }
  }

  // receive H events here
  onInteractionEvent(event) {
    const eventName = String(event);
    // ...
  }
}

registerInstrument('my-instrument-element', MyInstrument);
So here’s what I tried:
Result:
I’m guessing I did something silly like “wrong path” or “you have to add new files to a manifest that you forgot”, so please don’t worry about embarrassing me if the answer is simple. ![]()
the htmlgauge00 value is relative to html_ui/Pages/VCockpit/Instruments (at least in my experience… maybe this is customizable in some way I’m not aware of). So for example if your file is named html_ui/Pages/VCockpit/Instruments/x/y.html you would put htmlgauge00=x/y.html, .... Also do indeed make sure that all the files you add are in your manifest.
Thanks, that makes sense! I’ll try it tomorrow and see if I can get my experiments working. ![]()
This is what I ask for. This path leads to the …/Packages/Official/. I want to create a custom plane and with a custom html gauge and sell it to the people. I imagine I should not touch the “Official” folders.
you can create that directory structure within your add-on as well.
Sorry devsnek, is it something you do and it works or an idea to try out?
@UniformCarp3294 We do this in the A32NX mod. See https://github.com/flybywiresim/a32nx/tree/master/A32NX/html_ui/Pages/VCockpit/Instruments.
In my test modification of the gauge aircraft sample I’ve managed to get loading of the HTML template to work, and I can see the background color change to what I set in the CSS, but I can’t for the life of me get it to instantiate the custom element.
I also have no idea if my JS is even running (it no longer complains it can’t find it, so that seems like a good sign, but console.log(‘gauge running’) at the top doesn’t show anything visible in the dev console. I have no idea if that, or any other possible method of logging from JS to the console, would actually work or not. ![]()
I’m on the right track at least though, thanks! ![]() I’ll mess with it more after the Dec 22 update drops and whatnot.
I’ll mess with it more after the Dec 22 update drops and whatnot.
A few notes:
Will report back more next week after updates and more time. ![]()
the JS console methods are not forwarded to the normal dev console. You will either need to “acquire” a copy of coherent gt debugger or use GitHub - dga711/msfs-webui-devkit: This devkit is a mod and guidance for easier development of WebUI (Panels, MFD..) in Microsoft Flightsimulator 2020.. 99% of the time while working on A32NX, we use msfs-webui-devkit.
I will give it a go, devsnek. Thanks for your contribution. Vibstronium as well.
Development of html-javasript instruments.
An important point.
I could not find information anywhere on the Internet on how to make a clickable html-javascript instrument.
I analyzed the code of default html-javascript instruments for a long time.
And came across getter - isInteractive.
In the BaseInstrument class, this getter always evaluates to false.
In order for the simulator to consider the instrument clickable and to process mouse click events, you need to override getter isInteractive in your instrument so that it returns true.
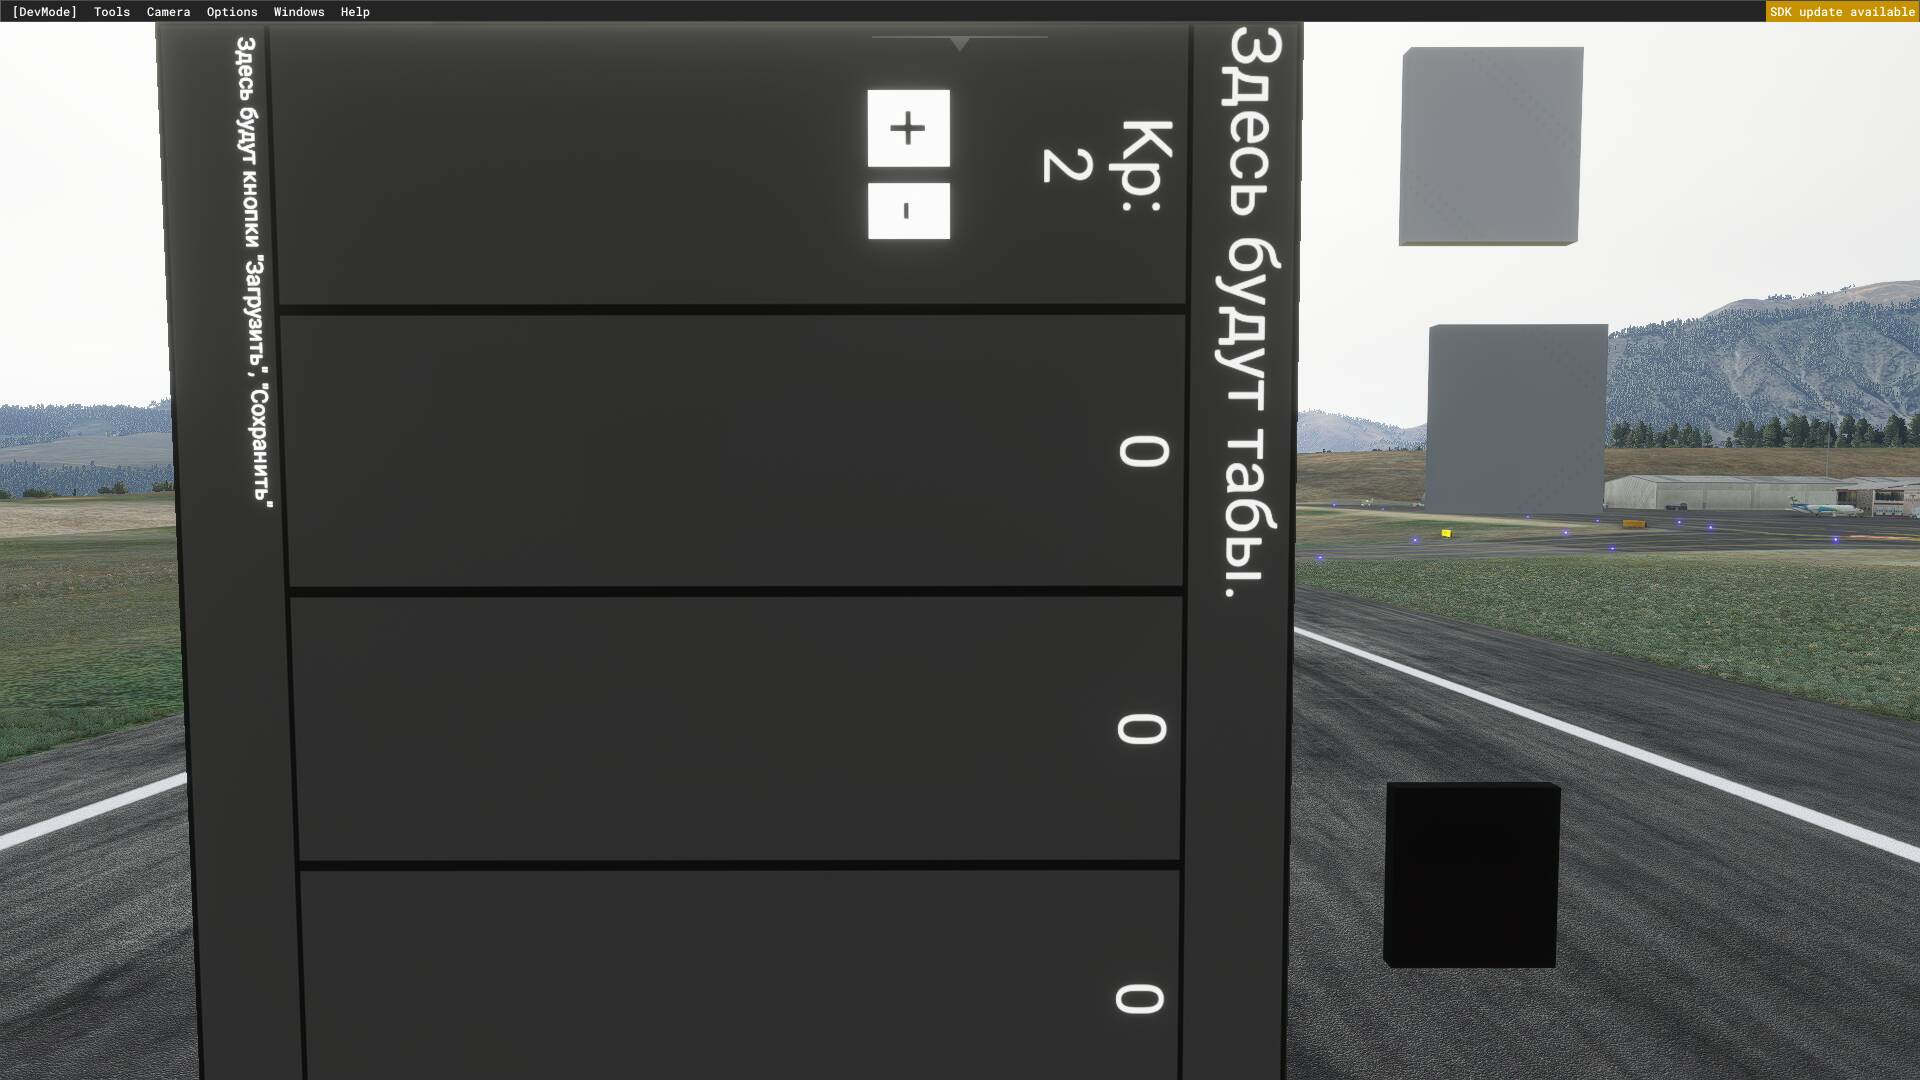
Here is an example of a blank instrument for setting the autopilot parameters:
APParameters
Here’s the device in action:
After clicking on +, 2 changed to 3
Thanks for sharing the sample on how to make a clickable HTML. The sample was simple so easy to figure out.
I have a question for anyone. The problem with a clickable HTML is any switch or knob that is behind your screen will prefer to click that before the HTML click hot spot. I have tried many methods to block anything behind the screen but with no luck. I also tried using my no click panel i use for blocking other clickables and this causes the HTML to only click that entire surface of the no click mesh since it defaults to anything else first and so then you lose all hot spots. Please reply with any solutions. I am also available on discord for any good HTML coders that would like to voice from time to time and share knowledge. So feel free to contact me.
Another question is the msfs-webui-devkit-master is now clickable. The C button refreshes the log. The other buttons do nothing. And the field to type console you can write but does nothing. Are there any other good plugins to basically refresh the JS. That is my goal. Also if you are updating the packagesources JS how would the sources update? Either way we need a fast way to test the JS code. And we need a way to check values from the JS as well.
I recommend Microsoft’s https://github.com for sharing code. Zip files are so 1995 and TBH for me clicking on the APPparameters.js didn’t display the file…
Re clickability - when you set isInteractive to return true, then the whole area of the $texture assigned to the gauge will be clickable (and you will see the pointy-finger cursor as you wave the mouse over the gauge).
Any model object in FRONT of the $texture will block the click going through to the underlying $texture and your gauge code.
You assign the ‘onclick(your callback)’ to whichever ELEMENT in your HTML you want to associate the callback with. Clicks to this element will be blocked by any html element in the same gauge that is in front of that element. Assuming you are positioning clickable elements by using ‘position: absolute’ in your css, the default Z-order is the order the elements are in your HTML, i.e. later elements will be in FRONT of earlier elements and block clicks to those elements. As often gauge click areas will have a transparent background it is easy to make a mistake with the dimensions and accidentally cover another click area. An easy quick visual check for this is set css ‘background-color: pink;’
The debugging tool for JS gauges is the Coherent GT Debugger, documented in the SDK. It takes a while to get familiar with but after that you can’t work without it.
Working on HTML/JS gauges is easiest OUTSIDE the Asobo project/package tools. Just edit the html_ui tree in the aircraft package and use the sdk ‘Aircraft Selector’ ‘load’ button to reload the aircraft. If you add new files use GitHub - HughesMDflyer4/MSFSLayoutGenerator: A drag-and-drop application for updating layout.json files in Microsoft Flight Simulator (2020) packages. to update the layout.json (typically on gauges your programming most of the time rather than adding files), then you need to use the sdk ‘project’ Aircraft Editor to ‘resync’ the aircraft.
The SDK menu bar has Window - Behaviours which has tabs and the 3rd (?) allows you to view ‘L:’ gauge variables. This is extremely useful in debugging as it is easy in your HTML/JS code to Simvar.SetSimVarValue(an L: var) and whach that value in real time in that window.