I don’t know how your situation was resolved, but I discovered how to fix the issue on my own yoke.
It’s fairly straightforward and easy to accomplish.
You may, or may, not know that the yoke has user selectable pitch spring tension. The yoke comes with a hex wrench and an additional spring that may be installed to increase the tension on the yoke. It has a user accessible panel that is removed to install or uninstall the tension spring. It is through this panel we also gain access to what is needed to address the incorrect centering function of the mechanism.
First remove the panel via the two hex-head screws (circled). Tilt the panel up at the rear (screw end) and lift up and away at the front. Note the front has two plastic pins that retain the front of the panel above the two axis sliders. If you refer to your yoke’s documentation you can see all this illustrated.
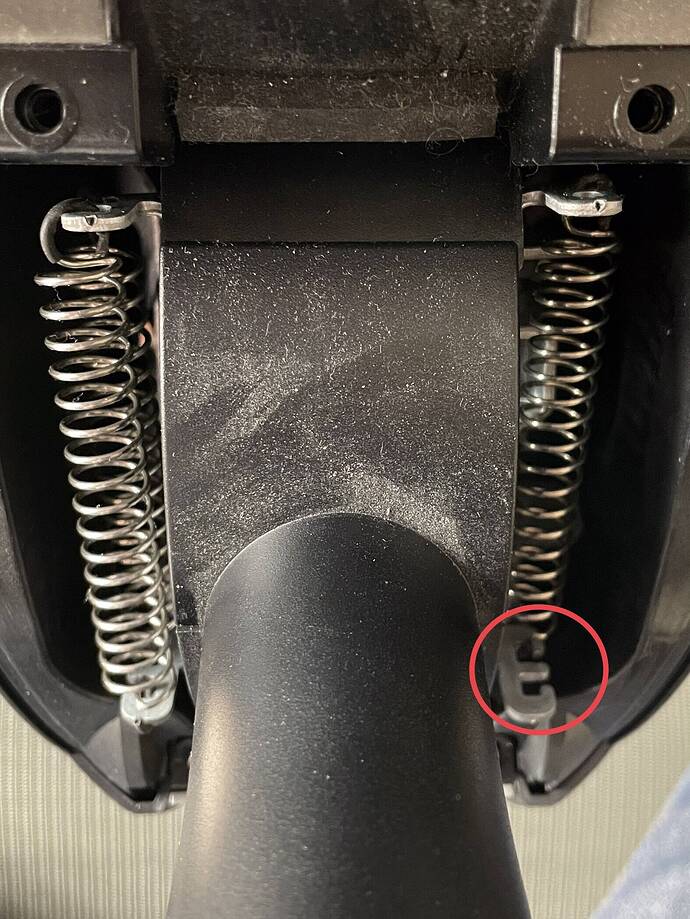
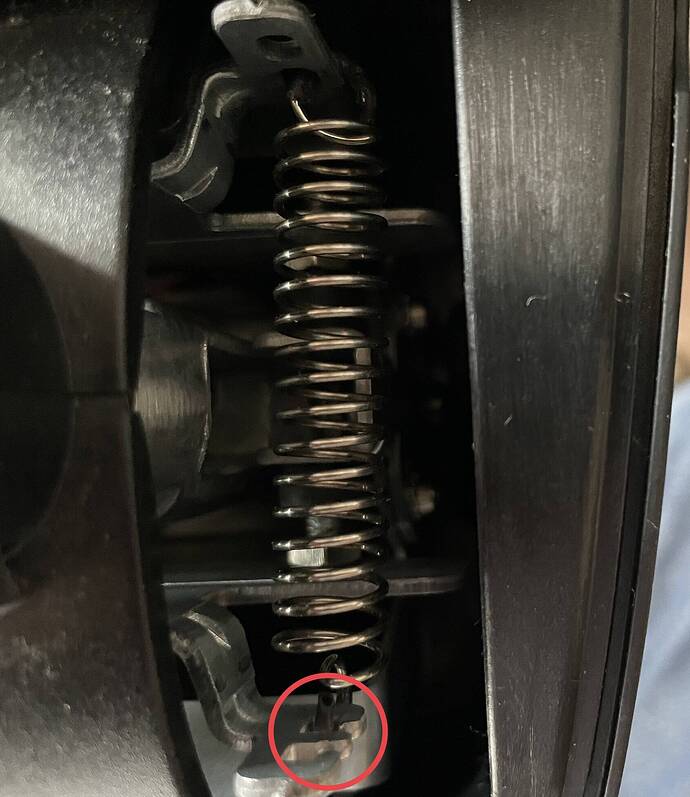
With the panel removed. You can see the tensioning springs. On my yoke, the factory installed two on the left and one on the right. We need to remove the right hand one to gain access to the stop screws below. It’s easy to unclip the spring at the front (circled) as the spring perch has a cutout in the retaining hole, to allow it to be removed with ease. You may have difficulty removing the rear part of the spring, so just allow it to hang down and, if needed, move it to allow access to the rear stop screw if you need to adjust that one.
Here’s an alternate view of the right-hand spring. Again, the removal point is circled:
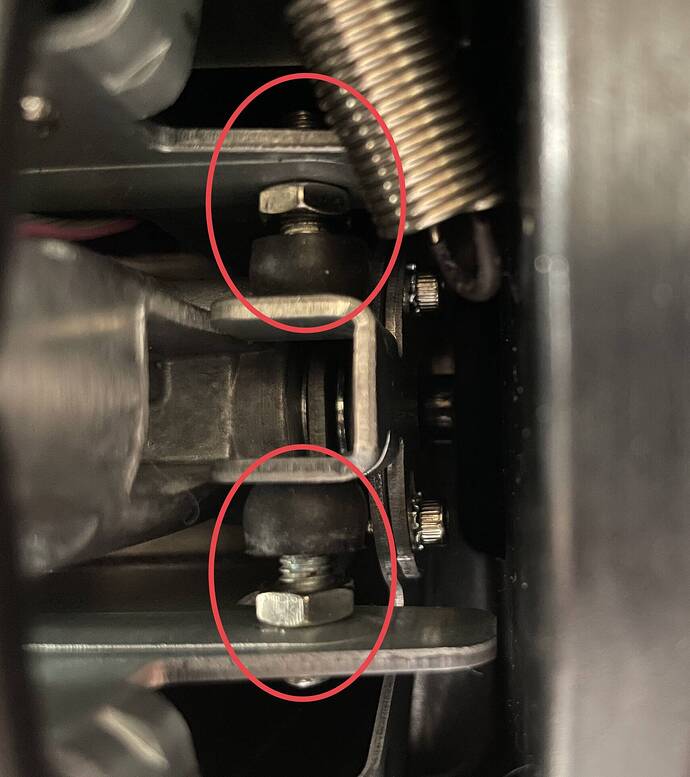
With the spring out of the way, you can see the two stop screws, their jam nuts and their rubber buffers (circled). The cause of our centering issue is the rubber buffers either compress some with age, the screws aren’t set correctly to begin with or a combination of both.
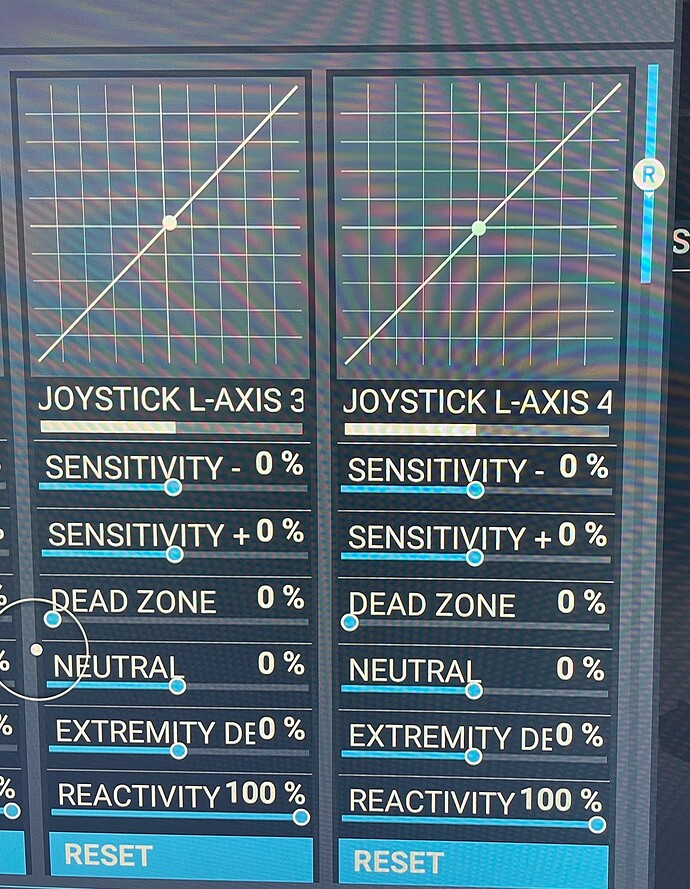
In my case, when pushing the yoke forward and bringing it back gently to center, it wouldn’t fully return the axis to center and would maintain a mild amount of downward pitch. If I allowed it to snap back more aggressively, it would usually be fine. This was making fine pitch adjustments whilst trimming the aircraft a bit of a pain. I’d find myself having to pull back on the yoke a bit to ensure it was fully centered. I’d increased the deadzone to help compensate, but I didn’t like how that added more movement to the yoke for the pitch axis before I got elevator response.
The solution, for me, was to adjust the stop screw closest to the two axis sliders. I needed to lengthen it to fix the centering. I recommend having MSFS open, and bring up the sensitivity settings for the yoke. That way as you carefully move the yoke, you can observe the behavior of the center point on your sensitivity graph, as well as the yoke’s mechanism to understand which stop screw will affect the physical centering of the yoke’s mechanism. As you adjust the stop screw (or screws if yours is giving you issues in both directions) you can see the results in real time on the sensitivity graph.
The jam nut takes an 8mm wrench.
Once you’ve got it centered, tighten the jam nut and recheck that you haven’t inadvertently moved the screw while fighting the nut, altering your adjustment. Replace the spring, reinstall the cover and enjoy your yoke behaving as it should.


