I can’t get the scenery to show up in simulator, even if I followed step by step many tutorials.
I created a simple object in blender 2.9 with png texture, created the folders copying them from the sdk example and renaming all parts as the tutorials say to do.
Then I open the project editor, load the project and build, then open scenery editor, create a polygon for deleting all objects, ok, then select my object, position it as required, it looks perfect.
Then I hit save project, save the shp file and then the scn file, copy the folder in community folder, looks all similiar to other sceneries I downloaded from the net, but when I reload the simulator… there is still the default object, no trace of my object…
Maybe some naming is wrong or I misunderstood something, but no error messages, no problems during all the creation process… only NO RESULT in sim…
Here is my object showing up in editor.

Ive noticed that the scenery.bgl file only gets saved when…
1.do what you said above. Save Scenery
2. Build project. again.
Thanks, you hit the spot (I think) because I did all again, this time I verfied I didn’t forget to build again the scenery, and this time the scenery remained visible also when I closed the editor (the previous times it disappeared as soon as I closed it). So I copied the folder in the community folder, restarted the simulator and this time the church was there!
There are a lot of tricky steps that you have to do exactly as described in tutorials, otherwise the scenery won’t show, but I hope that gradually I’ll remember all of them or find a way to have them done automatically (eg. all the folders creation with the files named correctly…)
Unfortunately the polygon that I created to delete default building seems not to have been loaded.
I must find out what I did wrong on this side…
Now the next step I have to test is to add new objects, all buildings have to be different object because I have to position vertically at different height following the terrain, so each building has to be a single model I guess.
Same thing when trying to add new objects to a project.
I cannot find a tutorial for this.
Here is what I did:
I created a new object in blender, same procedure and materials as the first model that worked (after rebuilding scenery AFTER having saved it… pretty crazy…).
The is the uncertain step:
I exported the model IN THE SAME FOLDER of the previous object, with another name.
EG: the folder is named “Cortina” then I added another object inside the folder
“MSFS_Custom_scenery\Cortina\PackageSources\modelLib\CortinaModel”
without changing anything else.
Then I open the project editor, select Cortina.xml, build package, open the Scenery Editor
but, again, the second model doesn’t appear in the object list, only the first.
Maybe is the name, maybe I have to use a different folder for each object, maybe I have to add other lines to the xml files…
Can somoene give me some hints ?
Ok I do silly questions so I answer by myself…
I solved these issues by trial and errors and very patient check of every single character in every row of xml, folders names, export and build configuration windows.. and finally I am there.
Boys it’s pretty boring to have multiple steps to do manually editing files in order to have all parts working, but I hope to get used to all of them and do everithing quickly and in a more reliable way.
I simply put exported multiple objects inside the folder Packagesources/modelLib/Myprojectname.
They don’t need to be named as the folder or the xml files as I thought initially.
If everything is done following all the small steps indicated in many tutorials, when I build the scenery, under objects I find all the models I exported one by one.
This way I can position, rotate and scale each one as it needs to be positioned.
Currently I tested the procedure with 3 models, I’m going to increase the number and test rebuilding the scenery. I wonder if rebuilding project I’ll be able to maintain the previous placement or I’ll have to redo everything…
It can also be a good idea to put each model in a separate folder. This lets you mirror those folder names in the texture folder, so that textures for 20 models are not all thrown into the same texture folder…
Right.
I use the same folder for the buildings of the same city, and this works fine, I have a folder with the name of the city and inside all the models of the buildings, and one folder for all the textures.
Then when I build the project I find all the models I need to place in different locations of the city.
Unfortunately, now that I was feeling confident and familiar with this procedure…
I had to install the new update and now I only have CTD every time I launch the simulator.
“Slightly” disappointed…
Everything working fine now, after the hotfix no more CTD, and my scenery is growing up!
Amongst other things, I added some high rise buildings in the city of Jesolo near Venice.
Using metric units, the objects created in blender (using 1 unit = 1 meter) look scaled properly in MSFS.

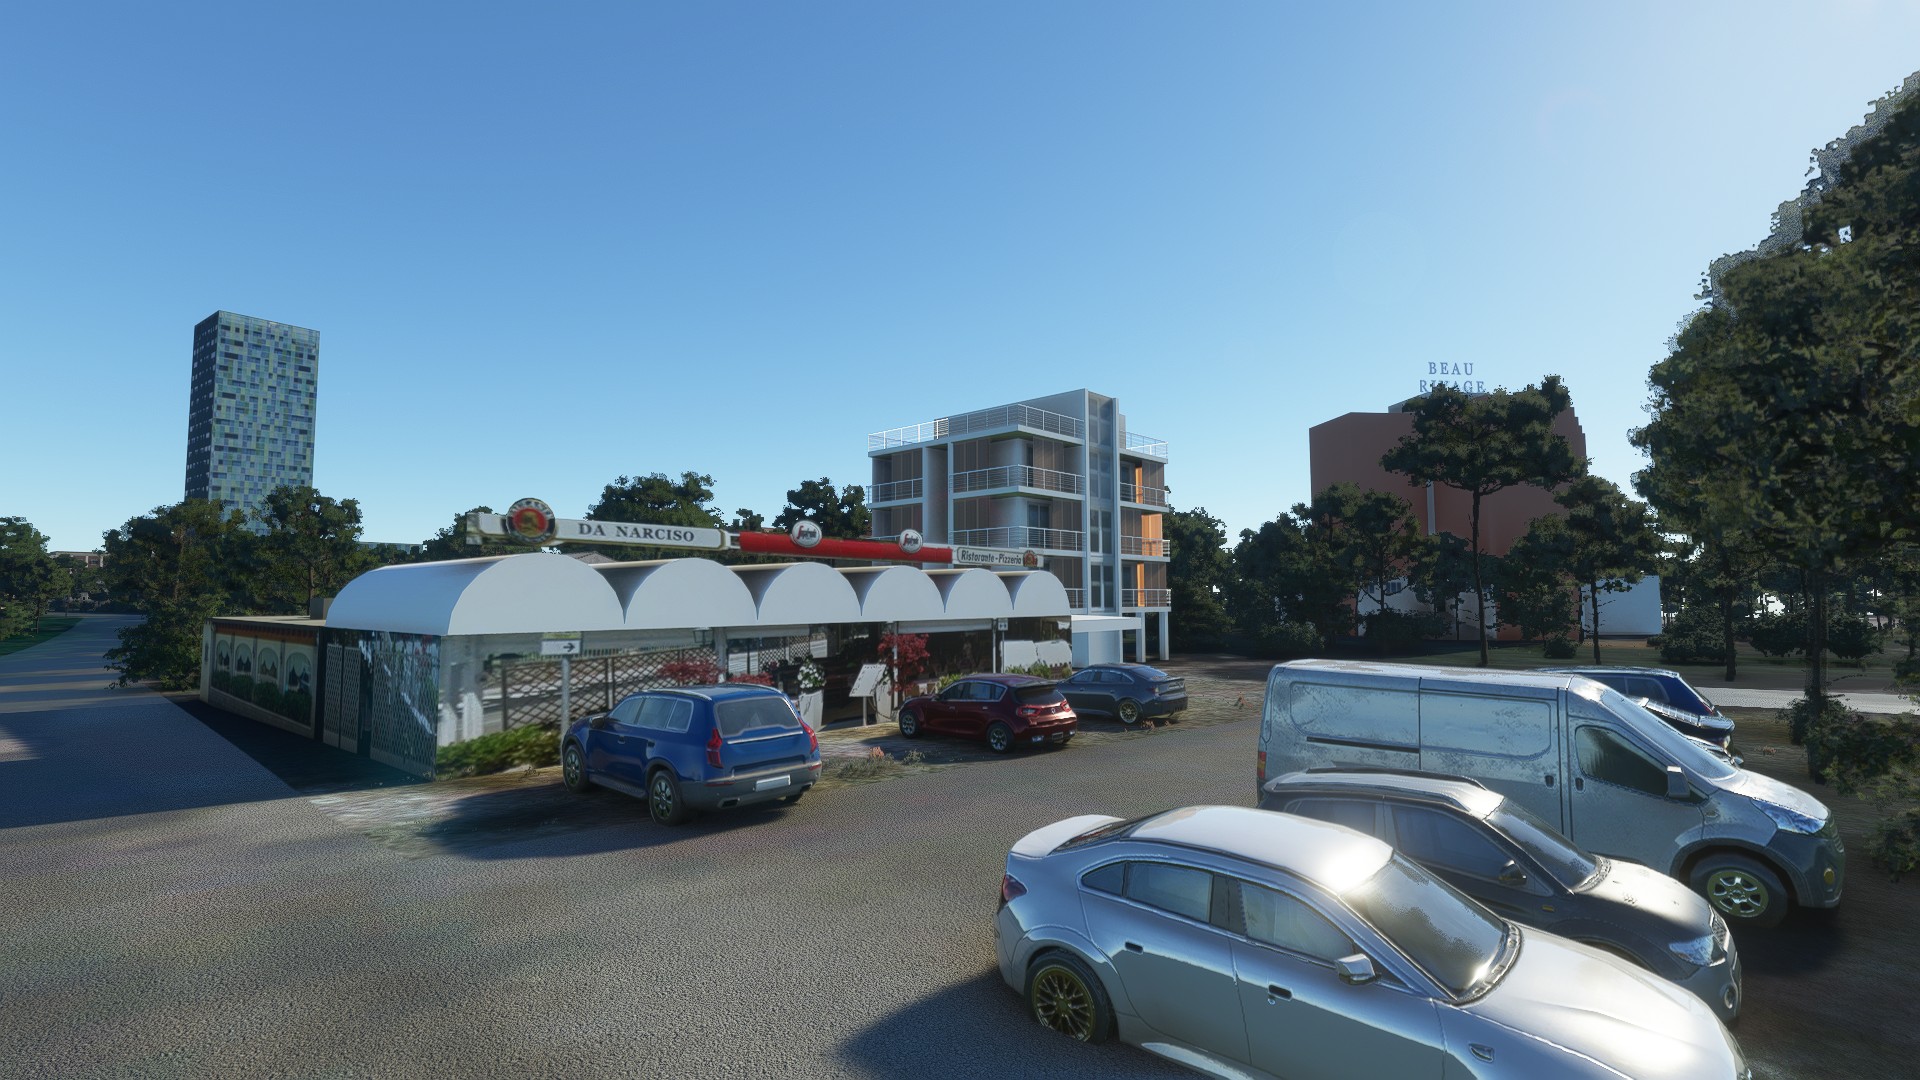
yes I know, modelling small and low buildings is not so noticeable when you fly, but I’m having fun with this rendering engine, better than any 3D modelling program renders…!
And much, much faster!