Hey guys have said this before but for performance testing you will go crazy hand flying the aircraft. I mentioned in another post how to make a totally automated test flight using AP (in a 787) but this produces a reproducible result every time (no live weather please).
This morning before work I changed from -30 to -15 all core, Load Line to 3, recommended for the X870E Tomahawk, as well as experimented with the Memory Efficiency mode on Tighter. Will be doing some R23 runs tonight. Not sure if I will test either sim tonight.
But one thing I already noticed, when using the hot keys for volume, the windows slider would jump a few digits, on -30. After switching to -15, the volume slider moved evenly when changing volume up or down.
I’ve actually taken a break from flying over the past two months. Sometime this week I’ll be formatting and reinstalling Windows on this sim rig, utilizing the new Rufus to get rid of the fluff of W11. Moving this rig to be only 2024 as opposed to the daily use I’ve been putting it through.
pic before I swapped out the Vengeance (m die) for Dominator Titanium (A die !!!)
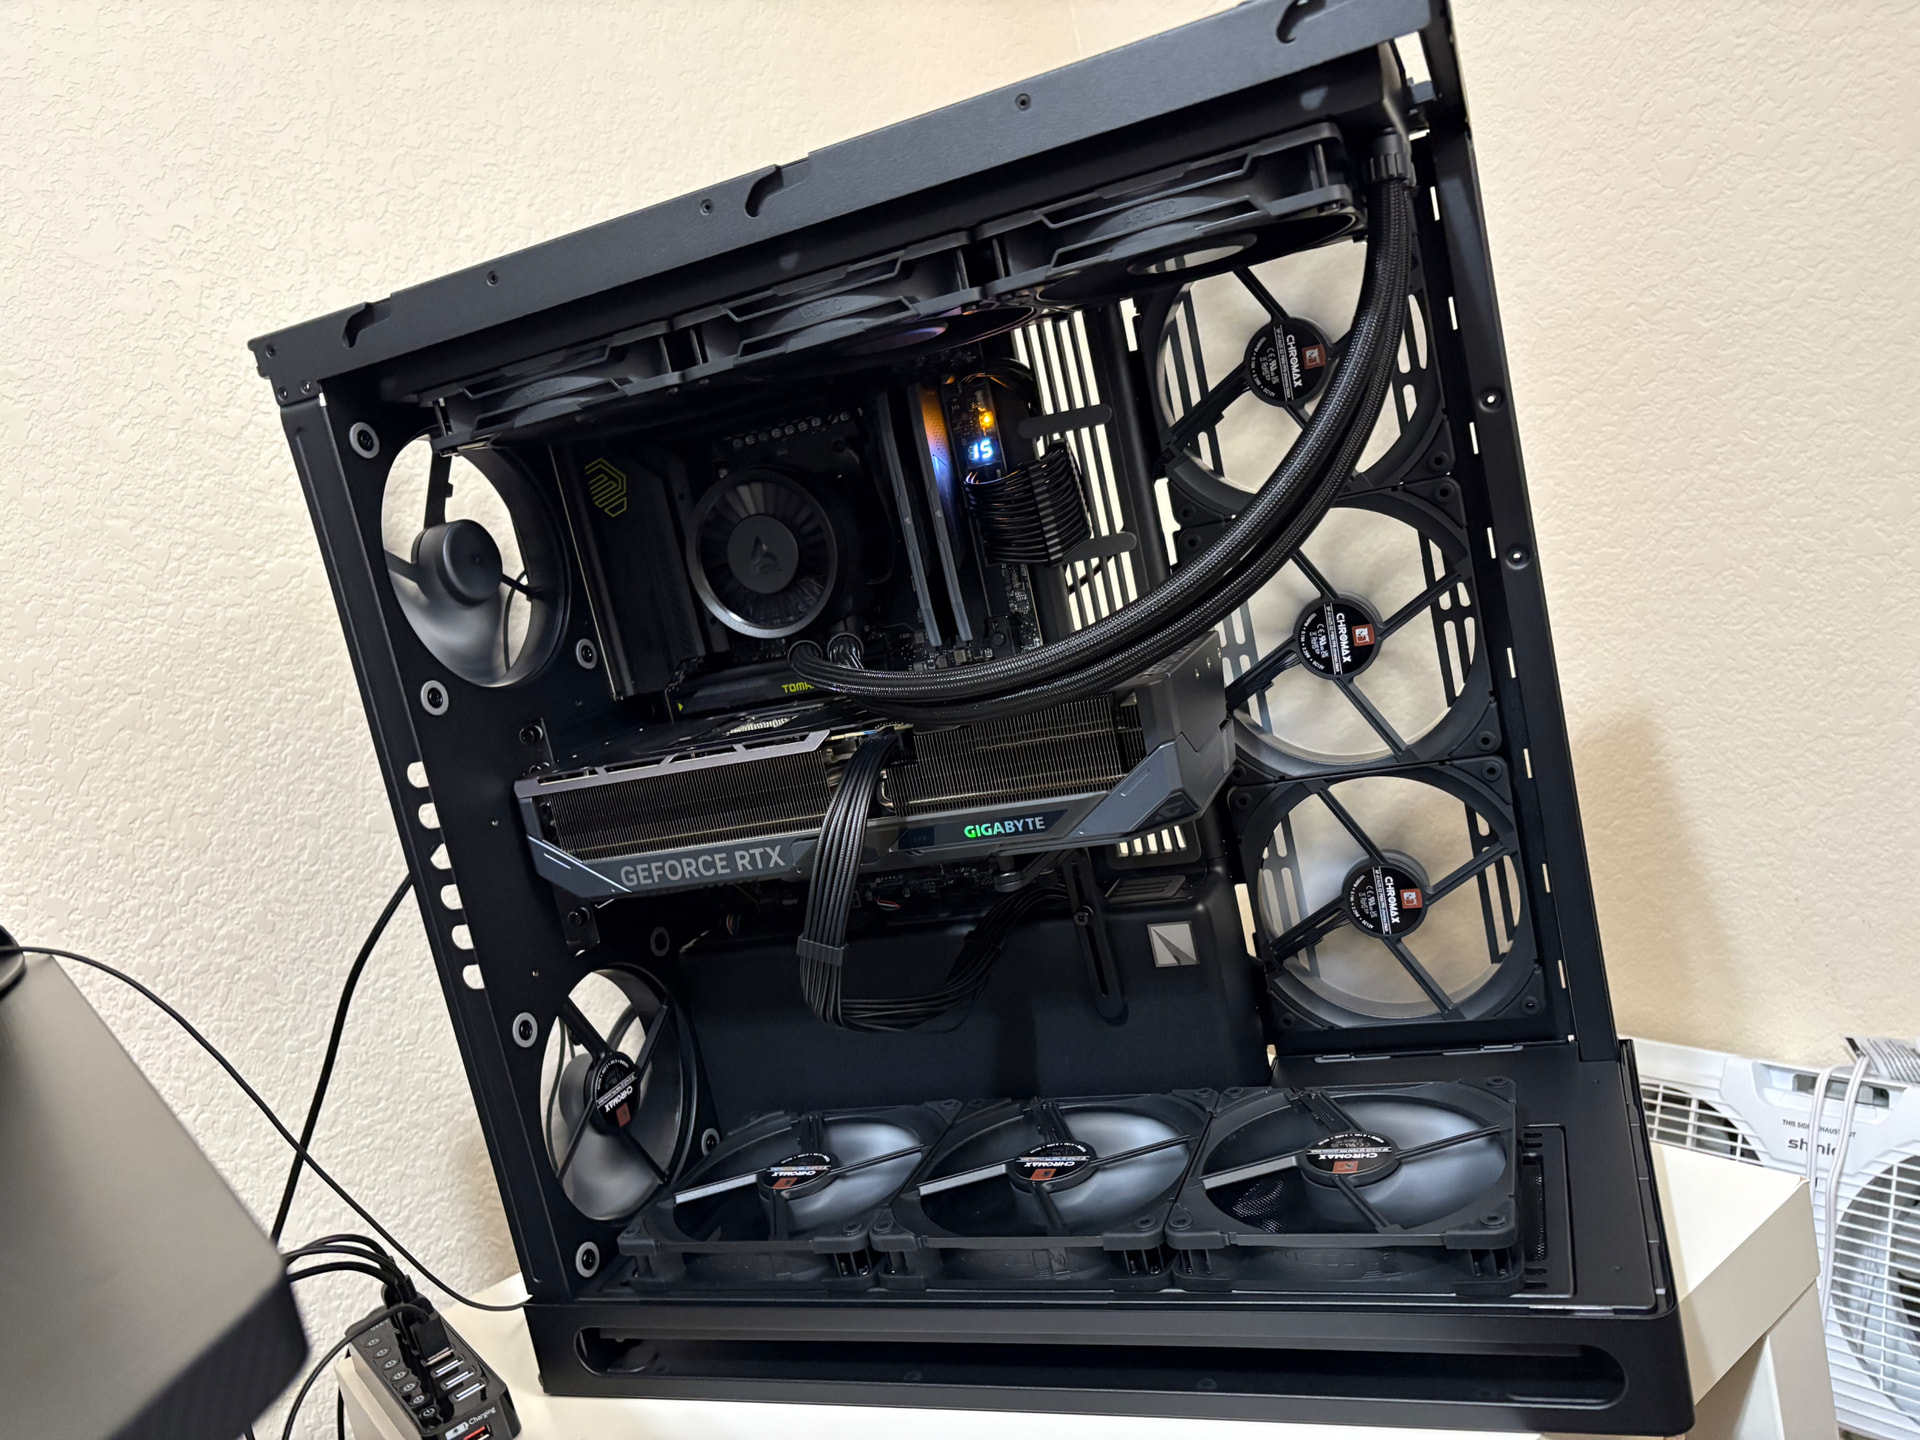
I like a new install! I don’t know why, but MSFS always runs better after a full clean install. I set up my PC to make this easy, and this takes me about 2-3 hours (excluding any time I take to benchmark and stability test)
Here’s my full reset checklist if it’s of any use to you:
NOTE: I’m not a pro, this is just my own method, others may have better / different advice. This is just what works for me. Your mileage may vary!
I’m trying to nest the forum’s “hide details” function one inside another, let’s see if it works…
My own Full Windows and MSFS reset checklist
1. Download installers before starting
I download all the installers to a 2nd drive, so I can install before connecting the new Windows to the internet - avoiding Windows Update from sneaking in drivers.
- Download the latest Windows 11 Media Creation Tool
- Create bootable USB Windows Installer
- Download latest AMD Chipset Driver for X870E
- I check for BIOS updates and only install latest “stable” (not beta)
- I download the LAN, WIFI, Bluetooth drivers from my motherboard’s website to avoid Windows versions. I do NOT install audio drivers - and have not had any issues.
- I download the latest NVIDIA Driver, and the DDU (in case Windows sneaks in a driver…)
2. Check your Microsoft Account credentials!
Before signing OUT of Microsoft, I make sure I can sign IN
If you use a Microsoft Account, I highly recommend you test your login to Microsoft.com in a browser first, to be sure you know your password.
I also go the extra step, while logged in to the microsoft.com account: I make sure my backup login methods are all current, and I create a passkey saved on my phone, and have Authenticator set up, etc, etc. That way, I know my account credentials are good before I start!
- Login, click your User Initials in the upper right corner
- Choose View Account
- Click on Security on the left
- Click on Manage how I sign in…
- I recommend establishing as much as you can so you have multiple ways to verify your account.
3. Sign out of Microsoft Apps, Delete Cloud Save
I keep a text list of controller changes, so that it’s easy to re-create controller profiles, allowing me to really delete Cloud Save Data - which has historically been the source of persistent issues.
Also, I’ve noticed that from version to version, the default control bindings are changing without being mentioned in the release notes. So each version, I start by deleting mine, duplicating the new defaults to then edit with my list of changes (which are only about 10 items, so it’s easy for me).
Note: my process really resets everything - no saved controller profiles or log book, all will be gone if you follow this, to get a new “out of box experience”.
-
I sign out of Microsoft Office
-
I Open MSFS and manually “Set to Defaults” all the Settings pages 1 by 1, to force “defaults” to save to the cloud
-
I manually delete my controller profiles so they aren’t saved, and are deleted from any Cloud Save (and can’t reload corrupted copies)
-
I manually clear the “Career History” (even though I’ve never touched it).
-
I use the command line to delete Cloud Save Data
-
With the MS Store version of MSFS, using the above command line to delete cloud save date actually launches MSFS, I let it get past the “sync data” stage then force quit the app.
-
I then go an extra step, and log in to Microsoft.com > View Account > Devices > and at the bottom… Delete Cloud Saved Settings!
-
I also go in to Privacy and delete a lot of history.
-
Surprisingly, even doing all of the above, my bookmarks and any saved info in Edge is still retained and synced back after a new install of Windows 11 using a Microsoft account.
4. Reset BIOS to defaults
- Because I like to do a few benchmarks with default settings each time I do a full reset, I also set BIOS to defaults before installing Windows
- On my MSI board, to reset BIOS, I shut down the PC and press the Clear CMOS button on the rear panel of the board for 10 seconds (where the ports are). When you next boot, it takes a long time as it has to re-train memory.
5. Clean install Windows
- Boot from Windows Install USB
- On my MSI board, I hold F11 when rebooting to get boot menu
- I select the USB drive to boot the Windows 11 installer
- I select “Install Windows”
- “I agree everything will be deleted…”
- On the Product Key page I click “I don’t have a product key” because my license is in my Microsoft Account, and is automatically retrieved and activated when I sign in
- On the Select Location to Install Windows page…
- … My primary NVMe drive (C drive) is “Disk 0”
- … There are several partitions on “Disk 0”
- … I select each Disk 0 Partition and click “Delete Partition” until there is only 1 “Disk 0” and it is unallocated.
- I take care because I have a 2nd drive, “Disk 1” and once I accidentally deleted it!
- I select Disk 0 unallocated and then click “Next” at the bottom
- It will install and reboot a couple of times.
- Be sure to select the correct Region for your Microsoft Account
- Once you sign in, and set your PIN, it starts asking about preferences…
- … Just before it reaches the desktop for the first time during the install process, I unplug my ethernet cable to avoid Windows Update installing NVIDIA or Chipset drivers.
6. Windows initial setup - before connecting internet
With a fresh install of Windows 11, I do the following:
- I disable Hibernation because Hibernation is constantly trying to write the contents of RAM to disk, in an attempt to avoid losing data if the system crashes. I don’t want all that overhead or wear so I turn it off:
- Open CMD as Admin and enter:
powercfg.exe /hibernate off
I disable:
- System >
- … Notifications > Additional Settings > Suggestions, Tips OFF
- … Power > Sleep = Never
- … Power (I leave mine set at the default, Balanced)
- … Nearby Sharing = OFF
- … Clipboard history = OFF
- Apps >
- … Startup Apps > OneDrive, Teams = OFF
- … Resume = OFF … not sure many people notice this one
- Privacy & Security >
- … Recommendations & offers = OFF
- … Inking & Typing = OFF
- … Diagnostics > Optional = OFF
- … Search > everything = OFF
- Microsoft Edge…
- … Privacy > Help Improve, and ‘Allow Microsoft’ … OFF
- … Copilot > OFF
- … Start > Automatically open Edge when you sign in to Windows > OFF
- … System & Performance >
- … System > Startup Boost > OFF
- … System > Continue running in background > OFF
- … Performance > Preload > OFF
Then in Settings
- Windows Update > Pause
- Windows Update > Advanced > Delivery Optimization > Downloads from other devices > Off
7. Install Chipset and drivers, configure monitors
- Install Chipset driver, reboot
- Install LAN, Wifi, Bluetooth drivers, reboot
- Install NVIDIA driver and app, reboot
- I check Settings > Display > and set resolution and refresh rate 120
- I check NVIDIA CP for proper config
- … on 1 Screen I use GSync On, Monitor Tech = GSync Compatible, which sets Windows to use VRR
- … but when I use 3 screens, GSync is Off, Monitor Tech = Fixed refresh, and Vertical Sync = Adaptive Half Refresh (targeting 60)
- Reboot for good measure
8. Connect to Internet and update Win + MS Store
- Connect for first time to Internet
- Settings > Windows Update > Resume, and let it run, reboot
- MS Store App > Downloads > Check for Updates > there are a LOT, like Game Services, etc that always need updates, let it run
- I restore my water cooling profiles, etc.
- I sign in to Xbox App - which then does its own update
9. Stock Benchmark, and MSFS
- I really like HWInfo, so I can check CPU clock, voltage, temps, etc. and if you use it with an AMD processor, I suggest in Settings > enable “Snapshot CPU Polling” (so polling the AMD sensors doesn’t itself use more resources).
- I do a few basic Cinebench, Furmark, Superposition and 3DMark tests at stock settings to make sure things are stable, have a few baseline numbers for the current install, to compare after tuning.
- I install MSFS
- Settings > Displays > Graphics > I add MSFS and set to use NVIDIA GPU
- Settings > Privacy & Security > Windows Security > Virus & Threat Protection > Virus & Threat Protection Settings > Exclusions > Add Exclusion > Folder >
C:\Users\YourUsername\AppData\Local\Packages\Microsoft.Limitless_8wekyb3d8bbwe\
- I open MSFS and spend about 10 minutes re-creating my keyboard and controller settings. I leave the Settings at default to do a few tests
- I have come up with 2 ‘standard’ scenarios I use to get a sense of how things are working: C172 at a gate at KTEB, and A330 at KJFK, I usually take a few screen shots for later comparison
10. Only then, I optimize BIOS
Only after I’m sure everything is working, and I have some baseline benchmark numbers, do I tune BIOS.
Note these settings are tested on my PC, which is different from everyone else’s PC, you have to test to find out what is stable on your own PC.
- Boot in to BIOS
- My current settings are:
- PBO > Advanced > Curve Optimizer > Per Core, range of -13 to -23
- PBO > Advanced > Boost Clock > +150 MHz
- EXPO > enabled
- FCLK = 2000
- UCLK = MEMCLK
- High Efficiency Mode > enabled, Preset > Tightest
Then I install GPU Tweak III to tune my GPU a bit
- User Mode
- Memory Clock + 400 (28402) > Save
- VF Tuner …
- I select curve from 1075 mV up, and flatten to 1075
- I select range from 820 mV, raise curve by 210 MHz
- The resulting top end of the curve is 1075 mV = 3135 MHz
- This is undervolting, and again you have to test, each card is different. My card likes to draw about 1.05 V (1050 mV) and boosts to about 3050 MHz

11. Test for stability
- I test with Cinebench for stability, and compare to stock
- I test with Furmark, and SuperPosition as well, sometimes 3D Mark
- I re-test MSFS, still at stock settings, the 2 scenarios at KTEB and KJFK, and compare FPS and RAM usage, Temps, etc, 1 and 3 screens.
12. Tuning MSFS
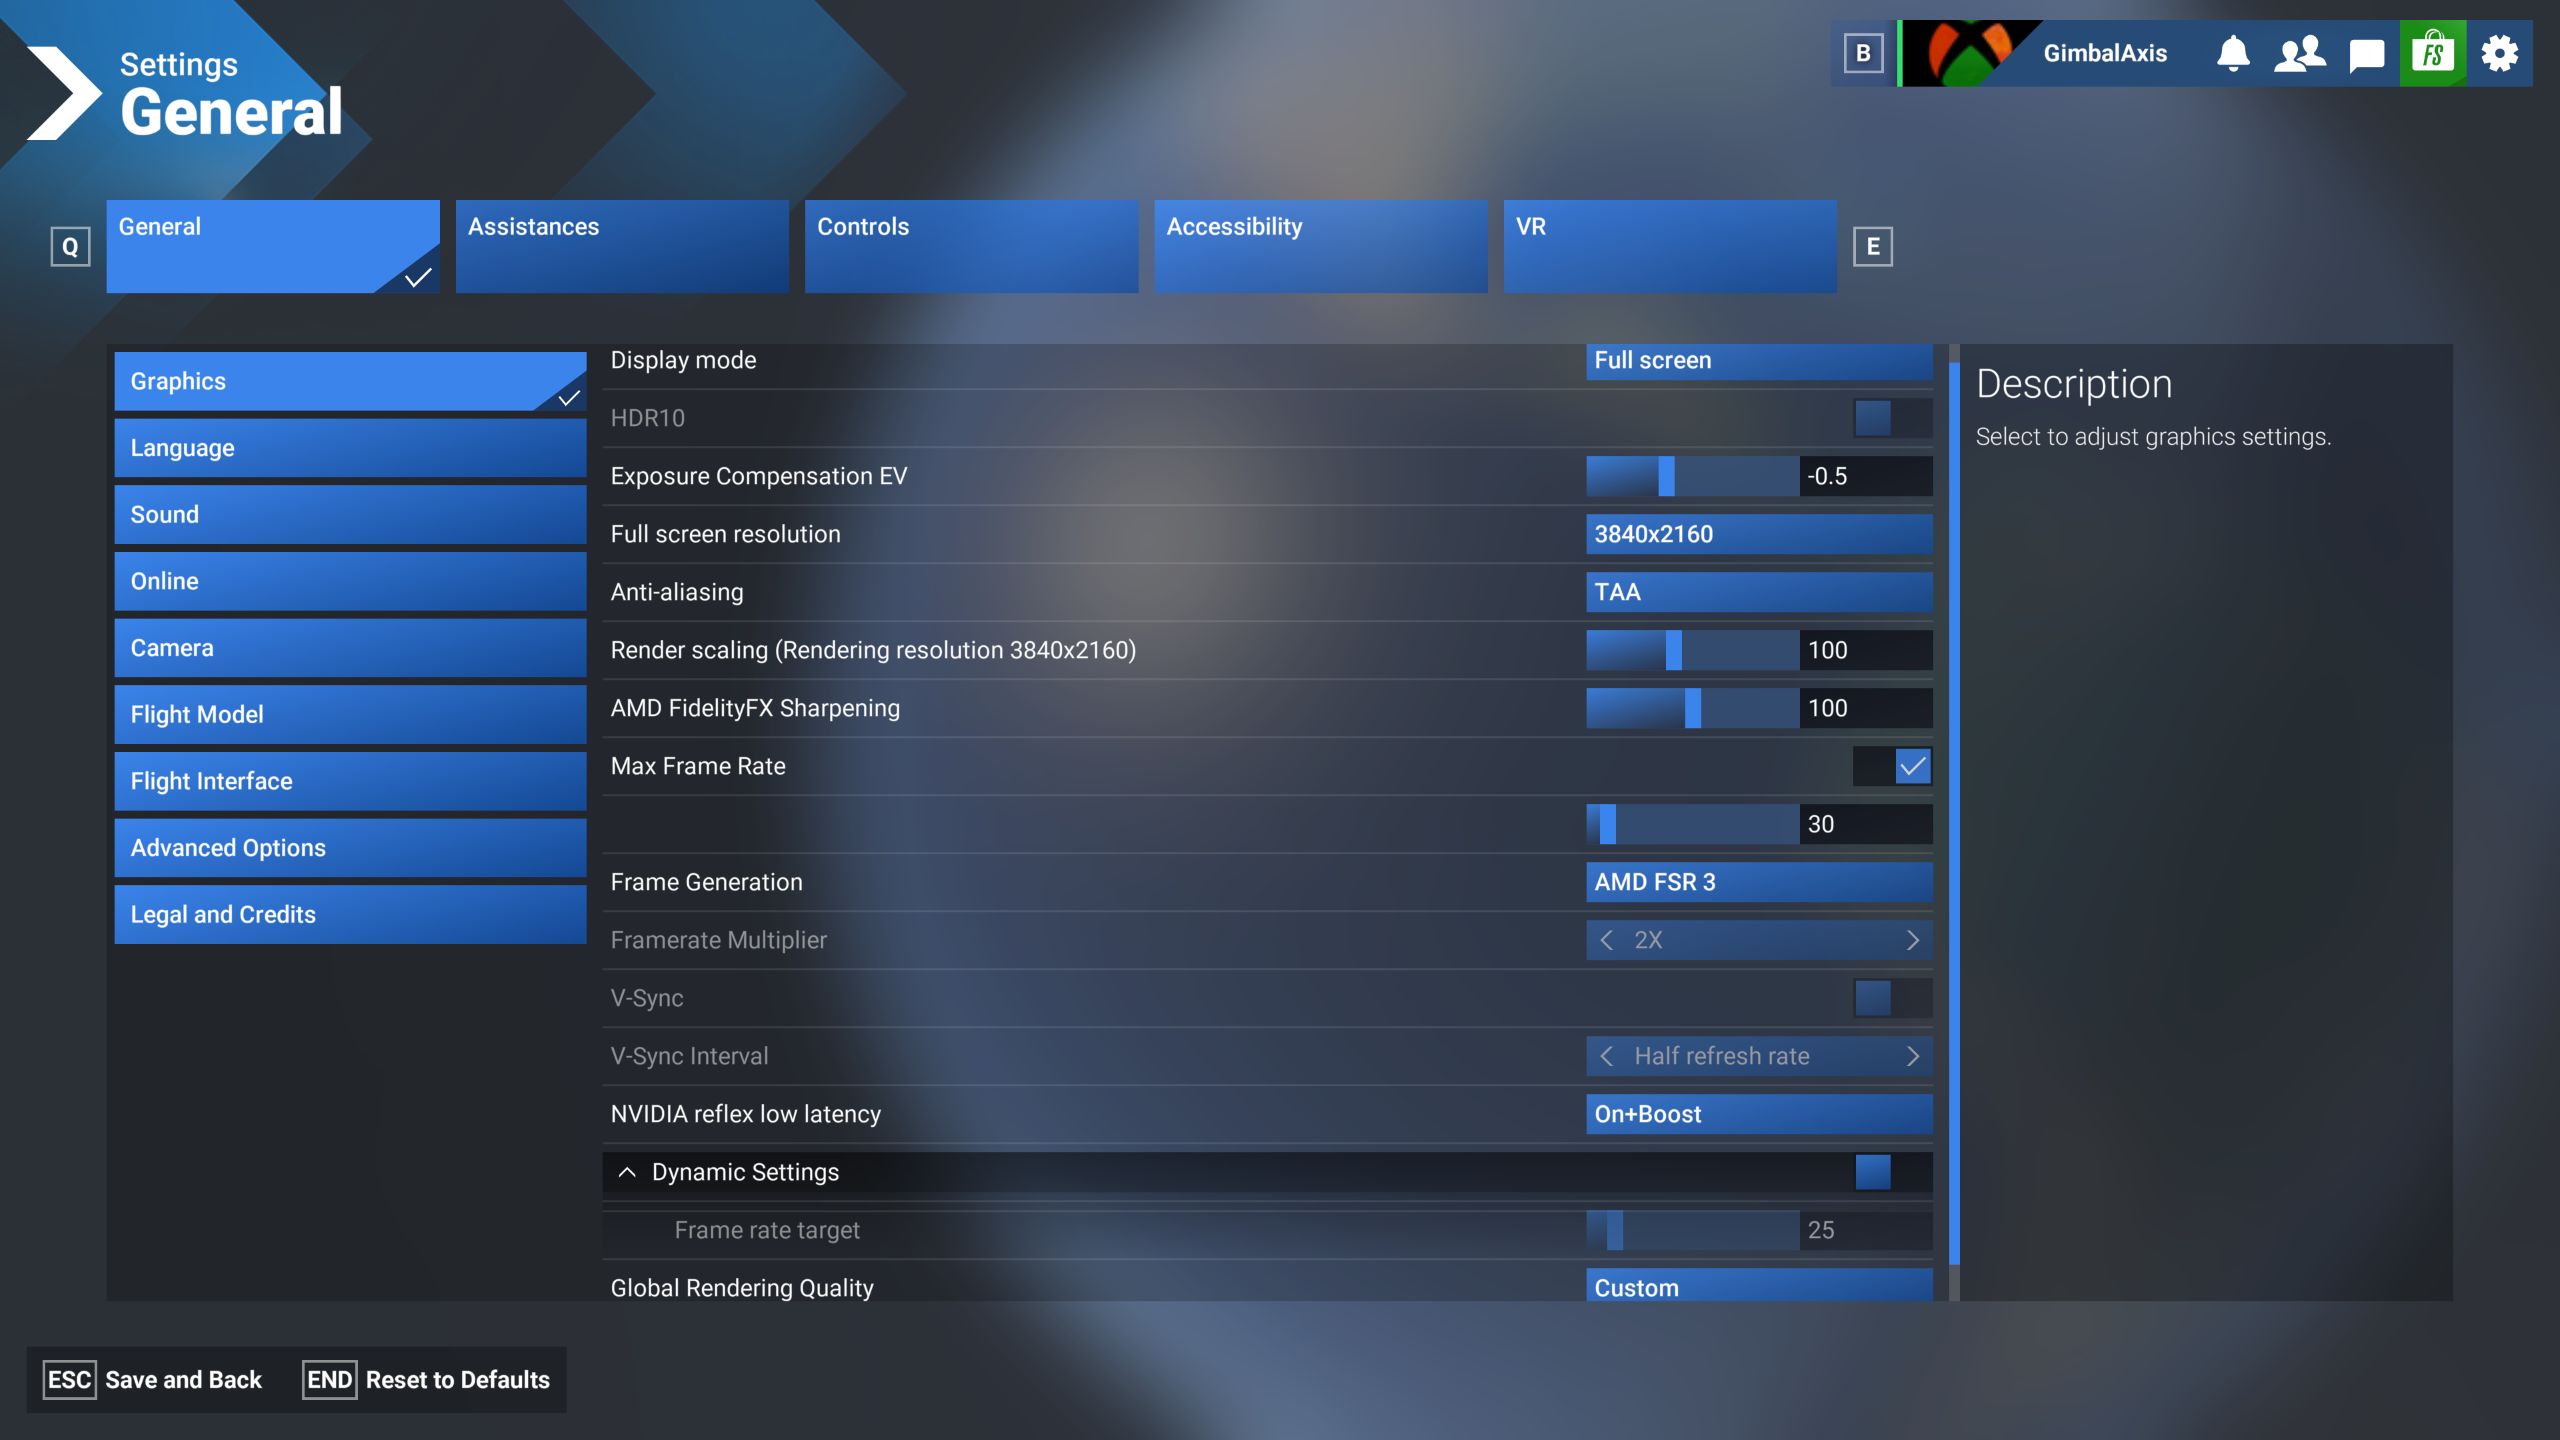
I tend to turn off Multiplayer, and turn down turbulence and wake turbulence, because I need as much performance as I can get on 3 screens.
- I use TAA at night, and DLAA for lower flying in daylight to get more details
- Max Frames 30
- VSync Half Monitor
- Frame Generation FSR3 x2 (targeting 60FPS on triple screens)
- NVIDIA Reflex Low Latency On+Boost
- Dynamic, On, 25 (so 50 FPS is the floor)
- Global Preset = High on 3 screens, or Ultra on 1 screen
- I keep Clouds and Textures at Ultra
- I turn off Motion Blur, Light Shafts, Parked and Traffic Quantities, and Seatbelts.
- I use BATC with Bravo Airspace ATG, FSLTL, and AIG models.
- I’m developing a habit of tuning TLOD / OLOD per flight, and sometimes in flight - higher TLOD at cruise, lower at landing.
These are my basic MSFS settings using 3 screens:
You legend, thanks! One thing that “scares” me out of everything we do with our systems is installing windows. I loathe it for some reason but it needs to be done.
I’m looking forward to a clean system again. I did not use Rufus last time so just having the fluff cleaned out will please my OCD haha.
Thanks Gimbal for the roadmap! Actually looking forward to getting this done and flying the DA40 and maybe the Fenix again, one day.
I think you’ll find it pretty simple - and it’s good to have the confidence to have it as an option if/when you have some persistent issues. I see people spending days troubleshooting an issue, and I just find it easier to completely reset - which usually cures whatever issue I had (or helps pinpoint a software bug if the issue returns).
One thing you might not be familiar with is when you boot from the installer.
- To reset BIOS to defaults, shut off the PC, and press the Clear CMOS button on your motherboard for 10 seconds (that’s usually the way, your MB might be different). Note when you change BIOS, the next boot takes a long time as it has to retrain memory… several minutes.
- To boot from the WIndows 11 USB installer, on my MSI X870E Carbon, I boot pressing F11, and it offers a boot menu, choose the USB Key
- Then you say you want to install Windows, not keep anything, and assuming you have a digital Windows license tied to your Microsoft Account, you click “no product key”…
- When it shows you the list of disk partitions, and ASSUMING … your main drive is 1 partition and it’s C drive… you would delete all the partitions for that device (usually device 0)… usually there are 3 or 4 partions. Just be aware if you have more than one drive that you know which you are deleting… it looks similar to this:
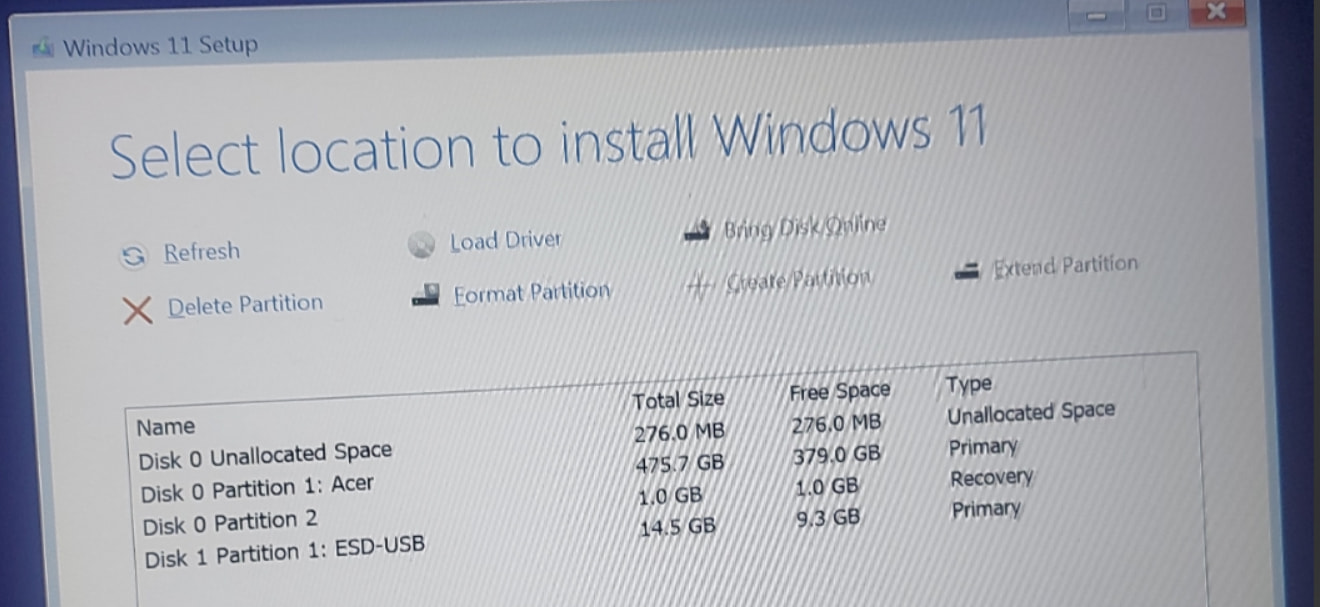
You would select each of the “Disk 0” lines (assuming that’s the one you want to install on), and click “Delete Partition” until there is just a single “Disk 0” unallocated - select that and click Continue at bottom and it will format it for the install.
Don’t delete the other Disk 1 (that’s what you are booted from) or any other disk that might be connected!
I’m sure once I’ve done it again, this is only my 3rd time installing Windows in my 39 years, I’ll feel the confidence again. I’ll admit I also “rushed” through the last 2 installs that that is prompting me wanting to do a reinstall. To ensure it’s done properly this time.
To avoid hijacking this thread too much with windows install talk, would you mind me DM’ing you if I have any other questions?
Sure, but I think the conversation might be helpful to others too… and I’m not a pro, so I’m only speaking from my own experiences! Others may/will have additional tips, I’m sure.
Something to add which resulted for me a 1% low significant gain on FS2024. Only works if you bought the game on xbox store. Myself running a 9070XT so dont know if it works as well for NVIDIA.
Make sure you have latest Windows Built, latest AMD Driver, then go over to xbox Insider Hub and enroll to the so called Games Preview. This activates Advanced Shader Delivery.
Restart PC, Start FS2024 and on the starting screen bottom left corner you will get a sentence stating Advanced Shader Delivery activated. Voila not a single microstutter again, CPU in the green, butter smooth. Best thing it is for free, quick and seeing a huge difference, as well in game loading times massively better
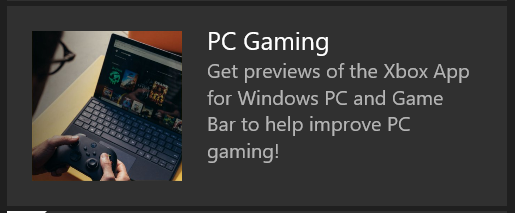
Ah, so only for AMD GPUs at the moment, with “NVIDIA and Intel GPUs are expected to receive support in the near future.”
Will be interesting to check out when it comes out for Nvidia.
@GimbalAxis Now that I’m home from work, great work on condensing the hide details! I’ve also had the proper amount of time to read through your process, bookmarked the benchmark links and really appreciate the tip about the boot menu.
ISO created and ready for the Friday reinstall.
Speaking of ISO’s, if you work with them often I can recommend getting a virtual ODD external disk caddy.
If you were one of those folks with a big CD/DVD folder with dozens if not hundreds of disks, these devices allow you to store them all as ISO images, and mount them, presenting them to the computer as a CD/DVD, even if the computer doesn’t actually have a DVD drive. Useful for a number of things, including OS reinstalls.
I’ve personally used the Zalman devices a lot at work, like the VE350, and I’ve read good things about the IODD devices also.
You should use the MediaCreationTool to create a bootable USB drive. You get a more up to date installation media than you do from the ISO download. I’ve re-installed Windows at least a dozen times in the last year.
Friendly reminder
Please continue the discussion about Windows and its installation in the thread linked below.
https://forums.flightsimulator.com/t/windows-11-25h2-24h2-and-msfs-observations-insights-issues-and-tips/657704
That topic is intended specifically for Windows-related setup and installation questions.
This thread is meant to focus on BIOS configuration and BIOS settings, not the Windows operating system itself.
Thanks for keeping things organized
Yes correct
That’s what I did, just used Rufus to finalize the ISO.
I like this idea! Thanks for sharing!
Well I finally got a chance to run 2024 with the -15 all core and yeah, I wasn’t fully stable before.
Still haven’t done the system reinstall but that’s okay. Maybe in the future. For now, a stable system is all I need!
Does that means it is working well for you now?
Remember, undervolt doesn’t equal performance gain - it just reduces voltage, temps, and power… Too much voltage = too hot, too little = underpowered. So it’s a Goldilocks thing.
The main performance gain comes from memory timings, and if the CPU has some room for it’s normal boost clock, plus any extra boost clock you give it. The undervolt does allow the CPU to boost higher and for longer, with that extra thermal headroom. It’s a balance / combo of those 2 things.