Below you will find the easiest way of setting up your 737’s FMS to get you flying.
I’m a firm believer of simmer-to-simmer tips and tricks at which you don’t need all the technical mumbojumbo that (real world) pilots overload you with during 90 minutes youtube videos. You’ll get to there once you’re intermediate or above. First you need to get ready to fly and have fun(!) with your new aircraft. You’re not an idiot, you just never sat in a 737 cockpit before and it’s pretty overwhelming at first.
You’ll get to all the technical details once you’re doing 5 hour flights between Amsterdam and Sharm el Sheikh and get properly bored during cruise (how’s that for immersion). First, let’s get you off the ground. Here and now.
*Moderators, please consider to not merge this thread in the big channel as it’s already getting quite repetitive due to it’s length. This guide is important for new community members.
First, work with me. Go to your Simbrief and select the Delta Air Lines flightplan format. It’s the only one I know that has a great(!) ‘flight summary’ on page 2 that we’re going to use to get you setup the FMS in under 3 minutes.
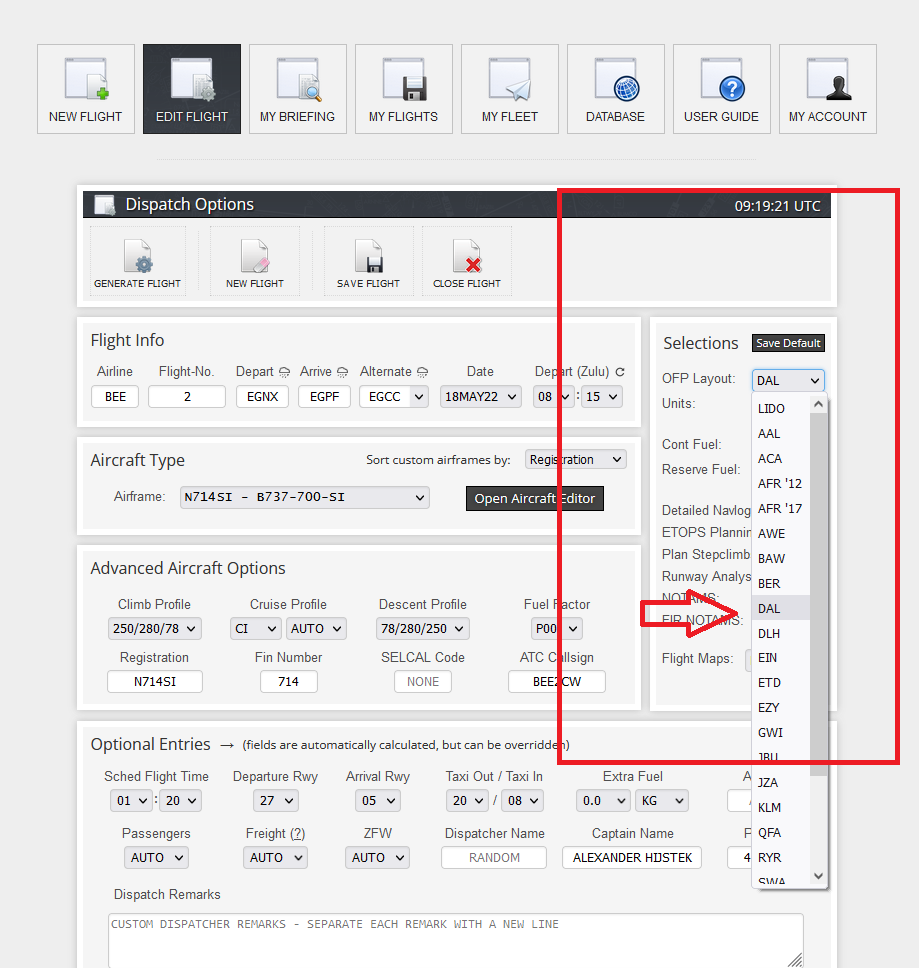
As we enter the PMDG 737 cockpit with our freshly produced flight plan, we need to prepare the aircraft for flight simulation first, or anything we’re doing here will be pointless. So go the FS Actions page on the FMS, select Fuel and set it to match the block fuel from your flight plan.

Now press RETURN and select the Payload page. Enter ONLY the Zero Fuel Weight.
Why? Because kilograms/pounds do not lie. There are different cabin layouts for the aircraft and that’s fine. Don’t be bothered by the amount of passengers and cargo being different from your flight plan, we ONLY need the zero fuel weight, it’s holy, like religion, we do not question it for now. It’s just simbrief profiles that can be different between single and dual cabin layouts and let’s not get into that now.
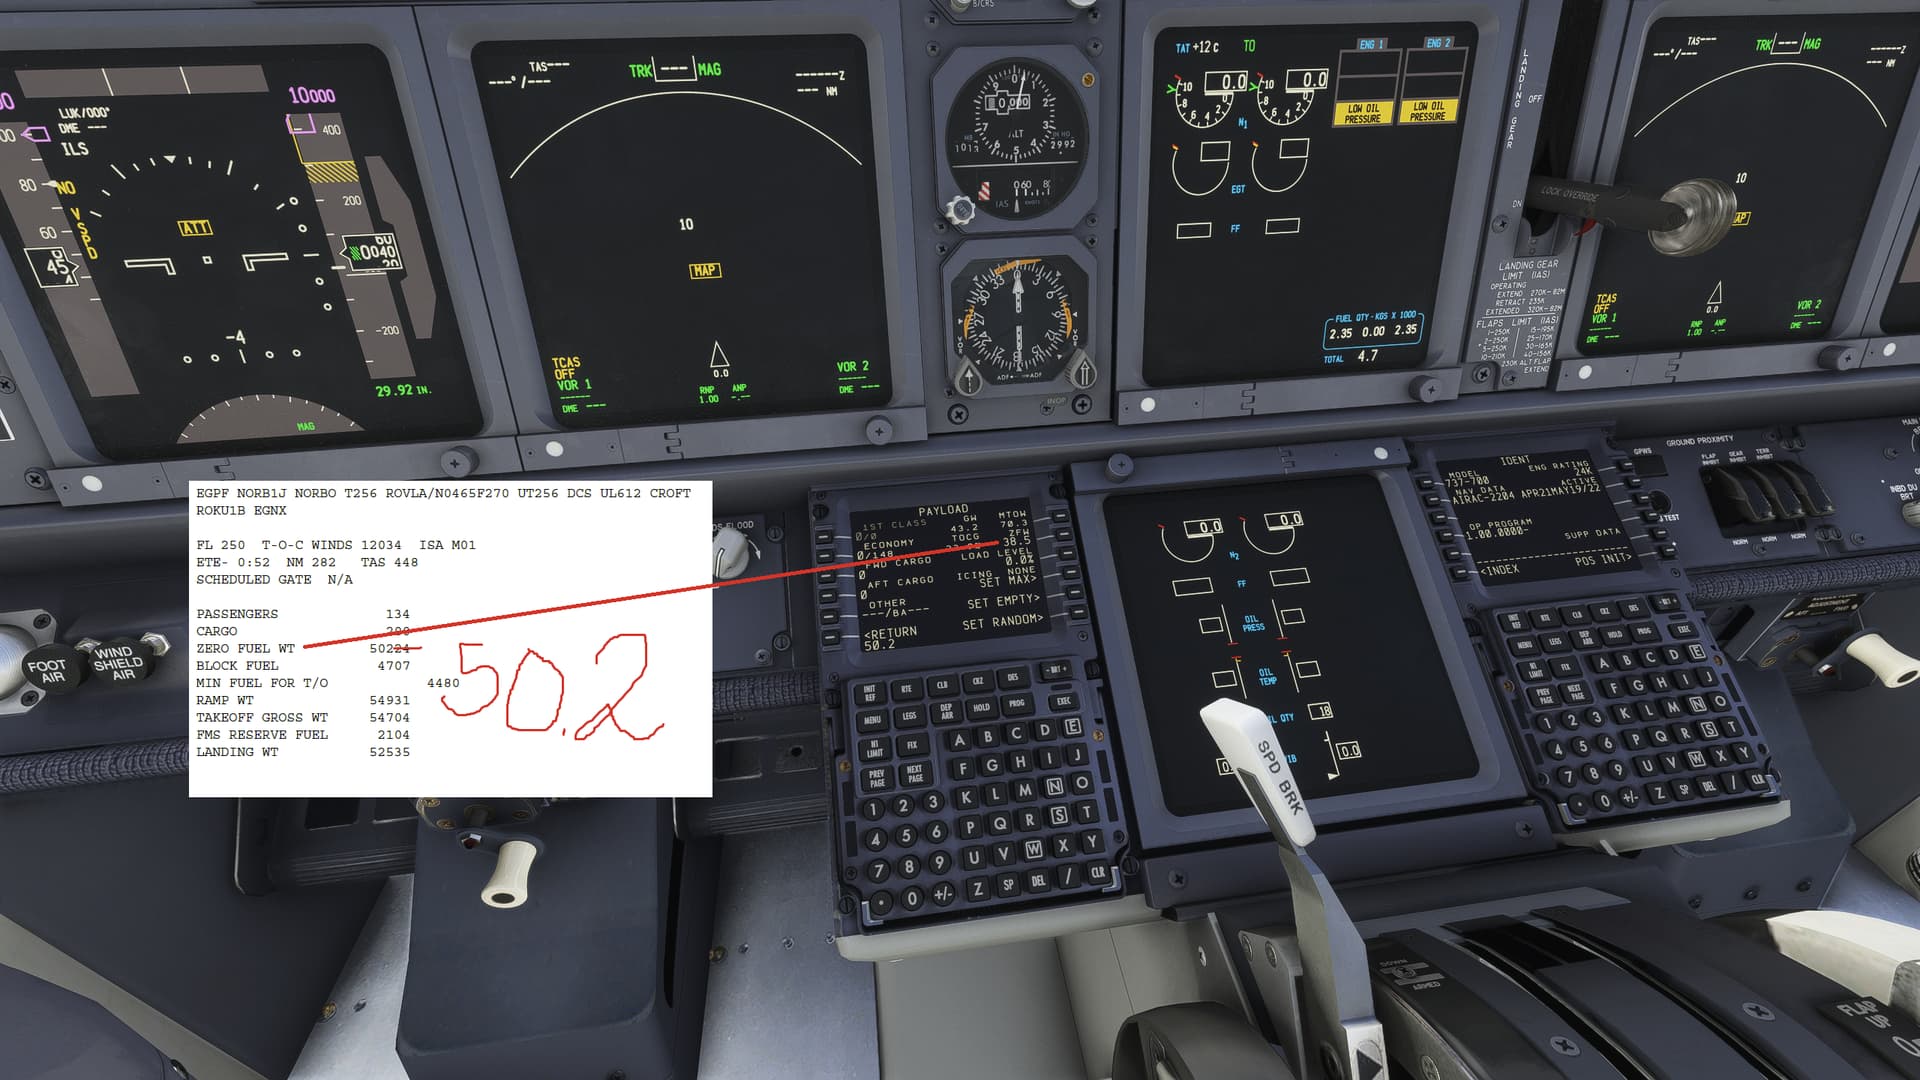
Now, log into the FMS and log into the right/copilot FMS too! It will copy your data from FMS 1 that we’re going to feed, but only if you log it on first. Put the IRS on the overhead panel to NAV as you should have done entering the aircraft, press INIT and you will find the position initialization as your first duty.
Small tip, quick way of getting a good position is to just enter the ICAO of your departure airport and it will give you some raw coordinates. That’s fine, the aircraft will autotune the precise coordinates later automatically, let’s not get into how mumbojumbo for now.
*I was using two different flight plans when setting up these screenshots, no problem though. The coordinates are off in my pic but this is about reproducing steps and you’ll do brilliantly.
Next, note how the FMS will walk you trough all it steps logically by pressing the bottom-right linekey for the next phase of data input. Neat!
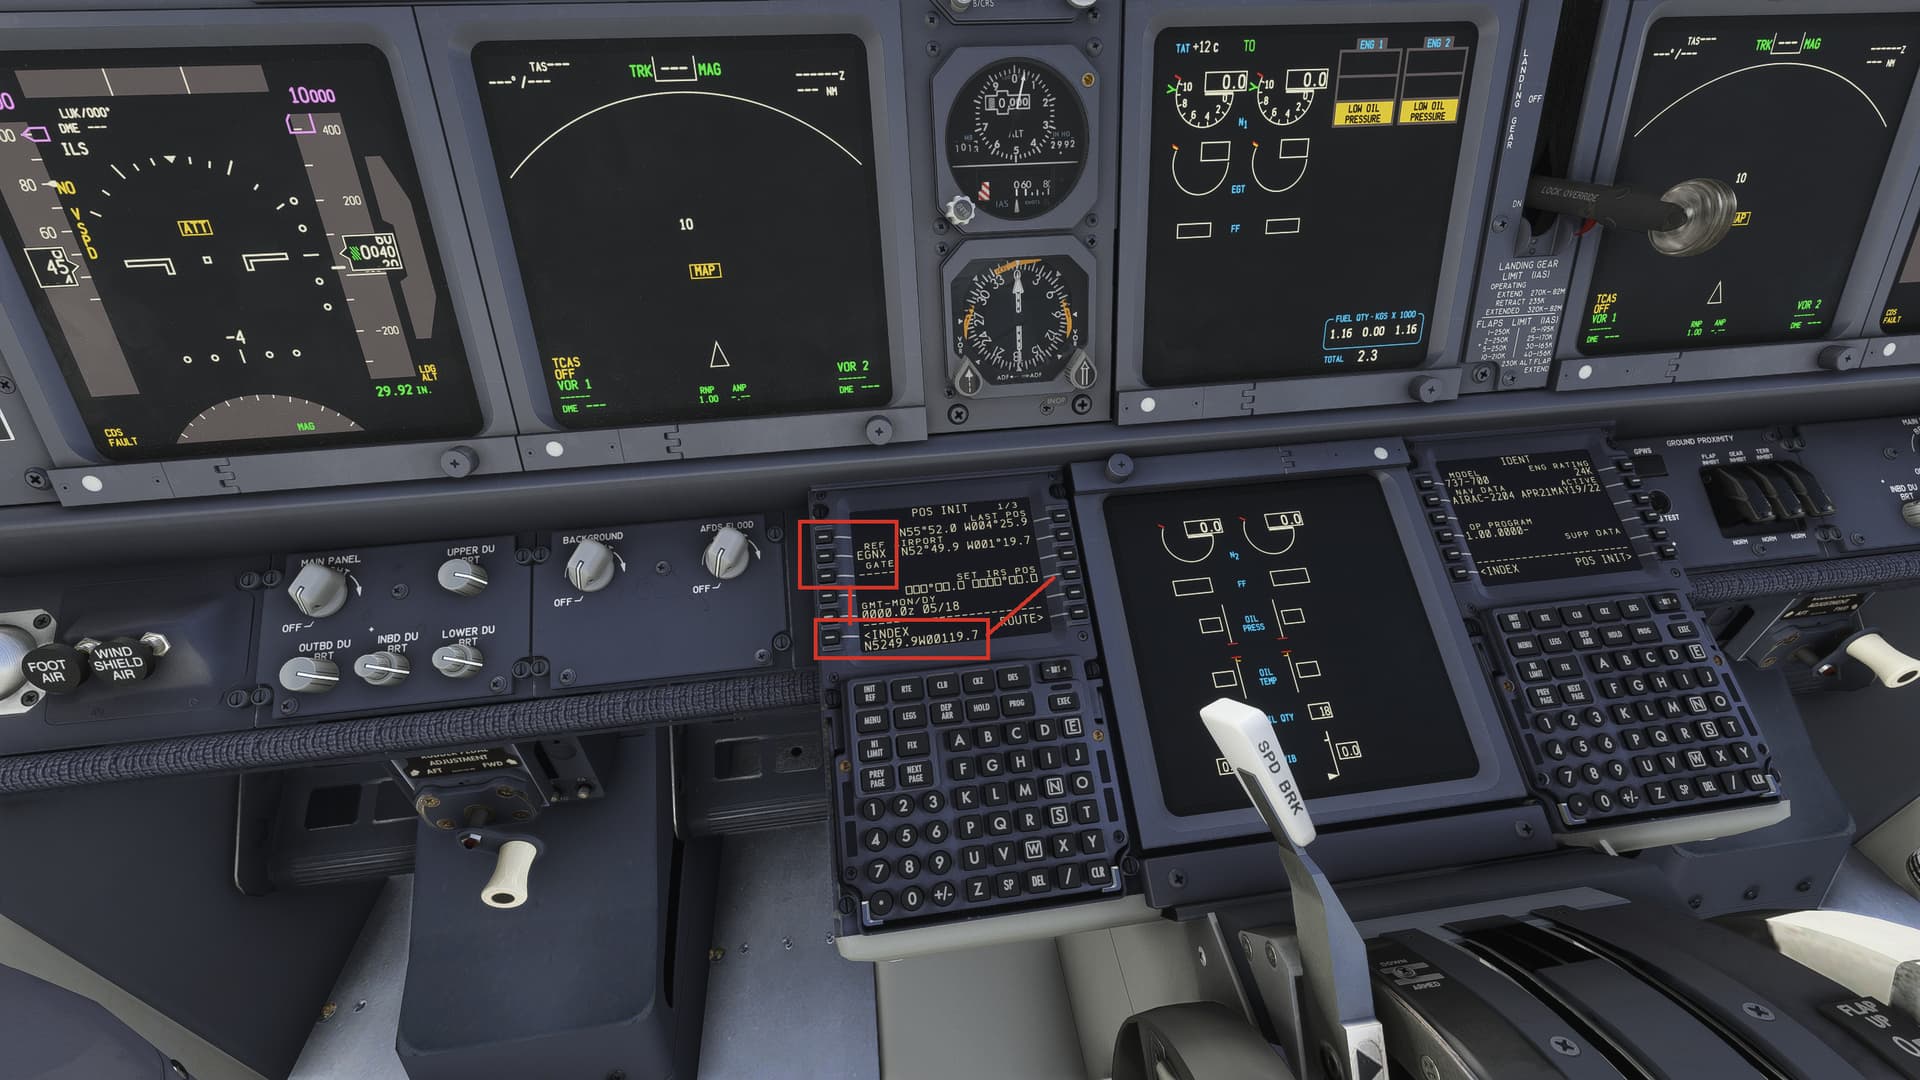
Now pull up page 2 from your flight plan and find yourself the ‘flight summary’ again. This is all the data that you need to put in. It’s only this. It’s not so hard. With regards to the ISA value: when it says M01 like here it means -1, so adjusting it to -35 like in the example. Would it say P03, it means to do plus 3 degrees and adjust the preset value accordingly.
Do not be bothered by the FMS cruise level suggestion. It’s a raw estimate of the flight optimum but you have an approved flight plan on your lap, made by a flight dispatcher that calculated the winds up there. You are going to tell it what you want it to be and that’s just that. You’re the pilot in command, so command it.
You’re almost done! Press the key again for N1 setup. Don’t be bothered with flex temperatures yet, you can learn all that later. On a medium to long runway (say longer than 6500 feet) and with average weight it’s perfectly fine to select the derated thrust. Also, humor yourself with selecting Climb 2 or Climb 1. You will experience that after takeoff at about 1500 feet, the aircraft changes engine thrust mode to this pre-selected value and is a little easier to control without that tremendous amount of power blasting from your engines. This is easier to control, experiment a little with it pending the departure terrain allows for it.

Now, before selecting TAKEOFF, press the DEP/ARR page first. Because the takeoff settings are calculated for the specific runway you are going to takeoff on, so we need to feed that data first.
Look at your flight plan summary again and find your first part of the route, it’s your departure routing from the airport. Select that in the FMS. Select the appropriate runway for takeoff and done you are.

Now press INIT again, skip the pages you have filled with data until reaching TAKEOFF. Now press the CG line-key and it will automatically give you the CG setting based on all the data we have put in. We’re cheating here, but PMDG products will always give you the proper value for a box if you just click it while its empty and this particular setting is a bit complex so we don’t mind the cheat. Press the key again to fill the value.

Now the FMS gives you the proper takeoff trim setting. Spin the big wheel to set that setting on your trim. Tip: it spins a lot faster on your yoke trim switches than turning it manually.
Finally, confirm the V-speeds for takeoff and you are FMS PRE FLIGHT COMPLETE.

Happy flying!
One last thing for ILS-approaches as I see some struggling a lot with that. This is not an Airbus that tunes everything automatically. Upon arrival, select your arrival route and runway as you normally would. Again, calculations are runway-specific so we need to feed that first. Now press the INIT page and you will indeed find there the runway length to decide on your autobrake power, it will also give you the ILS frequency and the inbound course. Lovely!
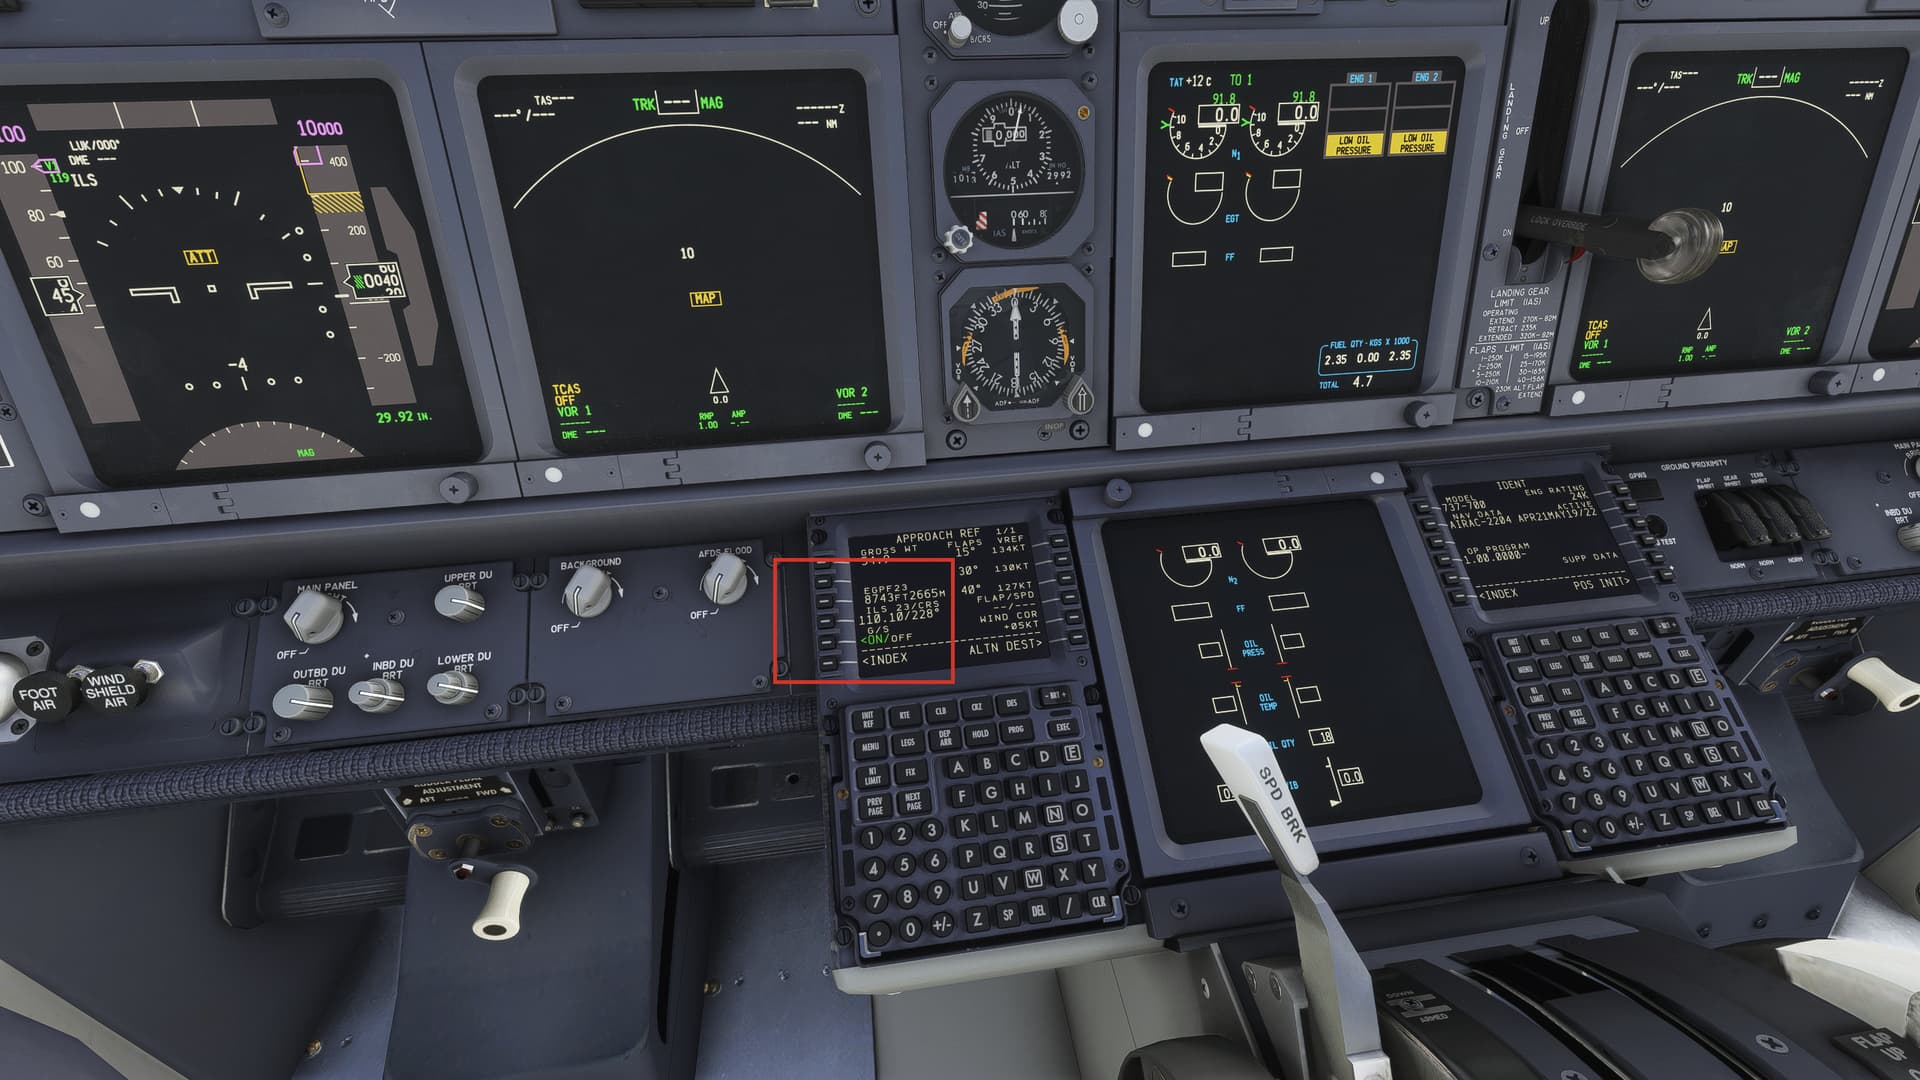
THIS DOESN’T AUTOTUNE HOWEVER, that misassumption comes by a lot on the fora. Take this data, and set it to you navigation radio and into the course selectors manually on both sides if you’re planning to do an autoland which I know 98% of new users will do to end a flight nicely.
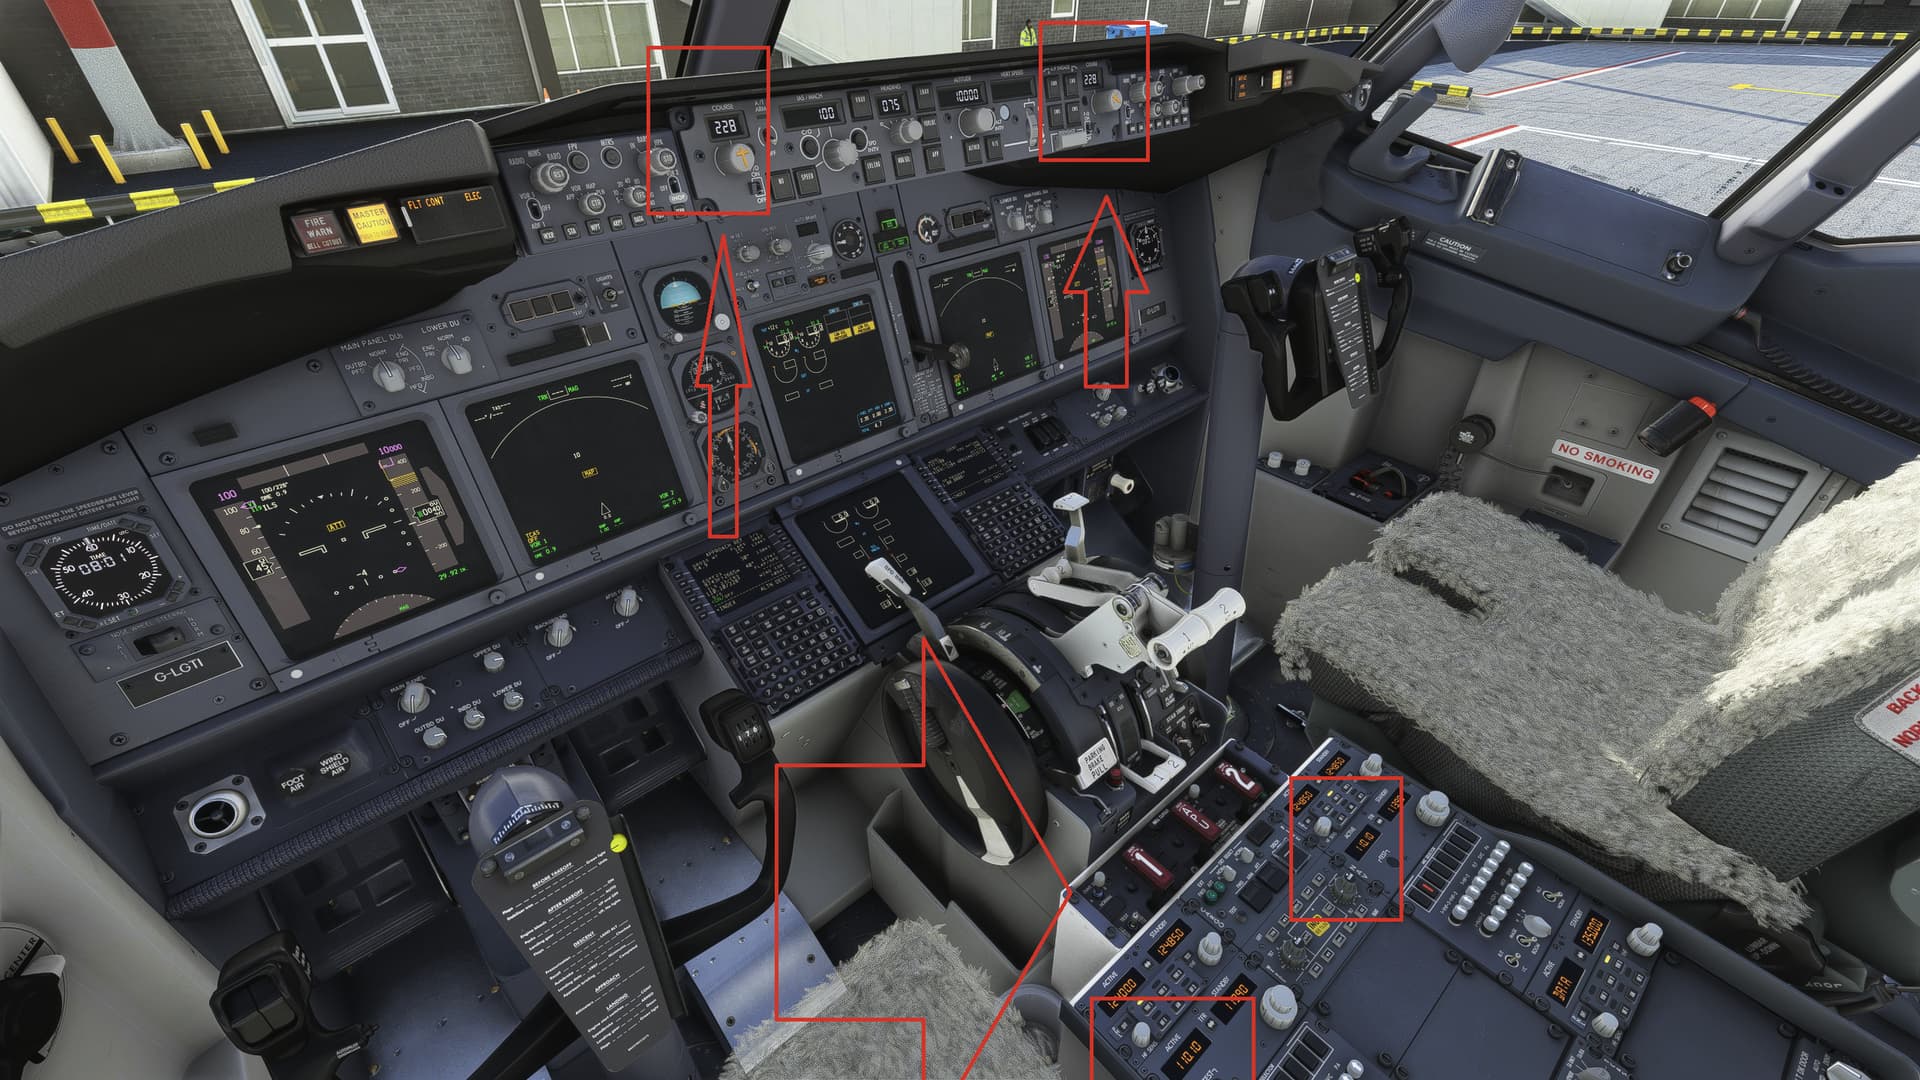
With regards to the autoland: once you have pressed the APPRoach mode button, press Autopilot B too and you will see both autopilot lights being on. This is only possible during this phase of flight so don’t bother experimenting with it before. A 737 autoland requires both autopilots to cross-reference their data in conjunction with each other. That’s why they both need the same frequencies and inbound courses too.
So after happy flying now comes happy landings too. Good luck!