Hi all, after many days of trial and errors, reading/watching any guide/tutorial over the internet I finally reached a very good quality with NVIDIA RTX 3060 Ti GPU.
I don’t know if someone here is interested because I didn’t find any recent updated guide/thread with this GPU and this VR headset.
If someone is interested write here and I’ll prepare a detailed post!
EDIT, 7th November 2023
This guide describes how to configure the simulator in order to enjoy an excellent experience in VR mode with an NVIDIA RTX 3060 Ti video card coupled with the Quest 2 headset ![]()
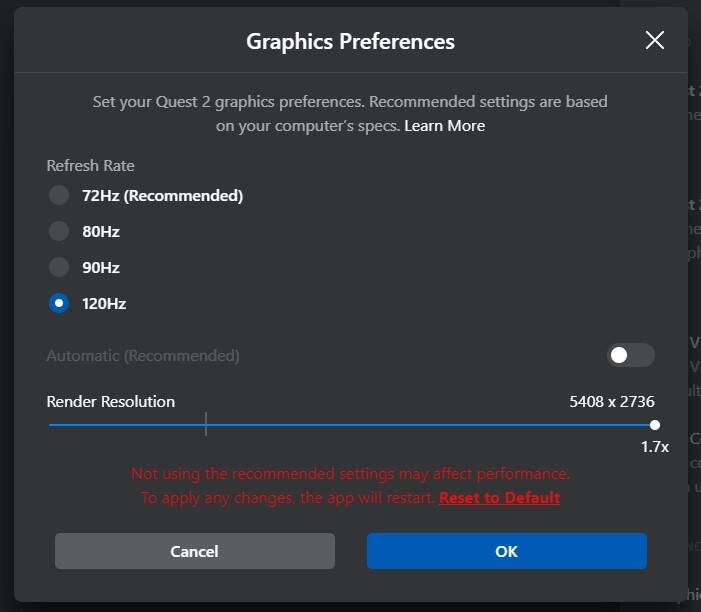
With more powerful video cards, use this guide as a starting point by varying, for example, the “Pixels Per Display Override” parameter (increasing it) in the Oculus Debug Tool and “RENDER SCALING” (increasing it) in the VR graphics options of Flight Simulator, in addition to the other graphic parameters of the simulator.
### MINIMUM REQUIREMENTS ###
- Quest Link cable (high speed): KIWI design Type C Link Cavo 10 Feet (3 Meters) Compatibile con Quest 2, Cavo USB C VR e PC : Amazon.it: Informatica
- CPU: Intel i5 12th 12400 (equal or higher)
- GPU: NVIDIA RTX 3060 Ti (equal or higher)
- NVIDIA driver version: 537.42 (Game Ready driver)
- RAM: 32 GB 3200 (equal or higher)
- OS: Windows 11
- MSI Afterburner: https://it.msi.com/Landing/afterburner/graphics-cards
- SideQuest (Advanced Installer): Get SideQuest Install SideQuest app on Meta Quest headsets, PC, and laptop
- Oculus: https://www.oculus.com/download_app/?id=1582076955407037
- OpenXR Toolkit: Releases · mbucchia/OpenXR-Toolkit · GitHub
NOTE: The “HOW TO START THE SIMULATOR” section explains the necessary sequence to follow each time to correctly start Flight Simulator in VR mode.
### USB SETTINGS ###
- Control Panel - Power Options
- Select the “High Performance” profile and press on “Change plan settings” to its right
- Tap on “Change advanced power settings”
- Expand USB settings and set “USB selective suspend setting” to Disabled
- Control Panel - Device Manager
- Expand Universal Serial Bus controllers
• Right click on “Intel(R) USB 3.20 eXtensible Hos Controller - 1.20 (Microsoft)” - Properties
• Go to the “Power Management” tab
• Deselect “Allow the computer to turn off this device to save power”
### GAME MODE ###
Start - Settings - Gaming - Game Mode - On
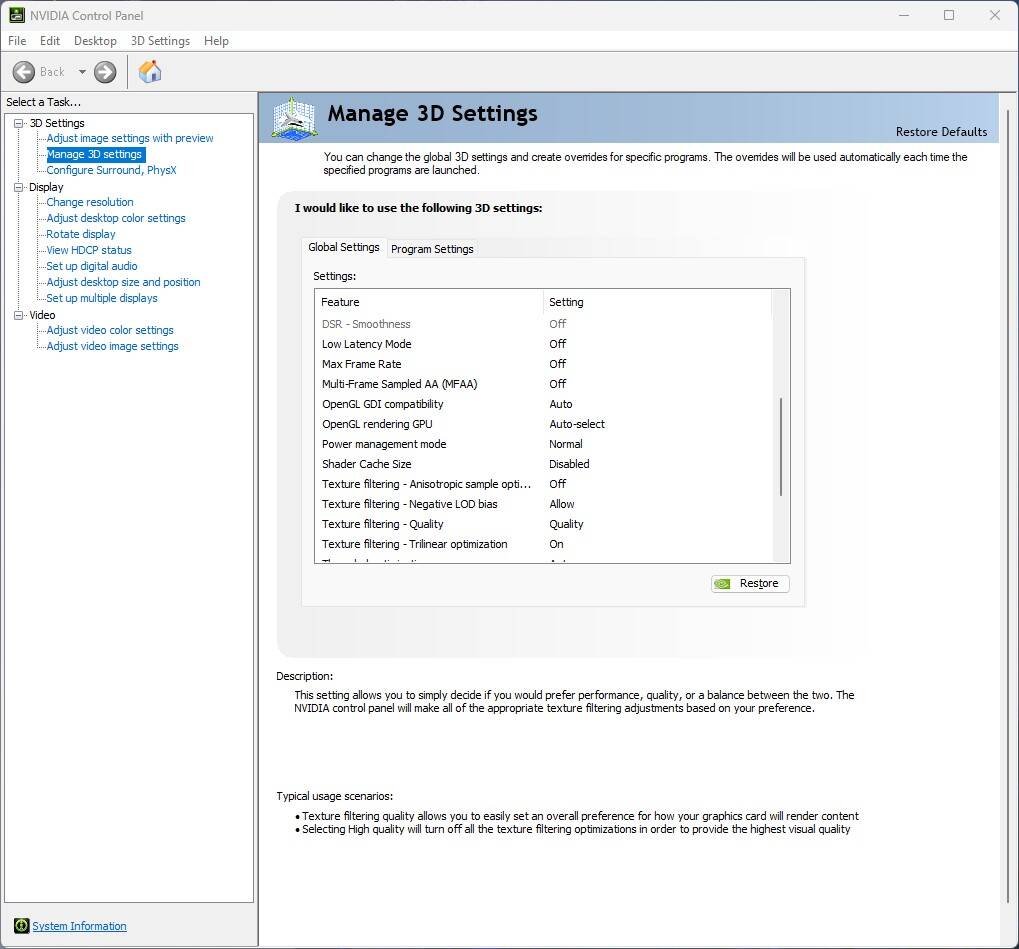
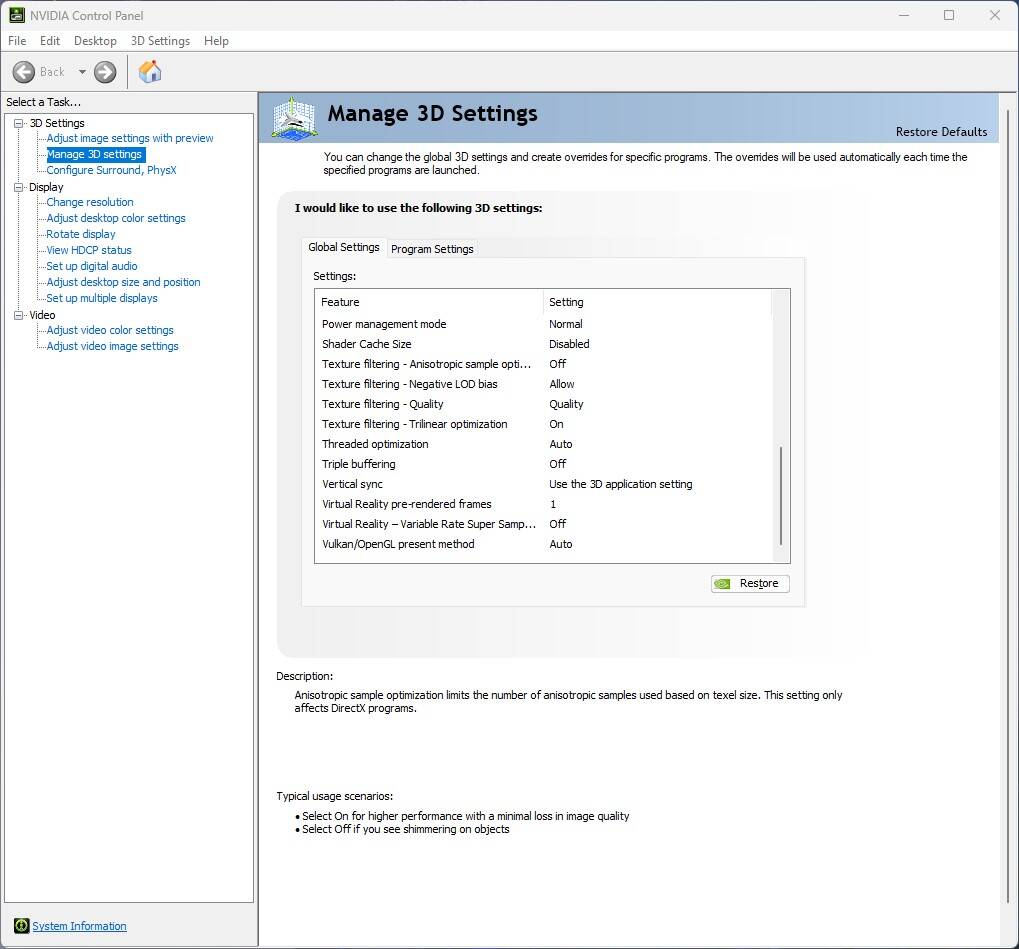
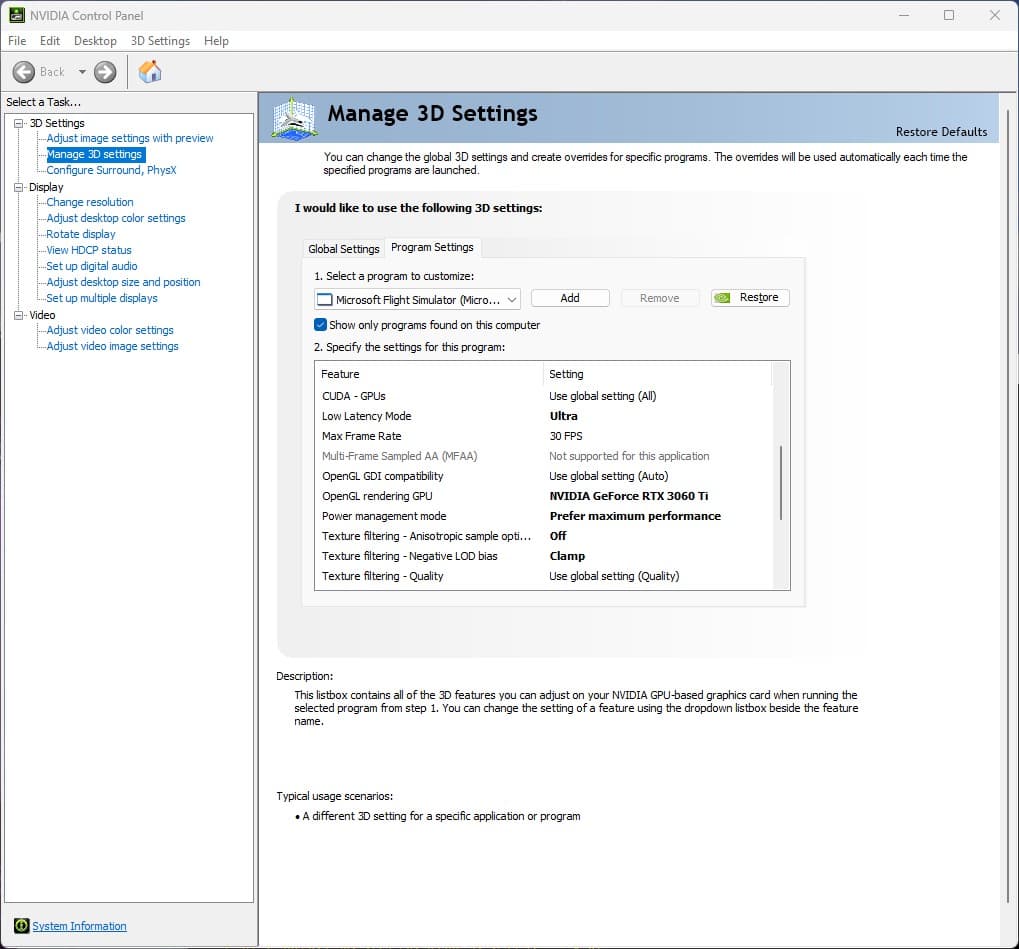
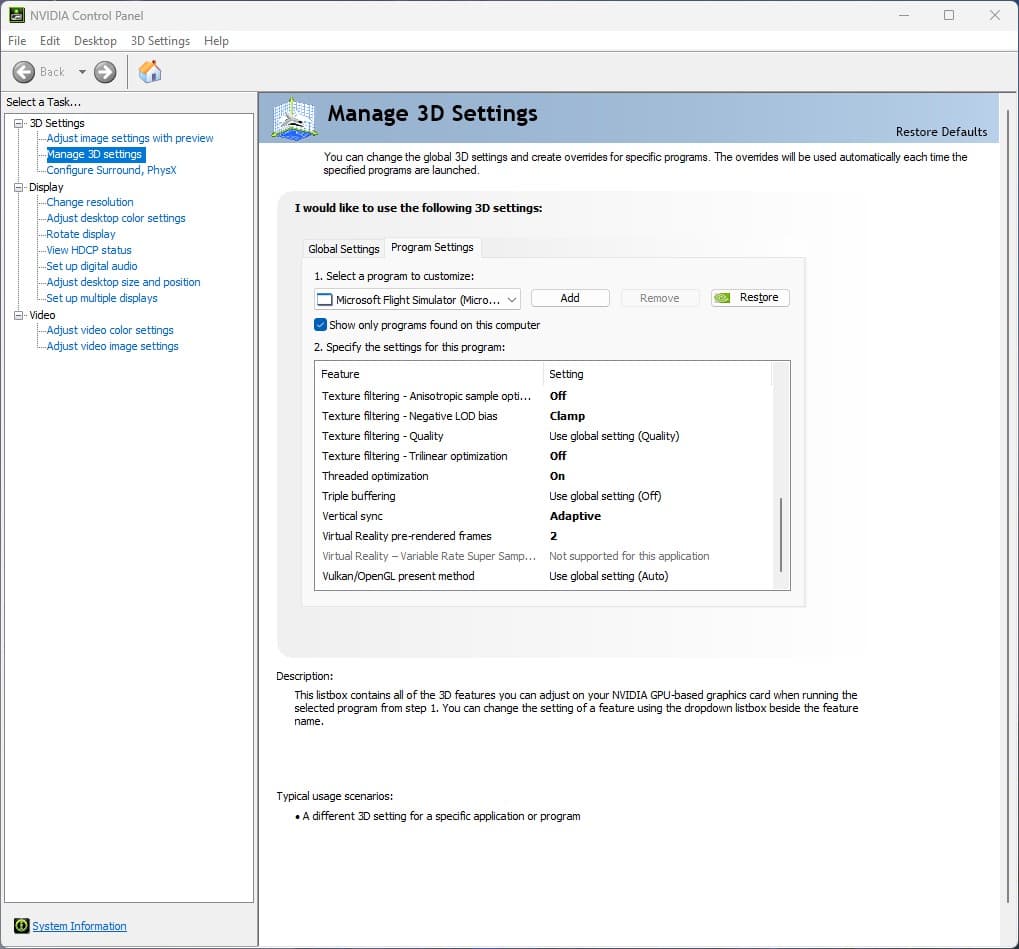
### NVIDIA CONTROL PANEL ###
Follow the screenshots:


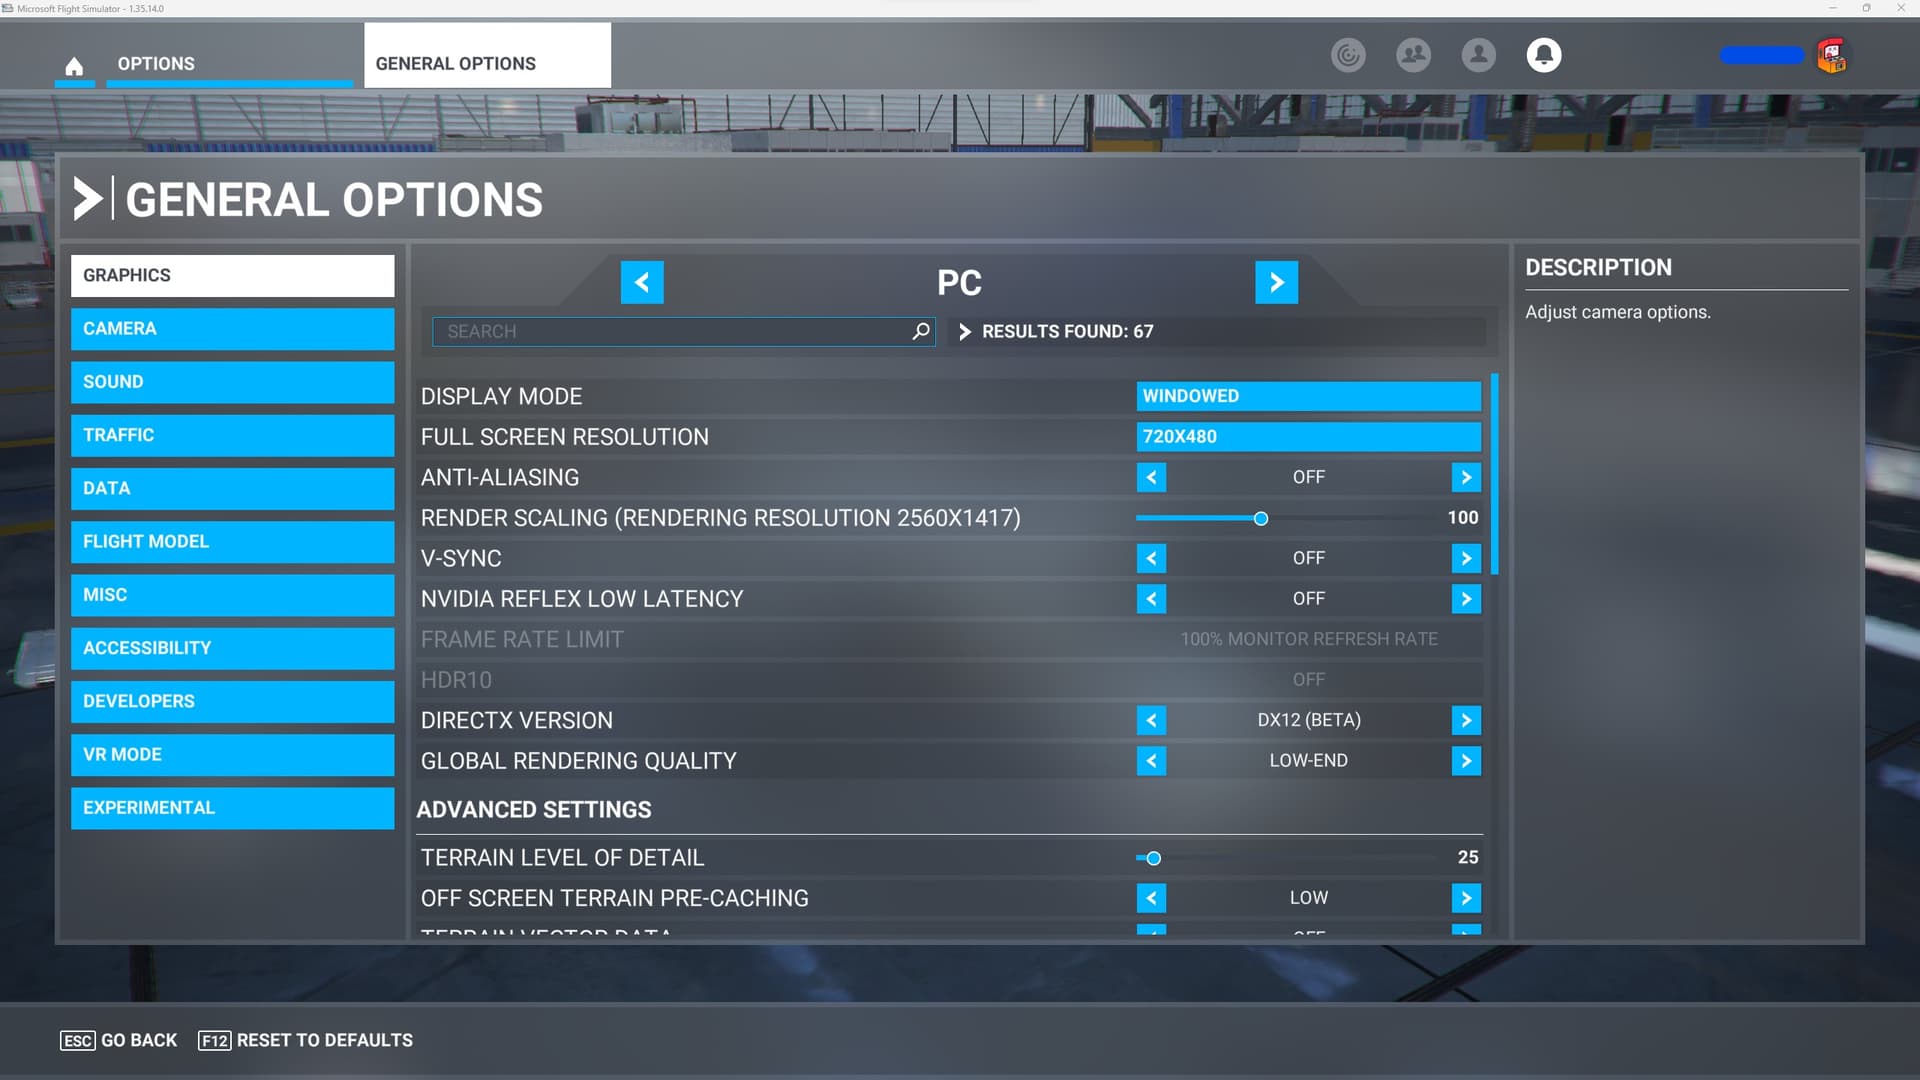
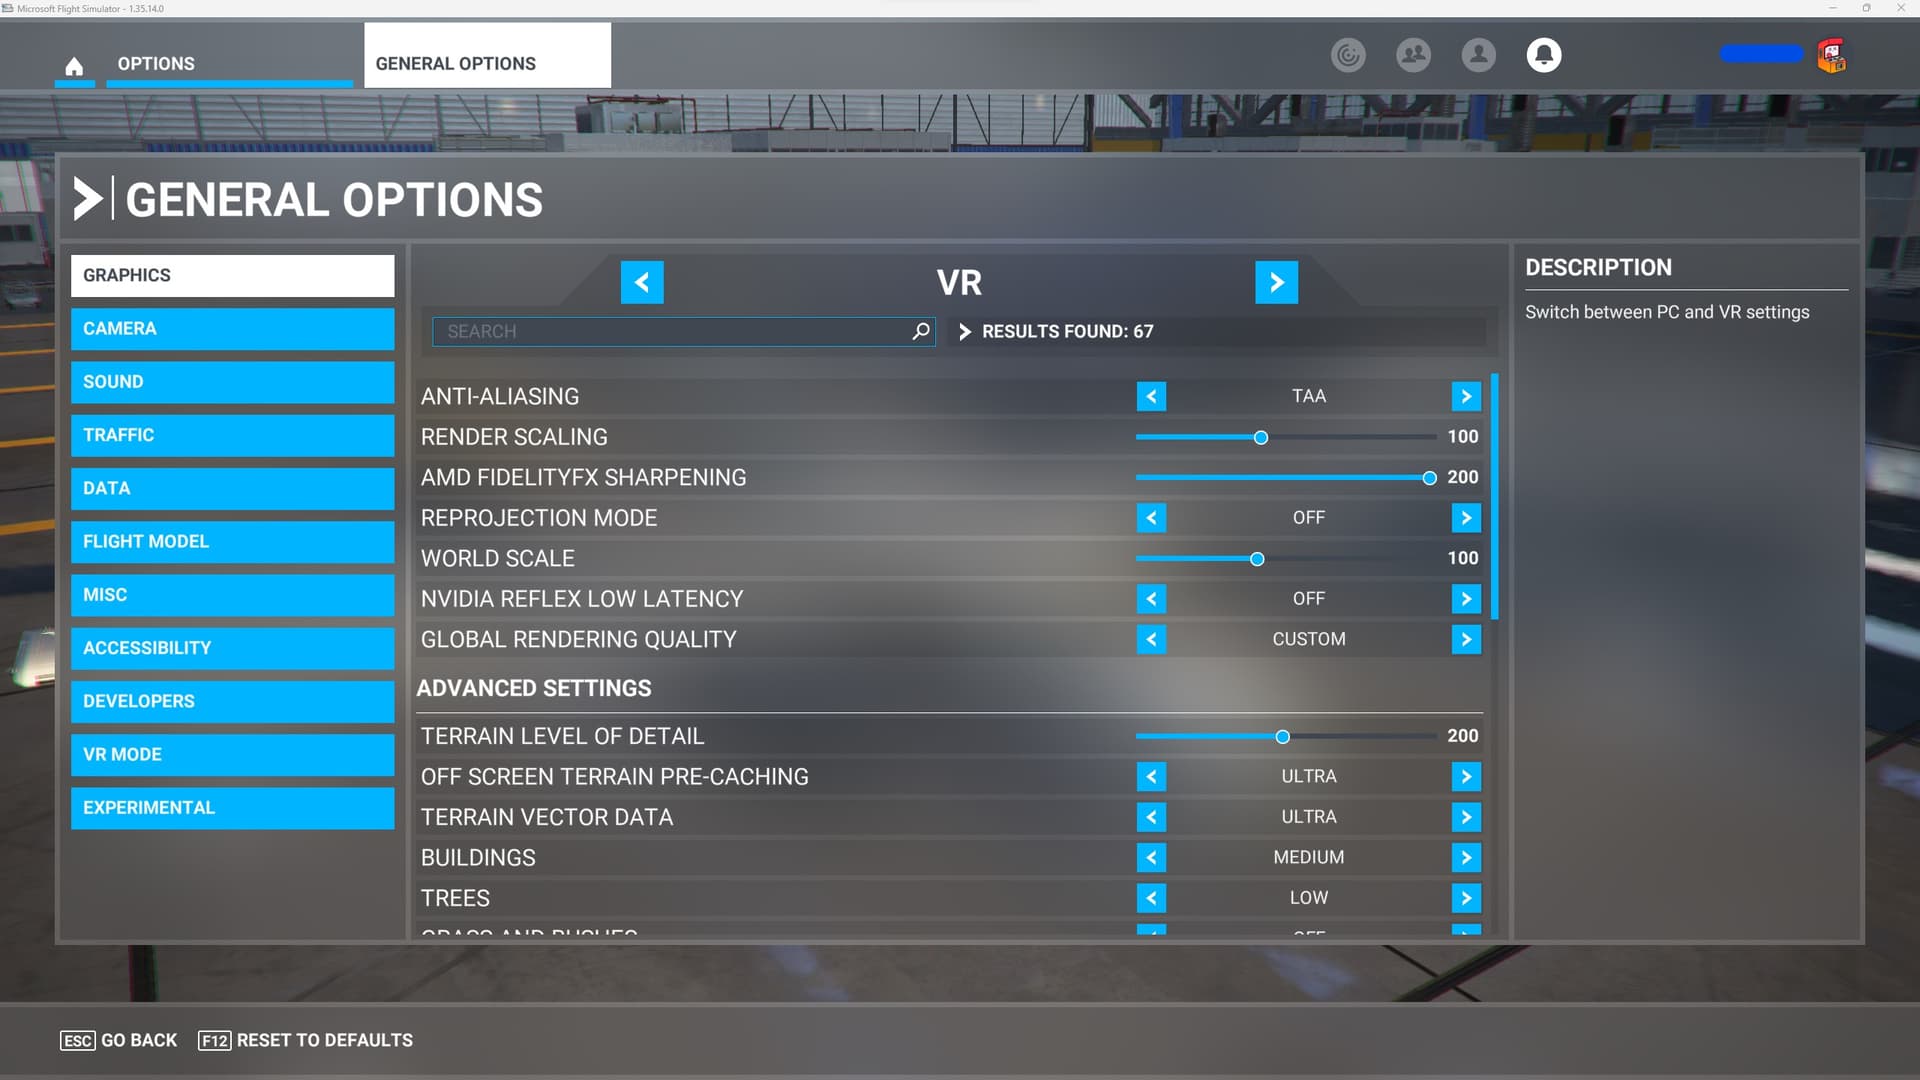
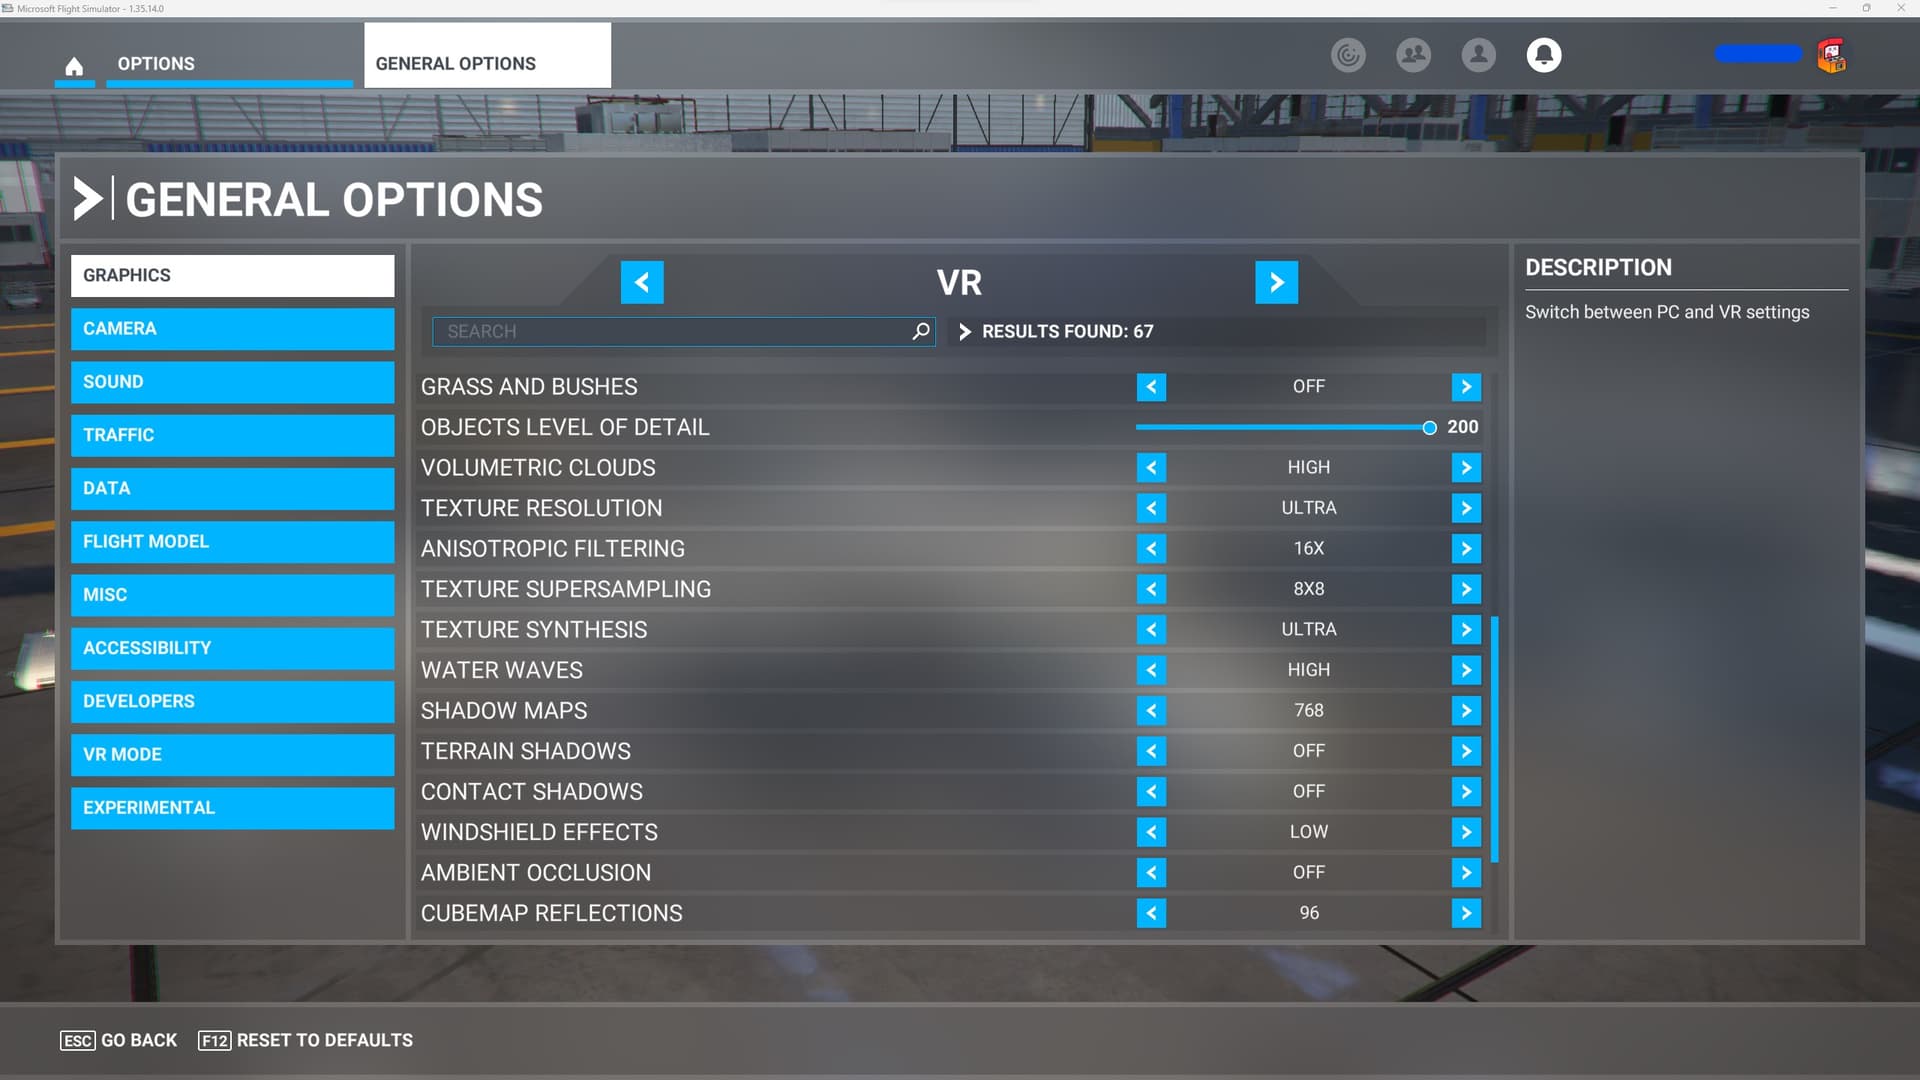
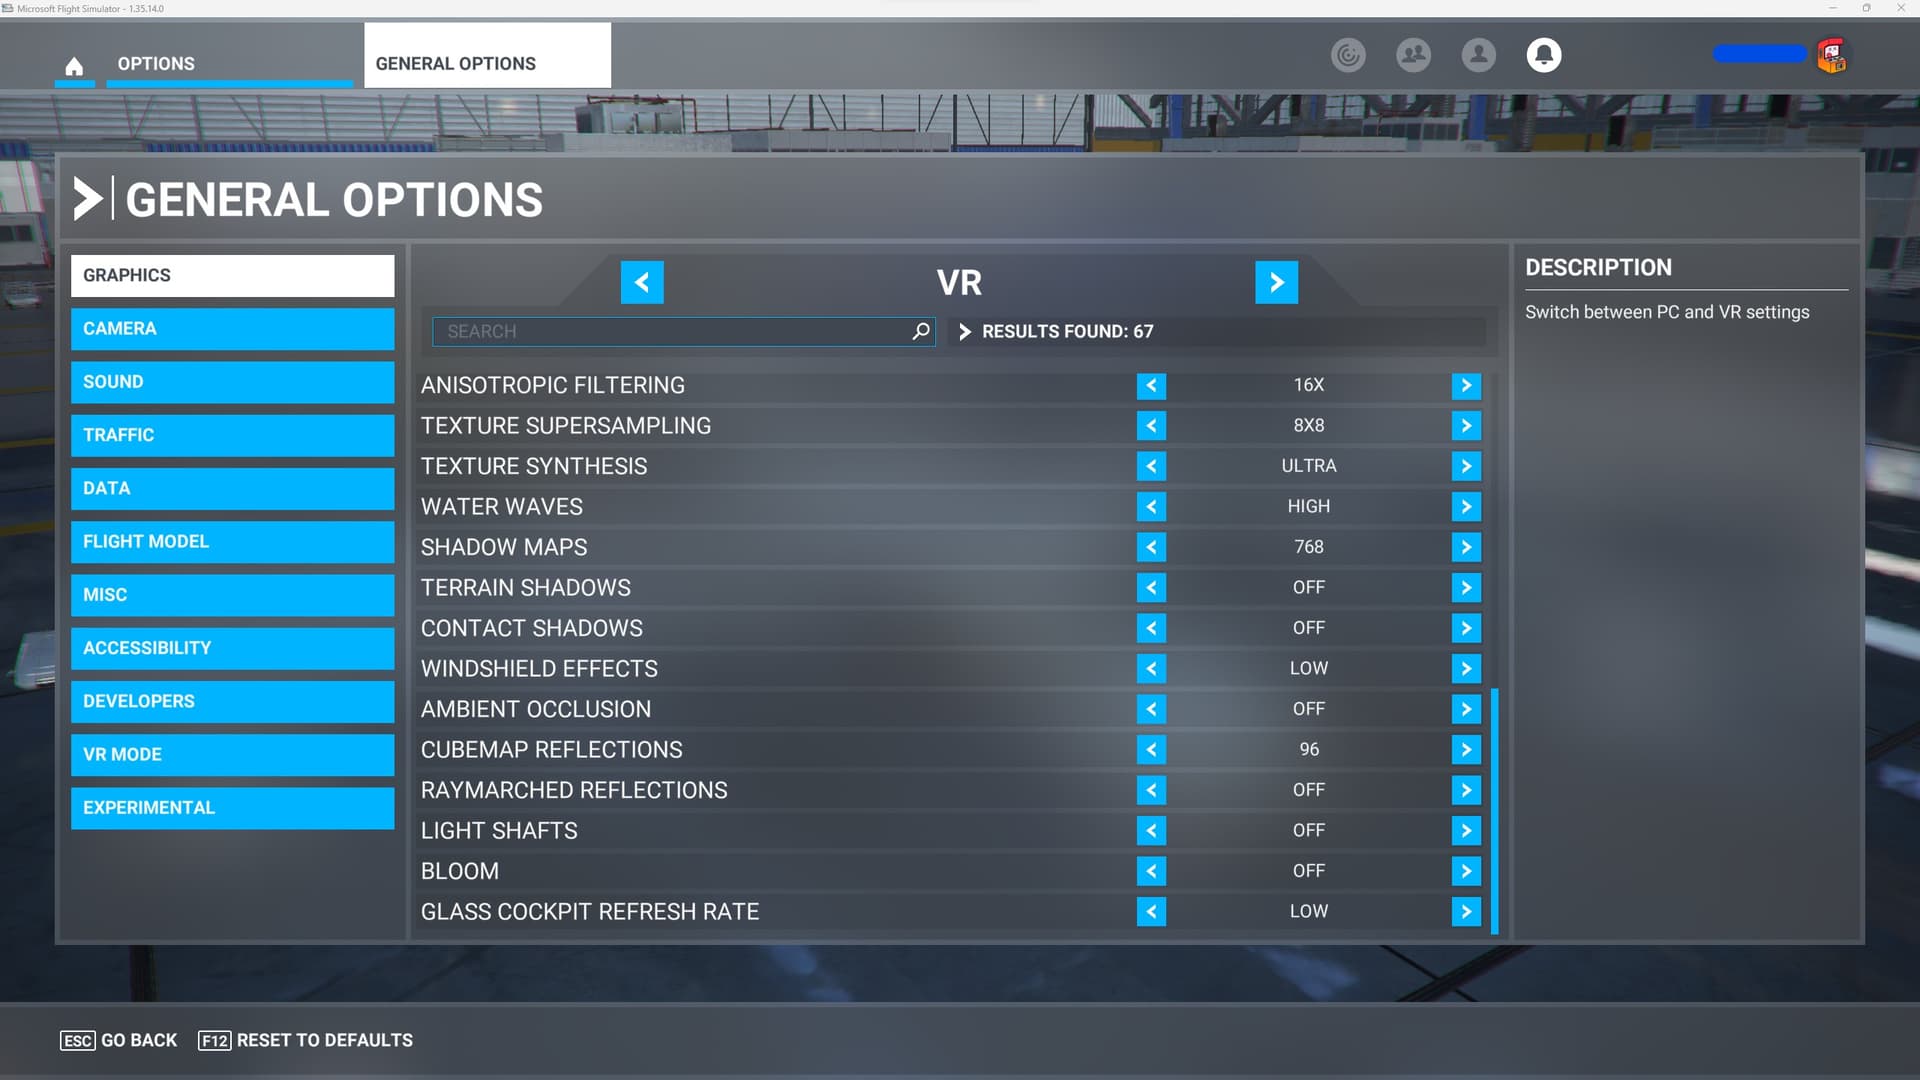
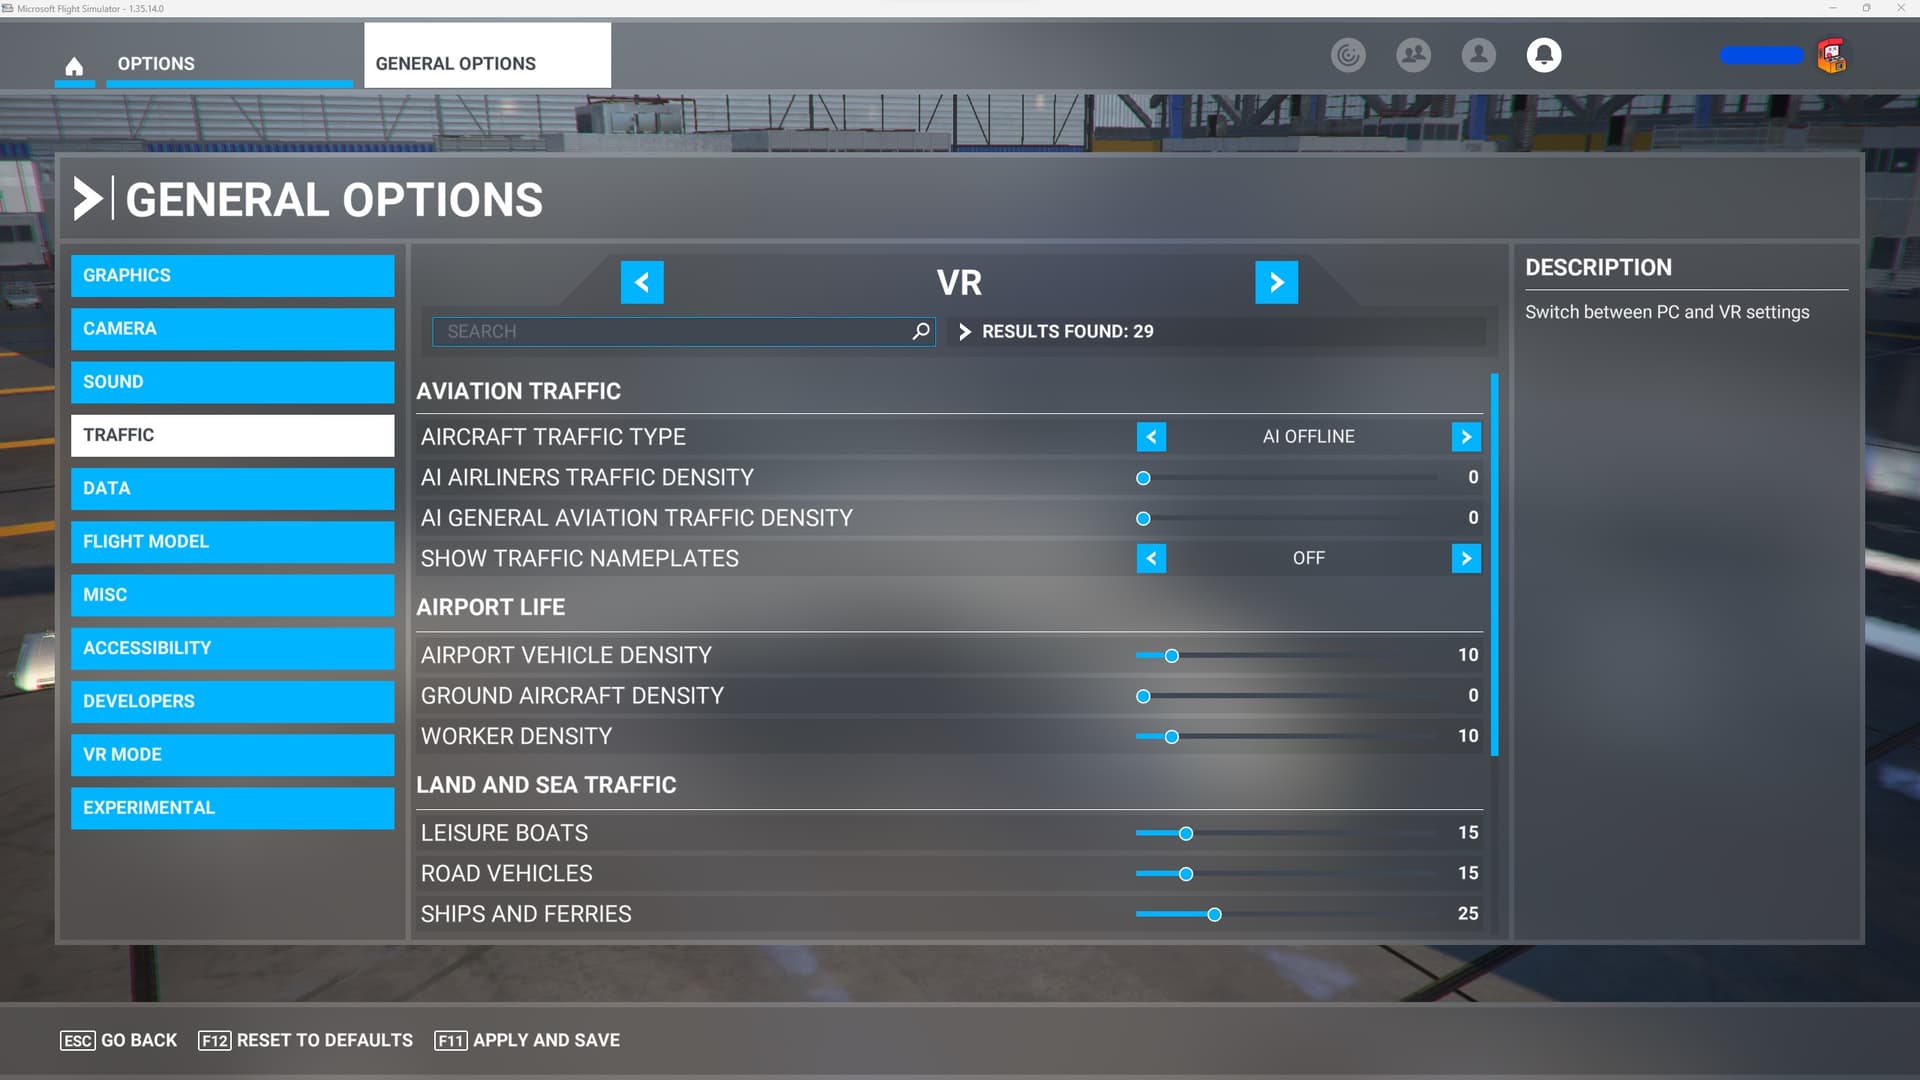
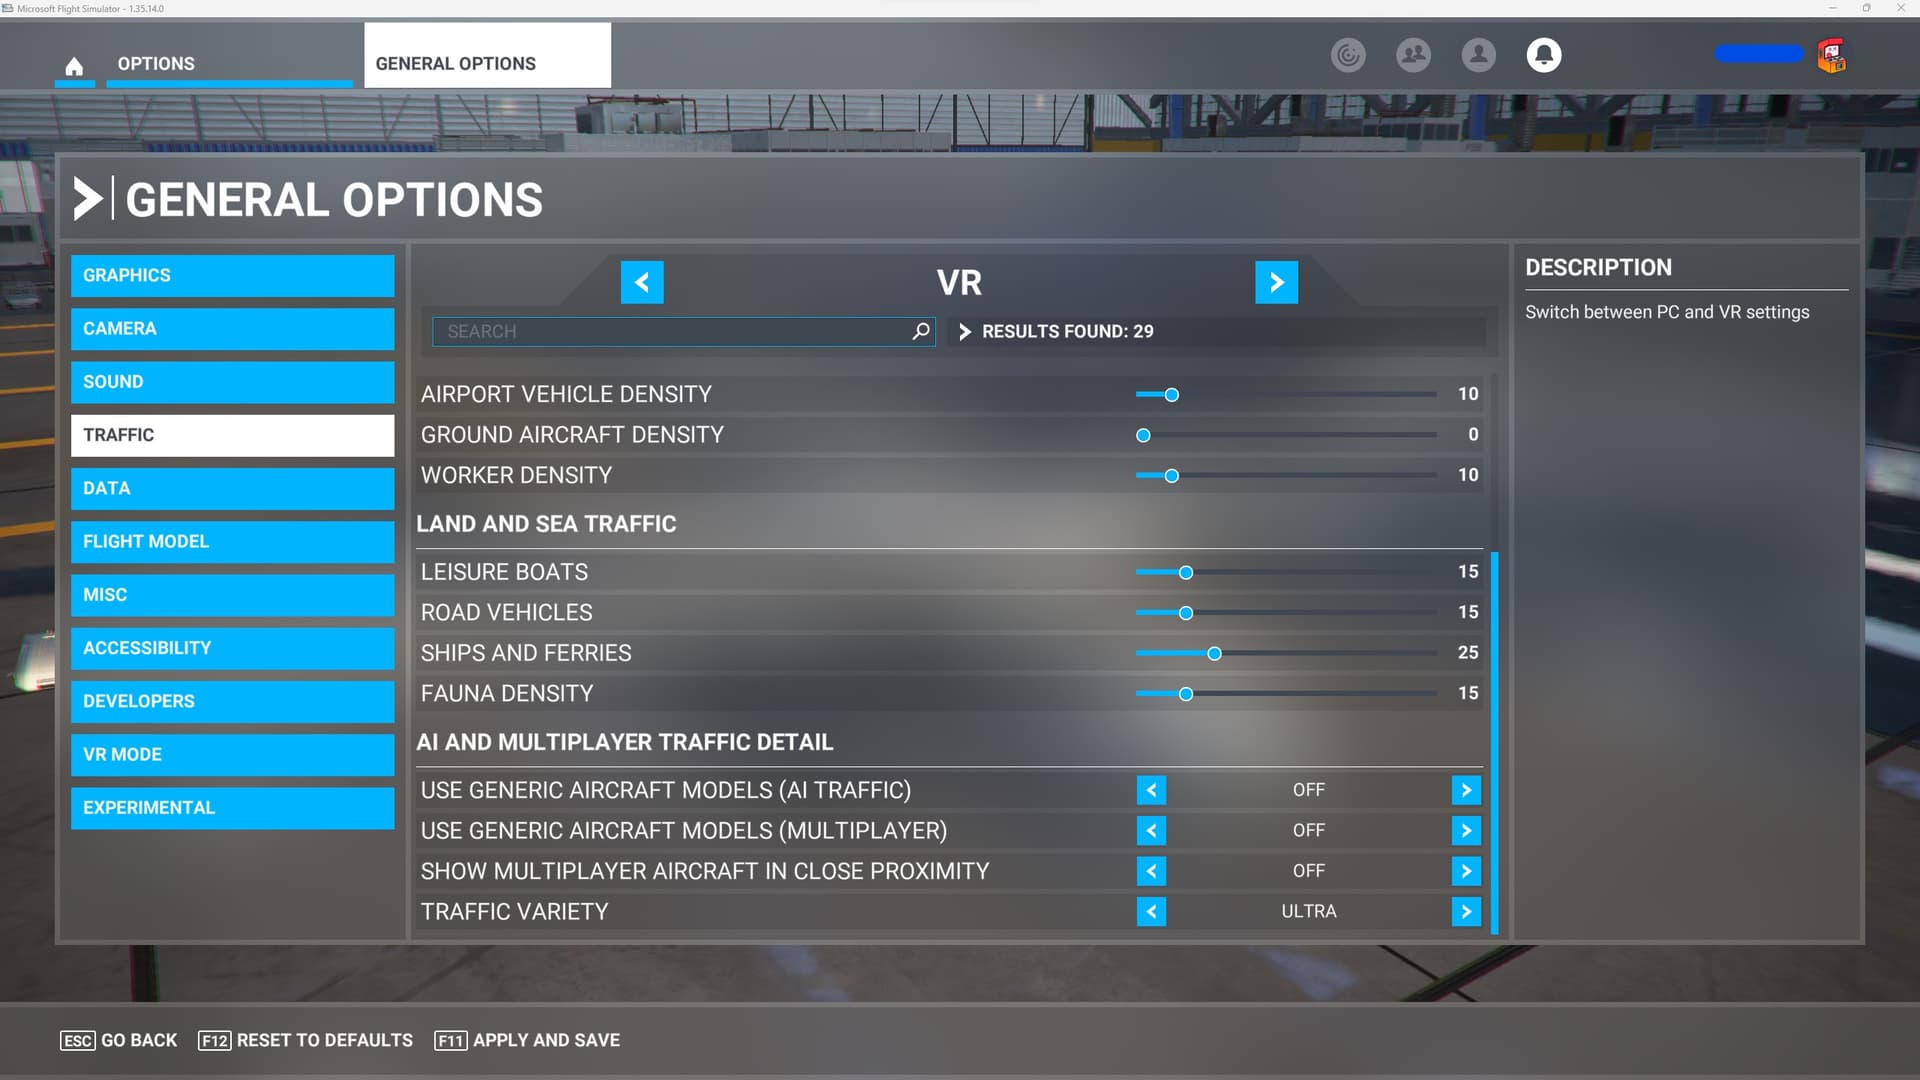
### FLIGHT SIMULATOR ###
Follow the screenshots then close the simulator:

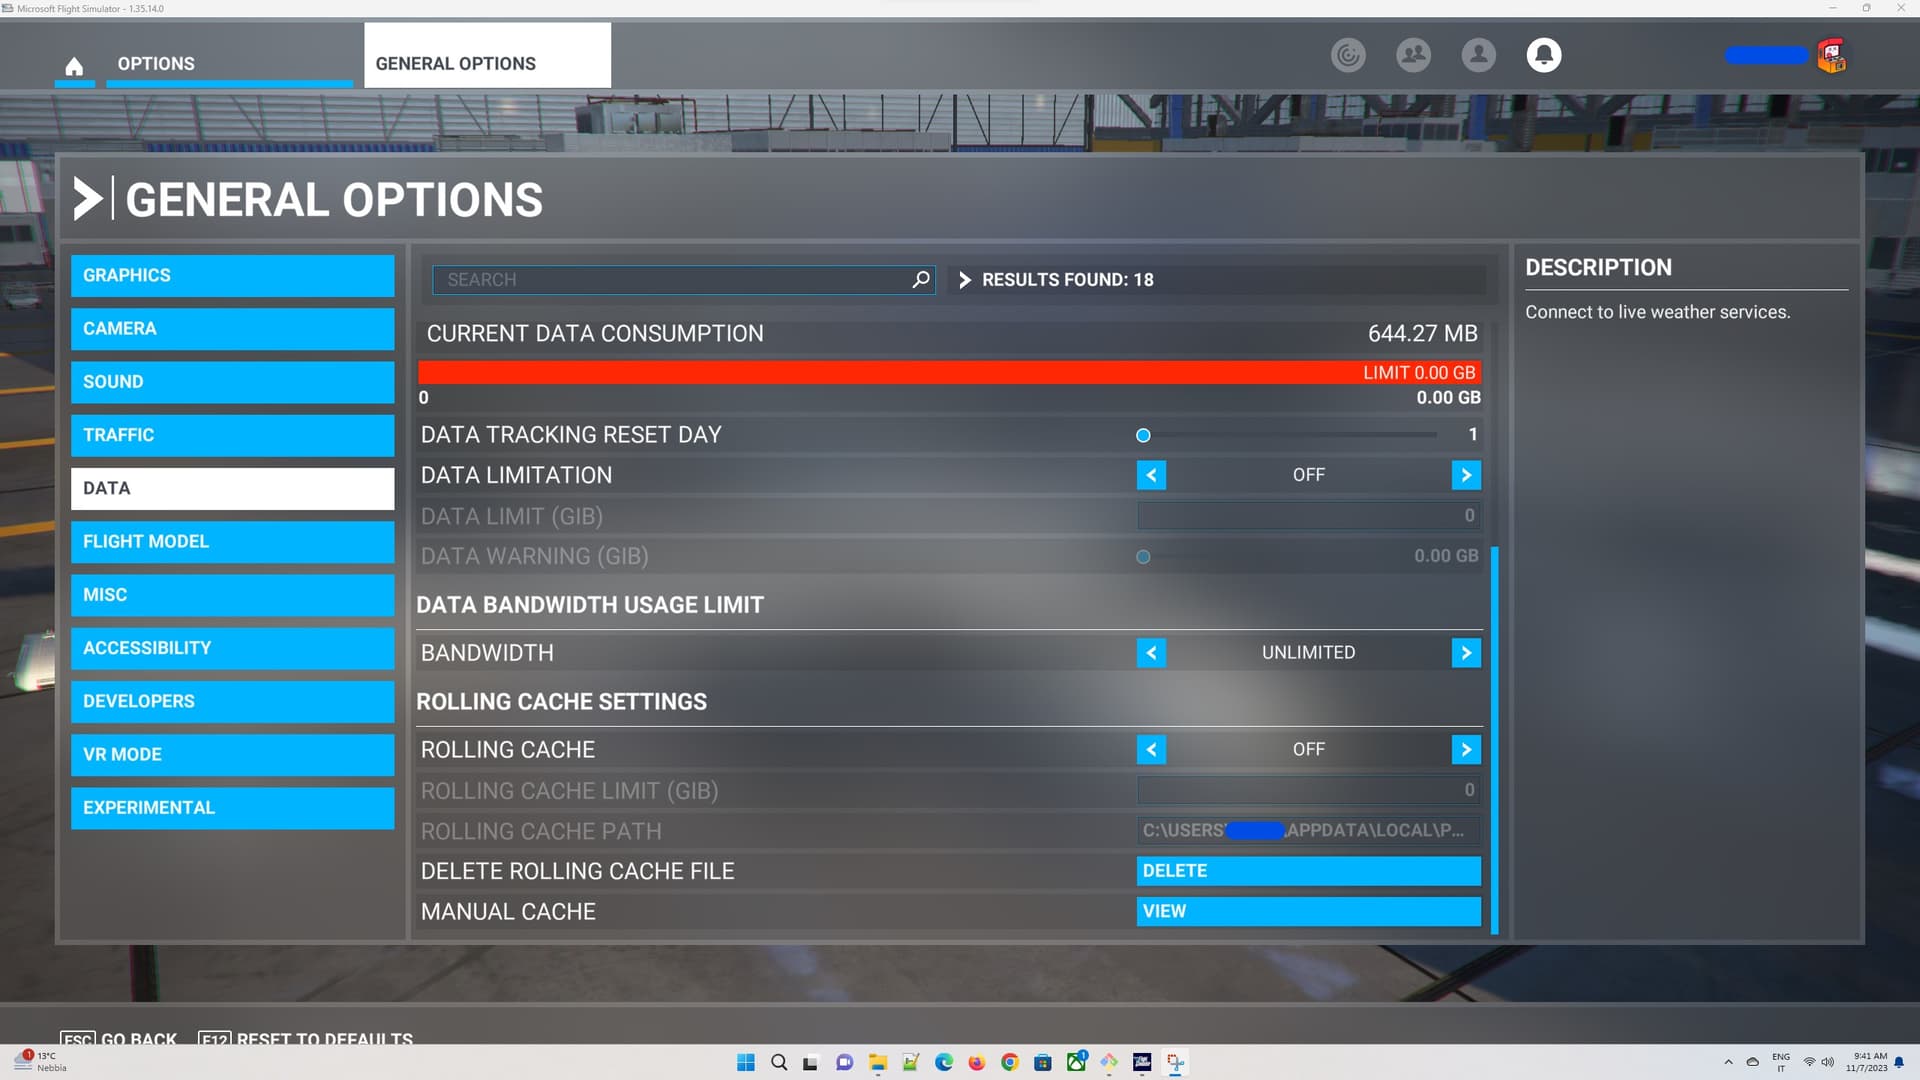
Now configure the UserCfg. opt file, in the GamePass version of the simulator the file is located here:
C:\Users\username\AppData\Local\Packages\Microsoft.FlightSimulator_8wekyb3d8bbwe\LocalCache\UserCfg.opt
where username must obviously be replaced with your Windows user. For other versions search on Google ![]()
Open the file and in the PostProcess section of GraphicsVR (not in the Graphics sectoin!!!) change the options as follows:
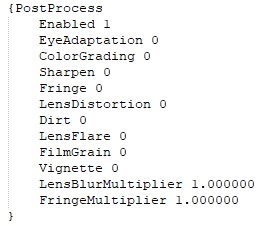
Note: after launching (or updating) Flight Simulator, ensure that these options were not changed.
### OCULUS applications ###
Oculus Debug Tool is installed together with Oculus and you can find it here:
C:\Program Files\Oculus\Support\oculus-diagnostics\OculusDebugTool.exe
Follow the screenshots:
### WINDOWS REGISTRY ###
On Windows registry modify/create this DWORD setting its value to 1:
Computer\HKEY_CURRENT_USER\Software\Oculus\RemoteHeadset\numSlices
### OCULUSMIRROR.BAT ###
Create a file named OculusMirror.bat with the following content:
start “” “C:\Program Files\Oculus\Support\oculus-diagnostics\OculusMirror.exe” --IncludeGuardian --IncludeNotifications --IncludeSystemGui --RightEyeOnly --Size 1280 720 --FovTanAngleMultiplier 0.75 0.75
### GEFORCE EXPERIENCE ###
In the application settings, deactivate the IN-GAME OVERLAY feature.
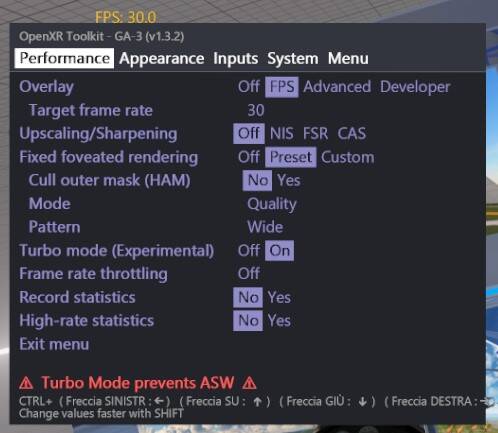
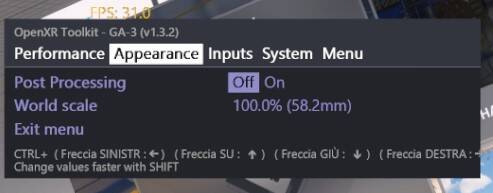
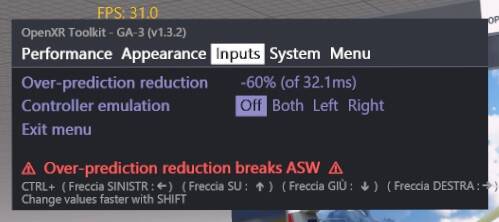
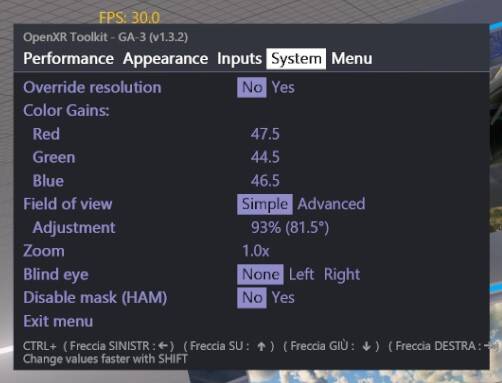
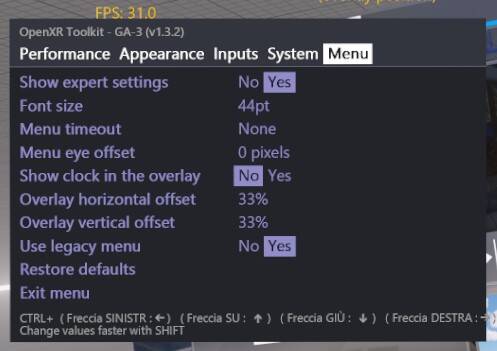
### OPENXR TOOLKIT ###
These options must be modified when simulator is in VR mode. VR mode must be restarted after that some options are changed so it is better to close and re-open the simulator and restart the headset. You can use OculusMirror.bat without put the Quest 2 on your head.
Follow the screenshots:
### FIRST TIME START ###
- To avoid problem, always disable Windows real-time virus protection
- Run Flight Simulator and set its process priority to High
- Run MSI Afterburner
- Turn on the Quest 2 then start Quest Link functionality on headset
Optional : If you don’t want to wear it move the strap near the sensor between the two eyepieces and use the joysticks in front of Quest 2 cameras, then
- Start SideQuest
- Start streaming with ScrCpy function:
- Click QUEST 2 CROP
- Click START STREAM
- “SideQuest Stream” window will be open
- Start Quest Link functionality on headset
- Close “SideQuest Stream” window
- Run Oculus Mirror.bat previously created
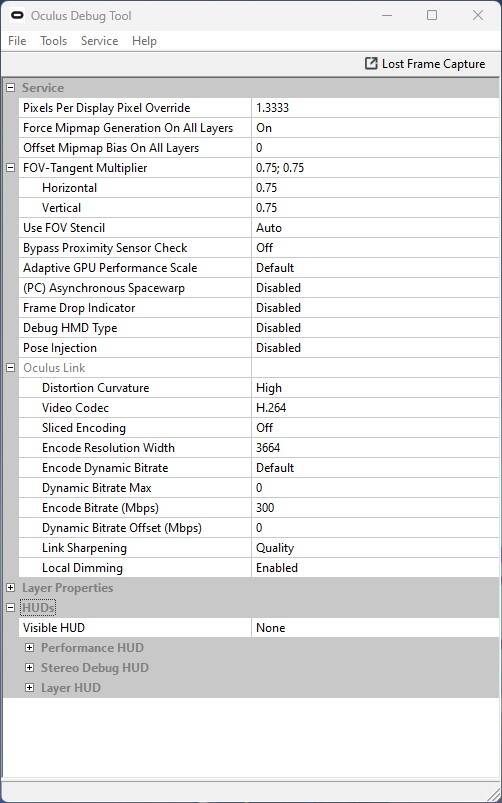
- Run Oculus Debug Tool and set the following values (also if already present):
- Pixels Per Display Pixel Override : 1.3333
- FOV-Tangent Multiplier : Horizontal 0.75, Vertical 0.75
- (PC) Asynchronous Spacewarp : Disabled
- In Flight Simulator :
- Press Ctrl+Tab to switch to VR mode
- You should see 120 FPS on the Oculus Mirror window, if not check Oculus app again
- Close Oculus Mirror
- Wait that Flight Simulator is stable at 30 FPS
- Close SideQuest
- Close MSI Afterburner
### HOW TO START THE SIMULATOR ###
- To avoid problem, always disable Windows real-time virus protection
- Run Flight Simulator and set its process priority to High
- Turn on the Quest 2 then start Quest Link functionality on headset
- Run Oculus Debug Tool and set the following values (also if already present):
- Pixels Per Display Pixel Override : 1.3333
- FOV-Tangent Multiplier : Horizontal 0.75, Vertical 0.75
- (PC) Asynchronous Spacewarp : Disabled
- Put the device on your head then, in Flight Simulator, press Ctrl+Tab to switch to VR mode
- Fly!
### TROUBLESHOOTING ###
If performance will drop try these:
- Check that NVIDIA cache is disabled (should be with this guide!), if not clean and disable it
- Clean DirectX cache
- Perform End process tree of OVRServiceLauncher.exe from Task Manager, restart Oculus application and re-set Oculus Debug Tool options
If you have to swtich from VR to 2D mode press ESC in order to pause the simulator, press once the power button on Quest 2 in order to power-off the lenses, remove the device from your head and click Ctrl+Tab.
To re-enter VR mode put the device on your head, power-on the lenses then click Ctrl+Tab.
YOU HAVE TO FOLLOW THESE STEP IN THIS ORDER OR THE PERFORMANCE WILL DROP!