Hi,
Is there any way to record x360 video or even 180 videos in msfs?
If so, how?
Thanks so much.
Hi,
Is there any way to record x360 video or even 180 videos in msfs?
If so, how?
Thanks so much.
The principle is as if you were recording a 360 degree video in real life. You need a recording from several angles and a program for gluing 360 videos
. MSFS 2020 | Microsoft Flight Simulator 2020")
Any way you could tell me what programs i could use?
OBS, Adobe Premiere and the replay tool ![]()
Can you please advise how to save/export video from the Video Recorder (replay Tool) in MP4 or other formats so it can be edited?
Is there any manual for the Video Recorder (Flightsim.to)?
Thanks.
It’s not called “Video” recorder. It’s called “Flight” recorder. It records the flight, not the video.
You can replay the flight in-game. If you want a video of that, use a capture program like OBS, nVidia, game bar, etc.
Can i get any sort of guidence on exactly how to do this? Thanks
I doubt there’s an easy ready-to-use solution if you want a full 360-degree view; if you search for “360 video” you’ll find a couple other threads like this one which has some samples but no directions on how to do it, because it required a lot of custom tooling and manual work:
For a less ambitious recording of just what you’re seeing from the VR screen, I did some experiments a while ago and wrote up some notes but I found it was not super great because the pilot’s head movements and limited field of view are forced upon the viewer:
Thank you.
I sit away from the laptop, which is hooked to an 85-inch TV and I use a controller, the Nvidia shortcuts are for the keyboard only, and I don’t use the keyboard for MSFS. Any workaround for the controller shortcut?
You could connect a wireless keyboard?
Excellent idea! And I have one too.
But I was thinking to have a controller shortcut.
For now, I’ll dig out that long-forgotten keyboard.
Thank you for bringing it to my attention. Sometimes it is important to state the obvious.
Great work! I’m trying to do this, but I can’t get the adequate projection on Premiere Pro. When I join the images on Premiere using VR Projection filter, the seams are completely wrong, it seems that the wrong distortion was applied.
Which filter do you use? Or another software, may be?
Have you managed to do 360º inside Premiere? I messed a lot with it, but couldn’t align the videos properly.
I haven’t experimented with it yet ![]()
I’ve done it! It still isn’t as good as those videos by @dbuz1805, but I’ll keep trying until I get a satisfactory result. My first try is here:
 - MSFS")
This one was recorded 6 times and glued together using StitchEm. I used a far from optimal resolution and a high field of view. I’m now trying to automate the recording process and using a higher resolution with 90º FOV. My hardware can’t record more than 2880x1440 at 30fps though.
Instead of a real headset, I used an example OpenVR driver and modified it to get orthogonal rotation (front, right, rear, left, top and bottom). I’m now trying with 16 recordings (8x at horizon level, 4x above and 4x below). But a long video with clouds cannot be recorded without cuts, because the clouds keep moving even when the simulation is paused.
Good and bad news on this topic! All in this one: the fewer recordings, the better for video stitching. This means that there is no need to spend, say, 16x the final video duration recording multiple takes. 6x is enough. But, this means less pixels per video. One must have a good hardware to record at more than 6K (I can record at most 5760px in all 6 takes).
The most difficult part on stitching 3D (binocular) 360 degrees video is parallax. Due to the distance of each eye from the center of the camera rotation, one recording will never match exactly its neighboring ones. This creates visible seams between them, specially on near objects (this also happens on real life immersive videos and may be very annoying on inside cockpit videos).
Given this, I’ll abide to the cube solution (6 recordings) and test whether using stitching software like StitchEm or Autopano Video is better than using common video editing tools like Adobe After Effects. In the latter case, the video may have more pixels, because there is no need of overlapping as in the specific software. The problem is the need of manual exposure correction, but this is doable on short takes without camera rotation (although I’ve seen some discussion on the VR topic about exposure settings in SU10) and the sudden seams of the cube pattern.
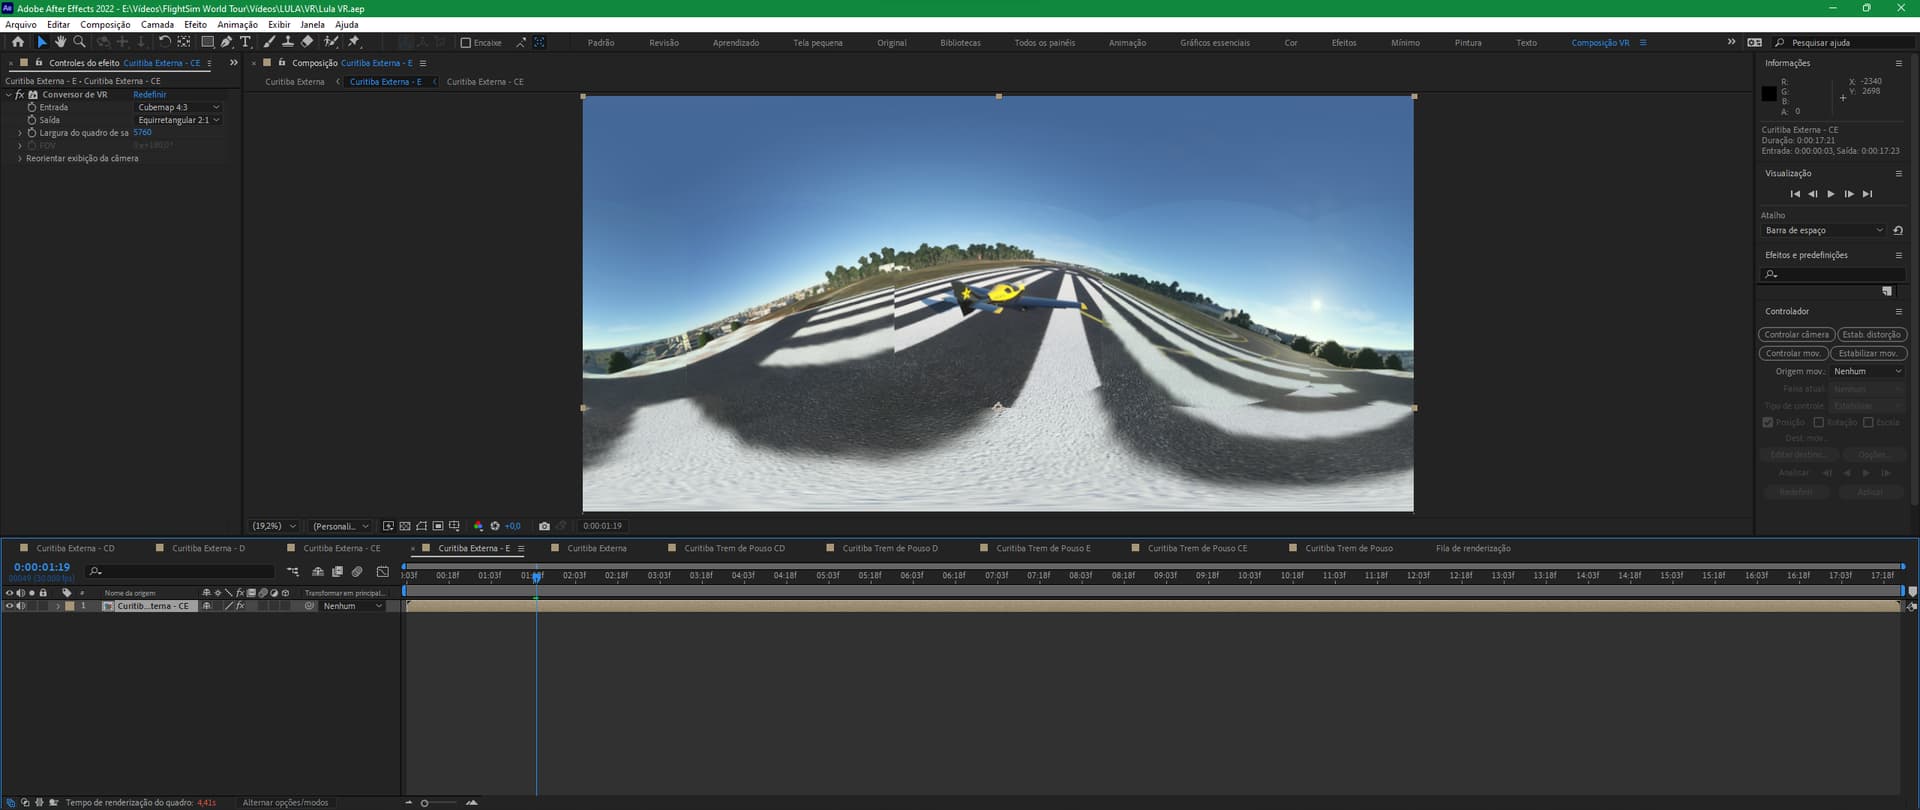
I’ve done it! I used the example OpenVR driver I’ve mentioned before (GitHub - leandroarndt/Simple-OpenVR-Driver-Tutorial: A sample OpenVR Driver for you to learn from) and After Effects’ VR Converter effect to transform the cube recording to 360 degrees footage:
At this first image you can see that I also used an animated color correction (Lumetri Color). It was less difficult than I imagined before, but there will be visible seams on binocular 360 degrees footage. Always. The final result, though, was better than I had imagined.
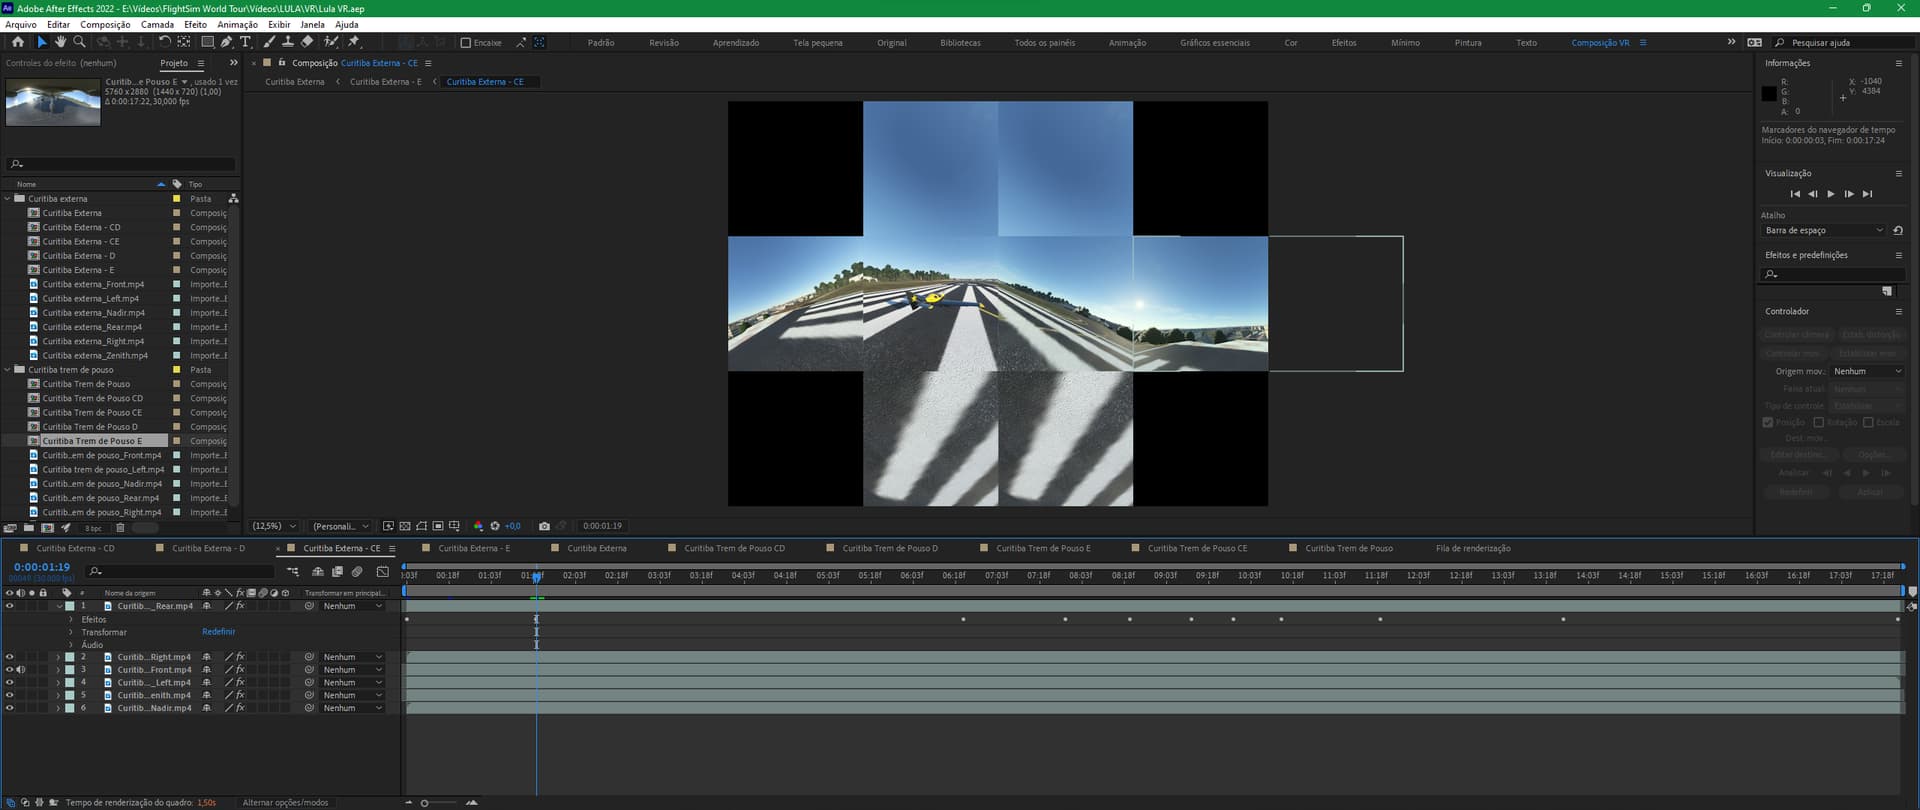
At the second image you can see the VR converter applied to the cubemap on a separate composition.
The composition tree at After Effects is:
The ambisonic audio was applied at Premiere Pro. I used both cubemaps to convert the audio of the front and right views and use them at Premiere (other channels had been muted, as you can see at the first image).
There is also one more problem at the video: some wobling caused by lost frames. One recording goes on, but the neighboring recording stops for a while. I’ve recorded the original videos at 1440px, but the next ones will be recorded at 1024 to fit the 4K VR standard (4096px wide) – this should solve that problem.
You can see below the resulting video. I uploaded as it is to demonstrate the technique. It is actually part of a bigger video I’m recording. It will be an immersive version of the video I uploaded before this one.

Two last tips:
PS: do not post at YouTube as shorts. It won’t work correctly from the subscribers’ notifications.
This topic was automatically closed 30 days after the last reply. New replies are no longer allowed.