Rigging & animating conveyor belt

Has anyone had any success in rigging & animating a conveyor belt? I set up a single plane with a texture applied to follow a circle curve stretched out & animated that to go around on an endless loop. Once imported though it is no longer following the curve and is just a flat plane moving along the ground.

I’m guessing I have to use bones to control the plane around the curve and bake the animation but having trouble doing this. Any ideas on how to achieve this?

Thanks I’m advance!

This is an interesting topic to me because I spent two weeks trying to figure out how to construct an armature that can do this in MSFS. It’s actually quite challenging and practically impossible without assistance from a script to create and position the bones and mesh.

The limiting factor depends on how tight a radius you need for the belt to pass around rollers. Smaller radius bends require many more small bones. You can end up with hundreds of bones in the armature. I did manage a proof of concept, but due to the complexity, it’s hard to recommend this process as it likely has detrimental performance consequences.

If you would like the Blender script, I will gladly share it.

2 Likes

Oh wow no wonder I wasn’t getting anywhere close with it! I’ve been playing around using 50 bones and a single plane subsided 50 times.

Very good point about performance been effected. That many bones animated may really take a hit.

I haven’t used scripts in blender yet so would need to do some more learning for that as well.
Does the script control the bone constraints instead of setting them individually?

I can describe the elements of the rigging and what is necessary to achieve the correct animations.

One of the main things to solve is the bone constraints so they can move around the curve. In Blender, this is the Follow Path constraint. While this works perfect for one bone, you can’t string together several bones and expect them all to just follow the leader. Instead, each bone is independent and they all have to be located at the origin to begin with. Every bone gets a follow path constraint except that the offset value is incremented so they can be distributed around the curve so each one starts its path behind the last.

At this point, you could create a mesh with a curve modifier that also wraps the curve. But then you have to assign the vertex groups and weights to the mesh by hand. Instead, I start with a single segment and duplicate it enough times to fill the curve length. This makes it easy to create a vertex group and set 100% weight to its matching bone before joining the segments into a single mesh and smoothing the weights after.

Assuming the bones and mesh are now in the correct locations with the vertex weights, it still won’t operate correctly because the rest pose of the armature is not really in the shape of the curve. The bone constraints have only temporarily translated them.

You need to duplicate the armature to preserve the follow track constraints and animation. This will be the control rig. The second armature will be used to deform the mesh. To set the rest pose, you would apply the constraint influence. Then, add a different bone constraint to the deform rig, copy transforms, with the target being the matching bone of the control rig. This way, the deform rig animates along with the control rig and carries the mesh with it.

To finish it off, you would bake the animation of the deform rig and export it with keyframe 0 as the rest pose. The control rig is not needed after baking. Always before baking, make a save point because this step removes the bone constraints.

Here is the Blender file and script I used to discover this. Maybe this is overkill for a conveyer belt but I sure learned a lot about making armatures from this.

2 Likes

Would you be able to make a quick video of the baking and export from Blender process? Also how important is it that the bones and objects have their locations reset before export for other bone based animation?

I’ve always struggled with cables between bones since the bones controlling the are often parented to another bone system and never seem to show up in the game the same as in Blender.

To bake , you select the armature, switch to pose mode, select all bones and use the Pose → Animation → Bake Action command.
Set the start frame to 0 and the length of the animation in my case is the same as the Path Animation settings of the curve because that is related to the follow path offset values I used.
The other setting are:
Only Selected Bones
Visual Keying
Clear Constraints
Clear Parents

The reason for baking is that the constraints won’t be exported so you need to create normal keyframes.

You don’t normally have to reset the location of the bones, they can be anywhere. But this particular constraint uses the offset from the bone location when it attaches to the curve on the control rig. The deform rig bones get reset to their rest pose locations which need to be on top of the mesh. If you don’t do that, you can have an offset of the mesh to the bone.

The important thing is that the mesh is not parented to the armature or anything else that can move it around. I think it’s best that the mesh origin is at the world origin. The idea here is that once the mesh is being deformed by an armature, it must be entirely controlled by bones. I believe you can have more than one armature modifier on a mesh as long as all the vertices are assigned to at least one vertex group.

You also do not have to parent bones together unless you need that particular behavior. I often use individual bones instead of chains which are too limiting in most cases.

The rest pose and exporting while on keyframe 0 is quite important. The exporter should have a checkbox to “Use Current Frame”, at least the older exporter that I use has this. That setting makes sure the rest pose is the non-deformed state and every other keyframe is a transform from that point.


2 Likes

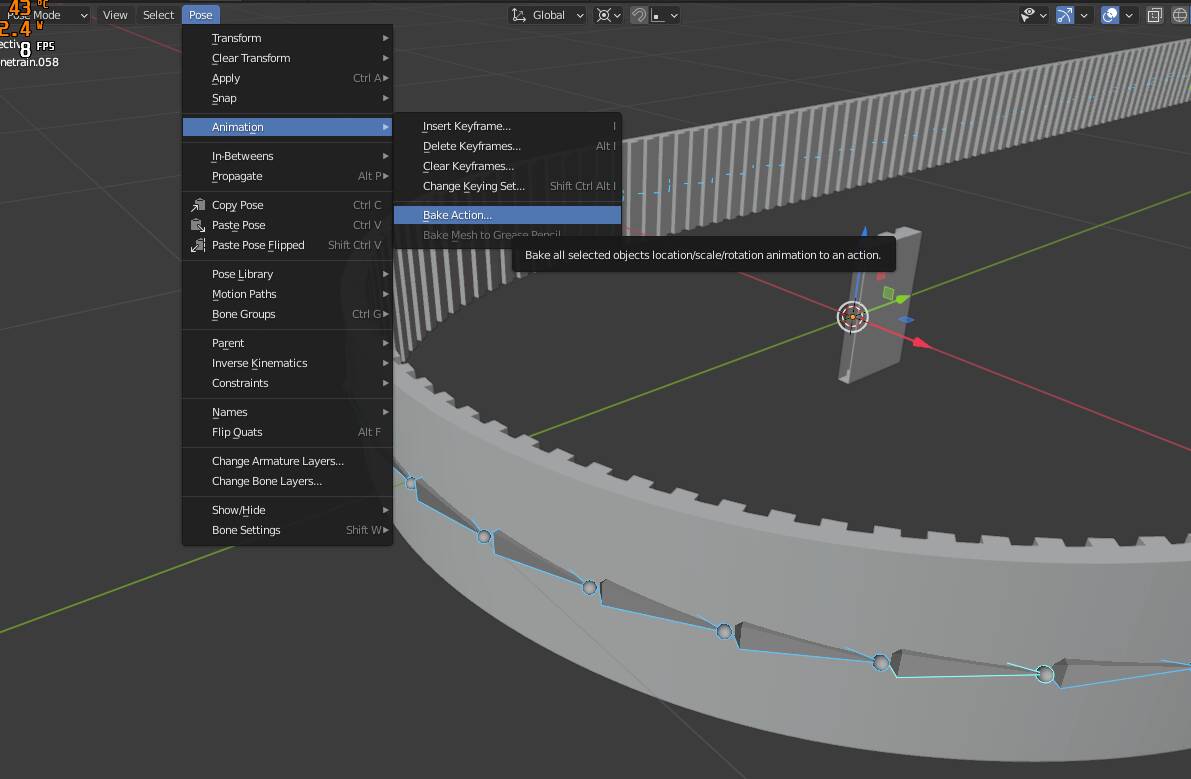
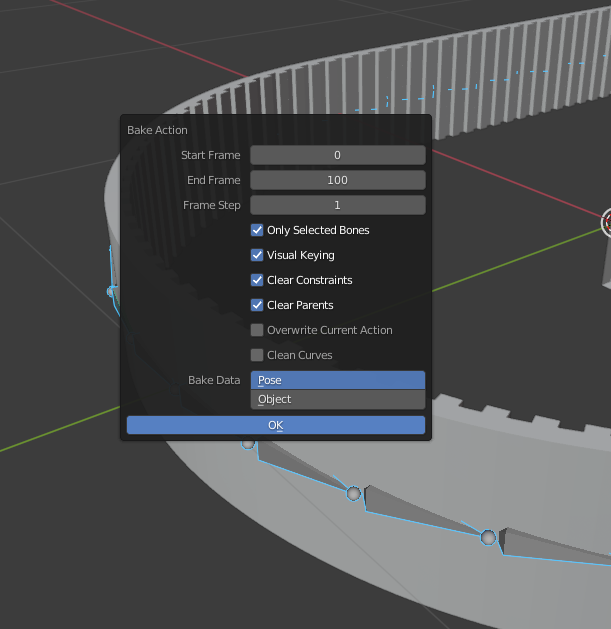
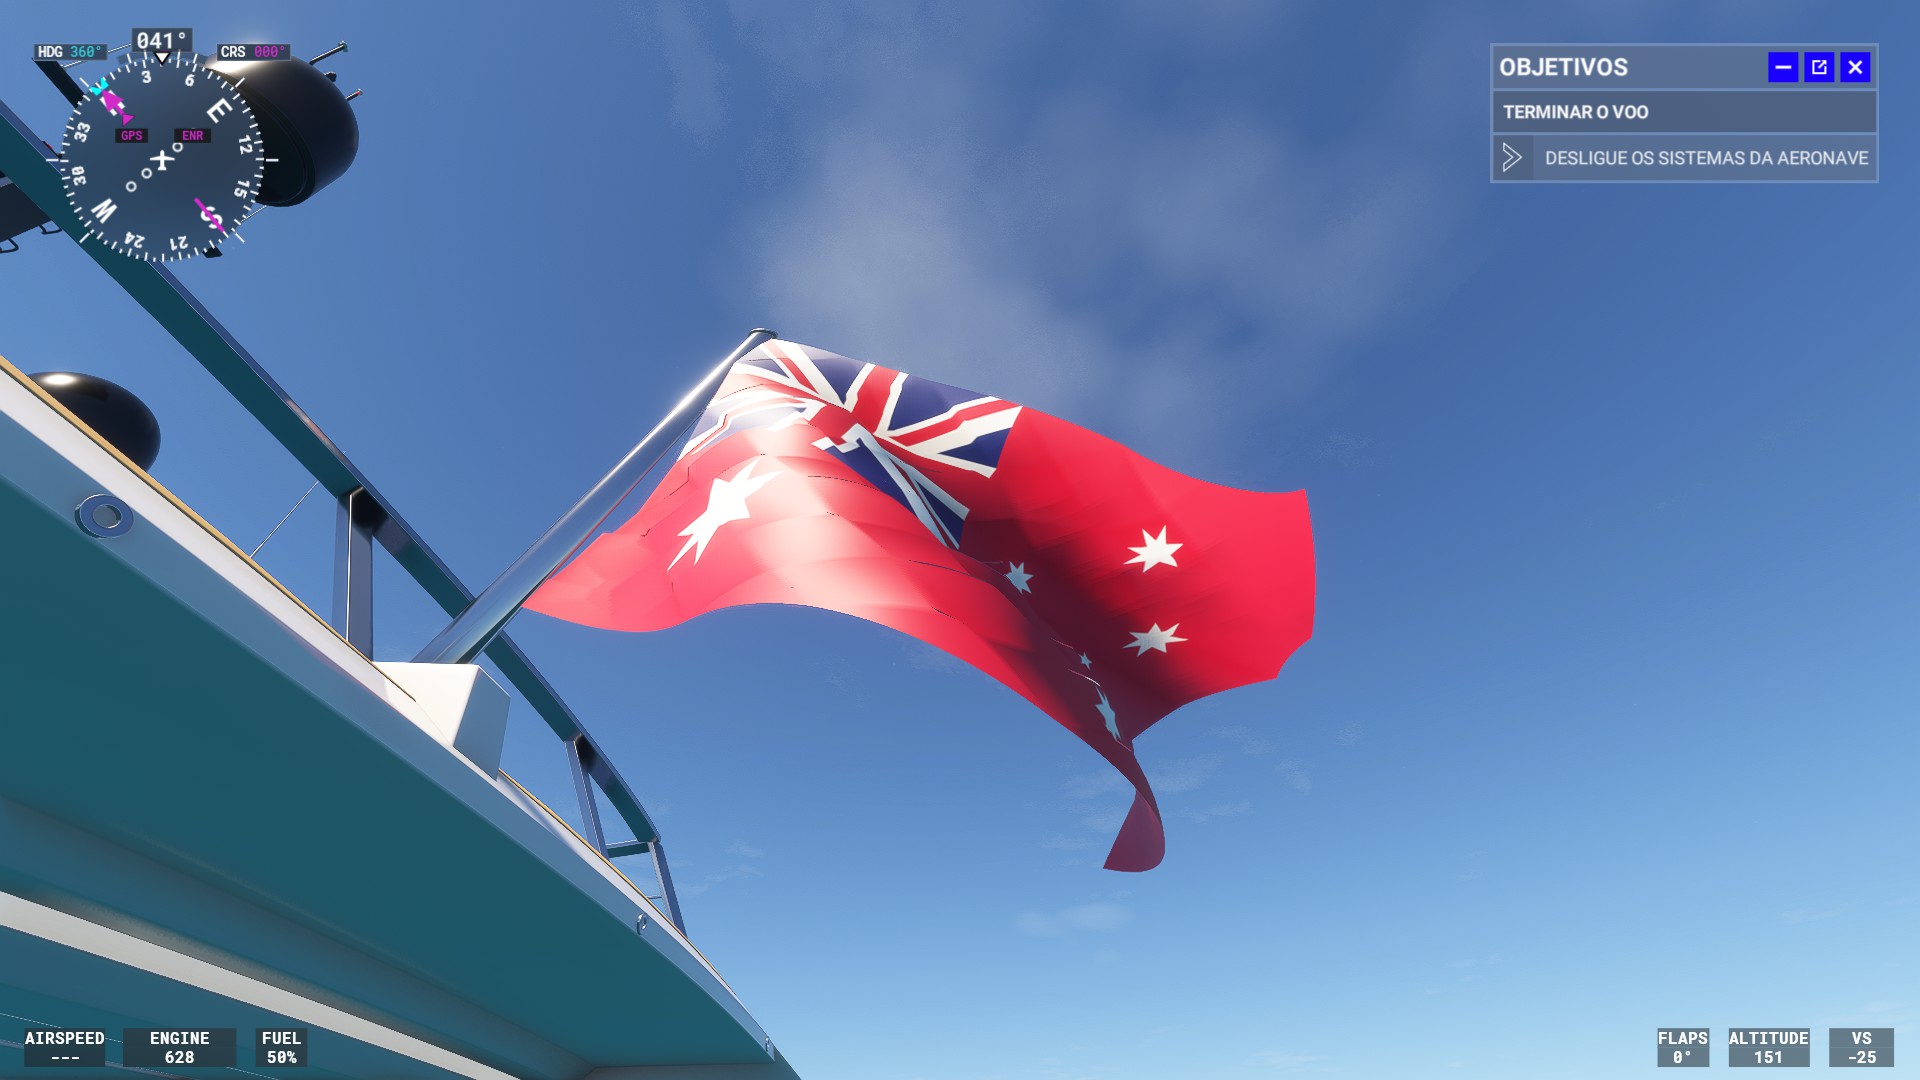
@Sal1800 In my case, I created a python script that converts an animation into a mesh using shape key to armature bones, and although the animation is displayed correctly in Blender, MSFS constantly returns the error: Animation target ‘weights’ not supported. Animation[8] ‘Flag.004’, channel[3].

Any ideas?

My python script:

import bpy
from mathutils import Vector

def create_clean_armature(obj):
“”“Cria armature limpa sem vertex groups”“”
if not obj.data.shape_keys:
print(“Objeto não possui shape keys!”)
return None

# Cria nova armature
arm_data = bpy.data.armatures.new(f"MSFS_{obj.name}_Arm")
arm_obj = bpy.data.objects.new(f"MSFS_{obj.name}_Arm", arm_data)
bpy.context.collection.objects.link(arm_obj)

# Configurações visuais
arm_obj.show_in_front = True
arm_data.display_type = 'STICK'
arm_obj.location = obj.location.copy()
arm_obj.rotation_euler = obj.rotation_euler.copy()

# Cria estrutura de bones
bpy.context.view_layer.objects.active = arm_obj
arm_obj.select_set(True)
bpy.ops.object.mode_set(mode='EDIT')

# Bone raiz (obrigatório para MSFS)
root_bone = arm_data.edit_bones.new("MSFS_Root")
root_bone.head = Vector((0, 0, 0))
root_bone.tail = Vector((0, 0.1, 0))

# Bone de controle principal
ctrl_bone = arm_data.edit_bones.new("MSFS_Ctrl")
ctrl_bone.head = Vector((0.2, 0, 0))
ctrl_bone.tail = Vector((0.2, 0.1, 0))
ctrl_bone.parent = root_bone

bpy.ops.object.mode_set(mode='OBJECT')
return arm_obj

def transfer_animation_without_weights(obj, arm_obj):
“”“Transfere animação sem usar vertex groups”“”
shape_keys = obj.data.shape_keys.key_blocks[1:] # Exclui Basis
scene = bpy.context.scene

# Configura bone para rotação XYZ
ctrl_bone = arm_obj.pose.bones["MSFS_Ctrl"]
ctrl_bone.rotation_mode = 'XYZ'

# Encontra todos os frames com keyframes
keyframes = set()
if obj.data.shape_keys.animation_data and obj.data.shape_keys.animation_data.action:
    for fcurve in obj.data.shape_keys.animation_data.action.fcurves:
        if 'key_blocks' in fcurve.data_path:
            for kp in fcurve.keyframe_points:
                keyframes.add(int(kp.co[0]))

# Cria driver para cada shape key que controla o bone
for sk in shape_keys:
    # Cria propriedade customizada na armature
    arm_obj[f"SK_{sk.name}"] = 0.0
    arm_obj.keyframe_insert(data_path=f'["SK_{sk.name}"]', frame=1)
    
    # Cria driver para o bone
    driver = ctrl_bone.driver_add("rotation_euler", 0).driver
    driver.type = 'SUM'
    
    # Adiciona variável para cada shape key
    var = driver.variables.new()
    var.name = sk.name
    var.type = 'SINGLE_PROP'
    var.targets[0].id = arm_obj
    var.targets[0].data_path = f'["SK_{sk.name}"]'
    
    # Configura a expressão para combinar todas as influências
    driver.expression = " + ".join([sk.name for sk in shape_keys])

# Transfere a animação para as propriedades customizadas
for frame in sorted(keyframes):
    scene.frame_set(frame)
    for sk in shape_keys:
        arm_obj[f"SK_{sk.name}"] = sk.value
        arm_obj.keyframe_insert(data_path=f'["SK_{sk.name}"]', frame=frame)

def clean_all_vertex_groups(obj):
“”“Remove todos os vertex groups”“”
for vg in obj.vertex_groups:
obj.vertex_groups.remove(vg)

def setup_non_deforming_armature(obj, arm_obj):
“”“Configura armature sem deformação física”“”
# Adiciona modificador Armature sem skinning
mod = obj.modifiers.new(name=“MSFS_Armature”, type=‘ARMATURE’)
mod.object = arm_obj
mod.use_vertex_groups = False # Crucial - sem weights!
mod.use_bone_envelopes = False

# Configura parentesco
obj.parent = arm_obj
obj.matrix_parent_inverse = arm_obj.matrix_world.inverted()

# Marca bones como não deformantes
for bone in arm_obj.data.bones:
    bone.use_deform = False

def main():
obj = bpy.context.active_object
if not obj or obj.type != ‘MESH’ or not obj.data.shape_keys:
print(“Selecione um objeto de malha com shape keys!”)
return

# 1. Remove vertex groups existentes
clean_all_vertex_groups(obj)

# 2. Cria nova armature limpa
arm_obj = create_clean_armature(obj)
if not arm_obj:
    return

# 3. Transfere animação sem weights
transfer_animation_without_weights(obj, arm_obj)

# 4. Configura armature não-deformante
setup_non_deforming_armature(obj, arm_obj)

# 5. Seleciona objetos para exportação
bpy.context.view_layer.objects.active = arm_obj
arm_obj.select_set(True)
obj.select_set(True)

print("Conversão para MSFS concluída com sucesso!")
print("Configurações de exportação:")
print("- [X] Animation")
print("- [ ] Skinning (DESATIVADO)")
print("- [X] Only Selected")
print("Dica: No MSFS SDK, verifique se a animação está marcada como 'Scripted'")

if name == “main”:
main()

Hi there. I haven’t really explored shape keys in MSFS. It seems possible but I can find very little information about successful uses of it.

Your script looks well done and it appears that you are using a driver for the animation. That would need to be baked because as far as I understand, the driver will not be exported to the gltf. The other important thing is to have all the bone animations in the same NLA track.

All of this will be highly dependent on the MSFS exporter and if shape key animation has been correctly implemented. The latest exporter plugins have the best chance of supporting a feature like this. You may want to ask in the dev support forum because there are a few very knowledgeable members who understand the exporter better than I do.

It looks like you are on the right track so keep experimenting. It took me many attempts to get to the belt animation above. That involved finding a method that was compatible with MSFS and much more difficult than making an animation that was only for Blender.

1 Like

Hi @Sal1800

Thanks for the answer and for your time. I hope this topic can help other devs.
My script was showing that error “Animation target ‘weights’ not supported. Animation[8] ‘Flag.004’, channel[3].” because it did not correctly delete the Shape Key data from the mesh, and when compiling GLTF in MSFS, the Shape Key was detected. It is not exactly a problem because MSFS ignores Shape Keys, but the animation did not work anyway because my script could not convert an existing animation into Shape Keys by creating corresponding armature bones and replicating the animation. It was tough, I had to abandon the idea and redo the entire animation in armature.

Now, I face another problem: The animation in Blender is smooth and great, but in MSFS it is broken, it works but it is not pretty. I do not know how to fix this. Have you ever seen anything like this?