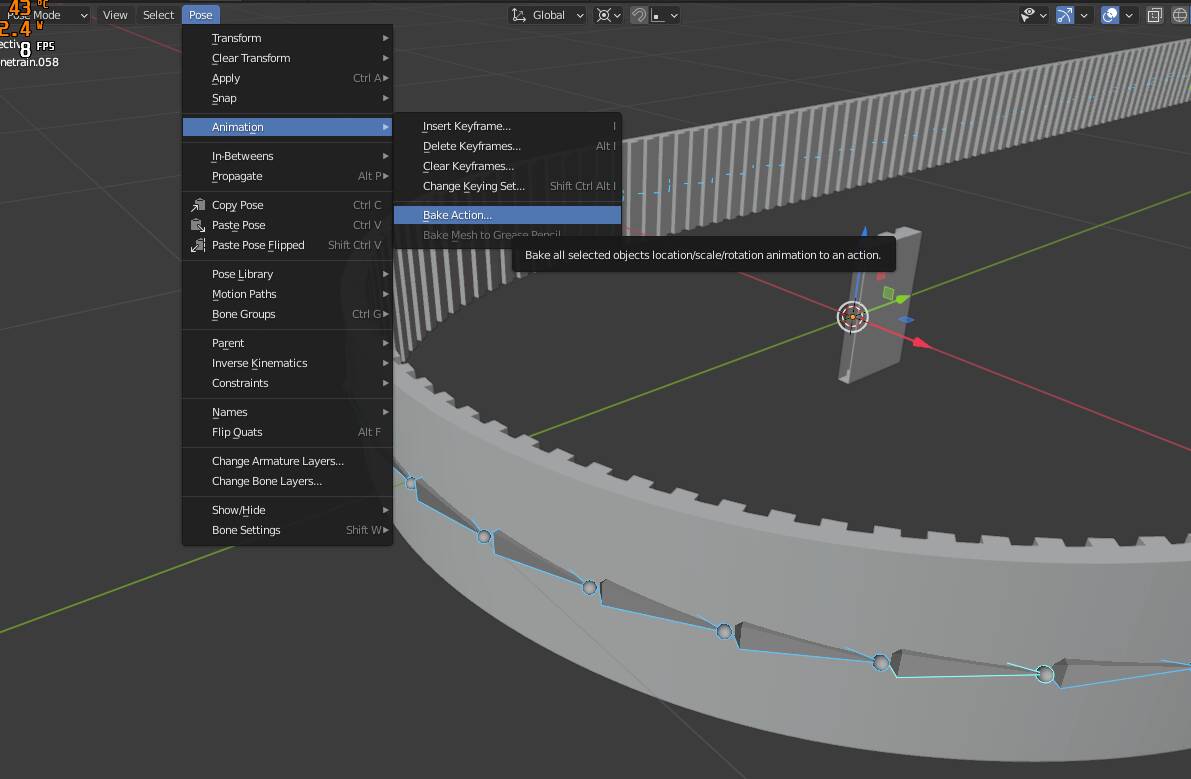
To bake , you select the armature, switch to pose mode, select all bones and use the Pose → Animation → Bake Action command.
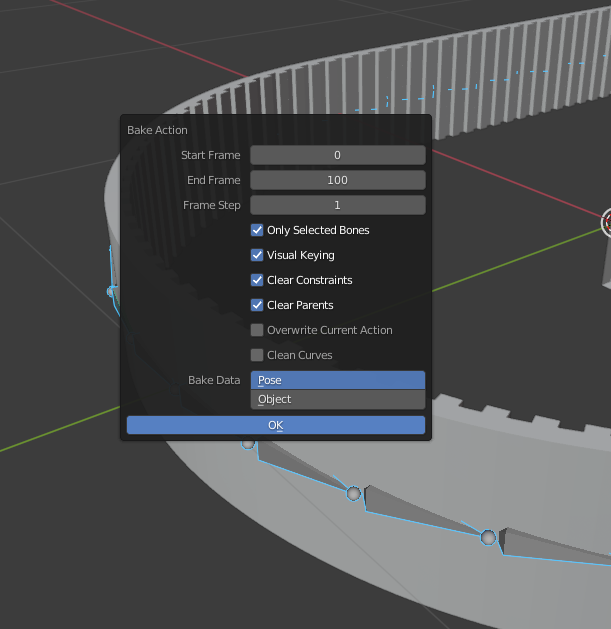
Set the start frame to 0 and the length of the animation in my case is the same as the Path Animation settings of the curve because that is related to the follow path offset values I used.
The other setting are:
Only Selected Bones
Visual Keying
Clear Constraints
Clear Parents
The reason for baking is that the constraints won’t be exported so you need to create normal keyframes.
You don’t normally have to reset the location of the bones, they can be anywhere. But this particular constraint uses the offset from the bone location when it attaches to the curve on the control rig. The deform rig bones get reset to their rest pose locations which need to be on top of the mesh. If you don’t do that, you can have an offset of the mesh to the bone.
The important thing is that the mesh is not parented to the armature or anything else that can move it around. I think it’s best that the mesh origin is at the world origin. The idea here is that once the mesh is being deformed by an armature, it must be entirely controlled by bones. I believe you can have more than one armature modifier on a mesh as long as all the vertices are assigned to at least one vertex group.
You also do not have to parent bones together unless you need that particular behavior. I often use individual bones instead of chains which are too limiting in most cases.
The rest pose and exporting while on keyframe 0 is quite important. The exporter should have a checkbox to “Use Current Frame”, at least the older exporter that I use has this. That setting makes sure the rest pose is the non-deformed state and every other keyframe is a transform from that point.