Chapter 7: Making our own WASM module
If we want to control “custom variables”, we will need to do that through a WASM module. In Chapter 1: SimConnect and WASM - what is this? I already briefly touched on what a WASM module is, and in Chapter 2: Setting up the environment I showed how to prepare your VS2019 solution if you want to develop your own WASM module from scratch.
You can not use C# for WASM. You have to use C/C++ instead. So it might be a bit confusing if you have been dealing with the above chapters, like you have been speaking Italian, and now you have to switch to Spanish ![]() .
.
Build our first WASM module
Unfortunately, the few lines of code that Microsoft includes in the WASM template are not very helpful.
// Test.cpp

#include <stdio.h>
#include "Test.h"

extern "C" MODULE_EXPORT void test(void)
{
	// TODO
}
I would at least have expected that the template would include something more useful code such as a framework for the initialization and de-initialization.
The most basic WASM module could look like this - let’s call the project “Test_WASM”:
// Test_WASM.cpp

#include <MSFS/MSFS.h>
#include <MSFS/MSFS_WindowsTypes.h>

#include <SimConnect.h>

#include <MSFS/Legacy/gauges.h>

#include "Test_WASM.h"

const char* WASM_Name = "Test_WASM";
const char* WASM_Version = "00.01";

extern "C" MSFS_CALLBACK void module_init(void)
{
	HRESULT hr;

	fprintf(stderr, "%s: Initializing WASM version [%s]", WASM_Name, WASM_Version);

	// ... do some initialization

	fprintf(stderr, "%s: Initialization completed", WASM_Name);
}

extern "C" MSFS_CALLBACK void module_deinit(void)
{
	fprintf(stderr, "%s: De-initializing WASM version [%s]", WASM_Name, WASM_Version);

	// ... do some de-initialization

	fprintf(stderr, "%s: De-initialization completed", WASM_Name);
}
Let’s first look at the includes:
MSFS/MSFS.handMSFS/MSFS_WindowsTypes.hare always required.MSFS/Legacy/gauges.his required if you want to use the Gauge API. In my opinion, it doesn’t make much sense to create a WASM Module without using the Gauge API, because without that your WASM Module can’t do anything useful.SimConnect.his needed when you want your WASM module to use SimConnect. Also this seems pretty obvious, because as explained in earlier chapters you need SimConnect to be able to interact with the WASM Module.Test_WASM.his added by the template automatically
Next to that we have 2 important functions:
module_initwhich is called when the WASM module is starting. Here we can do all kinds of initializations to bring our WASM module to life.module_deinitwhich is called when the WASM module stops. Here we can do some de-initialization and cleanup.
Remark: To get some information on what our WASM Module is doing, I’m using the fprintf command and write to “stderr”. This will be shown in the MSFS2020 Console window as error messages. I could also write to “stdout”, which would show it as warning messages. But if I use “stdout”, it seems that after a newline (“\n”) the next lines aren’t shown anymore. It’s like I can only print one line to “stdout”, and that’s it. I might be missing something, but it’s maybe not a coincidence that @MobiFlight in their WASM Module also uses “stderr” as output. I already posted a question on this in this forum, but no answers yet. If somebody has a clue, please let me know in this post.
We can build the above WASM module in a separate project. If you have used the instructions in Chapter 2: Setting up the environment, then you should find your WASM module in [Project folder]\Test_WASM\MSFS\Debug\Test_WASM.wasm (or in the Release folder if you build a release version).
Use our first WASM module
Our WASM Module can be installed as a Gauge or as a Stand-Alone Module. I have no clue how to install it as a Gauge, but I know how to install it as a Stand-Alone Module. For this, you need to copy it to the MSFS2020 Community folder. You have to use a specific folder structure and also add 2 additional files “layout.json” and “manifest.json”.
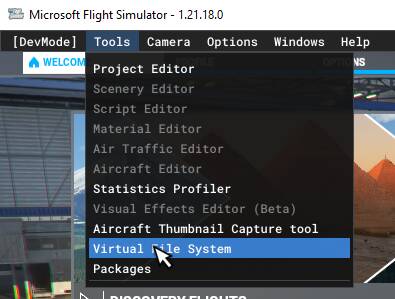
Let’s first find the Community folder. It all depends whether you have installed MSFS2020 from the store, or via Steam. But there is a very easy way to find this. Launch MSFS2020, and if Developer Mode is enabled, you can use the menu on top and go to “Tools/Virtual File System”.
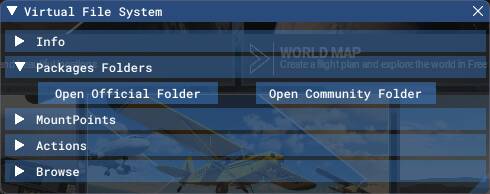
From the next window you can directly “Open Community Folder”.
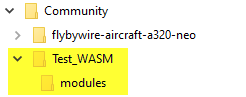
Now create a folder for you WASM module, and in that folder create a subfolder “modules”.
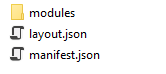
Copy the earlier built file “Test_WASM.wasm” in the “modules” folder.
Next to that, we need 2 json files in the “Test_WASM” folder (not in the “modules” subfolder!).
The content of the json files is below:
layout.json
{
"content": [
{
"path": "modules/Test_WASM.wasm",
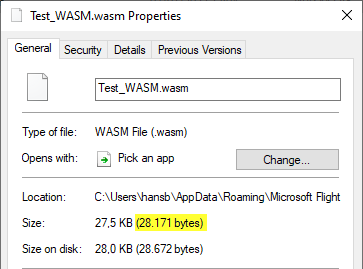
"size": 28171,
"date": 132857136167661584
}
]
}
manifest.json
{
  "dependencies": [],
  "content_type": "MISC",
  "title": "Test_WASM",
  "manufacturer": "",
  "creator": "HABI",
  "package_version": "0.1.00",
  "minimum_game_version": "1.19.8",
  "release_notes": {
    "neutral": {
      "LastUpdate": "",
      "OlderHistory": ""
    }
  }
}
Make sure that the “path” and “size” in the layout.json and the “title” in the manifest.json is using the correct info about your WASM Module. I have no more knowledge about the “manifest.json”, but the one shown here works fine. For the “layout.json”, make sure that the size of your WASM module is correctly set each time you update the WASM Module. You can easily find this size by right clicking on the Test_WASM.wasm file, and select properties. There you will find the size that you have to type over in the “layout.json” file.
There is also a handy tool MSFSLayoutGenerator which allows you to drag the “layout.json” file on it, and it will automatically update the size and even the date. When writing this tutorial, I could download the executable from here.
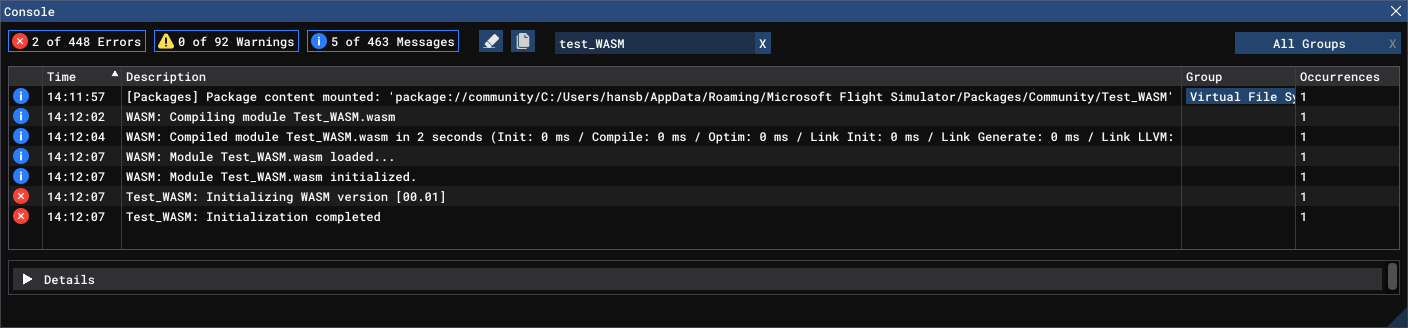
When all files are copied and json files are updated, we can start MSFS2020 (time to cross some fingers ![]() ). If you have done everything correctly, then you should see the below messages in the Console Window in MSFS2020 (in Developper mode, menu “Windows/Console”).
). If you have done everything correctly, then you should see the below messages in the Console Window in MSFS2020 (in Developper mode, menu “Windows/Console”).
Now we are able to develop our own WASM module, we can start with writing its body to deal with our “custom variables” and communicate with our client through SimConnect.
Help needed! How can we restart a WASM Module without restarting MSFS2020?
The main issue with developing a WASM Module if you put them in the Community folder (Stand-Alone Module) is that you have to restart MFSF2020 completely after each change. Knowing that restarting the sim takes several minutes already makes it clear that developing a WASM Module is not an easy and smooth process. There is a post on this forum from @Voss1917 to ask if there is a way to restart a WASM Module without restarting MSFS2020, but so far none of the offered solutions seems to work.
It seems that installing the WASM Module as a Gauge should do the job, because then you are not using it as a Stand-Alone Module, but as part of an airplane. You can then restart your airplane, which should also restart the WASM Module. But I have no clue how to do that.
I hope that some clever people can come up with some answer.
EDIT: @RoystonSidhe came with the solution!!! You find his explanation here. This is a real time-saver! Reloading the WASM Module only takes about 15 seconds, which is a huge improvement compared to having to restart the sim every time. THANKS A MILLION RoystonSidhe!
Goto Chapter 8: Communicating with the WASM Module through Client Data Areas