Thank you very much, it gives me how to look at the subject, in fact I have a problem I made a livery with a metallic aspect but is really much too bright, I understand that I have to influence one of the layers, by telling what I do not understand yet, is that the more blue I put in the blue layer the more metallic it is ? on the other hand remove blue it goes to gray and then black ? I actually use photoshop, I must look where and how I set it but your explanation is magic, that’s exactly what I’m looking for, bravo.
Thanks again OzBoz
How in photoshop do I add for exmeple gray on one of the layers ? I do it directly by painting on it ? or is there something smarter ? sorry I find out.
For example if I’m on the green layer to make my material less smooth ?
This isn’t how it works… as OzBoz73 also explains above (I’ll try again).
The blue channel is not actual values of blue, it stores data for values of blue and it does so using values of grey. For example, if a single pixel in the blue layer, is 100% white, where the remaining R and G channels are 100% black, that pixel, in RGB combined, will be represented as 100% blue.
Here’s an example… you can see that the white area in the individual blue channel is represented as blue in the combined RGB channel.
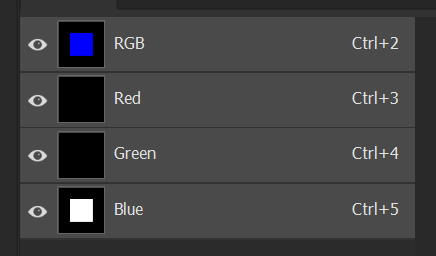
If you were to say, have the green channel look like this blue one, and the blue one all black, you’d have a big green box in the middle of the RGB image. Same for red. Start making these values something other than 100% grey, and your RGB image can represent a million different shades of color across the spectrum. But your individual channels always remain values of grey.
So to extrapolate this to metal in the COMP files… if you wanted to change your livery to have a more metal appearance, you will need to change only the greyscale information in the blue channel. If you were to use the image above, it would have a big square of 100% metallic area surrounded by an area that is not at all metallic. Make this white square some value of grey in between, and you get some value of metalness in between.
You should probably watch this tutorial on how channels work also.

3 Likes
Thanks a lot to both of you I will test all this to understand but I understood the principle, I must test to realize the results according to the values.
LOL See there was more help, I also tried to fix this to explain a bit more.
Just don’t let the colors fool you, they are just a result because you watch it as an RGB image but in fact you are just dealing with 3 grayscale images that are put in one file to be more efficient.
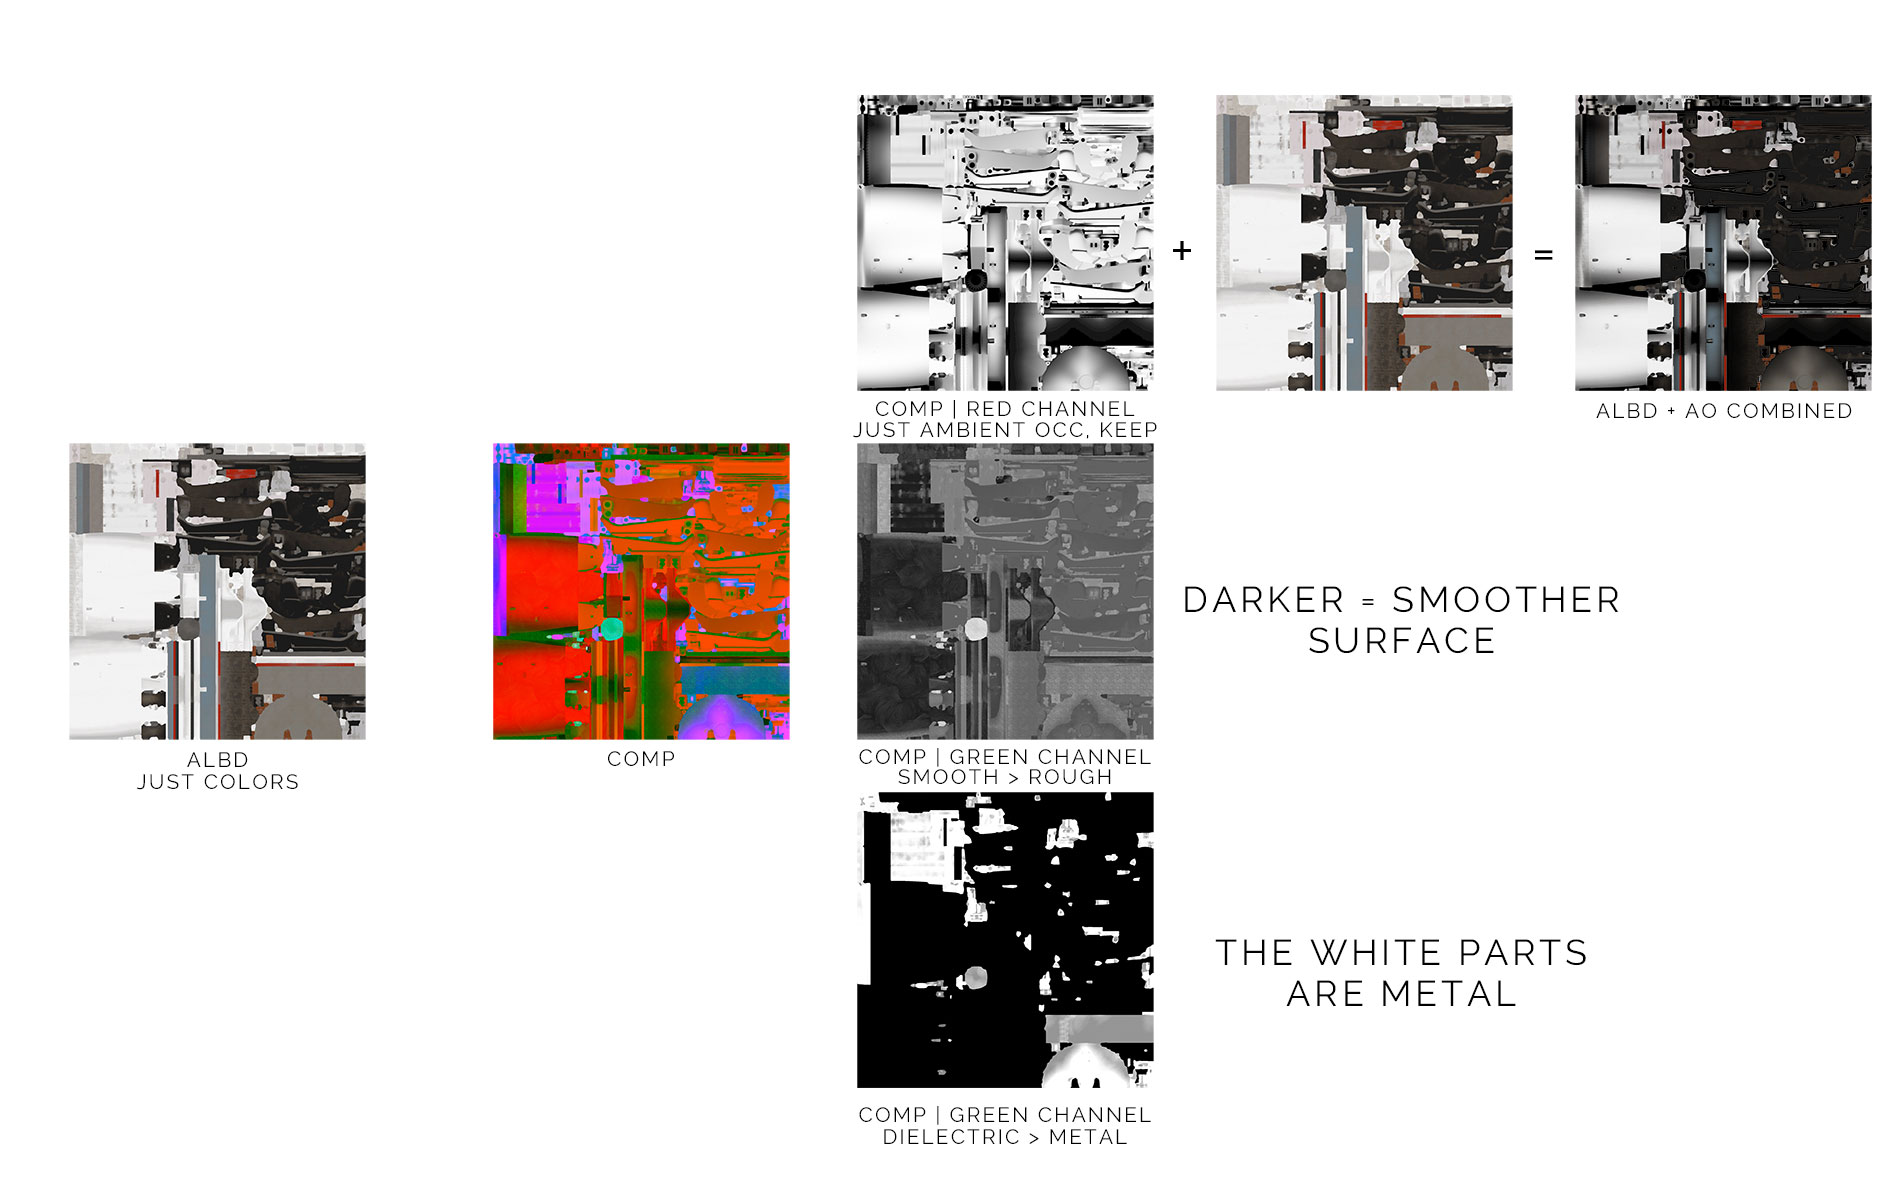
It helps a lot to look at just objects around you and realise they have a color (ALBD), a roughness (the G channel value) and they are either a metal or not (the blue channel). Painted metal for example is not a metal, it’s paint.
The Red channel you should keep like it is because if you for example have it entirely white your plane will look like it misses depth. It fixes a detailed baked shadow. While it’s more a trick you need it since a game simply can’t figure out such detailed shadows real time.
This example is the engine of a Longitude. I took the engine because it has a metal ring on the outside and you can see that’s white in the metal (B) channel. Besides unpainted metals the blue channel is just black.
It’s a lot of trying and error but if you google at ‘roughness/metallic workflow’ you will also see examples on how a certain roughness value (gray tint) works out. It’s actually a real friendly way to create the look/feel of materials since with some experience you can easily recreate the look/feel for real life materials. You just have to answer the questions ‘how rough’ and ‘is it a metal’ that’s all. Well the color is something separate and for some structure there are normal maps.
I use Substance Painter for liveries and that shows the result, so instead of colors you already see what a roughness value will do. Helps but still you need a bit of the basic understanding else you keep seeing it as a puzzle without any logic ![]()
Good luck!!
1 Like
Thank you for all these explanations, I have to test, and make it my own, but now thanks to you I know how to approach it and how to look at it, I made some test yesterday (late) 3AM, I realized that when I modified the COMP of the fuselage it also had a direct effect on the COMP of the engines, whereas I had not modified this last one, I still can’t adjust independently each of the slaps to influence only one of the concepts associated with each channel, I’m going to snoop a little on the web. I don’t master this aspect on photoshop, since it’s all new to me.
You can see my Livrées here : https://flightsim.to/profile/Sp3cialFx
The one I’m worried about is the Fictional Air France
Thanks again for your help and answers
If you just make one channel active you can draw (grayscale) in just that channel. But if you think it’s easier you can also just make a new grayscale image with the same dimensions and just copy that in the corresponding channel of the comp if you are done (also by making the target channel active in the channel panel).
I normally do place a wireframe over all just to help me to get things at the right place when I’m working in Photoshop.
While it has quite a steep learning curve you can also download a trial from Substance Painter (also from Adobe now). You paint in 3D which makes things more visual. I simply love the program right now but still I do a lot of stuff in Photoshop/Illustrator for sharp shapes/logo’s etc.
1 Like
It’s me again, I’m testing and implementing what you explained to me, but I can’t get what I want, although now I modify layer by layer the RGB, that’s when the texture is weakly lit, I have the ‘metallic’ result that I want, on the other hand as soon as it is lit, the metallic aspect disappears and it becomes all ‘flat’.
I’m sorry to be bad but I’m trying to understand and I take advantage of your knowledge and kindness.
I would like to keep the general aspect of when it is not too lit, this metalic aspect, without it becoming a mirror when it is lit, attenuate/smooth the difference between dark and light, smooth the difference between the 2 make it more homogeneous.
It’s good I found it, thanks a lot to both of you.
Ah you’re getting there. Well the disadvantage of using ‘metal’ is that metal itself doesn’t have strong colors. So without a nice reflection it will look boring. It helps if you play with stuff around you and the light of your phone for example as sun. While you will see the shape of a chrome/metal object very well if there is something reflecting in it (like the doors of the hangar) it will look almost flat if you don’t have anything reflecting in it.
You can cheat a bit by not making the metal channel entirely white on the blue channel or put at least enough color in it. Like if you have a totally smooth surface of metal with no color you get chrome. Chrome itself doesn’t really have a color but it’s just the reflection of stuff that gives it a color (like a mirror).
Also try not to use complete white in the ALBD image or complete black. For a game to render reflections, shadows, light etc it need a bit of room to make things lighter/darker. If you use RGB 255/255/255 or 0/0/0 it just doesn’t have any headroom to make a difference between that and darker or lighter area’s.
1 Like
Blender Guru has some excellent tutorials on his tou Tube channels
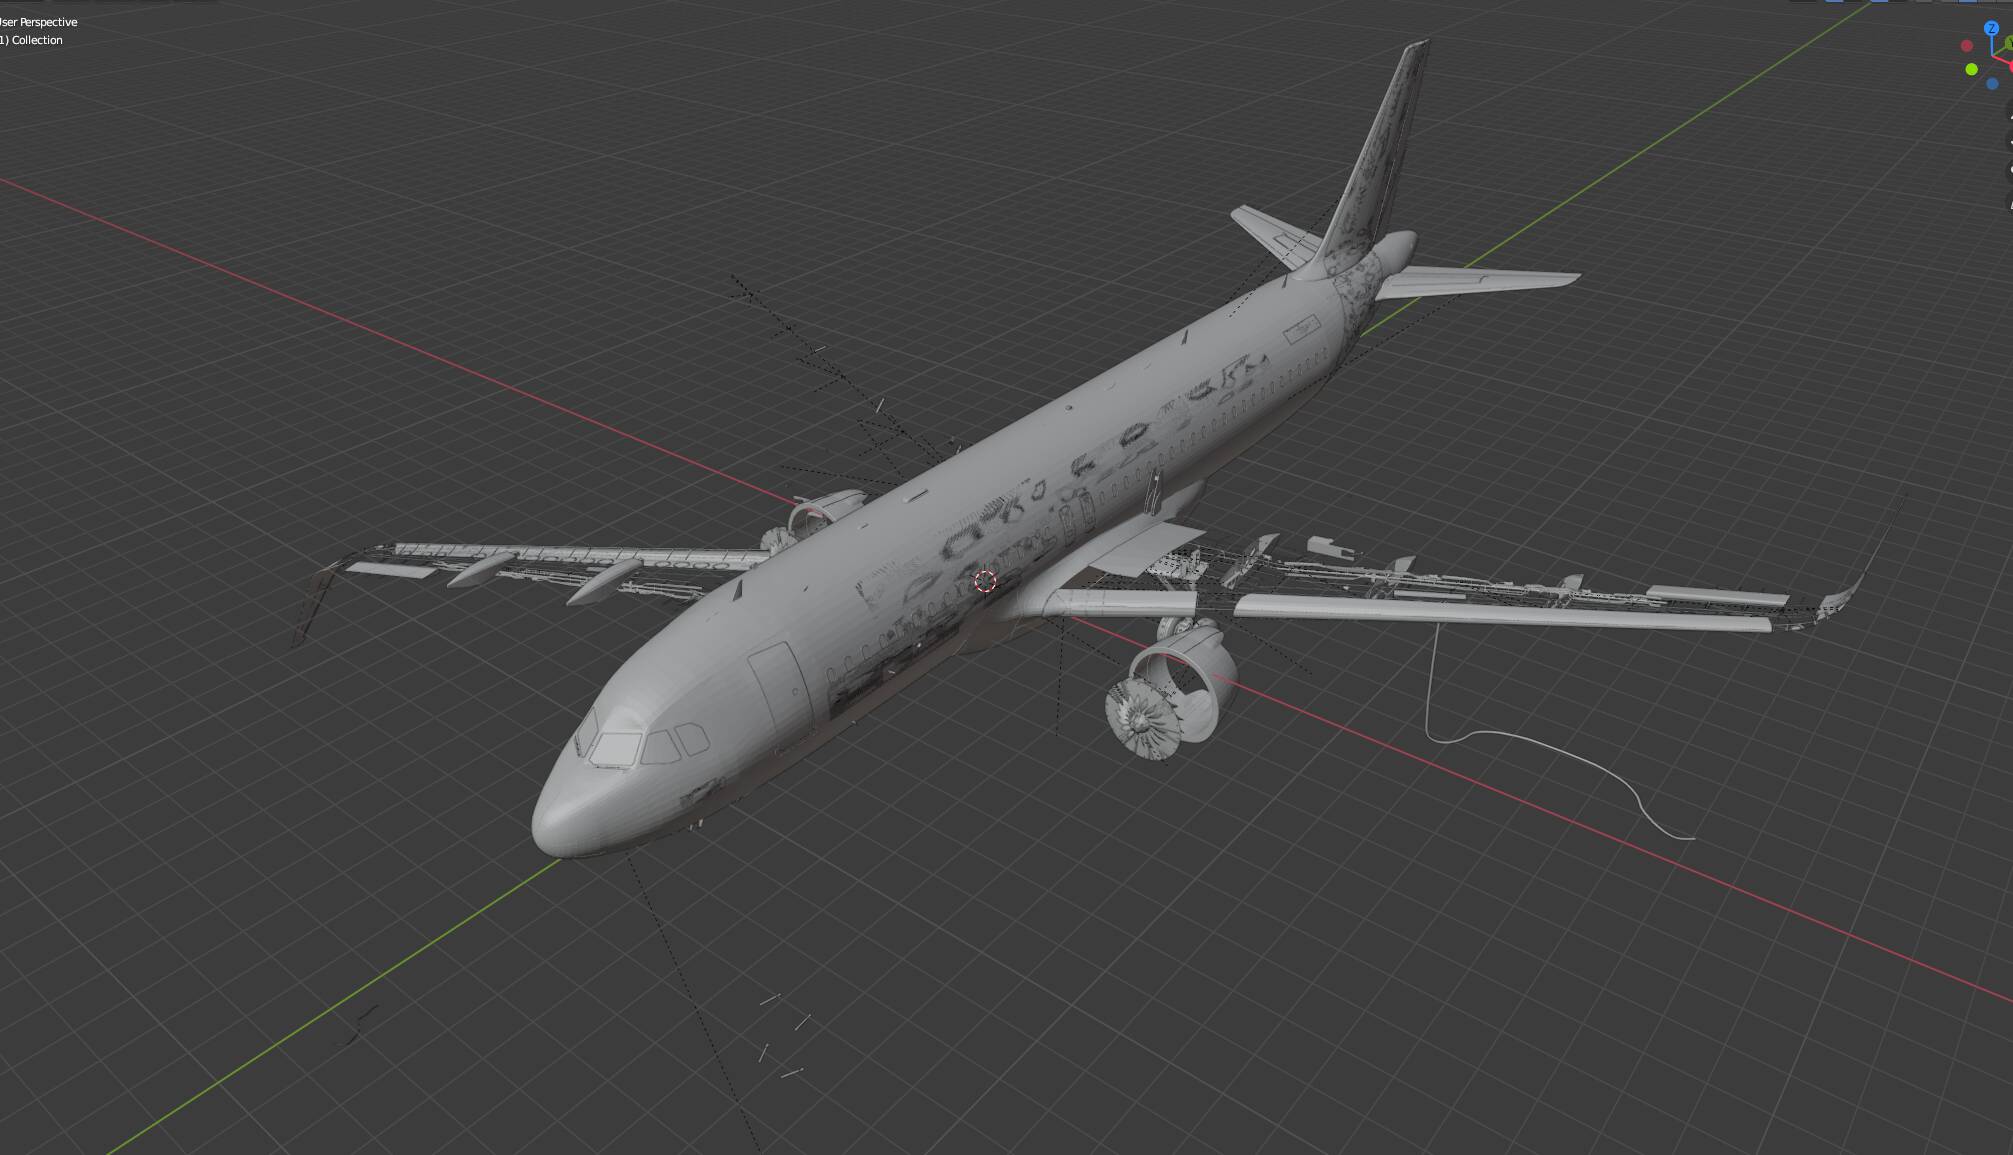
With the current tools, this is what you get. If you’re texture painting, you have everything you need except the front portion of the engine nacelle, which I’ve yet to find in the model once imported into Blender.
I have the same problem. Using the newest Blender and Script. CJ4 works, but with a320 not. Can someone help?
Hey all… I’ve just tried to start off with 3D painting, and having followed tutorials to install blender and the addon from scratch i’m having the following issue when trying to import any model:
Edit: Did a 3rd fresh install of everything and it’s working now… have no idea what i did earlier to screw it up so much
I can open any airplane except the generic airliners.
Is there any trick?
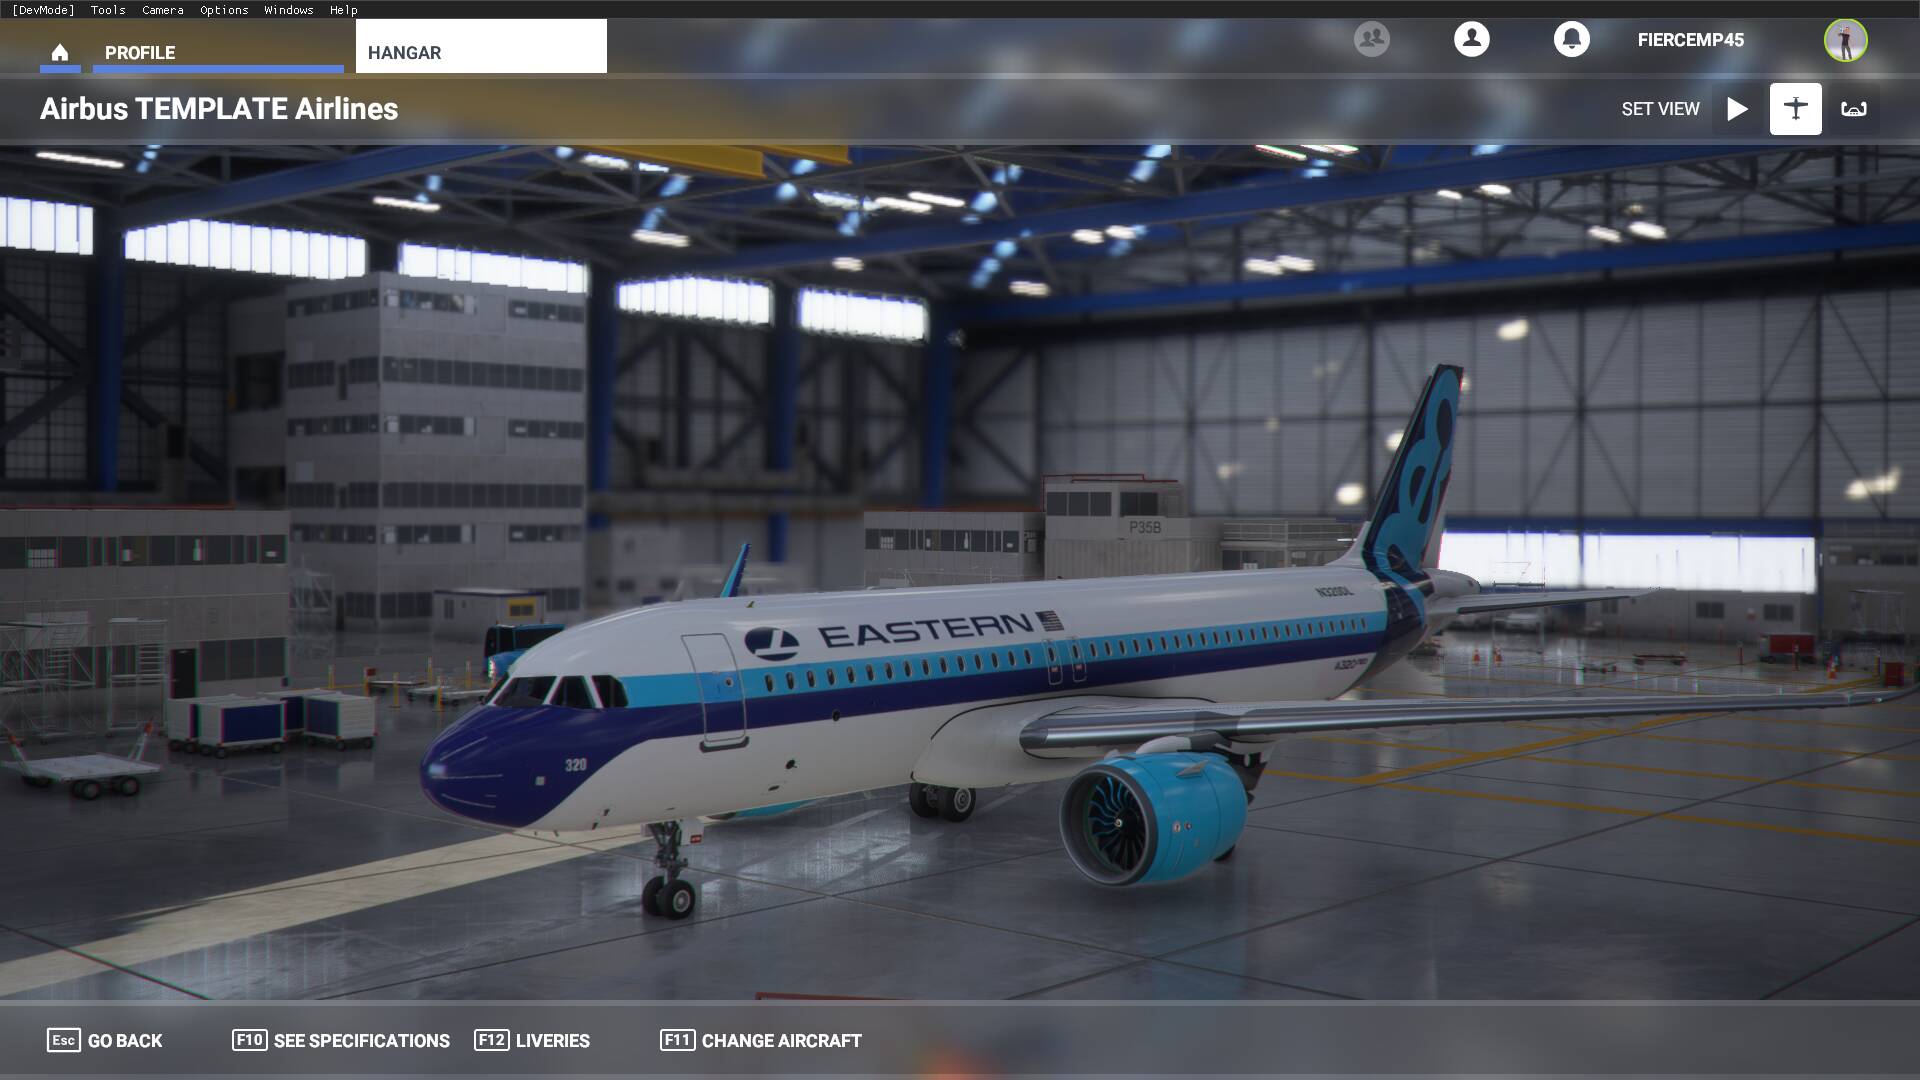
I need some help with high gloss textures. I just finished this livery but want to add aa super high gloss like the Air Florida livery. I have 4096px textures and even copied the texture notepad to mine and still do not achieve the gloss of the Air Florida.
1 Like
I’m extremely new to this but have Blender experience. However, when a friend sent over the LOD00.gltf of an aircraft file for me to make a livery for, I keep getting the following message.
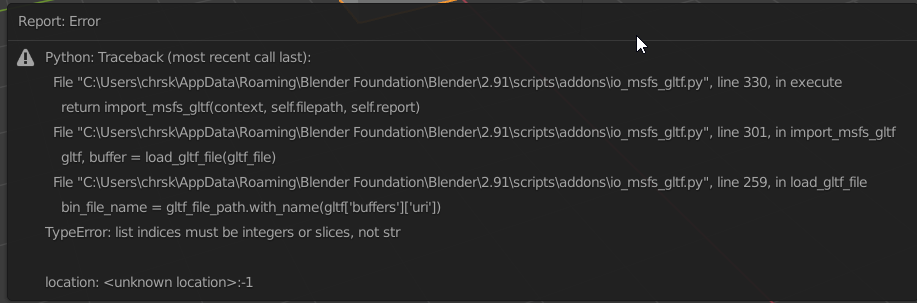
Is this on my end or another error? I re-installed Blender as well as the plugin and made sure everything is saved and enabled (I have never done it before). Any suggestions on how I can fix this problem?
Many Thanks!
That’s exactly the same issue I had… Still not got a clue what I did wrong to get it, but a fresh install fixed it… Sorry I can’t really help past that… Just try another install? ![]()
Hi, Try to change line 259 to the following
bin_file_name = gltf_file_path.with_name(gltf[‘buffers’][0][‘uri’])