Since you seem to like IFR flights, I’ll see if I can walk a fellow vet (Norton/March/Vandy/Beale in CA…ok, that last one not so much SoCal !) through some basic stuff…stand by for a lot of writing! LOL And there’s no “cheating”, just call it learning. Nothing like watching something else do things to start and see how things work.
If you like smaller and fast, the TBM 930 works pretty well, is pretty fast overall, and the G3000 has some complexity as you get to know it, but works pretty well at the basic level too.
If you want to give it a try, let’s do a quick hop and see what questions come up afterwards…
Go into the world map, and select KLYV as a start place. Easiest to start on the runway. Pick KFOD as arrival. Then pick IFR/Low. That’ll give us a basic flight plan. If you know where the Nav Log box is, go in it and set 9000 feet as your desired Altitude. It’s a fairly short flight, so we won’t spend a lot of time climbing and descending.
Set “arrival” as “direct”, and “approach” as “ILS 06” That will give a decent landing approach.
I’d set weather to “clear” and time to sometime it’s light outside, since this is just a trial run.
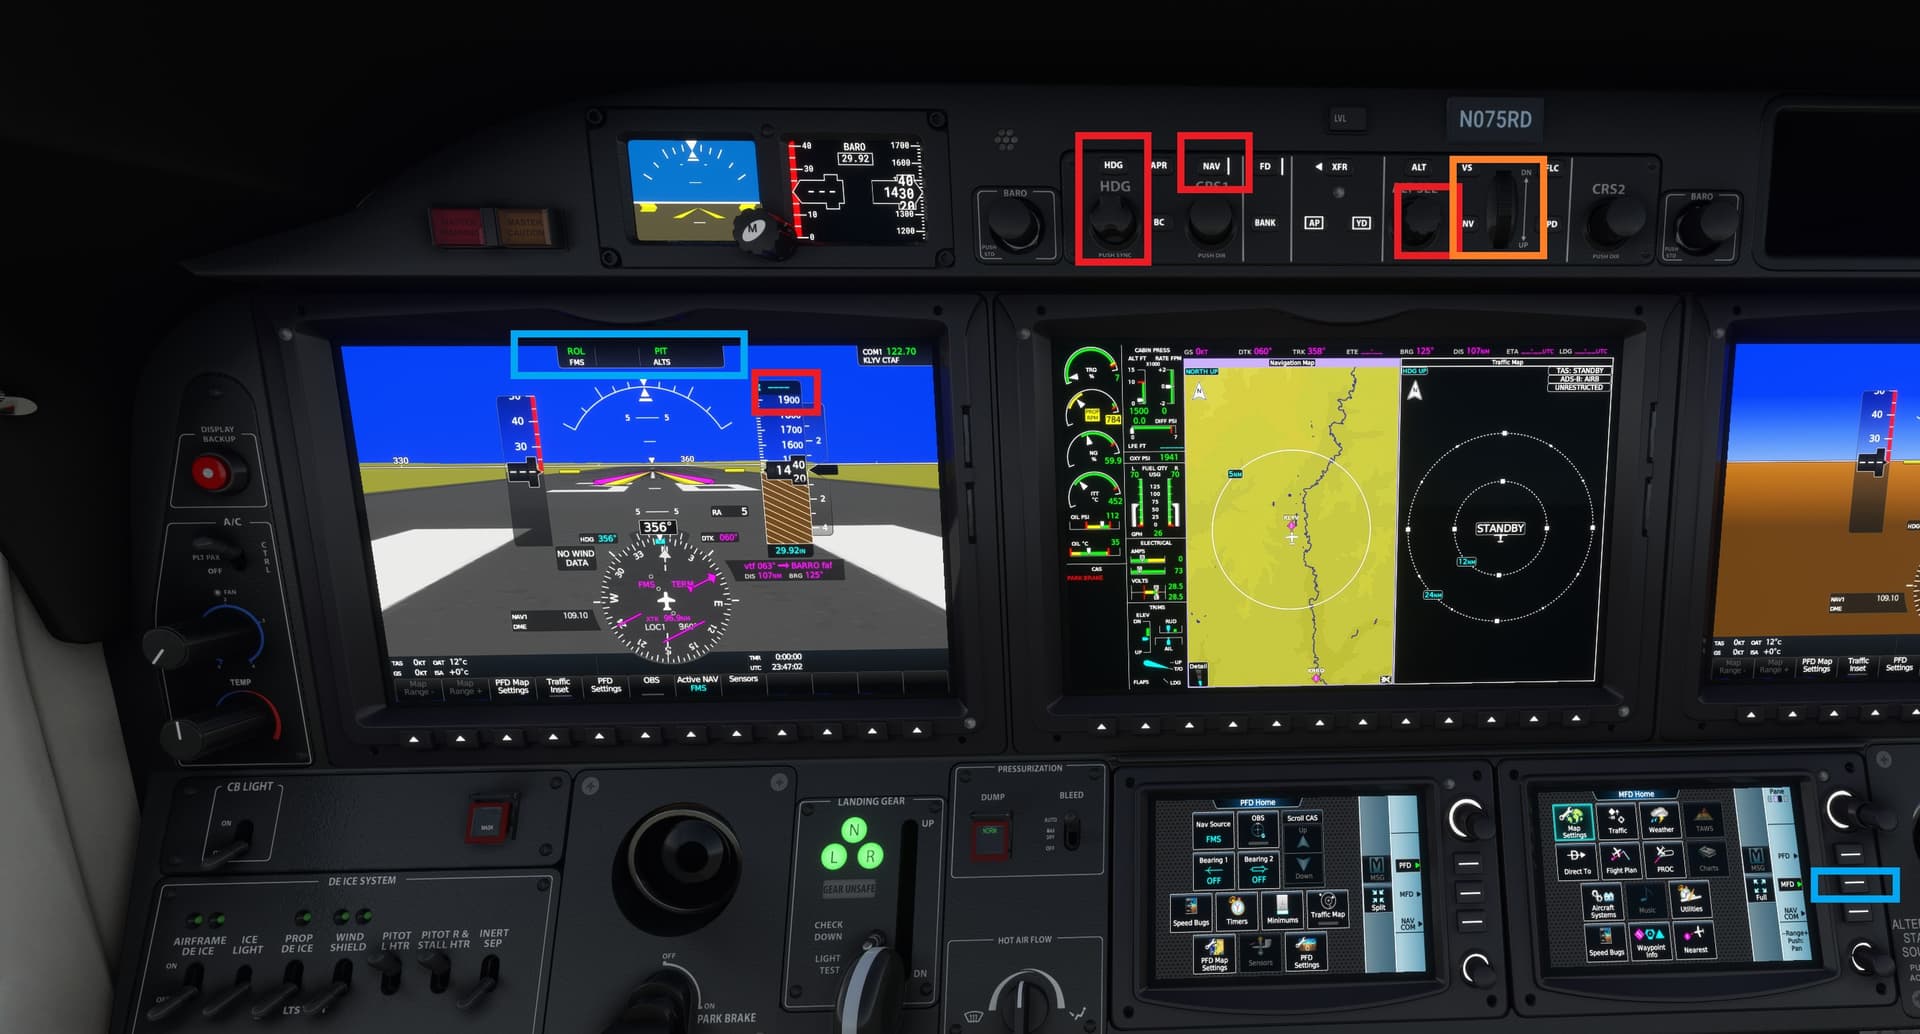
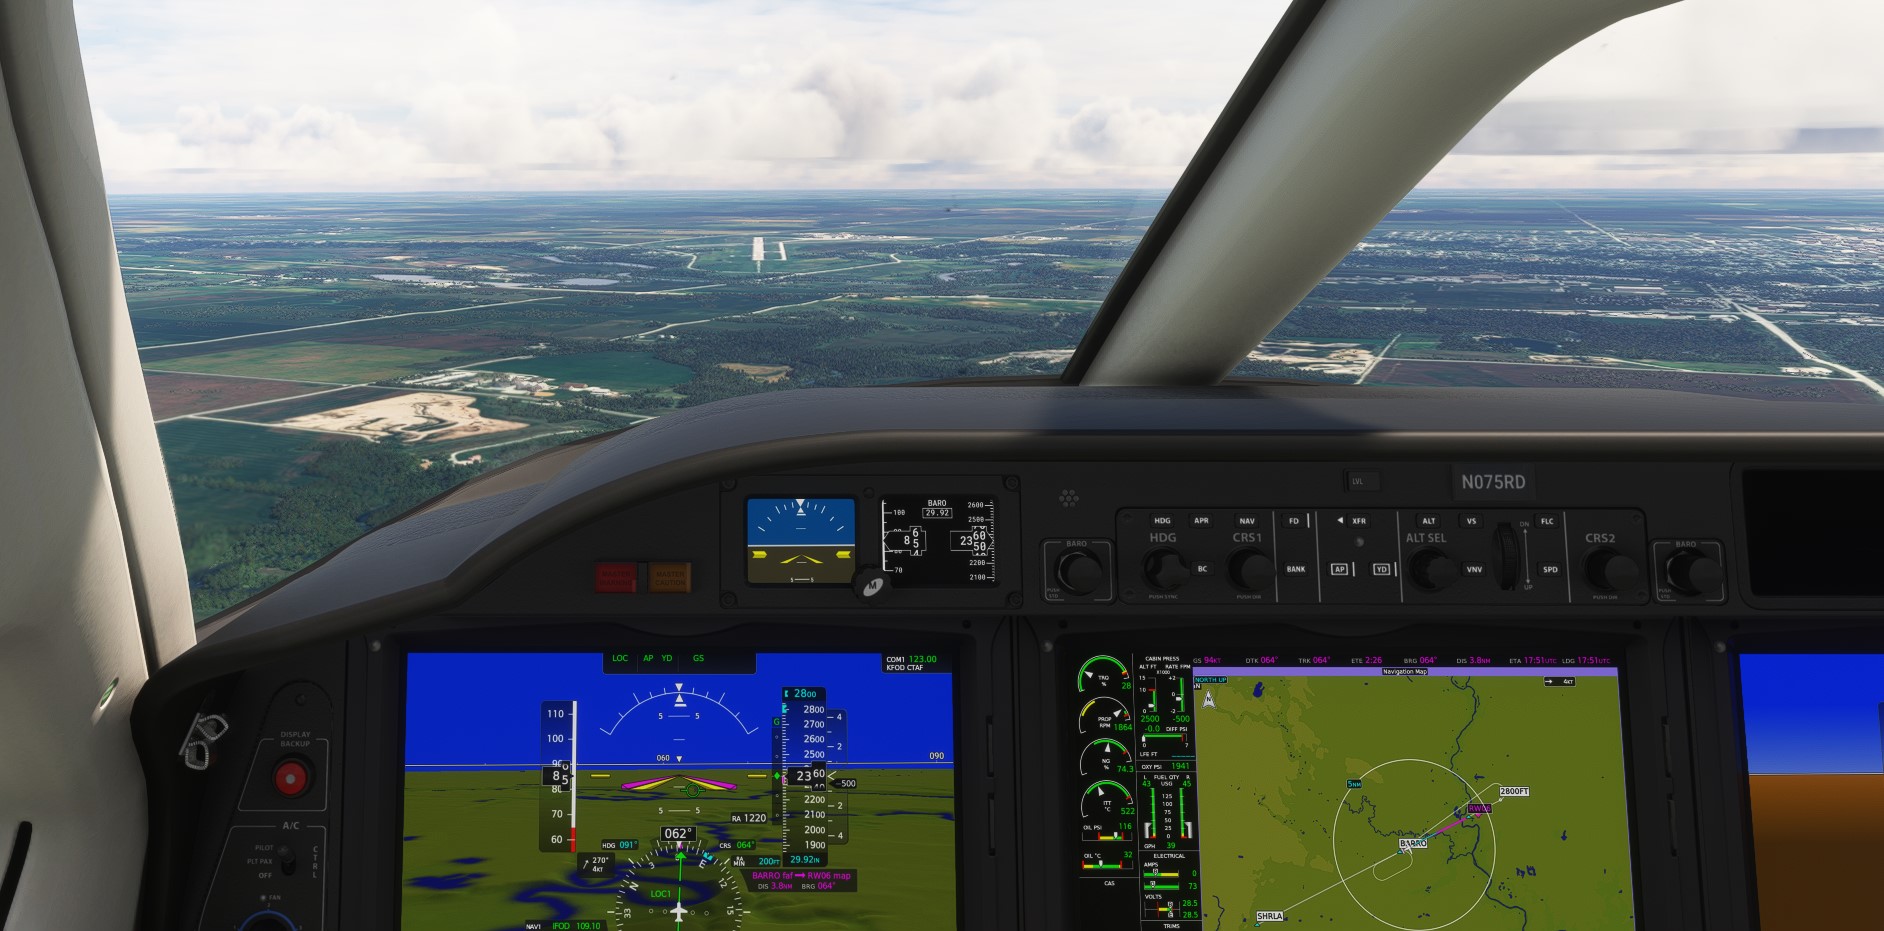
After you hit “fly”, you’ll be in the cockpit, and here’s where it gets a bit busy. I’ll show you how to set some things up (see screen shot). If I start covering stuff you know, let me know so I don’t over explain. If you’re uncomfortable with the inertial separator button (furthest right on bottom row of switches on bottom left of screen), just turn it off and leave it off. Won’t hurt anything in the sim. Make sure your “active nav” is set to “FMS” (at the bottom of the PFD in green on the other screenshot)
My Basic setup for an IFR flight is:
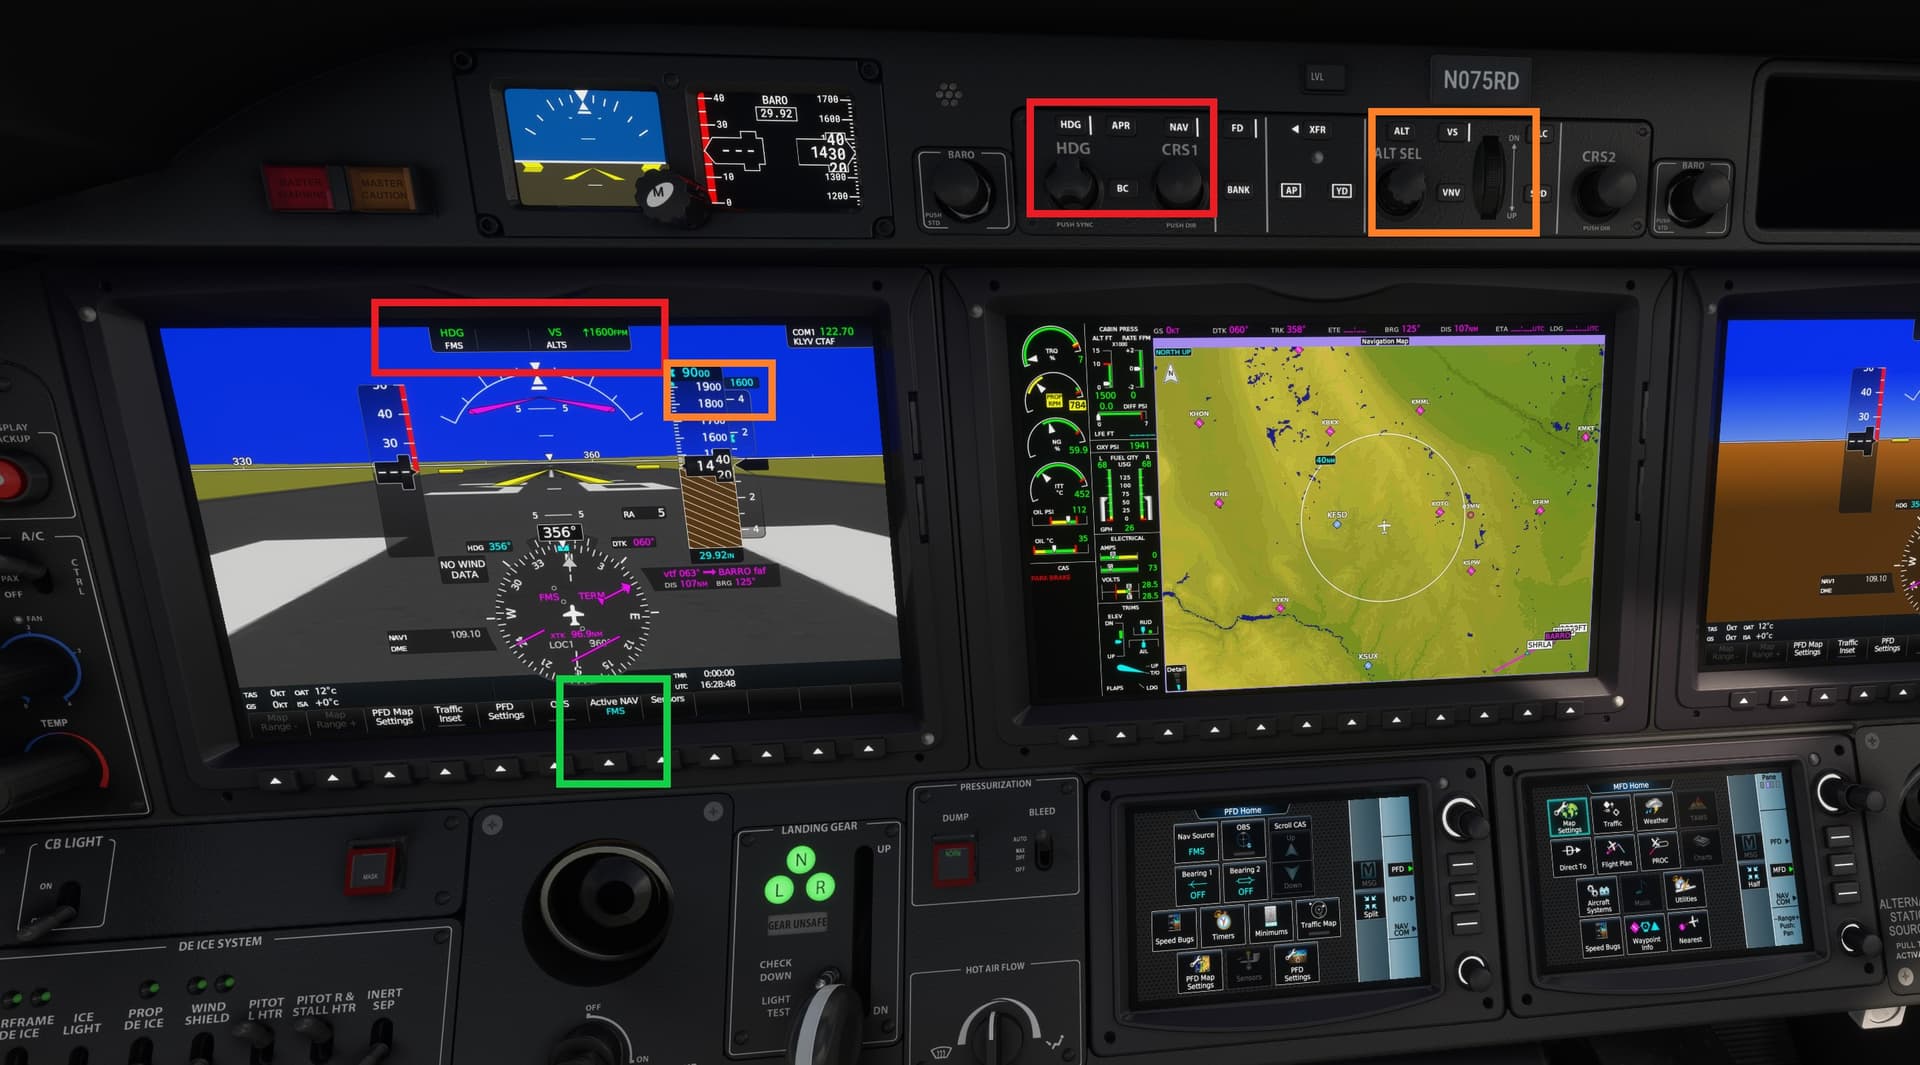
Hit the end of the HDG button to match the heading to the direction we’re pointing, then hit the “HDG” button right above it. In this case you can also hit the “NAV” button. In the blue box above the PFD, you’ll see it say “hdg” in green (active directional mode) and “FMS” in white (armed mode to take over when all conditions are met. I’ll cover those in a second.
Turn the altitude select dial until 9000 shows at the top of the altitude tape (red box at bottom right of blue box). In the orange box, Push “VS” (vertical speed) button and turn the dial to the right of “VS” button until you get 1600 on the top right of the altitude tape and in the box above the PFD.
On the bottom right blue box, select the MFD mode. I’ll talk about how to get a full screen map in a bit (if you know how to highlight the map mode and change to full screen, go ahead and do that. You’ll see I did that. If you’re not sure, I’ll cover next time. You’ll see there’s no GPS route on the map. There’s two reasons, 1. There’s no waypoint between your start and the initial approach point of the ILS approach that can automatically be reached by the FMS without your actions (I’ll talk about that later). or, 2. Your ILS procedure has “vectors” set as the “transition”, or 3. Both of those things.
Make sure you know how to raise the gear and flaps, and turn off the parking brake, and activate the autopilot.
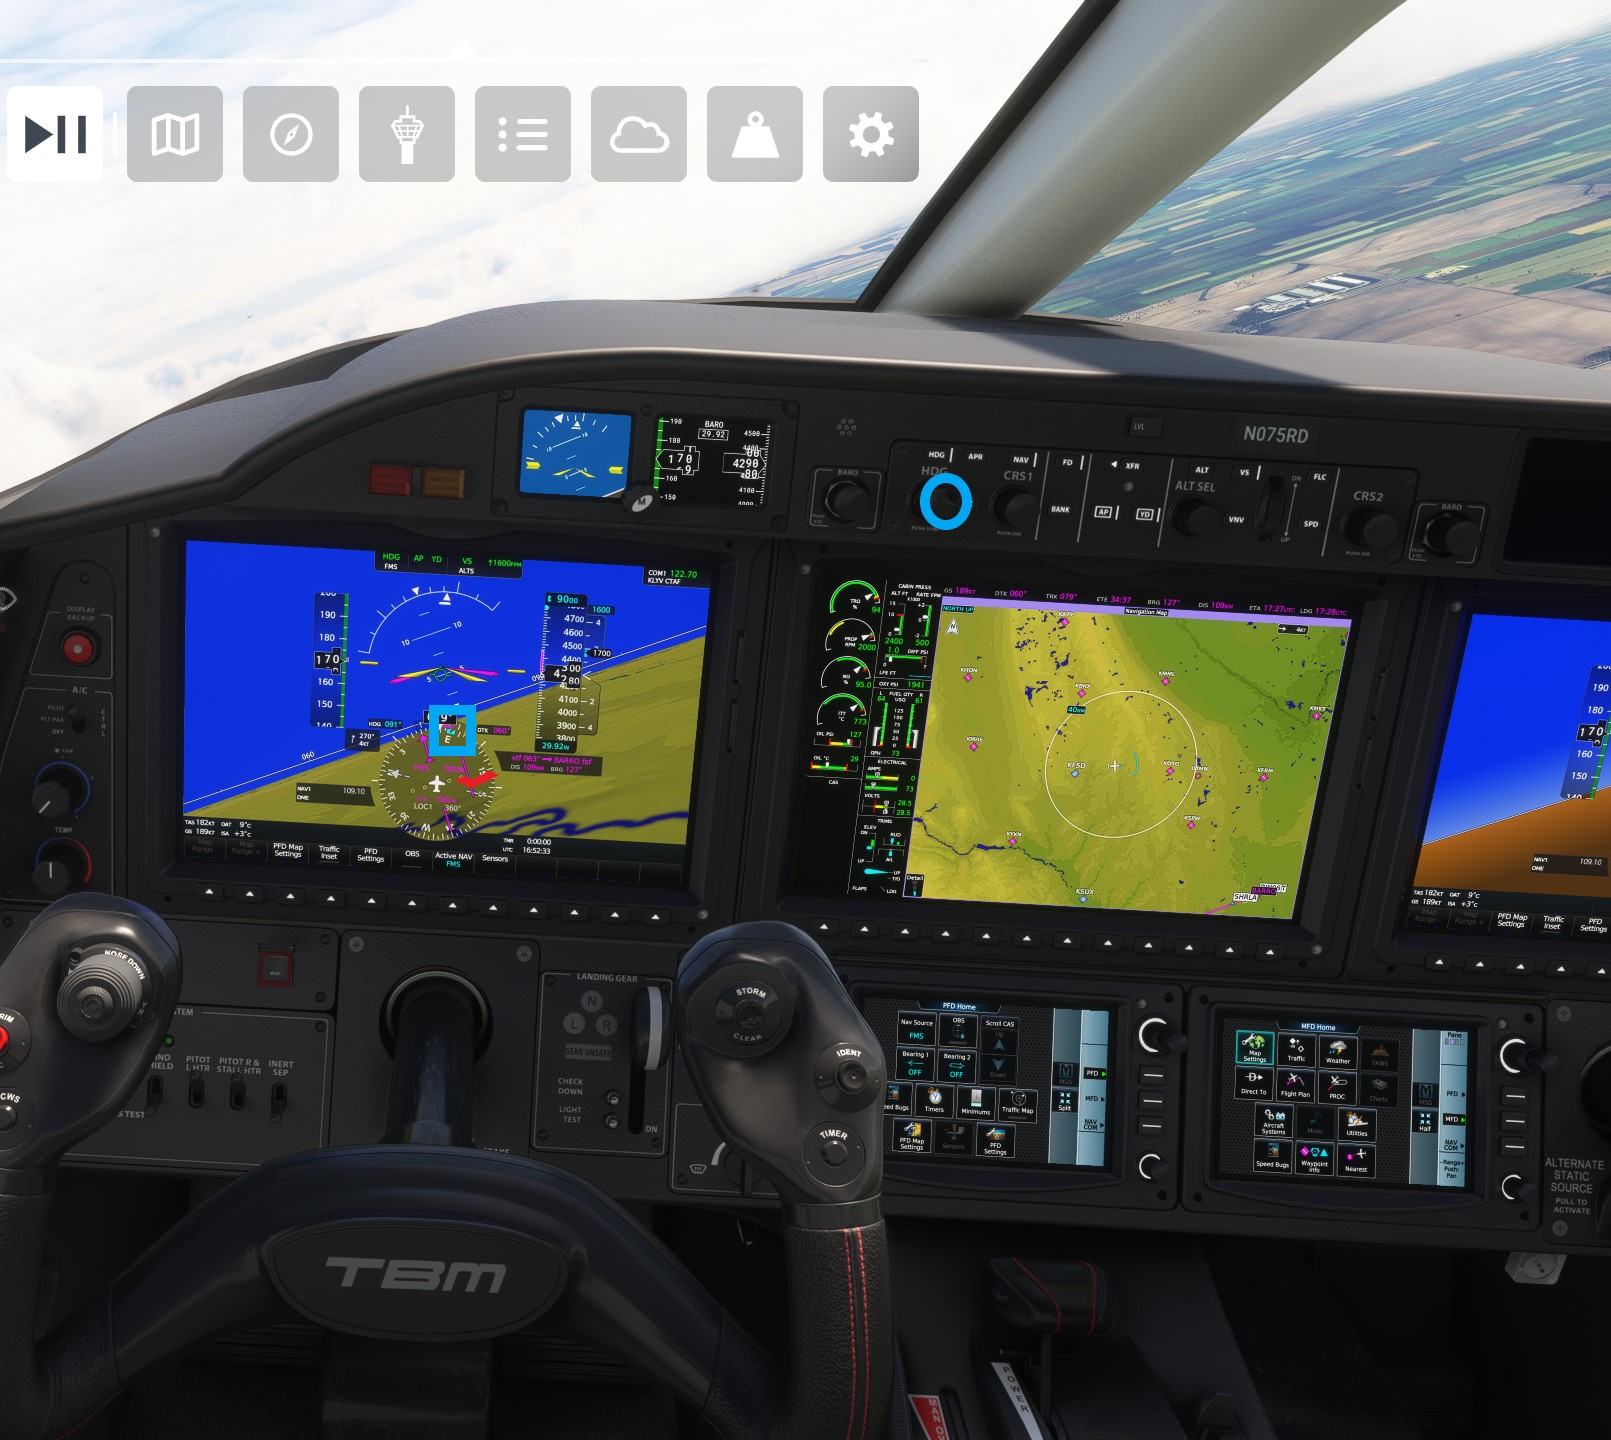
Time to fly. Parking brake off, push the thrust lever up (watch that it doesn’t go over 100%. It can get a bit touchy at the top-end of the range sometimes. After you get to about 75 knots, raise the nose, raise the gear once you’ve got a positive climb rate, raise the flaps around 100 knts, and then engage the autopilot. It will continue to fly straight ahead since you’re in HDG mode at the moment.
Once it’s going well (give yourself a few seconds to let it stabilize and take a breath!), turn the heading mode dial to change your heading bug (the little blue indicator in blue square) to intercept the GPS route indicator (in red check mark on the screenshot).
In this screenshot, notice HDG is no longer in the box above the PFD, and FMS has automatically taken over and guiding you to the next waypoint. This happens once the GPS line is within ~1-2 dots. You can watch when the FMS takes over! Don’t forget ATC during all this!
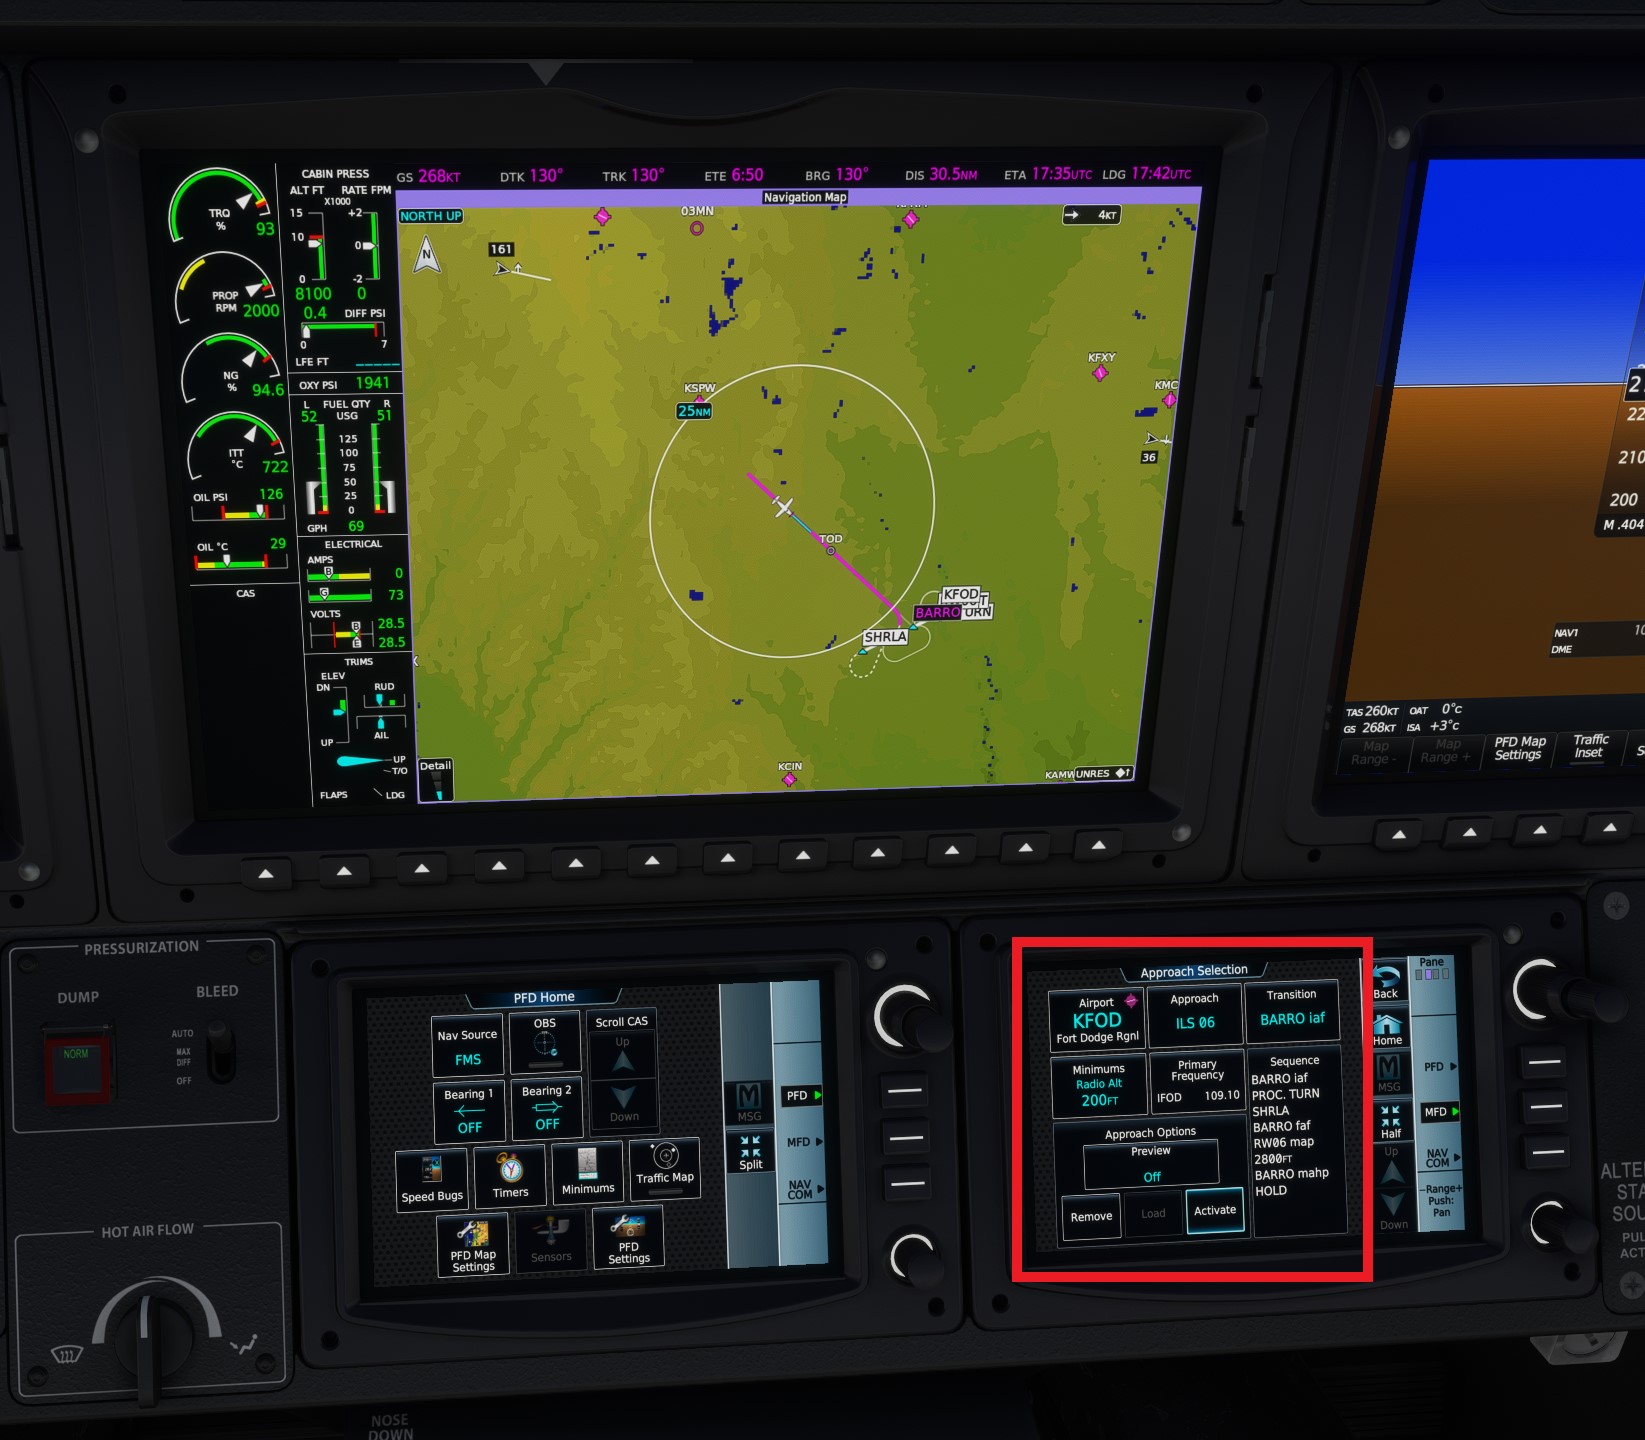
Take a look at the route and approach procedure if you like.
You’re going to want to activate your approach before you get to the initial approach fix. Watch to make sure you descend if ATC doesn’t remind you, and watch your speed as you get closer to the ILS approach so you aren’t going too fast to fly a reasonable approach. The final approach speed for the 930 is 85 knts IAS, but you can easily do 120 until you get ready to turn on final approach.
Once you’ve activated the approach, the FMS will fly it for you. Watch Your Speed and watch for ATC telling you to change altitude. The only thing you manually need to do is hit the “APR” button once you turn toward the runway, but well before you get to the final approach point. Those are all identified in the flight plan. In my case I’d turn it on at SHRLA. When you hit “APR”, you’ll get “LOC” and “GS” in white at the top of the PFD, and they’ll turn green as they lock on the signals. It will follow the localizer and glideslope down. You should take over at least 200 feet above the field height. You can take over earlier if you want to practice manually flying more of the last part of the landing.
I know it’s a LOT at this point, but let me know what else I can help you with or whatever you’ve got figured out!!
Regards