
Wow, nice work @Skytation! That’s incredible.
Thanks! It was definitely a labor of love!
How’d you make the curved side panels?
Impressive build, it looks fantastic ![]()
Very impressive.
You mean the side window cutouts?
Like how the side panels have an angle that goes into the window
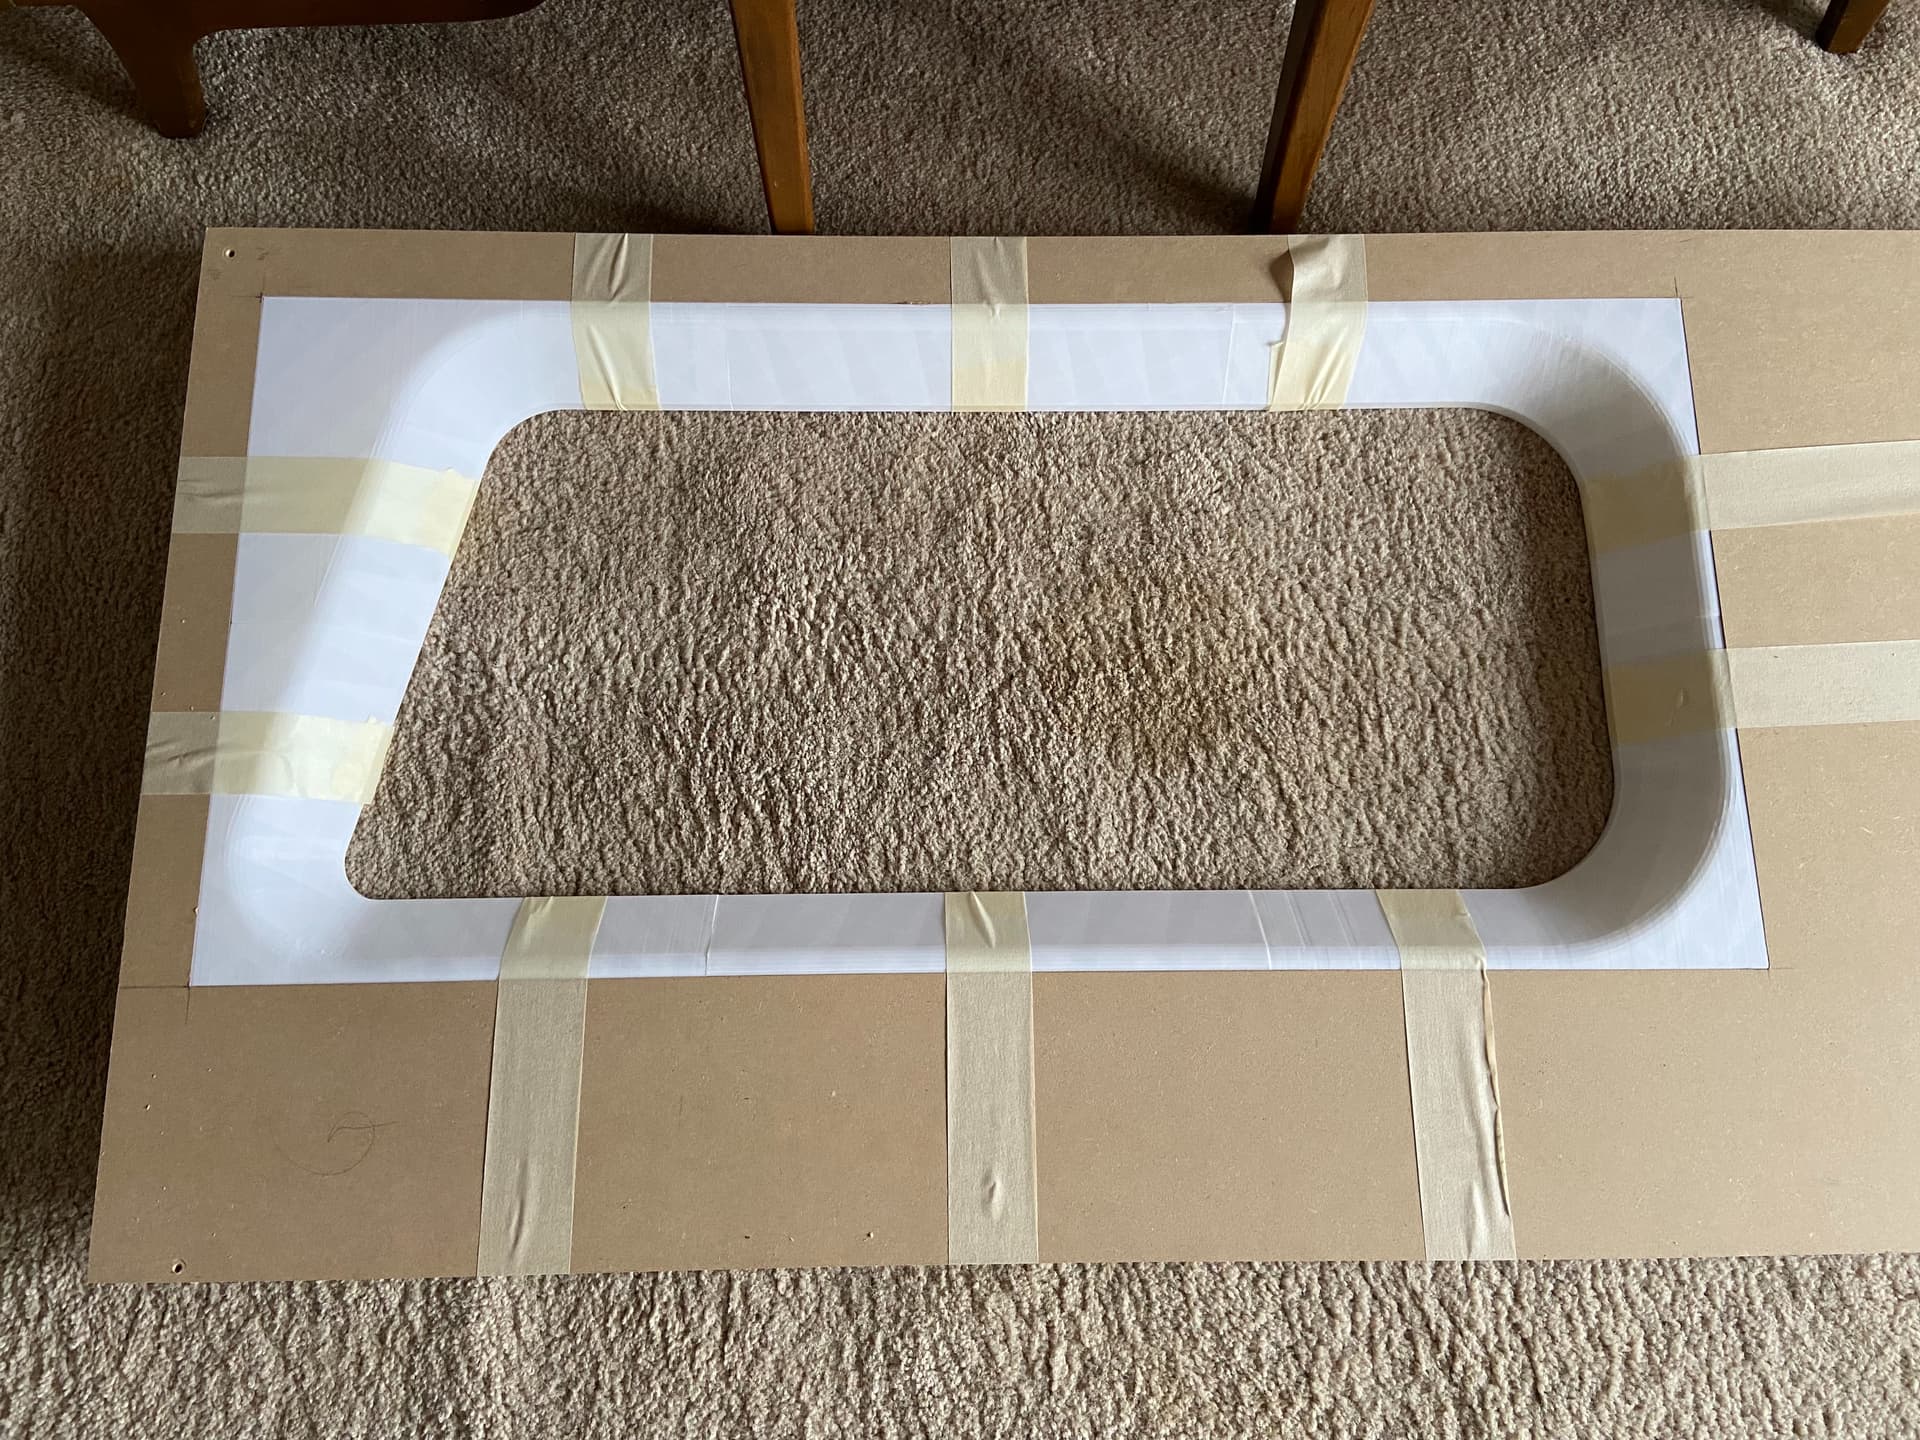
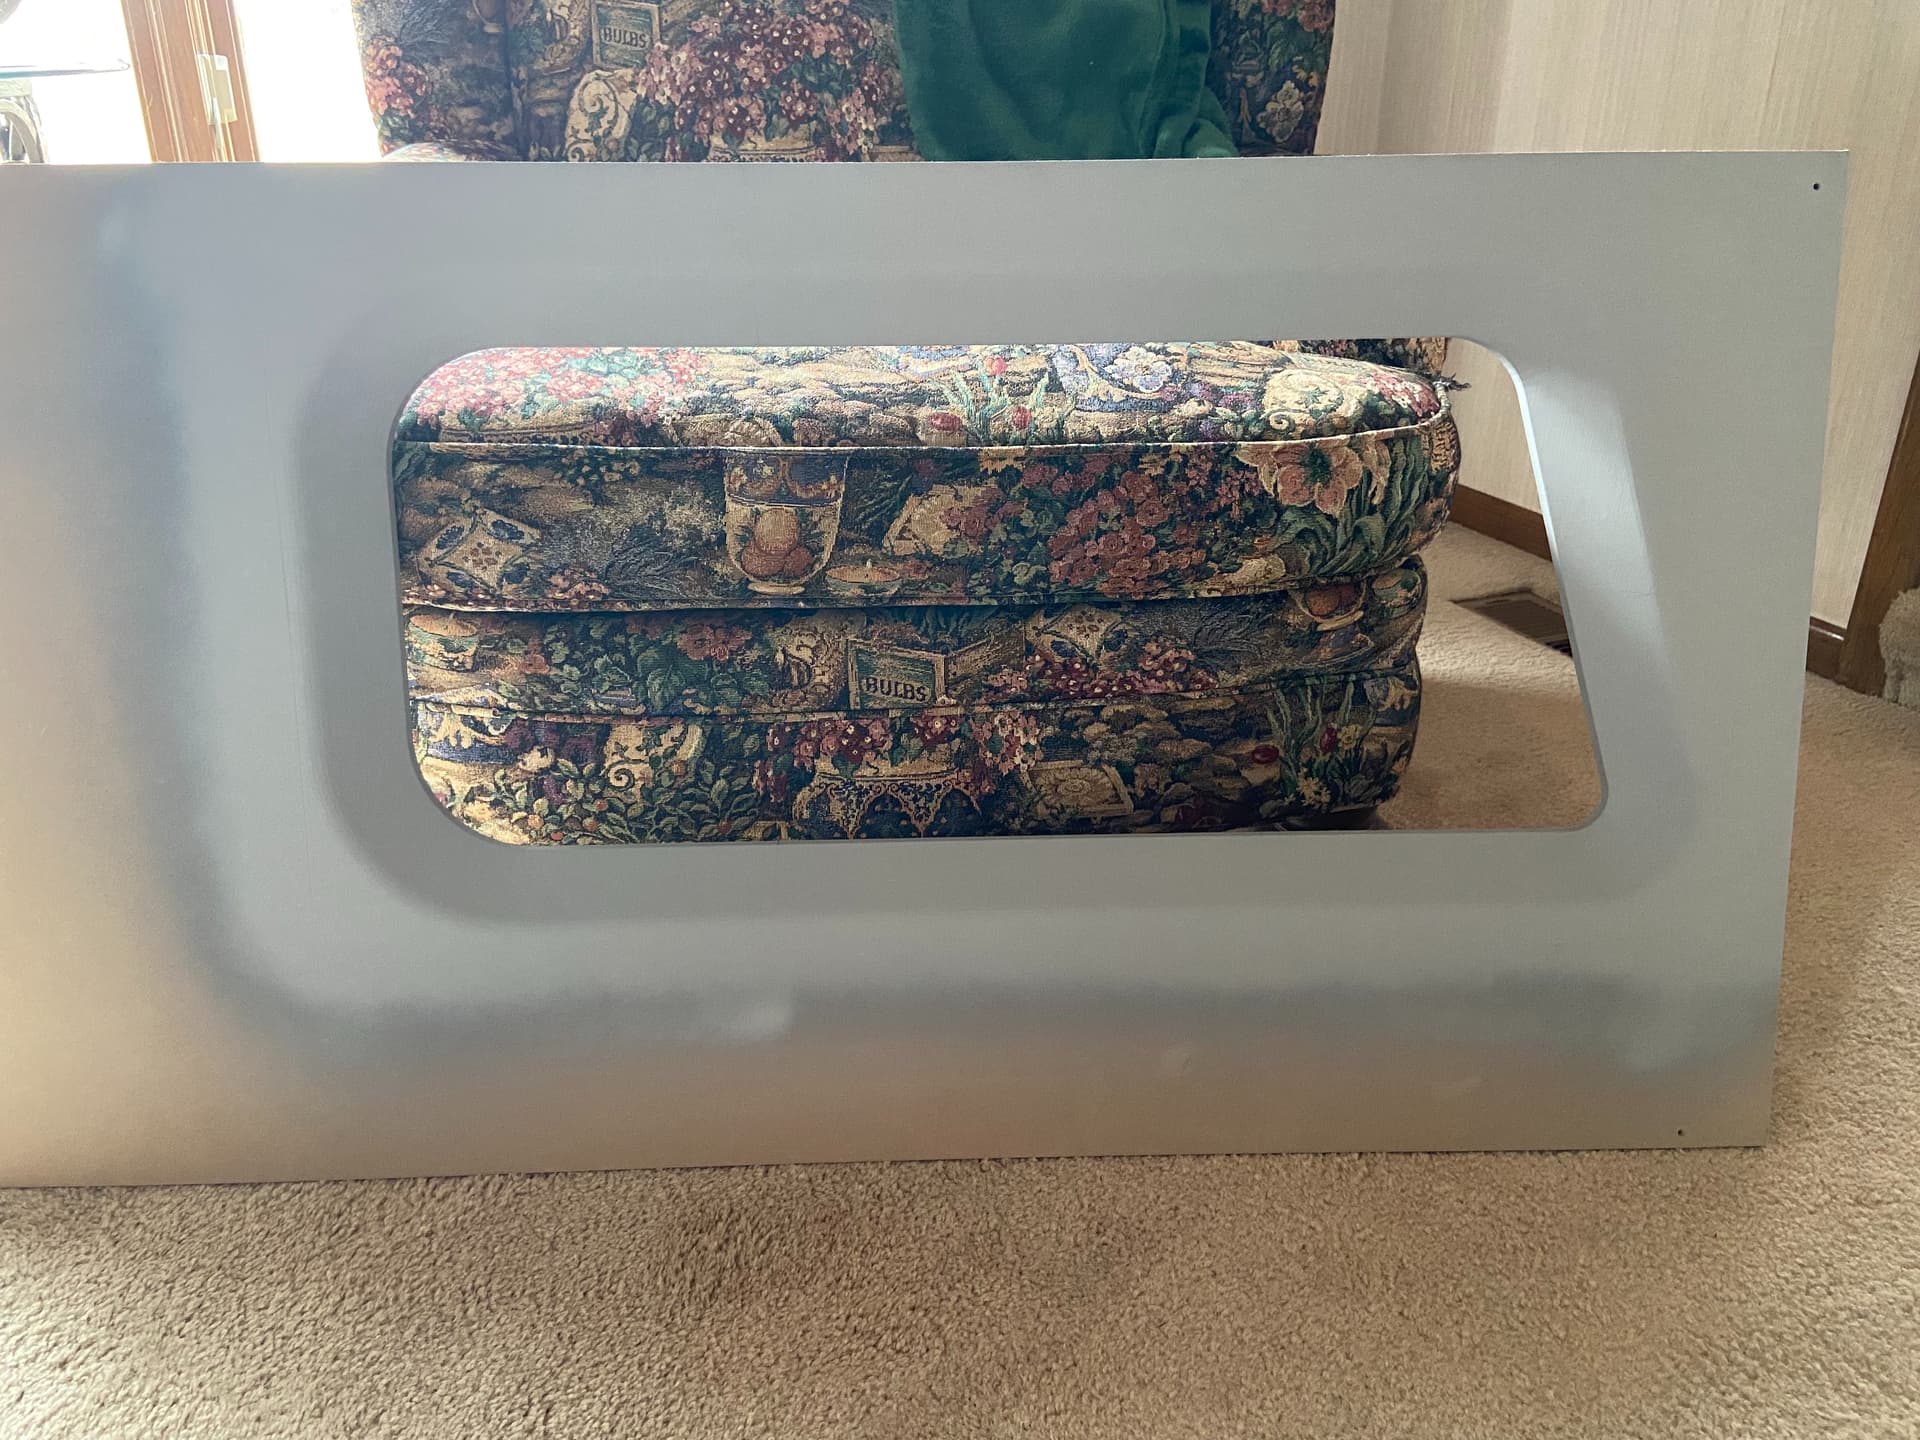
Gotcha, yeah so that was a fun task let me tell you. I knew early on one of the biggest immersion-killers I’ve seen in home cockpits is when people do side panels/windows and basically just cut a hole out and push a monitor screen up against it. There’s no depth, it just doesn’t look real. So, I tried to figure out a way to make it look more realistic. First, I tried taking a 1.5" foam board/panel (from home depot), cutting out a window shape, and then sanding/smoothing the bevel/angle into it to create that look. It “kinda” worked, but I knew after doing one that it wasn’t going to be the final product, it just wasn’t precise.
So then I went to work in Fusion 360 and essentially created that bevel/angle look, and then had to figure out a way to translate it that size/shape. What I had to end up doing was breaking the window frame I designed in F360 into 6 different pieces to fit on my 3D printer (Creality CR-10 v2). I also designed it in a way that allowed me only have to cut one rectangular opening out of my side panel (1/2" MDF). That way I was then able to take the 6 parts and basically fit them into that opening I cut out and allow for it all to line up very precise and square…as if it were one piece. And it actually worked pretty well! Then it was just filling a few gaps, spraying some filler primer, and a ton of sanding to make it look like it was all meant to be just one big side panel. I’ll attach a couple pics I took during the process, hopefully you’ll be able to see what I mean! I’ll probably make another video on the build process that goes more in depth with it as well.
Looks very good! Must’ve been a lot of work in sanding there. I need to-do something similar with a home cockpit design I’ll work on in the near future
Just a quick shout out to show my respect! Great overall build and I absolutely love your “sense of depth” (you are perfectly right about what you wrote about the other builds with flat windows). ![]()
Honestly, the sanding wasn’t as bad as I thought. As long as you are precise with the rectangular cutout in the MDF (I used a router following a straightedge so it came out pretty precise) then everything should fit pretty tight. I designed in a 1/2" dado on the 3D printed frame so that it not only made it more secure/possible to glue onto the back of the MDF, it also made the top (finished side) flush with the top of the MDF (probably explained that horribly, but you can sort of see what I mean in the first pic). Then from there just a quick pass with some filler, followed by a light sand, and it all but looked like it was one piece.
The amount of sanding to try and remove 3D print lines really is mitigated by one’s amount of OCD and what quality of print settings you use. I used pretty high quality print settings for that very reason, didn’t want to have to sand much. So while each side took about 8 days to print, in the end it was worth it to me only have to spray/sand about 2 coats of filler primer on them.
Thank you, I appreciate it!!
This came out awesome! How’d you remove the VC for the clean view out the front while keeping the wings?
I have some pretty big OCD when it comes to layerlines lol, never liked them in any visual parts that I’ve done, but you’re done a very good job
Thanks! It was something in the config file of a livery a guy created for me. It essentially removes the “walls/barriers” from the cockpit allowing you to clip through to the outside of the aircraft while still remaining in cockpit view. Basically when I start a flight I just alt+1 my way to my saved camera view that was essentially me moving the camera from the default position to the center, then forward through the windshield until all parts of the windshield/fuselage were no longer visible.
Yep, same. If you get real close you can still see some layer lines around the curved parts, but I just say it gives it character hahahaha.
Got any photos showing other aircraft. What you have looks great for the modded longitude livery but interested how it looks with others on those displays. What size are the side monitors?
DUDE where do you get everything?