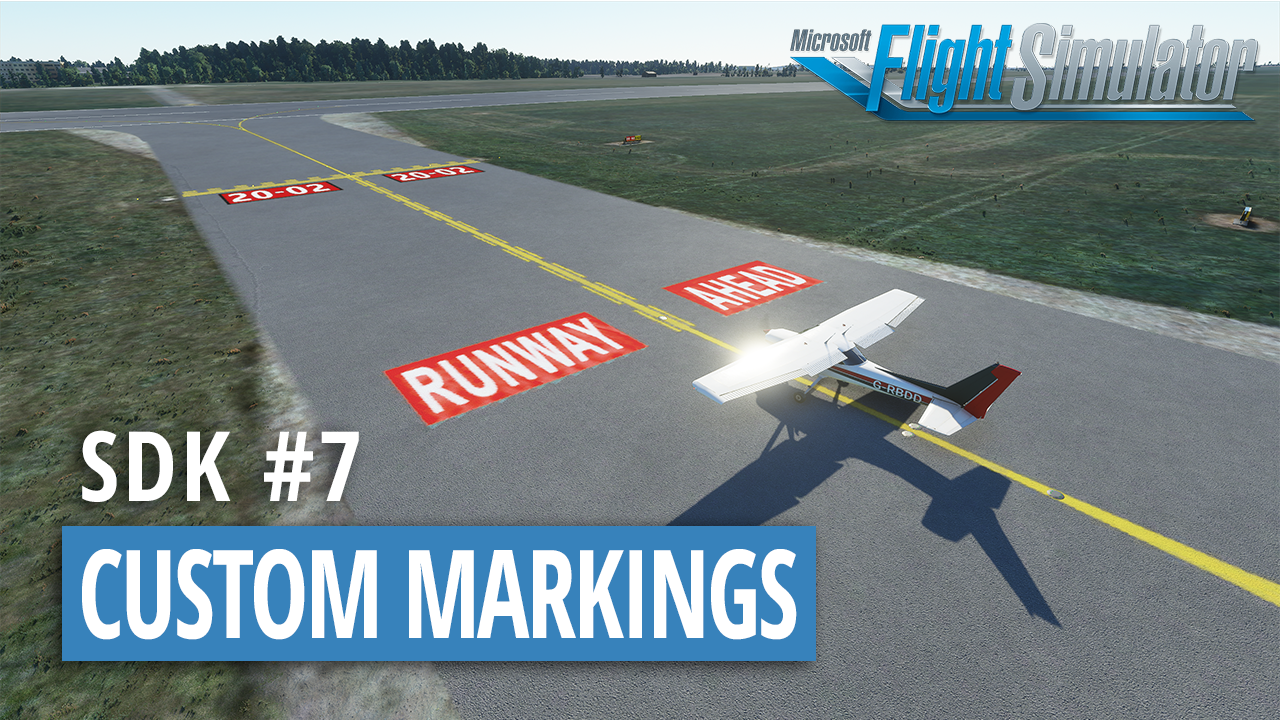
I’ve seen a number of people asking how to make custom markings such as the runway ahead signs you see on some airports (some people even resorting to drawing out the letters with aprons!) as it isn’t the clearest how to do this with the SDK.
Hopefully this tutorial shows you it doesn’t need to be that hard. It’s as simple as importing a custom texture and using an apron to place it down on top of a taxiway or apron.
SDK Tutorial #7 - Custom textures and markings
1 Like
All of the ones I’ve done with this method so far end up looking low res and blotchy no matter what size they are or what I do.
Any idea whether there’d some setting that can be tweaked or is this something innate in the sim?
I’ve tried every size up to 2048x2048, they always end up the same.
Try out the runway number markings which I show at the end of this tutorial and compare them to the custom ones that you are making. These runway number markings that the sim generates also look a bit aliased for me (which is what I think you’re talking about).
If this is similar to what you’re seeing with the custom markings then it’s more of a sim limitation and just increasing the texture size won’t help you here. You can try increasing your graphics settings but they will only look so good due to how they are rendered.
I’ve heard of people getting around this limitation by importing custom models (just a flat plane) with their custom textures on, I don’t know the performance implications of having all your ground textures as 3D models so be wary of that.
1 Like