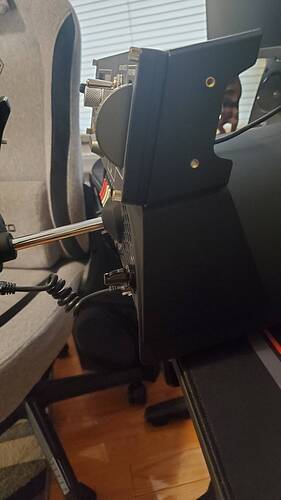
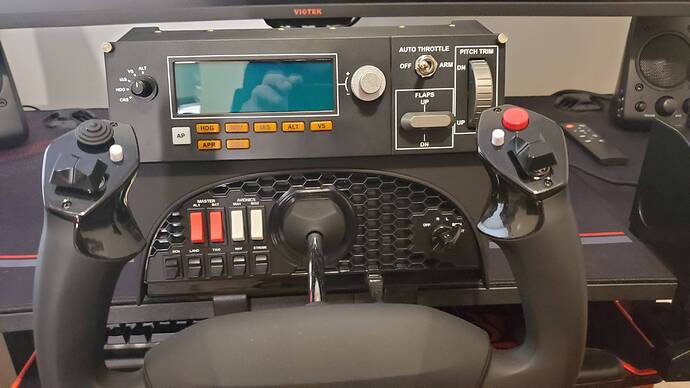
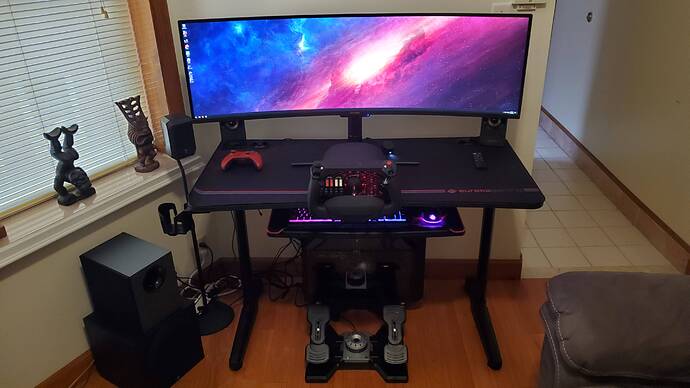
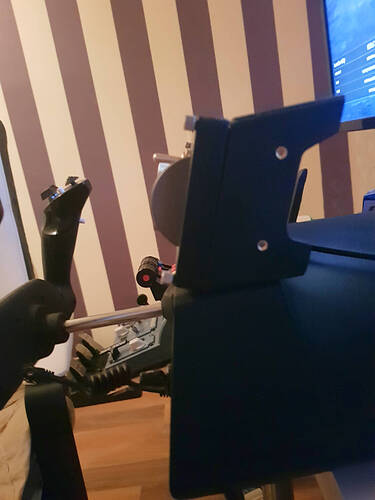
Yesterday I mounted the Logitech Flight Panel but I’m not digging how the front isn’t flush with the yoke, it sticks out a third of an inch or so. I was thinking of drilling new holes in the casing the exact amount of distance forward so that the face of the panel is flush with the Honeycomb. Has anyone done this? Just figured I’d ask before drilling new holes in a day or two.
I’m thinking of doing the same, two new holes in the multipanelbracket will be enough to mount it at a better position. Kinda weird that they took the hole position of the mountingbracket of the panels instead of the whole panel.
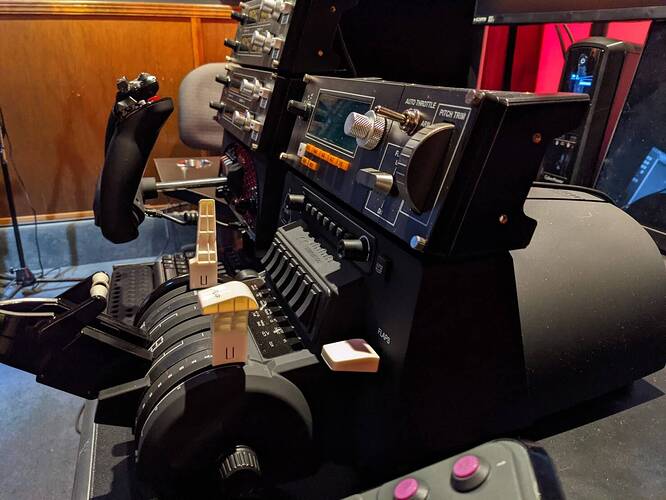
Same issue with the Bravo here. Instead of drilling holes I was thinking of using a small slat of wood or plastic and just making a small offset. Screw the slat onto the bravo, line the radio panel up where I want it and screw it to the slat.
I think either solution would be fine. That overhang on the Bravo makes it hard to operate the autopilot controls.
I like it,nice panel
The thing is it does line up flush if you mount it on the Logitech/Saitek yoke. It’s Honeycomb that has a smaller top and screw placements that make it non-flush. I think I’m just going to drill it. The holes aren’t that big anyhow so it’s shouldn’t affect the structure of the casing. I’m using four screws so it’s super sturdy.
Just use heavy duty Velcro.
Nah no way, not for that. I’ve used it for very many other things but for one I don’t want the glue messing up the finish on the yoke (I keep all my gear pristine in case I ever decide to resell plus I like keeping my stuff in excellent condition), secondly it wouldn’t be rock solid stable and would still wiggle a bit when using the controls on the panel. I may wind up doing this over the weekend, we’ll see. If I do I’ll post after pics.
Yes, I’ve already done this.
When I mounted my Multi Panel above my Bravo Throttle, I drilled a few holes, backset the thickness of the overlap and mounted the bracket further back. I did this mostly because the overlay was hiding the buttons for the Auto Pilot portion of the Bravo and my overhead light would not allow me to read them. Once I installed the Bravo driver and learned that those buttons are, in fact, LED backlit, it wasn’t such a big advantage.
In truth, I use the Multi Panel for my Auto Pilot needs rather than the Bravo because they are larger, and easier to read anyway.
[Edit: Be sure to use a countersink (or at least a low profile) type of screw, because if you try to use the silver thumbscrew type that come with the Logitech products, they’ll interfere with the housing when you try to install the panel into the bracket.]
Just my $.02.
Jim-Sim
I was actually planning the same. I have a Bravo coming, just won an Ebay auction yesterday (don’t judge me, I’ve been waiting for a retail order since October and they keep giving me dates then pushing them back). I’m currently using the Logitech Quadrant and at first was wondering if it would be a bit of a waste to get the multipanel but then I figured I really do want the LED readout cause it’s annoying to have to keep zooming in with the mouse and manipulate the graphical controls. Plus, I can always remap the Logitech trim wheel and flaps lever. I was using the multipanel yesterday doing approach mode for landings in a 737 in X-Plane and what a joy to use!
*EDIT - also, I plan to get the radio panel and mount it on the Bravo.
Yeah I’m just going to use the screws from the Honeycomb, that’s what I did for now as well. I realize if they don’t get nearly flush with the plastic the panel might not sit all the way into the housing. I think it would work fine with the Honeycomb screws even further back but if they’re still blocking a bit I can use a larger bit and drill a sink for the head to sit in flush.
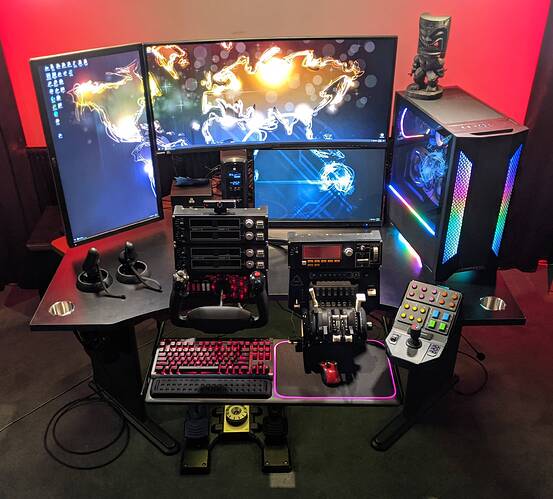
Two Radio Panels (Com1, Com2, Nav1, and XPDR) and the Multi Panel.
I bought the Alpha Yoke back in Spring of last year while I was first building my system for the then upcoming release of MSFS2020. I bought the Bravo direct from Honeycomb the very minute it started shipping and apparently seconds before it became such a hot commodity.
I’ve reconfigured my installation several times. At one point I had each radio mounted “under” the edge of my desk on either side of the Alpha, because I had made a custom bracket that held my keyboard at an angle on top of the Yoke. But when the Bravo arrived, I decided to put the keyboard under the desktop and mount the other three panels above. I played around with layout for a few days, but once I decided where the Alpha and Bravo would finally mount, I just screwed the attachment pads directly down to my desktop and did away with the metal brackets and clamps. That left plenty of room underneath for the keyboard tray and a nice edge lit mousepad.
End result (pic is a bit grainy, sorry, the room is usually dark):
Jim-Sim
That’s exactly what I did.
And for the record, those screws across the top of the Honeycomb products are not all the same length. You’ll find that out when you remove them. You can use the longer set when going through the Logitech plastic bracket, regardless of where you place them.
Heh, yeah I unscrewed them all yesterday. Then I saw two were smaller lengths so I figured I’d just mount it with the 4 screws, plenty stable with 4. So how did you mount the Alpha and Bravo directly to your desk? If you have a pic I’d love to see it. I too am not too keen on the big screw mount handles under the desk. As it is now it’s working ok but it’s a little bit close to the mouse. More concerned of how it will be when I mount the Bravo which will be in the area of my mouse (I have a keyboard tray).
*EDIT - Nice Hawaiian tiki!!! I have several myself. Going back there for my 12th trip April 8th.
I just drilled three holes through the mounting plates and used some short drywall screws to attach them down to the desktop. Then slip the Alpha and Bravo on as usual and tighten the thumbscrews on the back.
You have to commit to the mounting location, because you are putting six (in my case) screws directly into the desktop, but you might notice in the picture above, that I have two actual desktops. One was the original (it’s a corner unit desk I bought off Craigslist) and the other is a separate desktop that just sits on top of the original desk. I did this because I wanted a wider cutout than the original desk provided… especially when the Bravo arrived and I had to mount both units side by side.
I even came back later and drilled a couple big holes for cupholders (you can see on either side in the finished picture)… as I didn’t want to be knocking over my soda while flailing around reaching for things with my VR headset on. ![]()
Jim-Sim
Ah… that’s Tyrus. Tiki god of Tie Wraps. ![]()
He became my obligatory desktop mascot during the PC Build.
I found him at a thrift shop, painted him black with a textured paint, and stuffed some leftover tie wraps in his hands after the build.
Jim-Sim
LOL, you can see two out of the three Tikis I have next to my setup in the below photo. This was before I got the Logitech quadrant:
Nice.
Love the monitor.
I didn’t want to go quite that large, because I had the HP Reverb G2 on order (now since arrived) at the time. So I stuck with a curved 35". Plus I really liked having the vertical monitor for my pop outs and a better-than-included VFR Map option. Then I added the third, not-yet-supported, touch screen since I had it laying around from another project.
You’ll appreciate the Bravo, if only for the trim wheel. That was my biggest draw at the time.
I’ve reconfigured handles for the twin jets now, since I spend so much time in the Cessna Longitude.
[Edit: Now that I think about it… I’ve gotten so used to the AP in the jets, I can’t remember the last time I reached down and fiddled the trim wheel. ![]() ]
]
It’s truly an excellent screen. I was worried because as far as 49" Super UltraWide monitors go the Viotek is known to be one of the most budget monitors, but I’m truly impressed by it. Color is so rich, screen brightness can be blinding if set too high. I am VERY happy with the image it produces and ZERO dead pixels. I don’t bother to use the bogus HDR but it really doesn’t need it. That said, while I absolutely love it I’m still annoyed that there are no larger options on the market that would give me something between this screen and a 55" 4K TV - meaning maybe something that would be 52-55" but be Ultrawide (not super ultra). When I watch youtube videos on my Sony 55" 4K TV I’m sometimes envious at how the size of objects on the screen are so much more true to life. Being my screen is only about 13.5" vertically it doesn’t quite give that feeling, though the super ultrawide aspect gives a level of immersion 4K TV’s just don’t have. I’d be ecstatic if my screen was just 2-3" bigger vertically. Some day I’m sure some company will make such a screen.
Just drilled 4 holes 15mm above the standard holes and it looks a lot better now..
And for the autists, I tightened the upper screw now. ![]()
I second that.
My first curved was a 31" and it had such a tall shape.
When going to the 35" everything got squatty. Didn’t initially like that aspect ratio, but I’ve gotten used to it now.
