What Are Manual Cache Regions
MSFS has implemented a useful manual scenery caching capability that enables users to predownload custom scenery regions to their hard drives. Once these cached areas are stored locally, scenery data will no longer be streamed when flying over these regions. This provides a noticeable performance improvement since MSFS no longer needs to share CPU/GPU resources to stream data while flying over your custom regions. This capability is very flexible and offers nearly infinite solutions for every user.
How to Create a Manual Cache Region
Navigate to Options / General / Data and scroll to the bottom of the window. There are several sections in this window: “ Data Connection ”, “ Current Data Consumption ”, Data Bandwidth Usage Limit ”, and “ Rolling Cache Settings ”. We will focus on the “ Rolling Cache Settings ” section.

First, a comment about Rolling Cache. If you have Rolling Cache enabled, MSFS will cache the data you are flying over and store that scenery content in your rolling cache up to the data limit you have set in “Rolling Cache Limit (GIB)”. This is happening continuously as you fly and employs a first in, first-out logic once the cache is full. This rolling cache functions until such time as you enter a region you have manually cached. When you fly over a manually cached region, MSFS know this and interrupts streaming until you are outside that area. This is where the performance improvement is achieved since the CPU/GPU are no longer processing the streaming data pipeline.
To setup a manual cache, go to Option / General / Data, scroll down to Manual Cache, and select View. The Manual Cache interface open and looks like this:
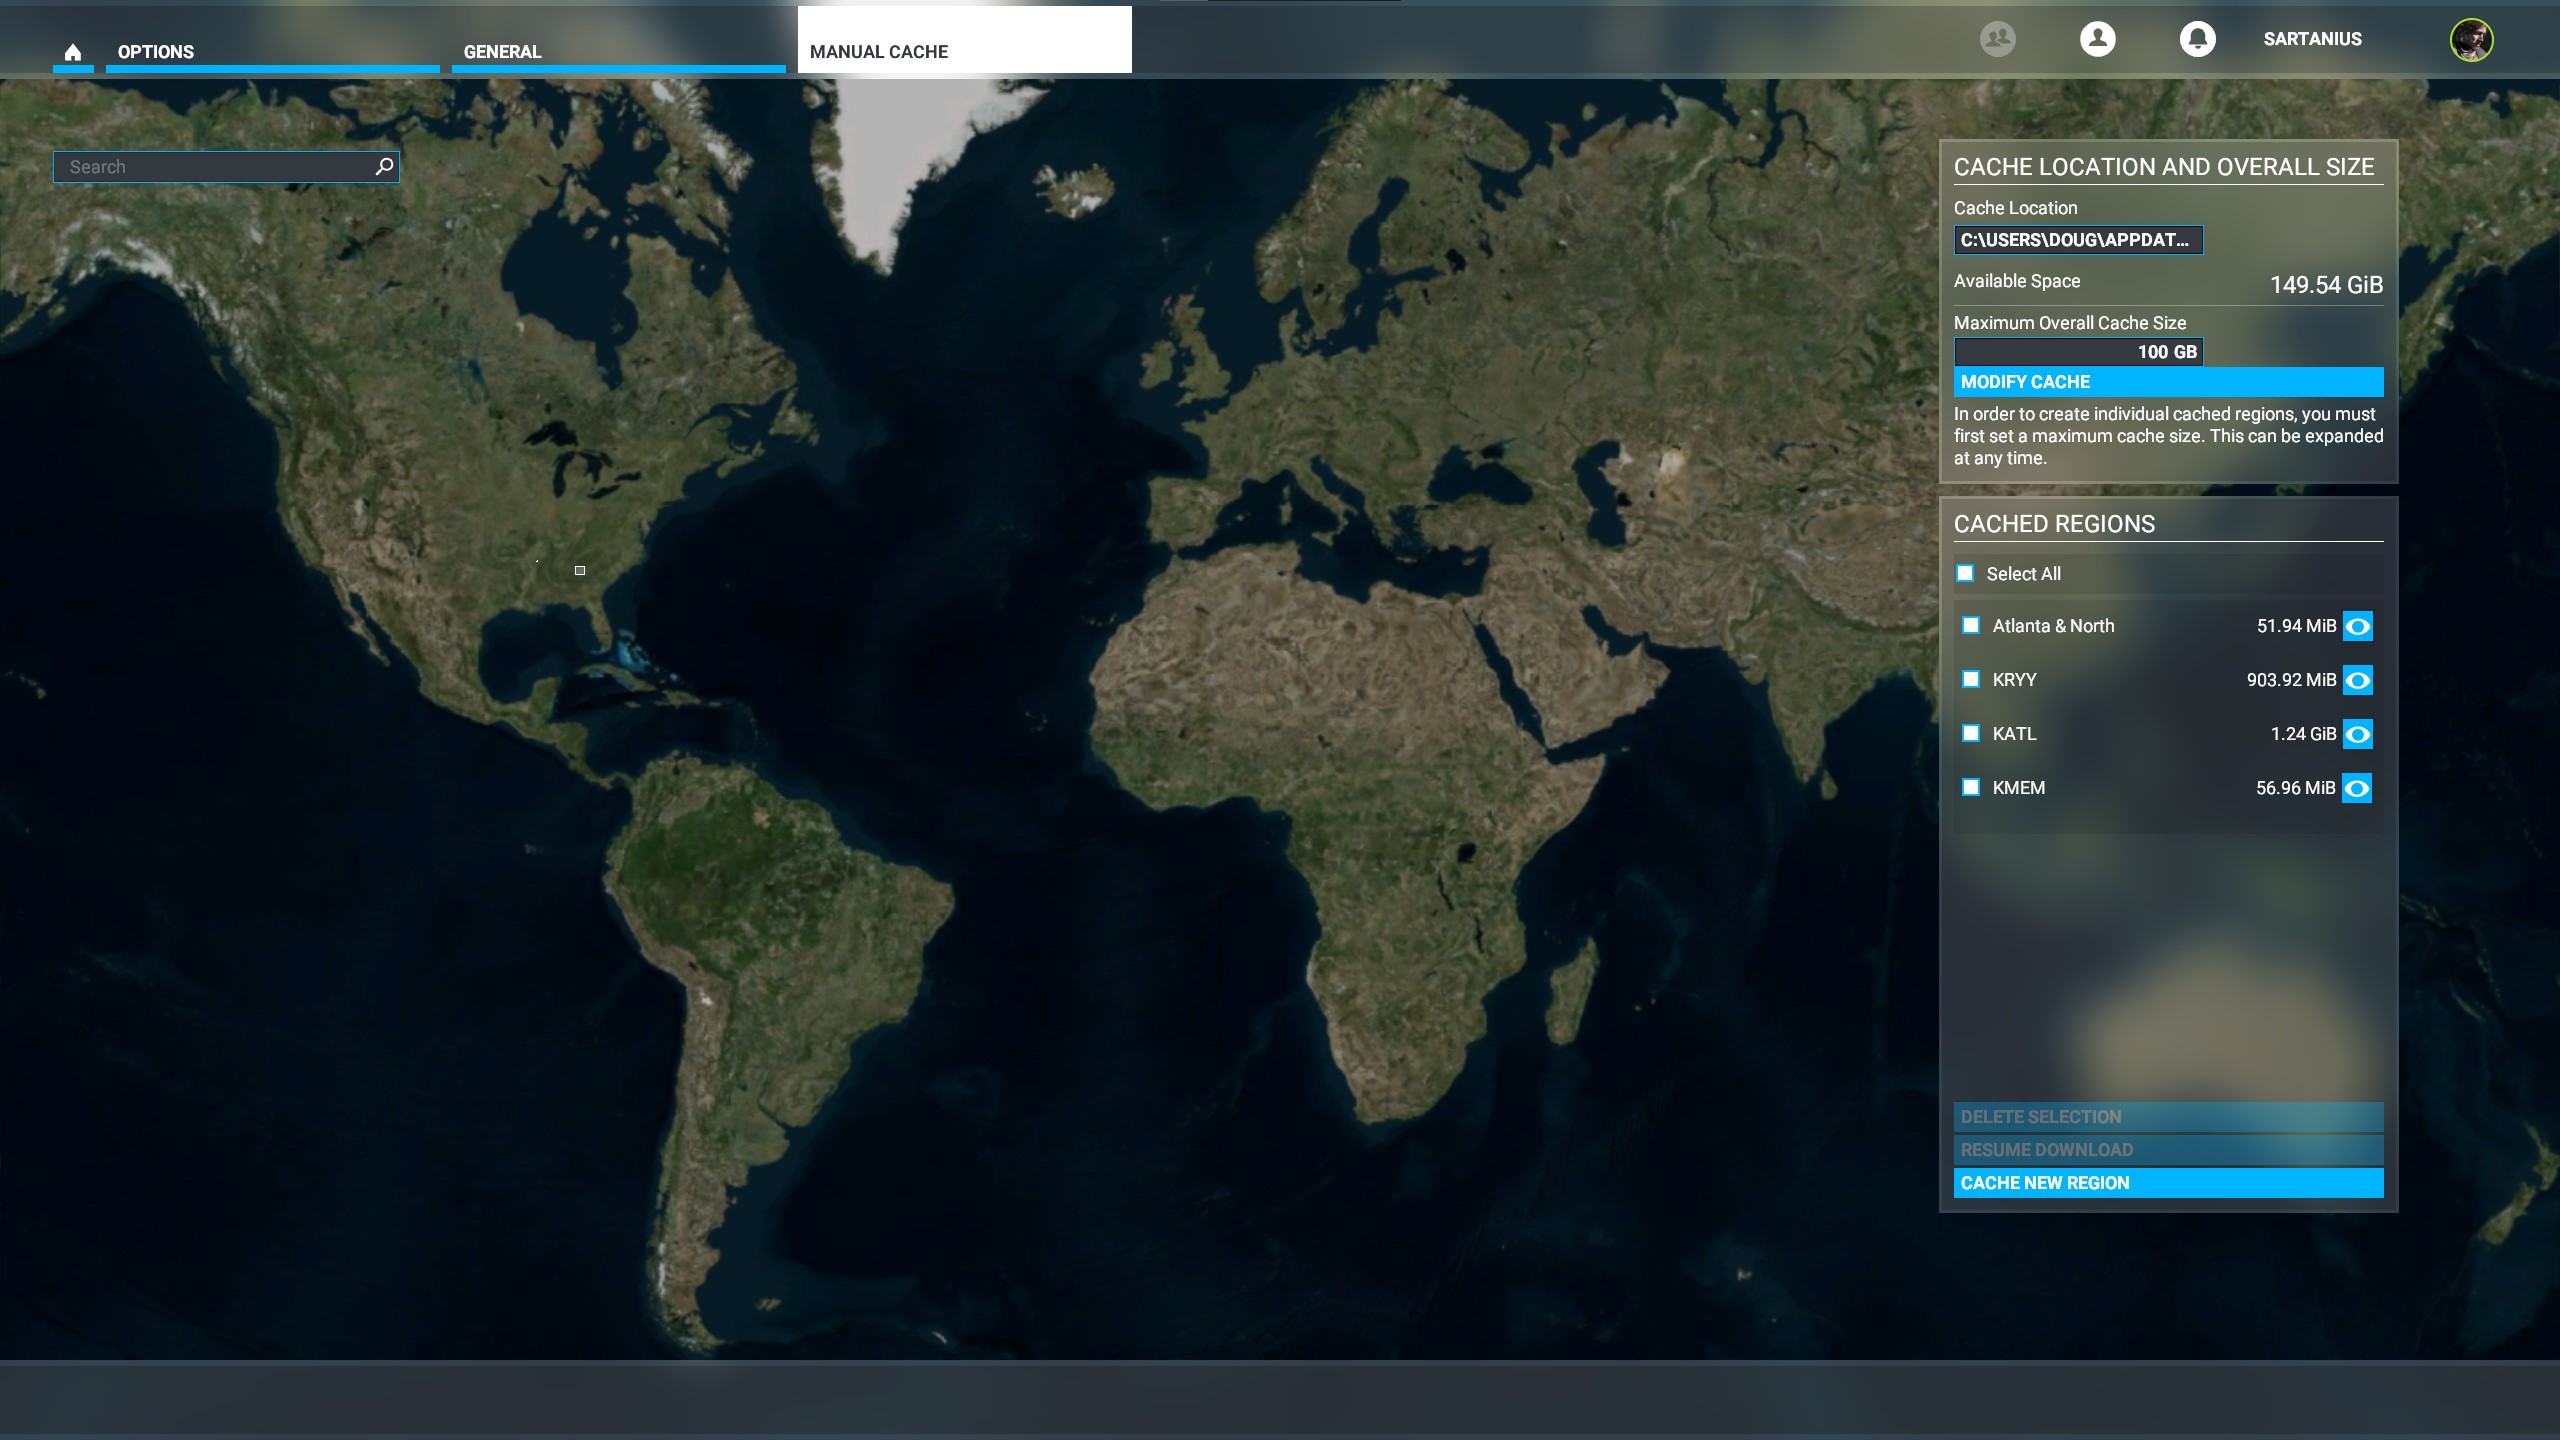
In the window on the right-hand side there is a Maximum Overall Cache Size data field where you enter the size you want your Manual Cache to occupy within the overall Rolling Cache folder. If you’d like, you can change the path here to have a unique location for your Manual Cache. I have created a Manual Cache size equal to the Rolling Cache, 100GB. Once you enter the size, click the Modify Cache button to setup the cache on your hard disk.
In the screenshot above you will see some Cached Regions I have already created. Each region shows the custom name you’ve given it as well as the hard disk space it occupies.
To create a Manual Cache region for an area you plan to fly around frequently, or to be part of a flight plan route, press the Cache New Region button and the window changes to show some new windows on the right-hand side. In my example, I am going to create a custom cache for south Florida with detailed emphasis around Miami International Airport.
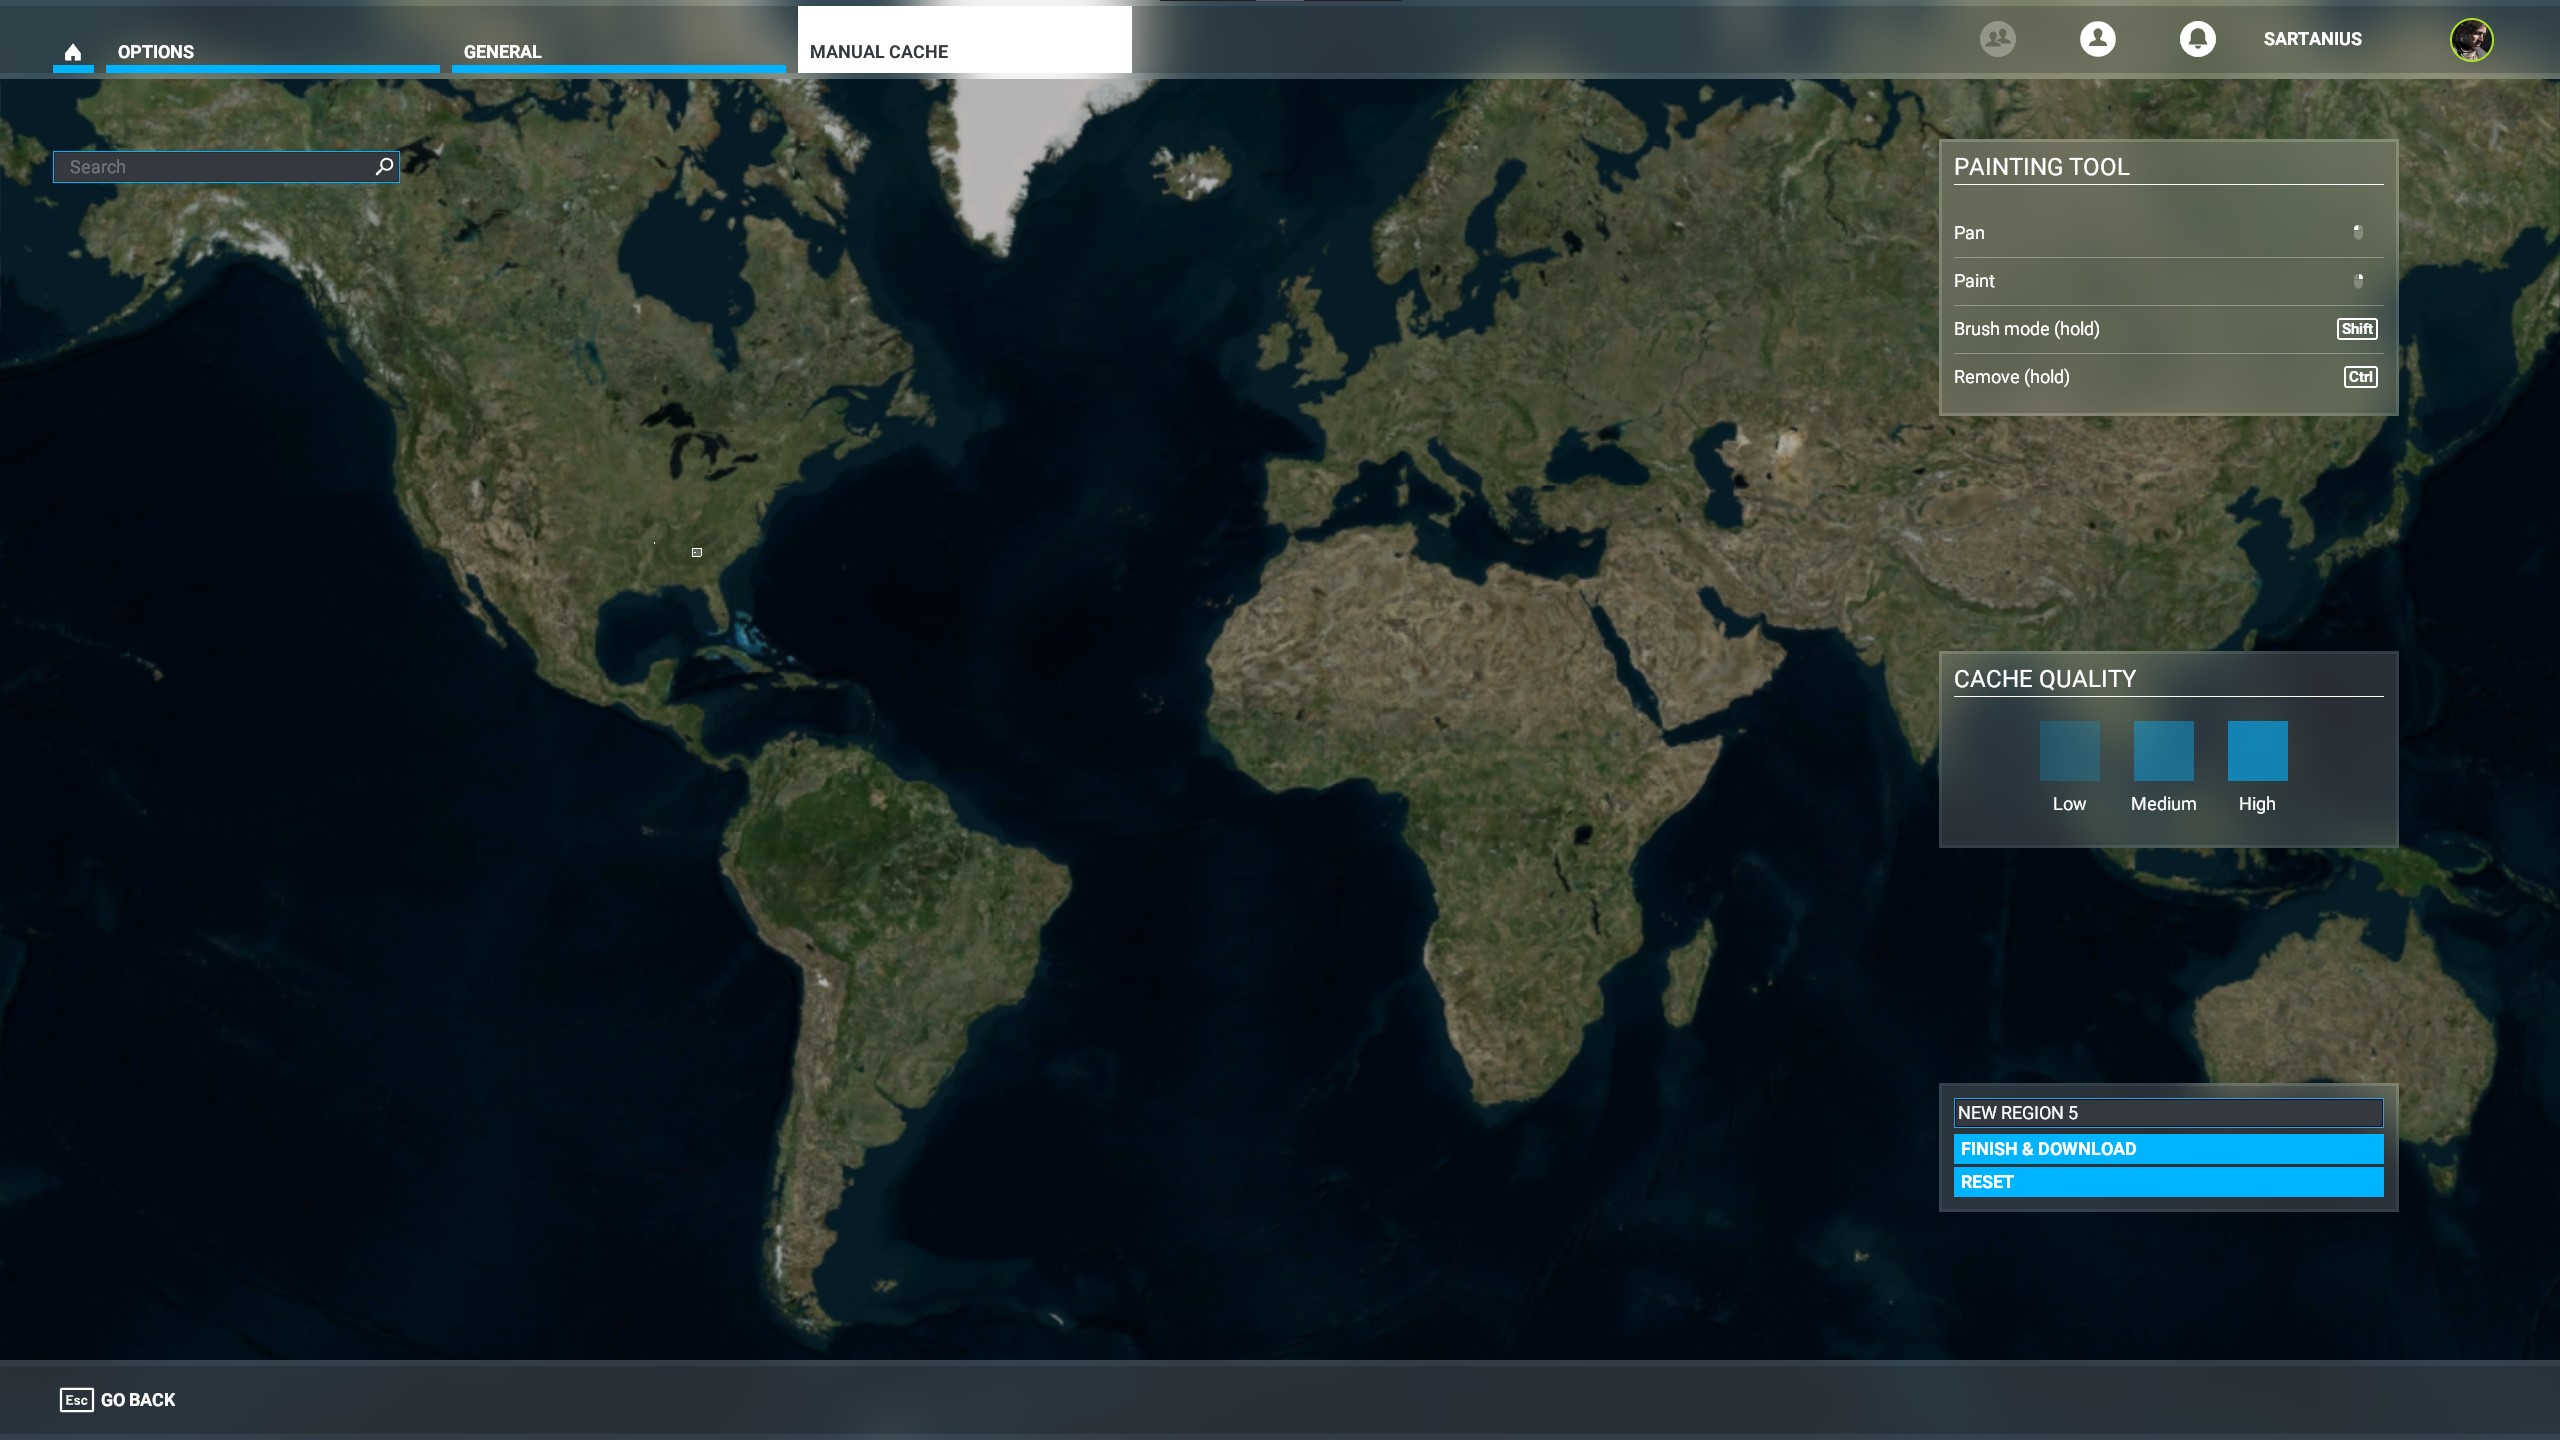
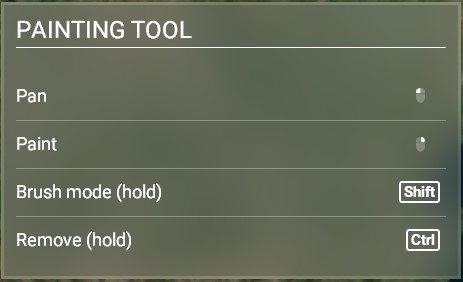
Note the three small windows on the right-hand side, “Painting Tool”, “Cache Quality”, and a small window where you name the custom region and complete its creation.
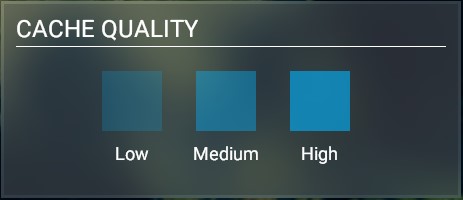
The Painting Tools window has four movement and selection settings for using your mouse to move and zoom on the map as well as to draw the actual custom region you desire for your manual cache. The Cache Quality window shows you the quality of data you are assigning to the custom region you are creating.
Next, using the mouse scroll wheel, zoom in to the map and use the left mouse button to pan the map to the location you want. Since I am going to create Manual Cache regions in south Florida, I have scrolled and zoomed to that region.
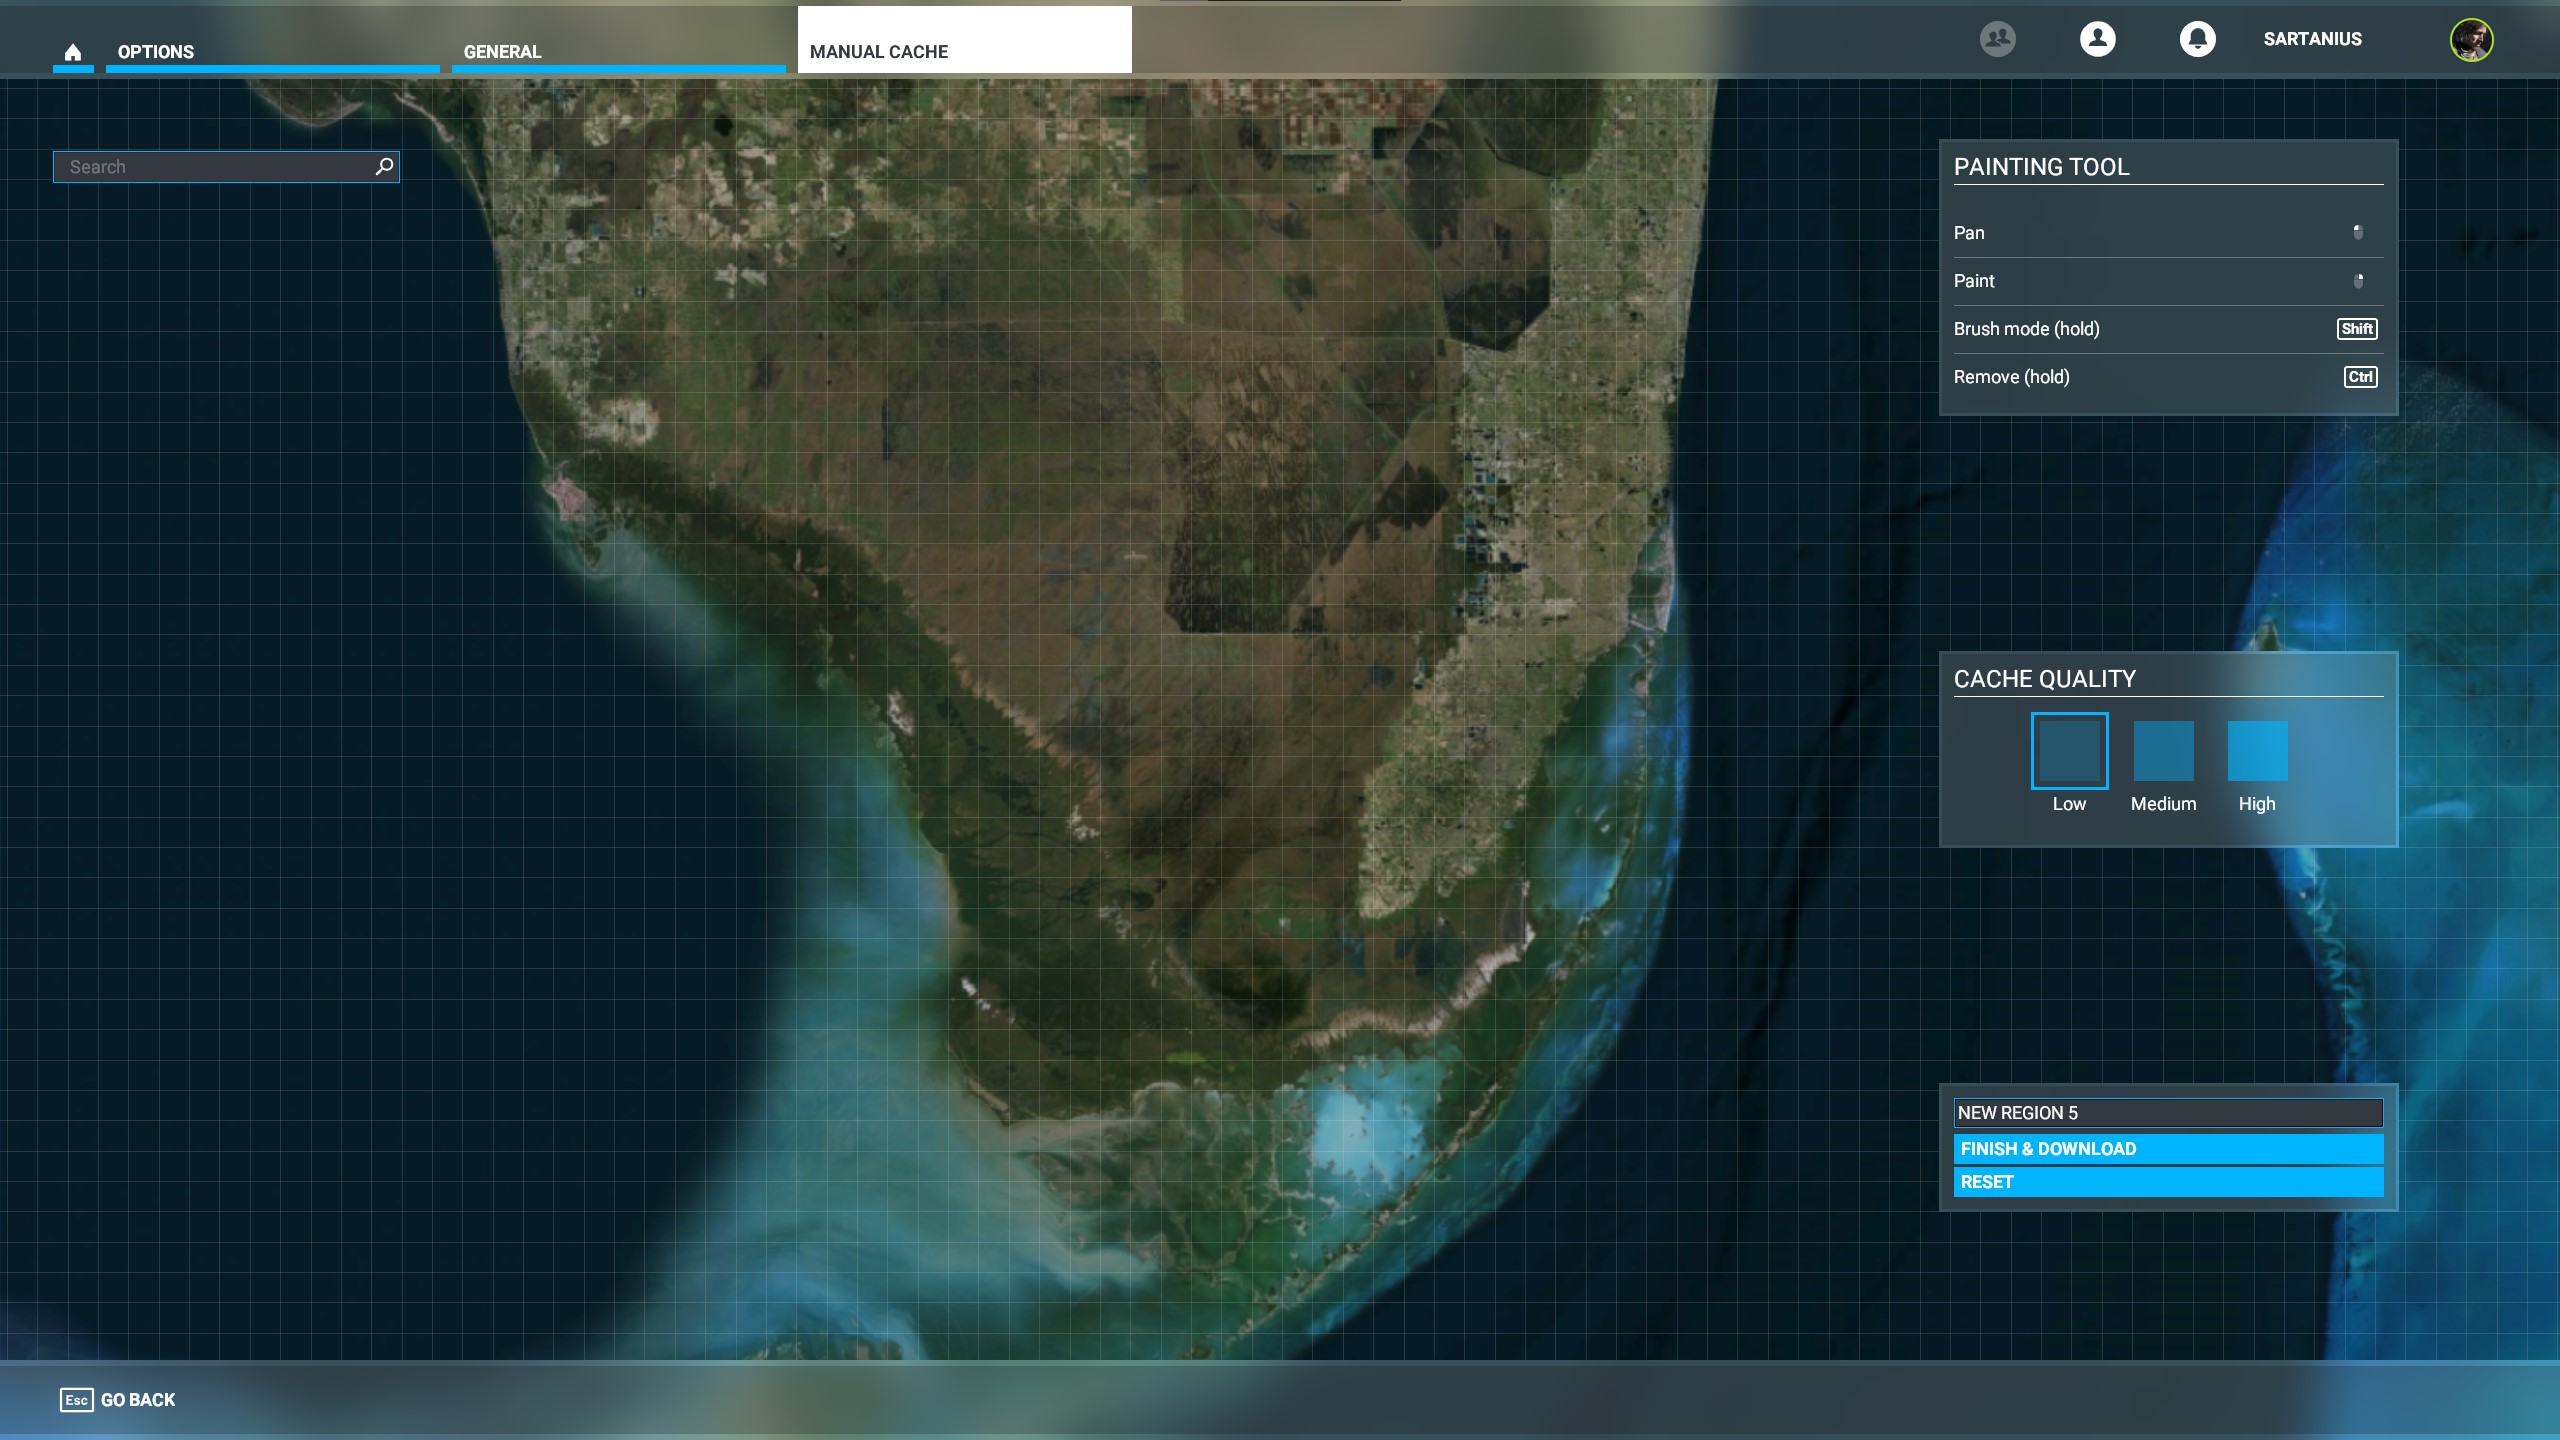
Note that you can’t create a region until you have zoomed in to a point where you first see a grid on the map. Once the grid appears, you’ll see a thin blue border around the “Low” Cache Quality box. This indicates that a region you create at this level will be low quality cache data. This is best for areas where you’re likely to be flying at higher altitudes.
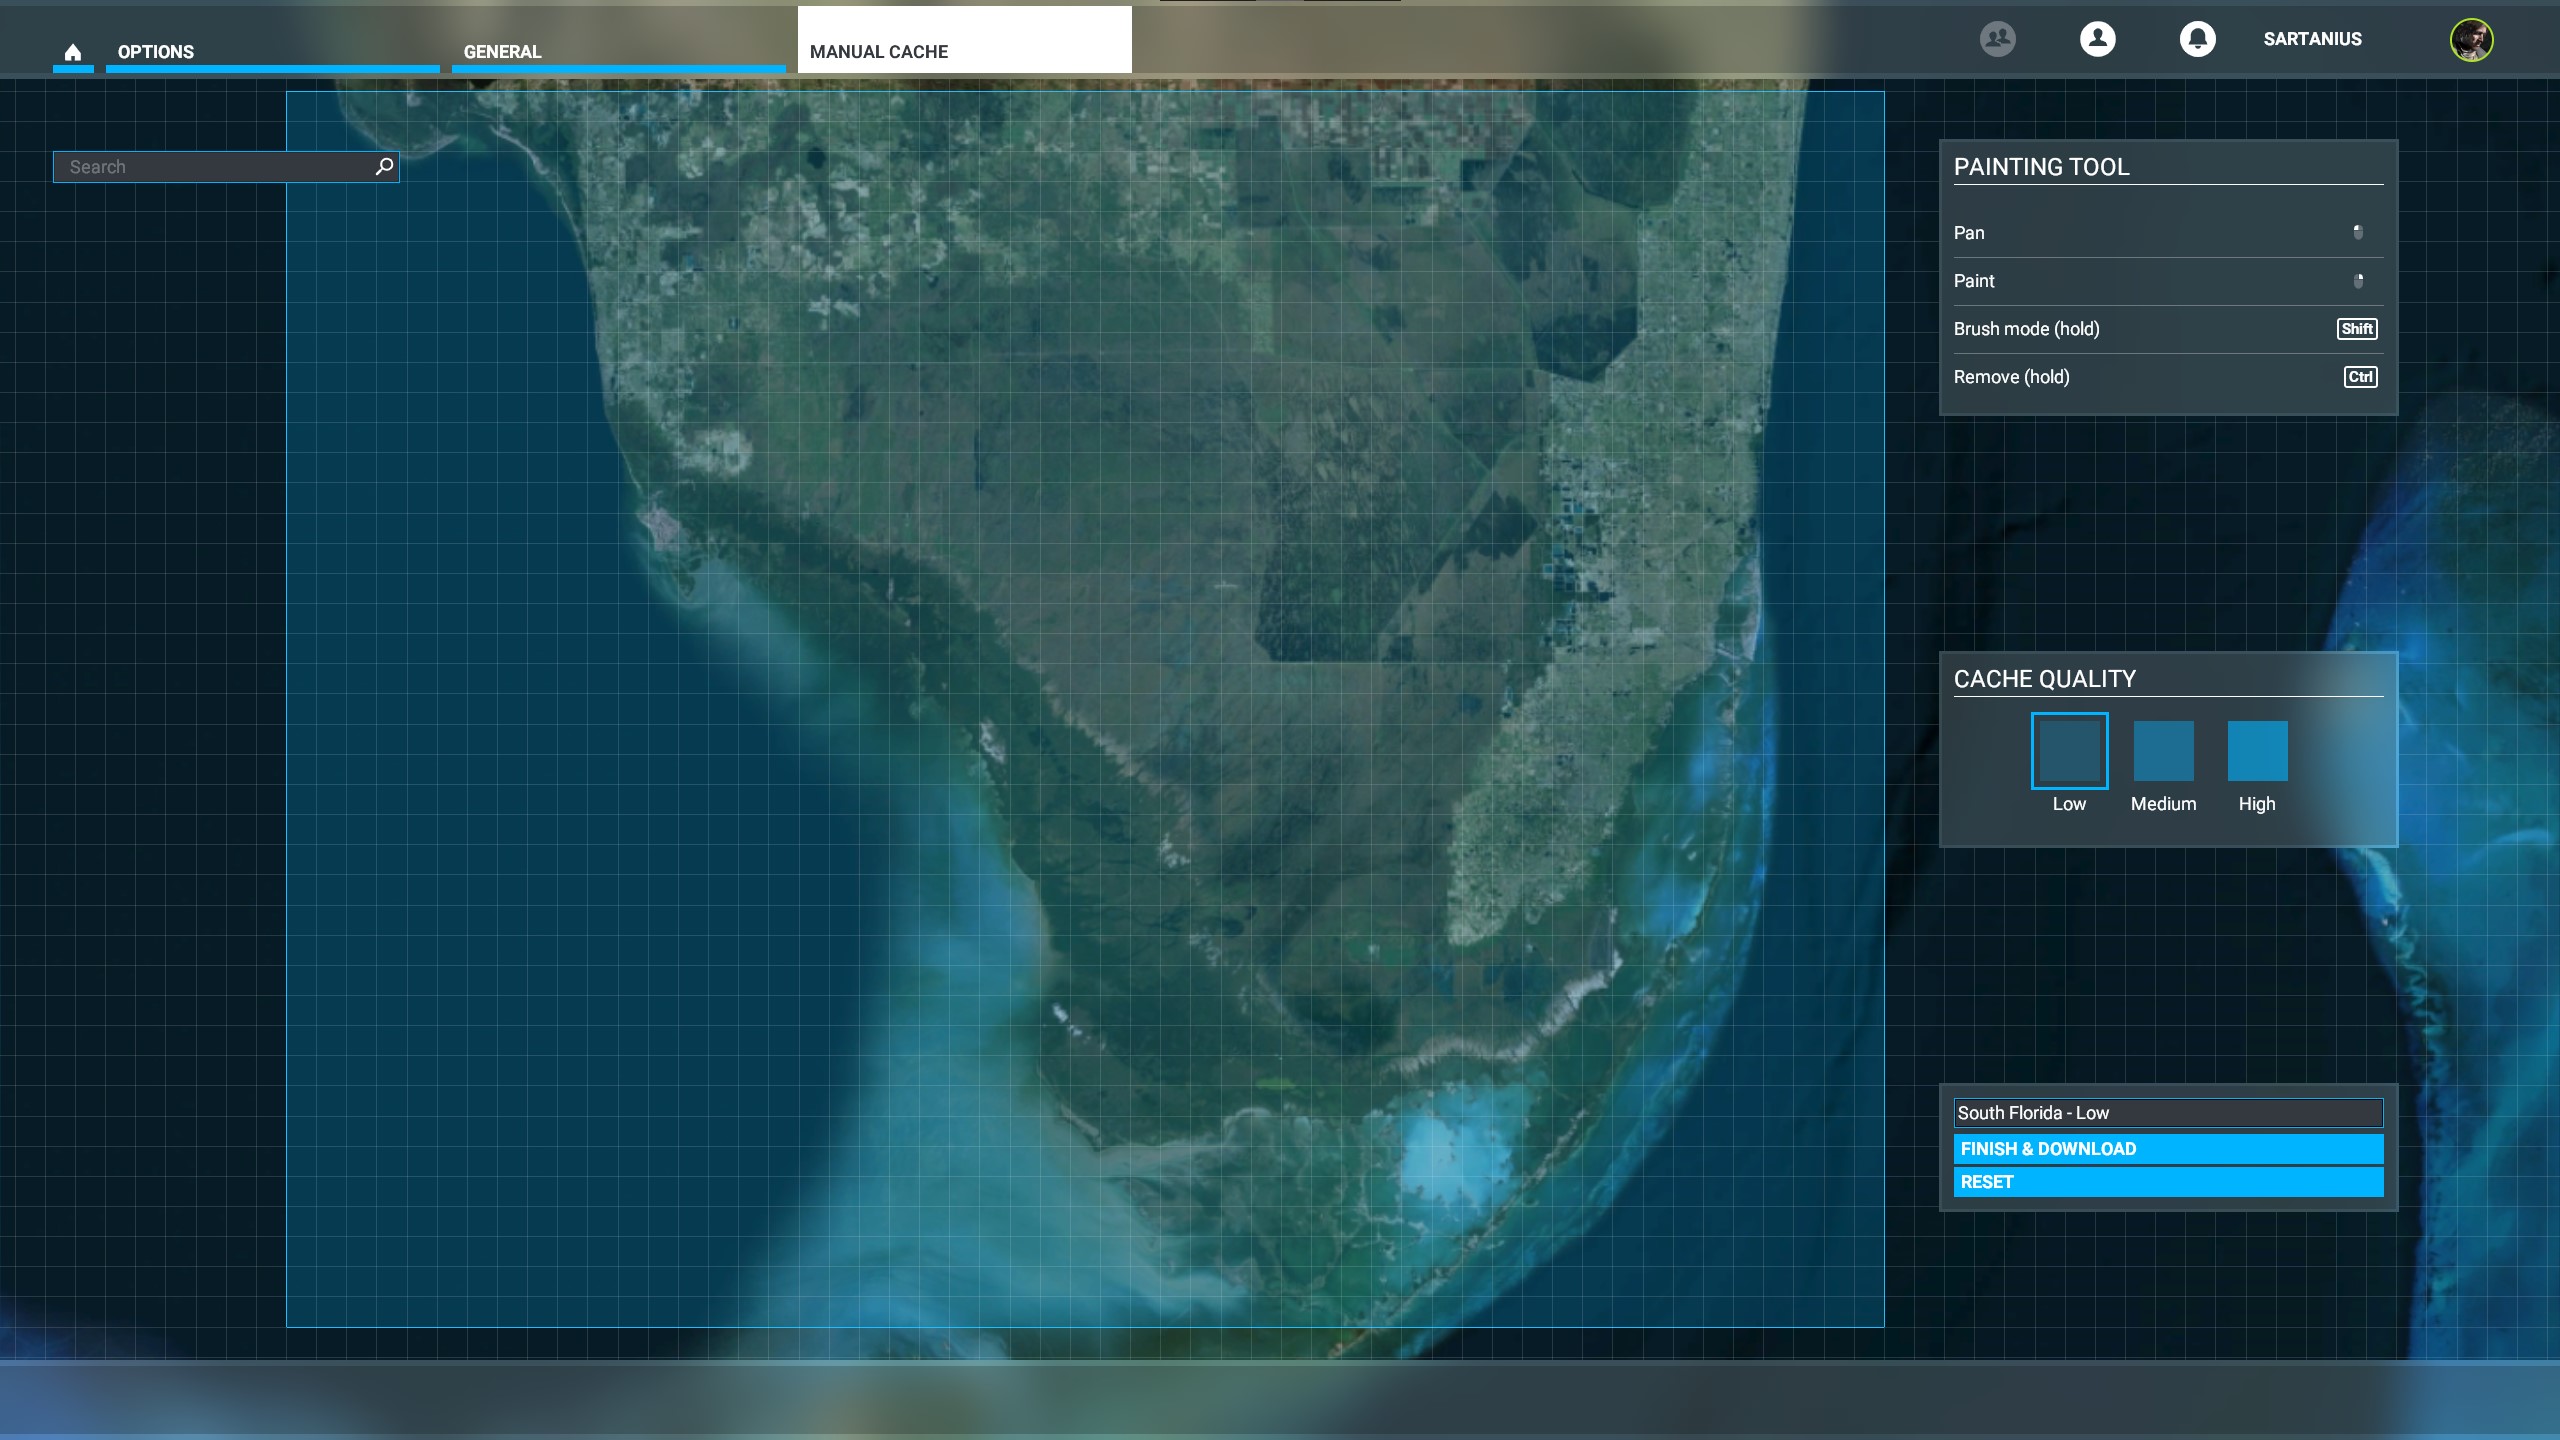
To highlight the area for the low data cache, click and hold the right-hand mouse button then drag a blue box over your target area. If you want to start the selection over, simply hit the Reset button on the lower right-hand side. Enter the name you want for the region in the small box on the lower right-hand side, then press the “Finish & Download” button. A small dialogue pops up showing the data being downloaded as the manual cache region is created. Note that the length of time needed to create the region is impacted by your bandwidth. You will see this new region listed in the window on the right-hand side with your other regions.
Since I want a medium level manual cache region for the Miami Beach area, I need to scroll down closer to the map until I see the Cache Quality indicator change to Medium. You’ll note the grid squares are smaller. Then, using the same technique as above, you draw a blue box over your target area, add a custom name, then click the “Finish & Download” button. Higher quality cache data takes longer to download, so this region will take longer to create than the low-quality region.

And lastly, we will create a high detail region over Miami International Airport (KMIA). Using the mouse wheel, zoom in over KMIA until you see the Cache Quality indicator change to High. Using the steps you’ve already learned, select an area over KMIA, enter your name for this region, then hit the Finish & Download button.
Once completed, scroll out on the map till you see all three newly created manual cache regions highlighted with white boxes. You can also see them listed on the right-hand side. You are essentially done with creating your new manual cache regions.

Resizing or Deleting the Manual Cache
If, after you’ve set up the Manual Cache you decide you’d rather have one of a different size, or you want to delete it altogether, the following steps will help.
Note: Once you have established a Manual Cache you cannot modify its size within the interface. The originally created Manual Cache file size is fixed. The only way to establish a different size Manual Cache is to delete the current one and then create a new cache file.
In order to delete the entire Manual Cache you first need to delete all the manually cached regions you created. Open MSFS, go to the Manual Cache interface and delete all your custom regions.
Once they are eliminated, close MSFS and navigate to “C:\Users\Name\AppData\Local\Packages\Microsoft.FlightSimulator_8wekyb3d8bbwe\LocalCache”. Once in this folder you will see a MANUALCACHE.CCC file that was created when you originally set up the manual cache. Simply delete this file.
Note: If you also use the rolling cache, you will see the ROLLINGCACHE.CCC file in this same location. Just leave it be.
Now, when you restart MSFS and return to the Manual Cache interface you will see the Cache Size is now 0 GB. You can now set up a new manual cache if you’d like. If you do, a new MANUALCACHE.CCC file will be created in the folder location indicated above.
How to Move the Manual Cache File
To move the MANUALCACHE.CCC file, go to the default directory shown in the Manual Cache interface and copy the MANUALCACHE.CCC file. Paste the copied version to your new location, then remember the new path.
Open MSFS and go back to the Manual Cache interface, click on the manual cache location path and a file dialogue will open asking you to point to the new folder where you moved the MANUALCACHE.CCC file. Once you select the new folder, you will see your cached regions appear below in the interface from the file in its new location.
You can now safely go back to the former default folder and delete the first MANUALCACHR.CCC file with no issue to reclaim the disk space.
Some Final Thoughts
If you want to quickly find an airport to manually cache, just type the 4-letter ICAO code in the search box and hit Enter. The map will scroll to the location then you can zoom in on the airport.
And, if you want to delete a manual cache region you already created, select the small check box next to the name, the click the Delete Selection button that appears below.
We will continue updating this guide as we learn more about this feature, but in the meantime, enjoy making manual cache regions so you’ll have better, smoother performance in the areas you frequently fly.
Updated 20 August 2020, v1.7.12.0