Updated as of 1.25.7
Hello and welcome to a second guide on the F/A-18E, let’s get familiar with the jets pilot relief modes and how they work in our simulated jet. The key thing to remember is these are deemed relief modes, this is not a traditional autopilot like you’ll be used to from the rest of the Microsoft Flight Simulator fleet.
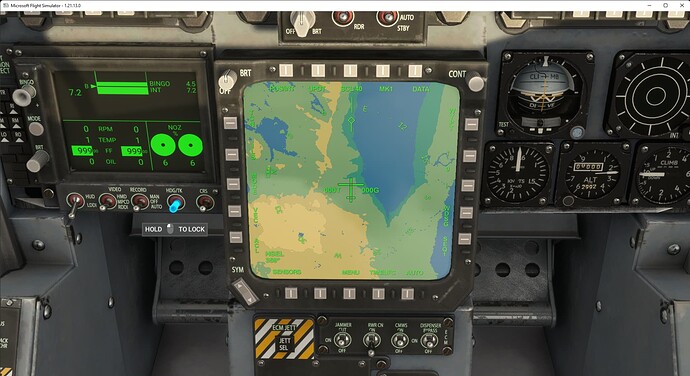
The F/A-18E Automatic Flight Control System (AFCS) offers various Pitch Relief, Roll Relief, and Coupled Steering modes. In addition the throttles offer an Automatic Throttle Control (ATC). For the purpose of this guide we will be focusing on the AFCS modes. These are managed through a combination of the A/P menu on the UFCD, the HSI page of the DDIs, and the HDG/TK switch below the Engine Fuel Display (see screenshot below).
When you press the A/P button on the UFCD you’ll be presented with the following

With the exception of CPL mode, the left hand side is our Pitch Relief modes, and the right hand side is our Roll Relief modes. Engaging any Pitch Relief mode will automatically also engage the HDG mode unless ROLL, GTRK,GSEL,HSEL, or CPL mode is already engaged. Engaging any Roll Relief mode will automatically engage FPAH mode unless BALT or RALT is already engaged.
Let’s start by looking at our Pitch Relief modes
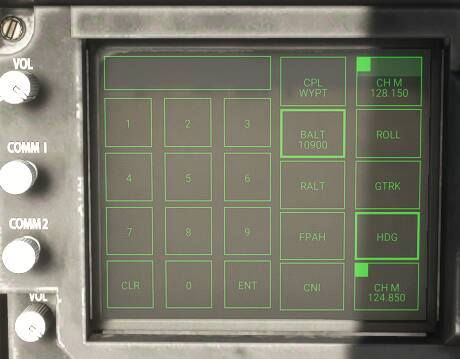
Pressing BALT will automatically enter your current barometric altitude and and automatically adjust pitch to hold that altitude. Once engaged you cannot adjust the target altitude, to complete any altitude change you must disengage BALT mode, climb/descend to the new desired altitude, then engage BALT again. Any significant pitch/roll input from the pilot will automatically disengage BALT and the AFCS will revert to FPAH mode.
RALT functions identically to BALT mode by maintaining a target Radar Altitude above ground. This mode can only be engaged below 5000ft AGL
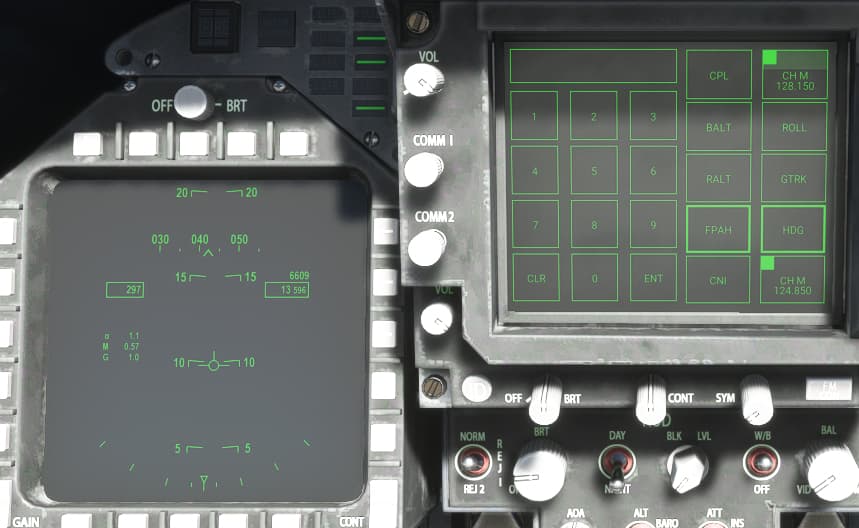
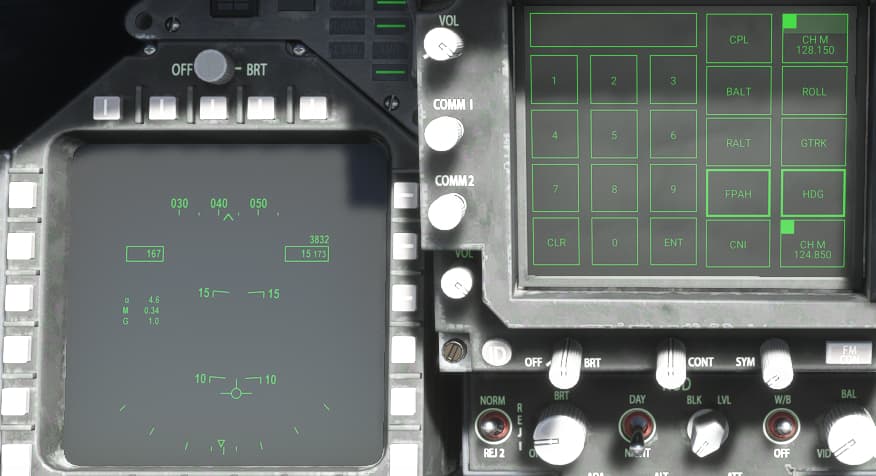
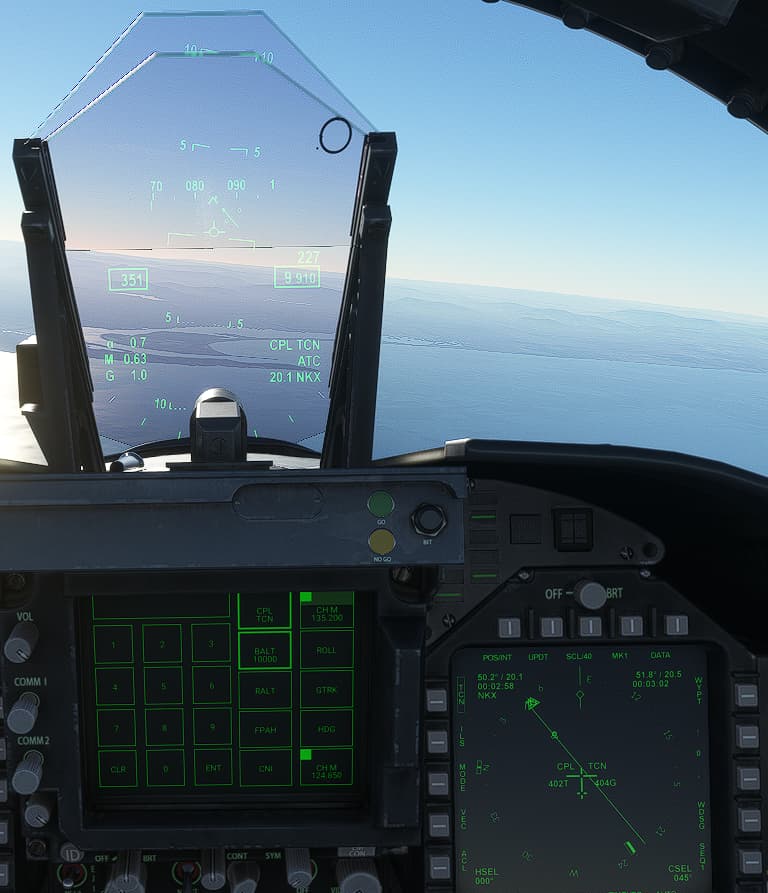
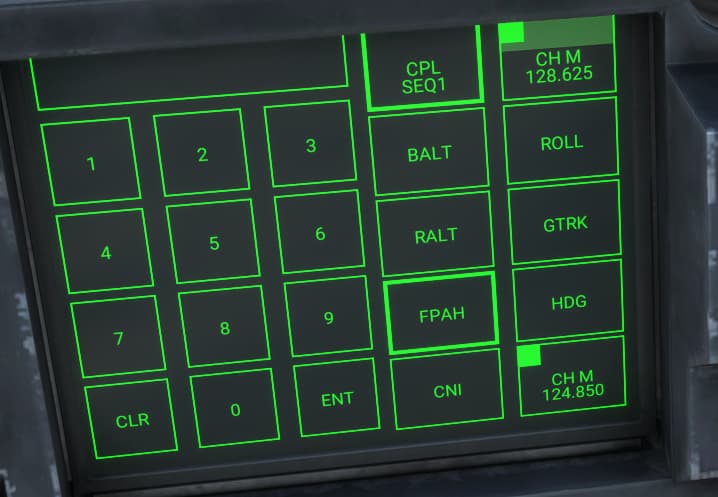
FPAH holds the position of our last Velocity Vector (VVS) pitch angle. For example if you pitch the nose up to place the velocity vector of the HUD at 10 degrees (image 1), engage FPAH, then place the throttles to idle, as the jet slows down the AFCS will automatically pitch the nose up and attempt to maintain the velocity vector at a 10 degree pitch (image 2). When applying pitch inputs via the control stick the AFCS will revert control back to the pilot, one the inputs stop the AFCS will set the current VVS pitch angle as the new target pitch.
Now let’s explore the Coupled Steering and Roll Relief modes.
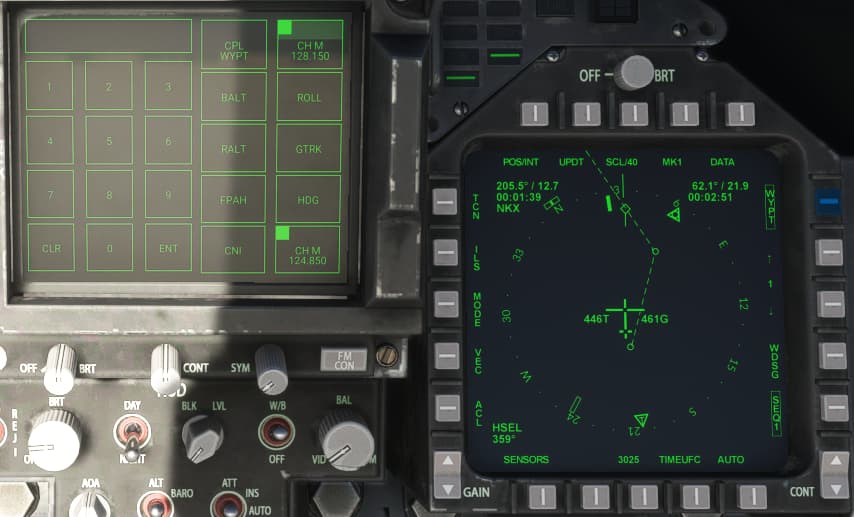
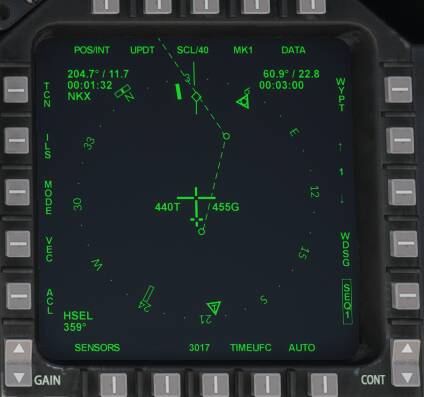
For easier visualizing I’ve loaded a basic VOR-VOR flight plan from KNKX-KLSV in the World Map for this guide. Now we’re going to the HSI page on any DDI and pressing SEQ1 at the bottom right, this will draw a broken line connecting all the waypoints of our flight plan.
First we’re going to look the Coupled Steering modes.
You can see we have waypoint 1 selected and shown on the HSI by a small circle in front of the jet to the right, and we have the NKX TACAN tuned and shown by a small circle behind the jet. Next we have to chose if we want to couple our AFCS to the waypoint or TCN, this is done by selecting either the button to the left of TCN or to the right of WYPT. In this guide we’re going to use the waypoint, once we press WYPT the following happens
- a box will surround it to indicate our selection
- the waypoint # and distance will repeat on the HUD
- the CPL button on the A/P menu changes to CPL WYPT
We can now engage CPL WYPT mode, in this mode the jet will turn until it is on a heading directly towards the waypoint. This mode simply keeps the jet pointing directly to the waypoint, it does not follow the flight plan Sequence or correct for wind drift. Once you reach the waypoint you have to press the up arrow on the right side of the HSI to change the next waypoint in sequence, then engage CPL WYPT mode again. If you wish to fly a specific course towards the Waypoint you can use the CRS switch above the Engine Fuel Display to set your desired course, once you engage CPL WYPT the jet will fly a 45 degree intercept then fly inbound to the waypoint on the desired course.
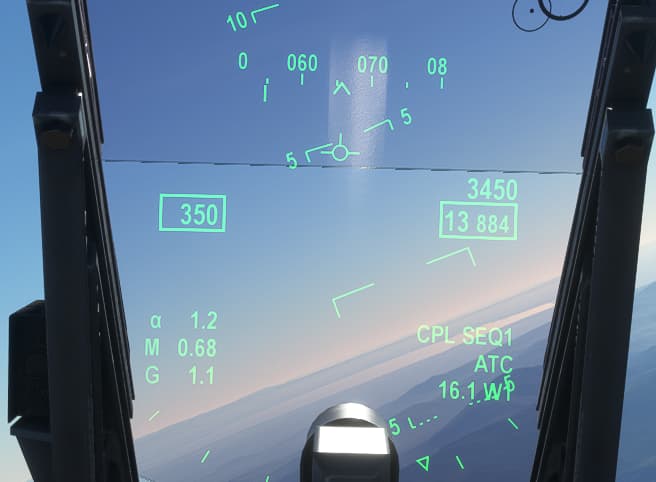
We also have the option of boxing the desired waypoint sequence (SEQ1,SEQ2, or SEQ3), then boxing AUTO on the bottom right, this will give us a CPL SEQ option. With this mode activated the autopilot will automatically intercept the current flight plan and proceed to the selected WYPT, once within approximately 2NM it will automatically step to the next waypoint and continue following the flight planned sequence shown by the dashed lines on the HSI.
Roll mode simply maintains the current bank angle, the desired bank angle can be changed by simply rolling the jet with the stick, once the stick is released the new bank angle is set as the desired bank angle.
Next we’ll look at HDG/HSEL mode. When heading mode is engaged the following occurs
- if the current bank angle is 5 degrees or less, the AFCS rolls wings level and maintains the current heading
- if the current bank angle is greater than 5 degrees, it holds the current bank angle
Pilot roll inputs will override the AFCS in HDG mode, once the pilot inputs stop the AFCS engages HDG mode again based on the parameters discussed above.
Pressing HDG a second time changes it to HSEL. In this mode the jet will now turn to maintain the desired magnetic heading as set using the HDG/TK switch, the current desired heading is displayed in the HSI on the outer compass ring and looks like 2 rectangles smashed together, this mode only maintain the desired heading and will not compensate for wind.
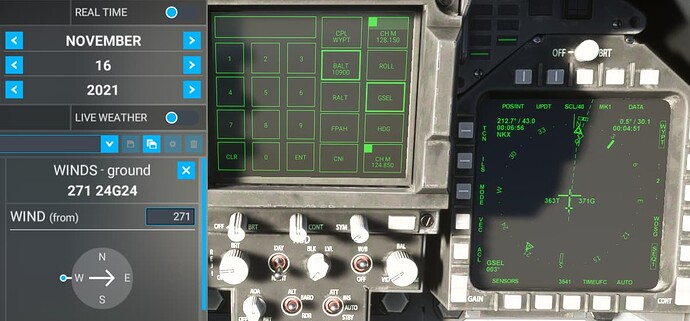
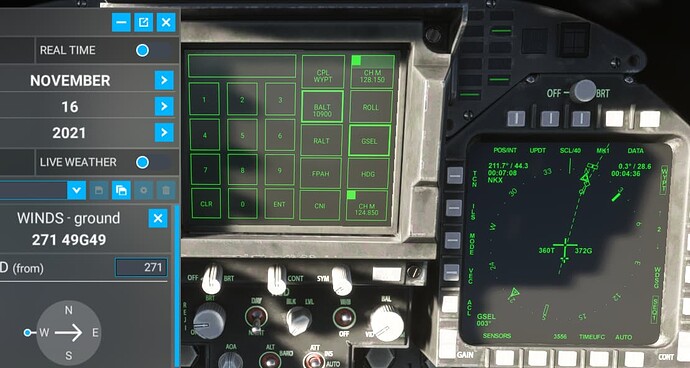
GTRK/GSEL mode works exactly to HDG/HSEL mode, only it maintains your current/selected track over the ground and will correct for wind.
Hopefully this helps make those longer flights in the hornet a little more friendly for you all.
