- Post Your Cockpit Pictures Here -

Read more about it in

2 Likes

Here is a picture of my cockpit with work in progress. The monitors at the bottom are 2x28" plus 1x32" all 3 with a resolution of 3840x2160 and connected to my RTX3080. The 2 monitors on the top are 24" with 1980x1080 connected to the motherboard via Thunderbolt 4 and served by the graphics functionality of the 11700k CPU.

In front of the monitors, there are the Logitech Saitek peripherals. As shown here my Tobii 5 eye and head tracker cannot see me. So I am widening the table by a 25 cm wooden board. Hard to see, below the desk surface are 2 Logitech power quadrants, and below the desk the rudder pedals.

What is still to be done is to add my just-bought Brunner CLS-E NG yoke. The expensive purchase of it where due to the lack of reality with the Logitech yoke. I used to fly real GA airplanes and the Logitech Yoke behavior was too far from the real thing. The Brunner Yoke should fix this.

7 Likes

I’ve added some instruments from another build I had. Some Simkits gauges.
The 4 compliment what I had and gives a semi hybrid setup between the C172 steam gauges to the G1000 setup.
Now at least the gauges can enhance my current build than to just sit in boxes.
gauges

9 Likes

Nice setup!

2 Likes
  • Dual control, Dual seat, Three 55 inch 4K TV screens
  • Two 15.8 inch touch screen monitors for instrument panels
  • One 8 inch Android tablet for centre instrument panel
  • Air Manger is platform for running Instrument panels
  • Honeycomb Yokes and Bravo Throttle Quadrant
  • Logitech G PRO Flight Rudder Pedals
  • Dash top is gymnasium rubber cut and heated to shape
  • Roof is ply cut to size and pressed up to form curve
  • Roof lining is selected upholstery fabric glued to ply
  • Side panels are shaped polyurethane foam lined with vinyl
  • Left side is hinged to open as a door (TV screen and all)
  • 3DOF Motion gear under cabin is in progress
  • PC Computer - Intel Core i7 12700K GPU Gigabyte GeForce RTX 3080 Ti
  • Voicemeter Potato as Default Audio controller for sound distribution to all TVs
  • Popout Manager for auto poput of instruments as required

30 Likes

The evolution of my “cockpit”, such as it is.

I have added Spacedesk and two inexpensive, (obsolete), tablets that I have laying around that aren’t useful for anything else. (In fact, I had to “side-load” an updated version of Google Play just to download Spacedesk!)

The problem I am trying to solve is the fact that “glass cockpits” are essentially useless to me because the screens are too small for my ancient eyes to see.  Spacedesk allows me to create two additional Windows displays on the two tablets and then I can move “detached” views of each of the two screens to the tablet - where they are much larger and easier to see.

Drum roll please!

This is the overall layout.
 

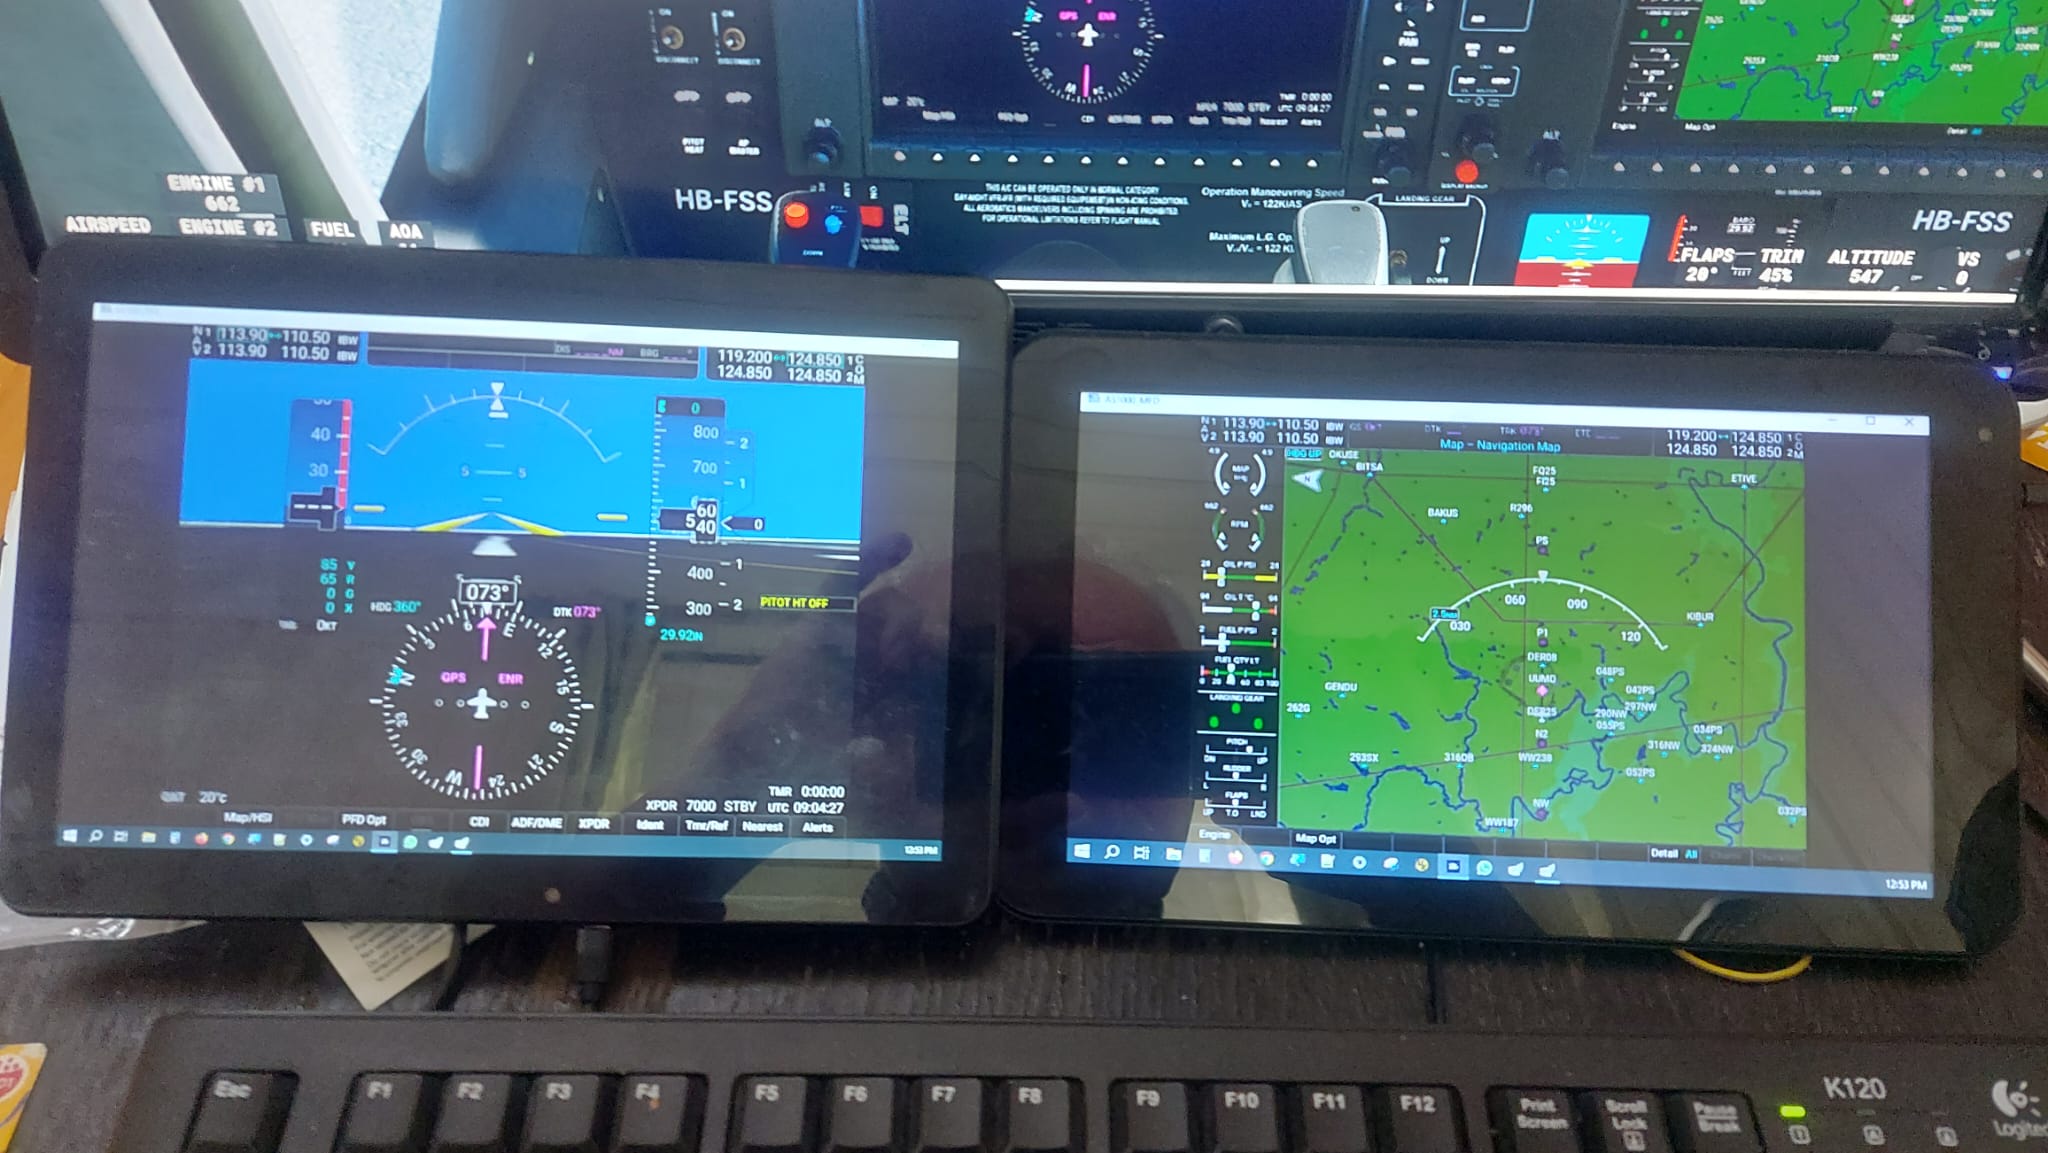
These are the screens up-close.  Note the enlarged view which makes the “glass screens” easier to see and use.

One issue:
It appears that any control buttons that might appear on a detached instrument, as is shown on the following picture. . .


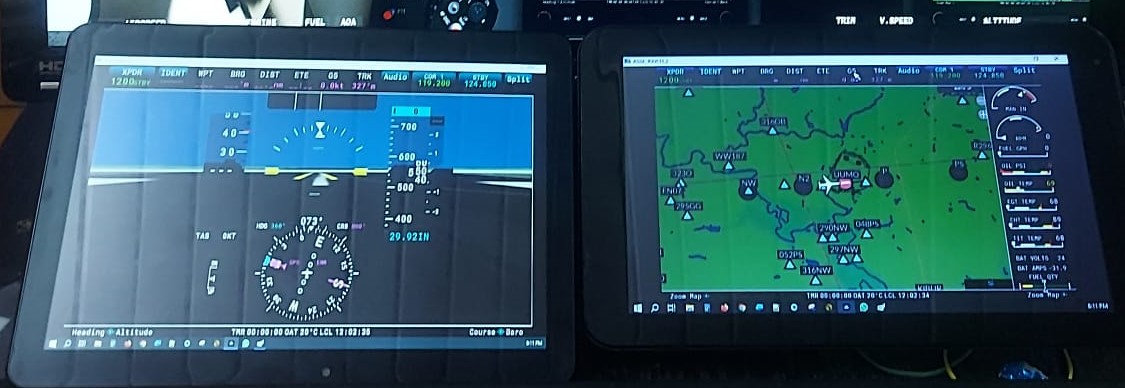
(This is a different cockpit with different “glass” instruments.  Note the control buttons on the top of the two external screens.)

On the composite control panel, these buttons are active controls that you can select - but on the detached images of these instruments the control buttons do not work.  Neither do they work if they are still on the main screen.

Is there a way to make them work?

7 Likes

@Jimrh1993
Your PopOuts only show the images from the simulator.
They do not bring the buttons and knobs with them.

Air Manger is a software that uses what are called “Overlays”
These are virtual instruments that have all the active buttons coded to operate in the simulator (MSFS or Xplane or…)… just like you can press buttons on your controllers for operating flaps or gear or other things in the sim.

The “overlays” have all the same buttons as the PDF or MDF and they work whether or not the Popout is on your monitors, but they are made with a transparent section the same size as the popout… so it then looks like you have the whole Garmin on the monitor.

You can see one of them on the left in this picture of my cockpit.

You can place an “overlay” on both screens and the “see through” area is where you place the popouts.

But you need Air Manager ( or a program like it - which unfortunately does not yet exist )

6 Likes

This is my home cockpit, with 3D printed parts and Arduino Micro devices.
![Imagen de WhatsApp 2023-03-25 a las 16.49.14|690x387]


14 Likes

Lots of nice 3D printed items. What 3D printer are you using???

1 Like

It’s a homemade version of the Prusa i3 Steel, but it started out as a clone of the Anet 8 bought on eBay. Over time I have made modifications such as using a steel frame, changing the printed parts of the X axis carriage for a machined aluminum version. Those two changes have helped give it greater precision when printing. I have also changed the classic linear steel ball bearings for Igus, which provide less noise and more stability in the movements of the hot bed and the X axis. The rest of the modifications are printed parts such as the power supply housing, the electronics box, supports for cooling fans for power supply and electronics, cable chains, nozzle fan, etc.

2 Likes

I am using a highly modified Artillery 3D printer which I truly love. I wish I had the money to afford the Prusa. Thanks for the information…

1 Like

Added a custom switch box as I couldn’t find anything ready made for use on Xbox.

9 Likes

Gets the job done!

1 Like


Motion Simulator

Side View

Pendular Yoke, Throttle Quadrant with trim wheel and reversers, Dual Encoder box, Switchbox with Gear lever

Cockpit in action

Throttle Quadrant - Boeing 737 inspired + Prop controls

HOTAS convertible to heli Collective + Switchbox + Thumbstick

6 Dual Encoder box + Switchbox with Gear lever

Joystick + HOTAS configuration

Heli Cyclic + Collective configuration

20 Likes

Very nicely done. How much time do you have invested in this project? I assume a lot…

1 Like

Yes, it took quite a while, but was done in stages. Overall, not as much time as you’d think. I was willing to invest time, but money was the limiting factor. The whole budget was less than $500! The goal of my project was to build a cheaper and better alternative to off-the-shelf motion rig and controls. I wanted something that is not just much much cheaper (because I couldn’t and wouldn’t want to afford at lest $4500 to buy the equivalent but worse system), but also modular and easily convertible to yoke+throttle / joystick+hotas / cyclic+collective configurations and to any aircraft I’d feel like flying.

It started as a way to save money and being able to afford a real motion rig, but ended up being IMHO better than anything that can be bought off-the-shelf for my particulate use case.

So I designed the motion rig that has exactly what I need, and the controls that are built for VR: Instead of modeling a specific cockpit, they are very compact, and have different encoder and switch shapes for easy tactile feedback. By feel I know exactly where my hand is at any time, around the encoder box and switch box. The throttles are 737-inspired and have the authentic design and feel, including analog reverser lever axes, TO/GA and T/A disconnect buttons etc. but hey also have prop and mix levers which can be selectively operated left/right engine by holding a yoke hat switch left or right.

Dual encoder box controls the entire functionality of GNS550, and also most 737 autopilot panel knobs and buttons, and analog instrumentation like heading bug, nav/com radios etc. Other systems like G1000 have partial control for obvious reasons (touchscreens and sideline nav buttons). In any case, I have most controls at my fingertips at all times, so almost the entire flight can be done without using VR controllers or mouse. GA planes have everything covered by my switchboxed from cold and dark state. Airliners would need controller/mouse interaction during FMC setup and some of the engine start-up, but after that, almost everything is also covered by my cockpit.

The main thread with videos and more details is here, and all design files and part lists are available on my website.

6 Likes

Wow, that’s impressive to get a motion rig for $500, even if it’s basic and DIY…
well done.

3 Likes

Are you using motion cancelling software to subtract the seat movement from the VR view? If so, how well does it work?

1 Like

It doesn’t feel basic :slight_smile: All the motion I could wish for and vibration totally fools my brain in VR. And DIY is a pro, not a con: I don’t believe any off-the-self solution like this even exists - I’m talking about converting the controls in a couple of minutes to yoke/throttles to joystick/hotas to cyclic/collective, at least not with the large-throw sticks and pendular yokes.

Yes, I use OXRMC that gets the motion rig position data from FlyPT Mover’s OVRMC “virtual tracker” module. It works perfectly. No need for extra trackers or hardware. It was tricky to set up, but once I got the numbers right it works fine. But with limited movement (and you don’t need a lot for VR, just motion cues) it’s not bad even without motion compensation. Though it’s better with it of course.

3 Likes

basic compared to the 6DOF $20k rigs :stuck_out_tongue: but better than most $5k seats.

1 Like