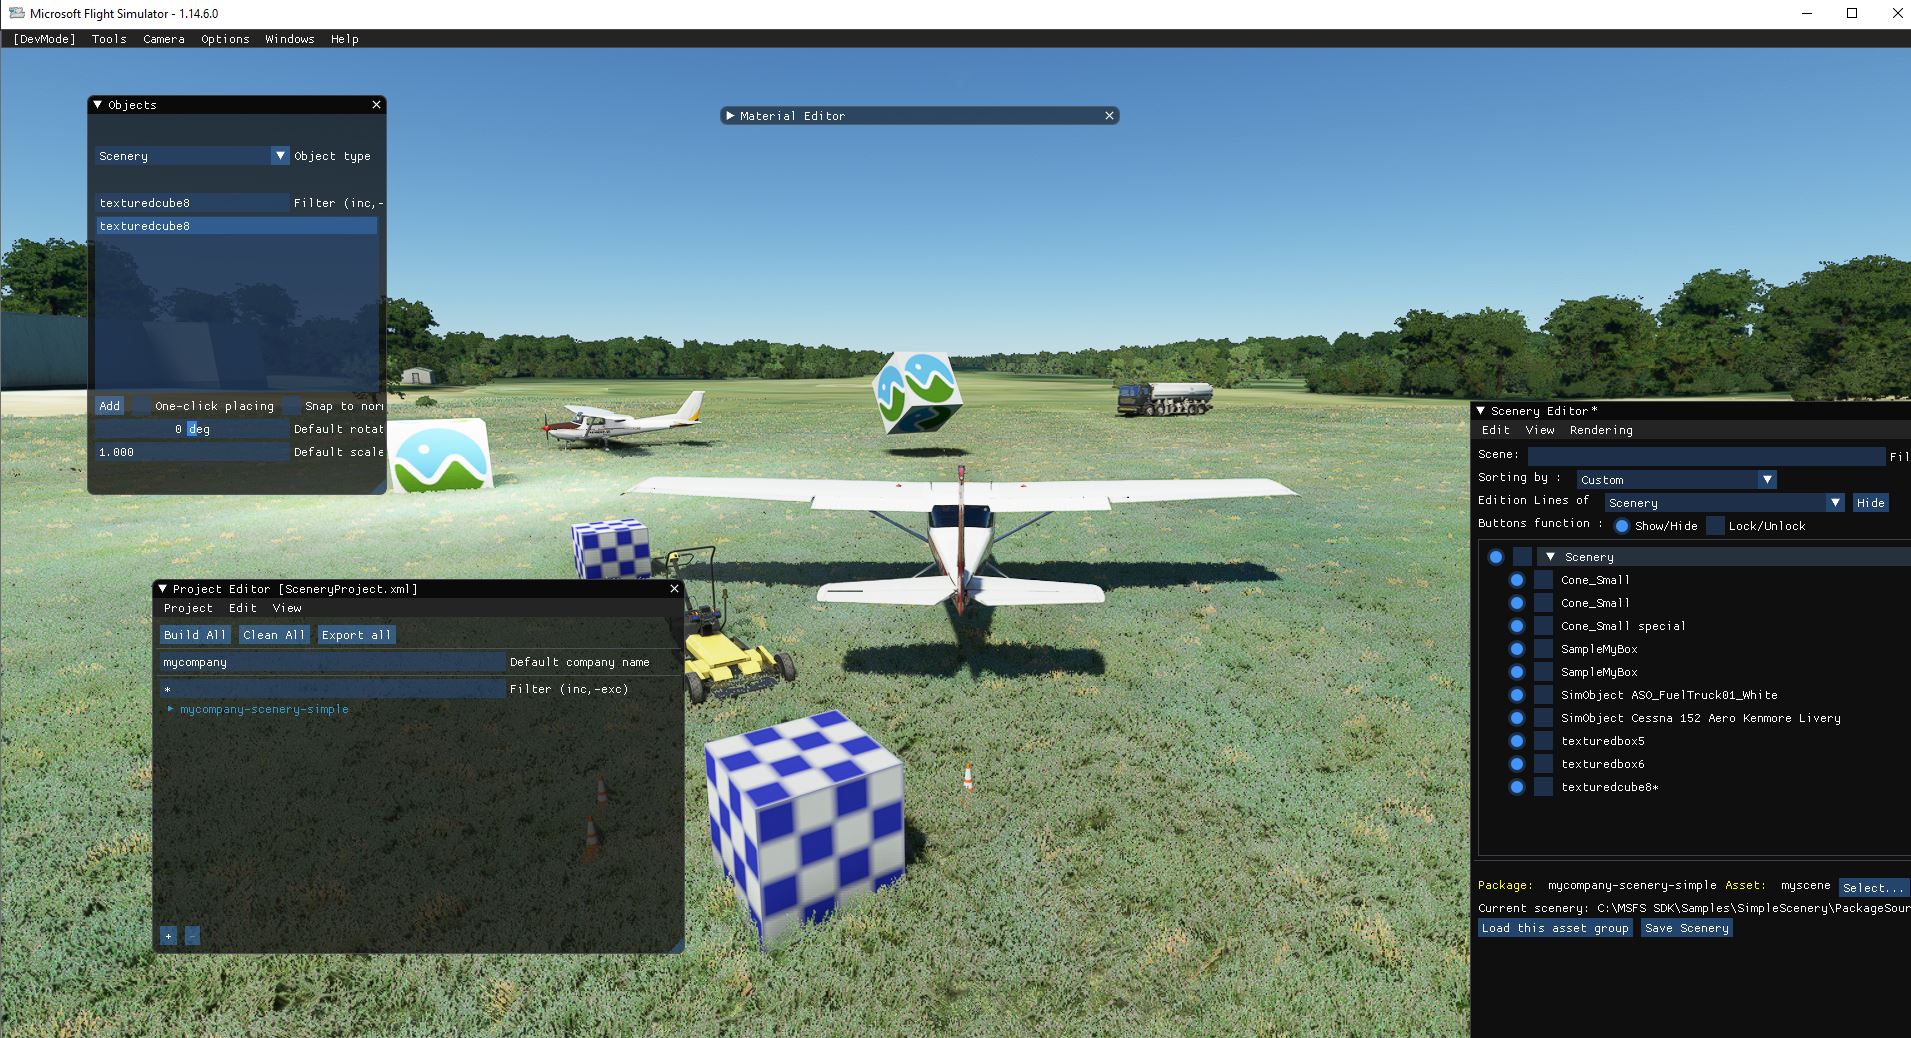
Weekend… Playing around putting objects and textured cubes with Blender (I’m an absolute Blender beginner) 
2 Likes
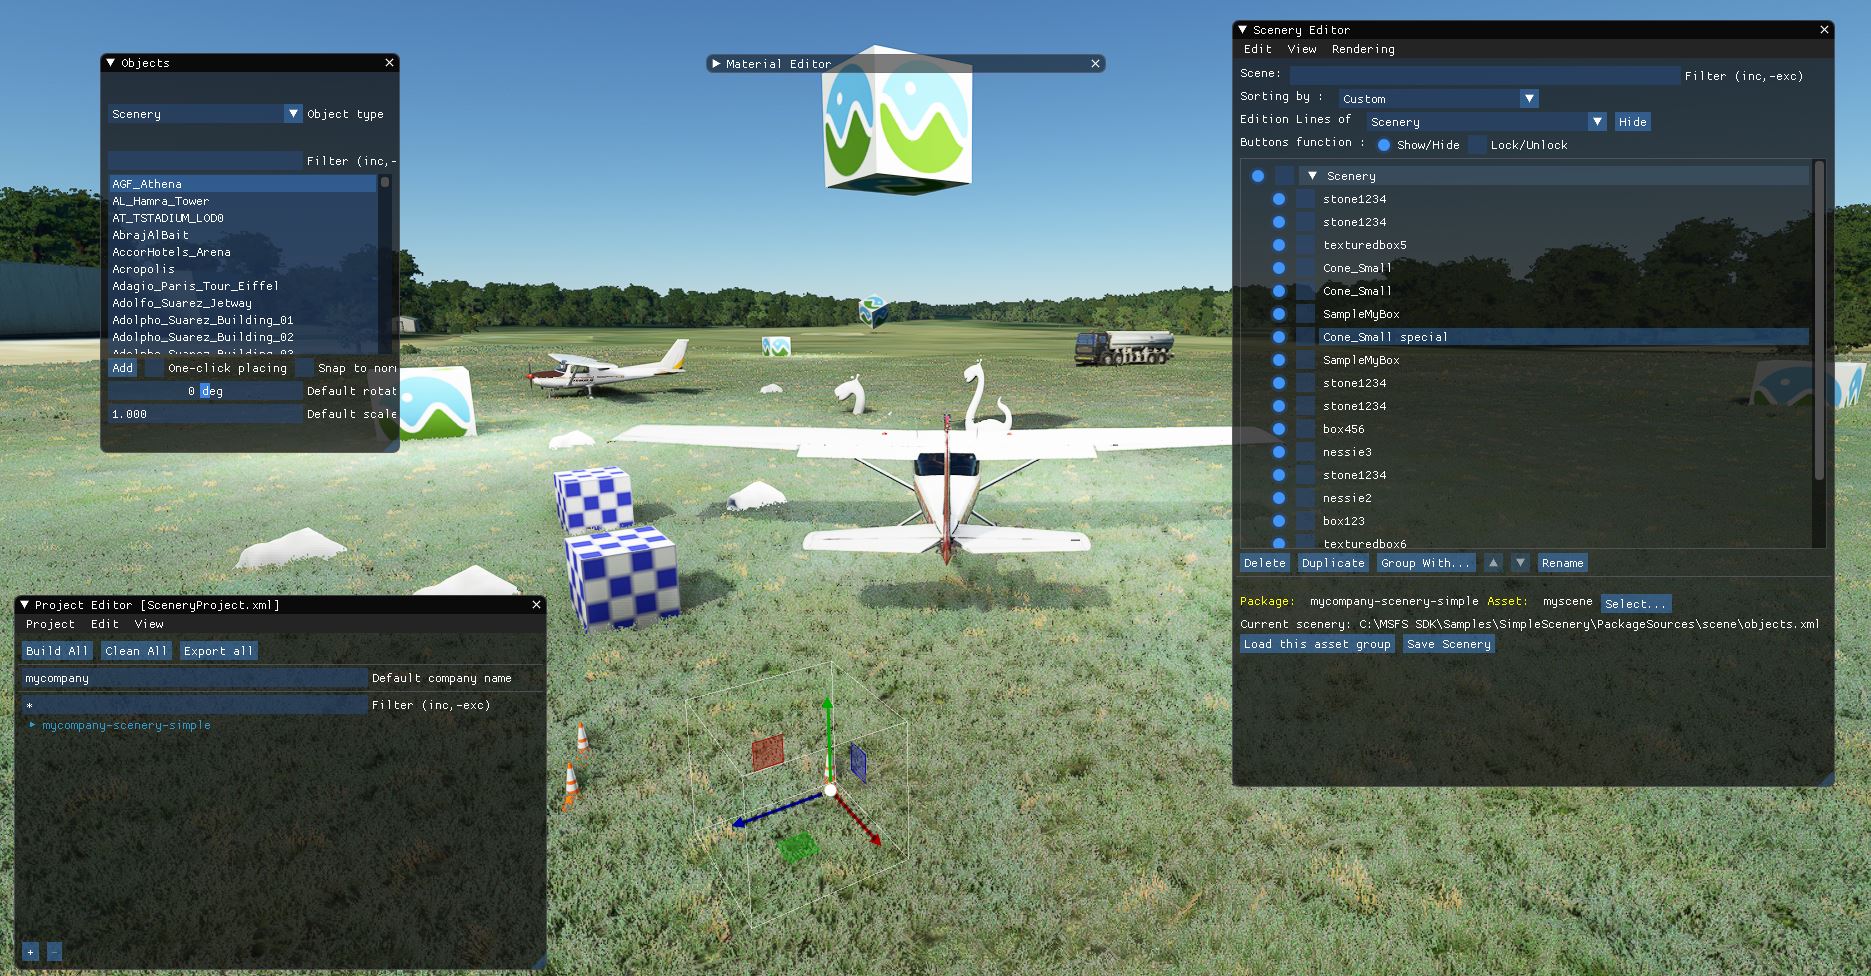
Day 2… I’ve got some stones and a few dinosaurs in there… And there’s right click/Properties/ ground level snap OFF… so objects can be elevated or buried anywhere. Behold Jurassic park stage #1. Now how to get the texture on it 
2 Likes
1 Like
Day 4… lighting experiments… when you leave lights in Blender, they are incorporated. Lights inside an object will work light lamps.

When it gets dark…

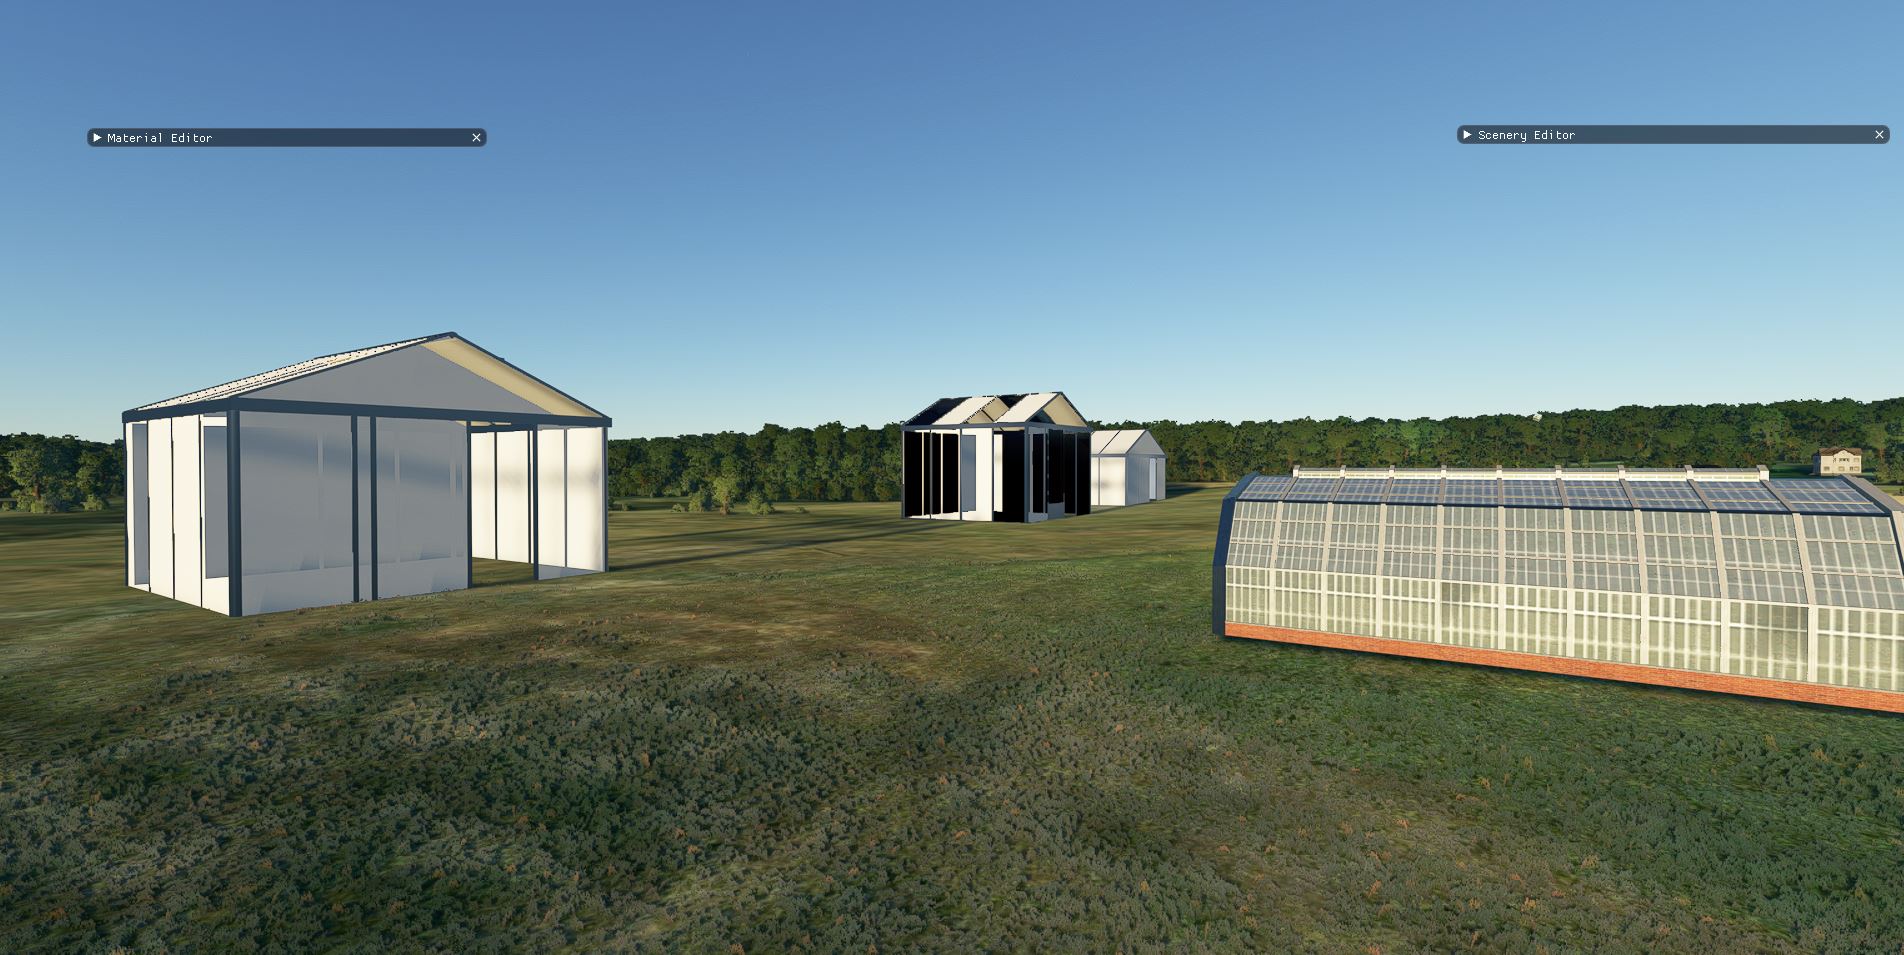
Day 5… transparency (no, my sweet home 3d greenhouses don’t look as they should  yet
yet
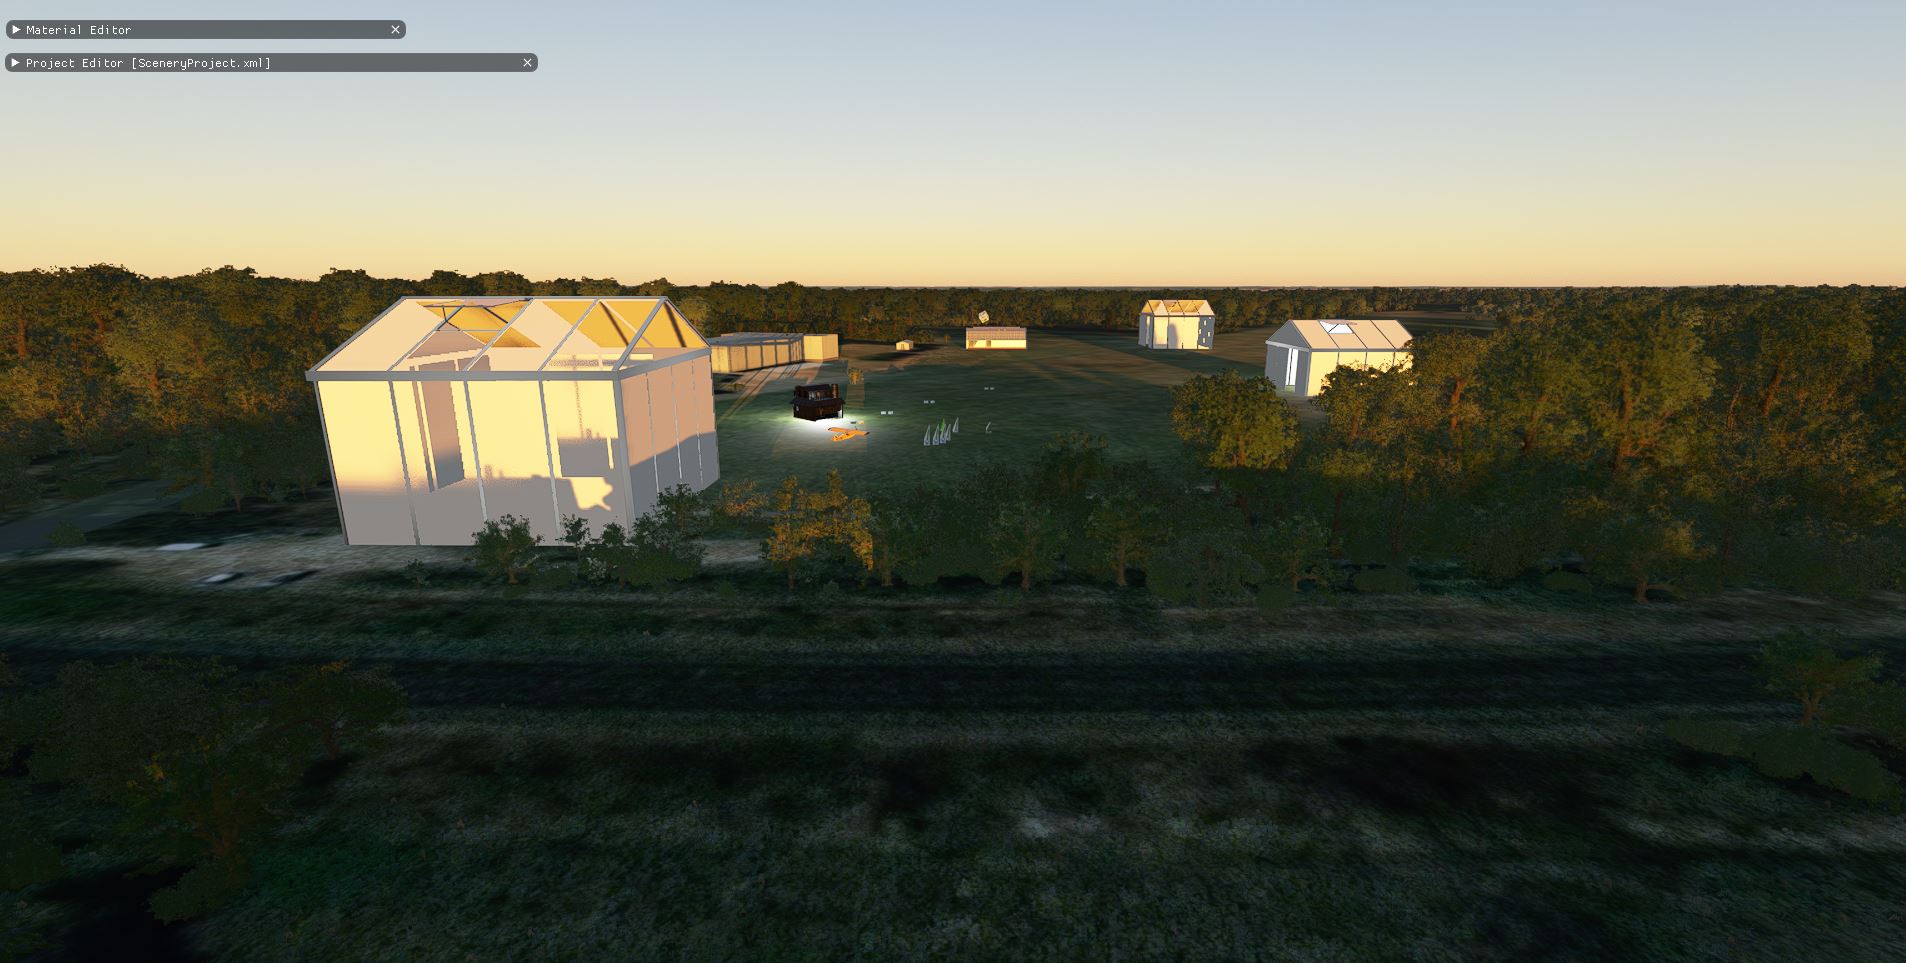
Thanks to Basic Alpha Transparency – Blender Knowledgebase I’ve found something, this involves 2 shaders in Blender, and it survives the Khronos glTF-conversion… only cleaned up the texture,

3 Likes
Let’s do something from scratch in Blender.
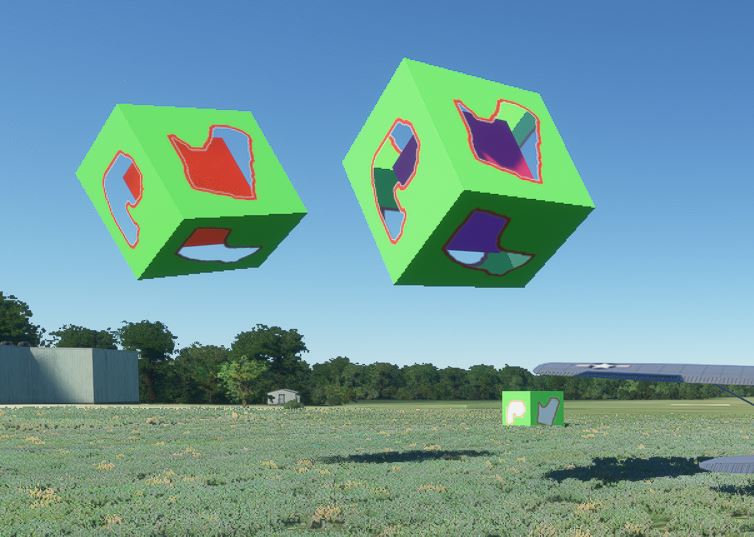
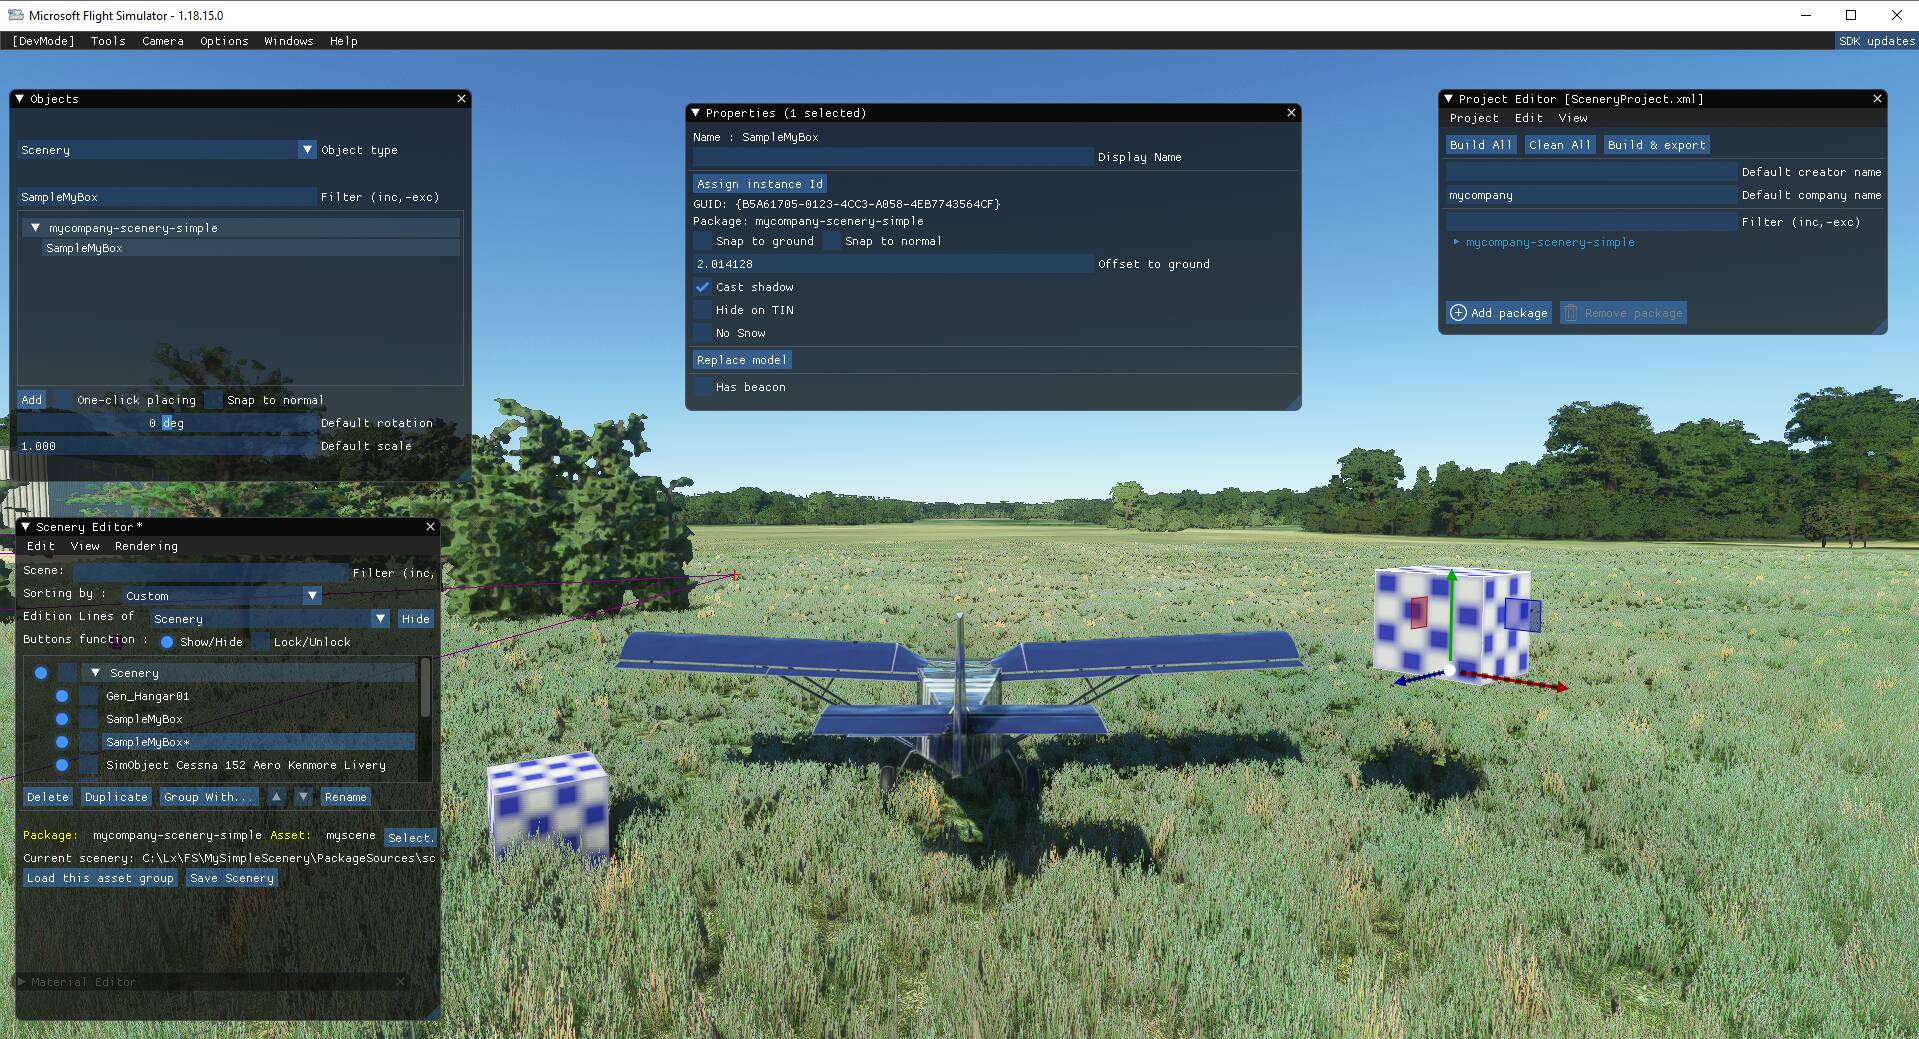
First create a simple mono color PNG texture with a cube mapping with Blender and Save it, or use an existing cube texture PNG. Then, modify the image in Photosho, drawing the shapes. Fill each shape with “clear Alpha” brush. Save the png and in Blender, create a new Cube, assign a new Material, set Material Color to Texture, then open the modified texture .png file for it. For fun, put a smaller red cube inside… then, export BOTH objects in a GLB 2.0 for MSFS. Put the 3 files that result in a new directory under \modellib. Make sure you put your texture file in \modellib\texture.
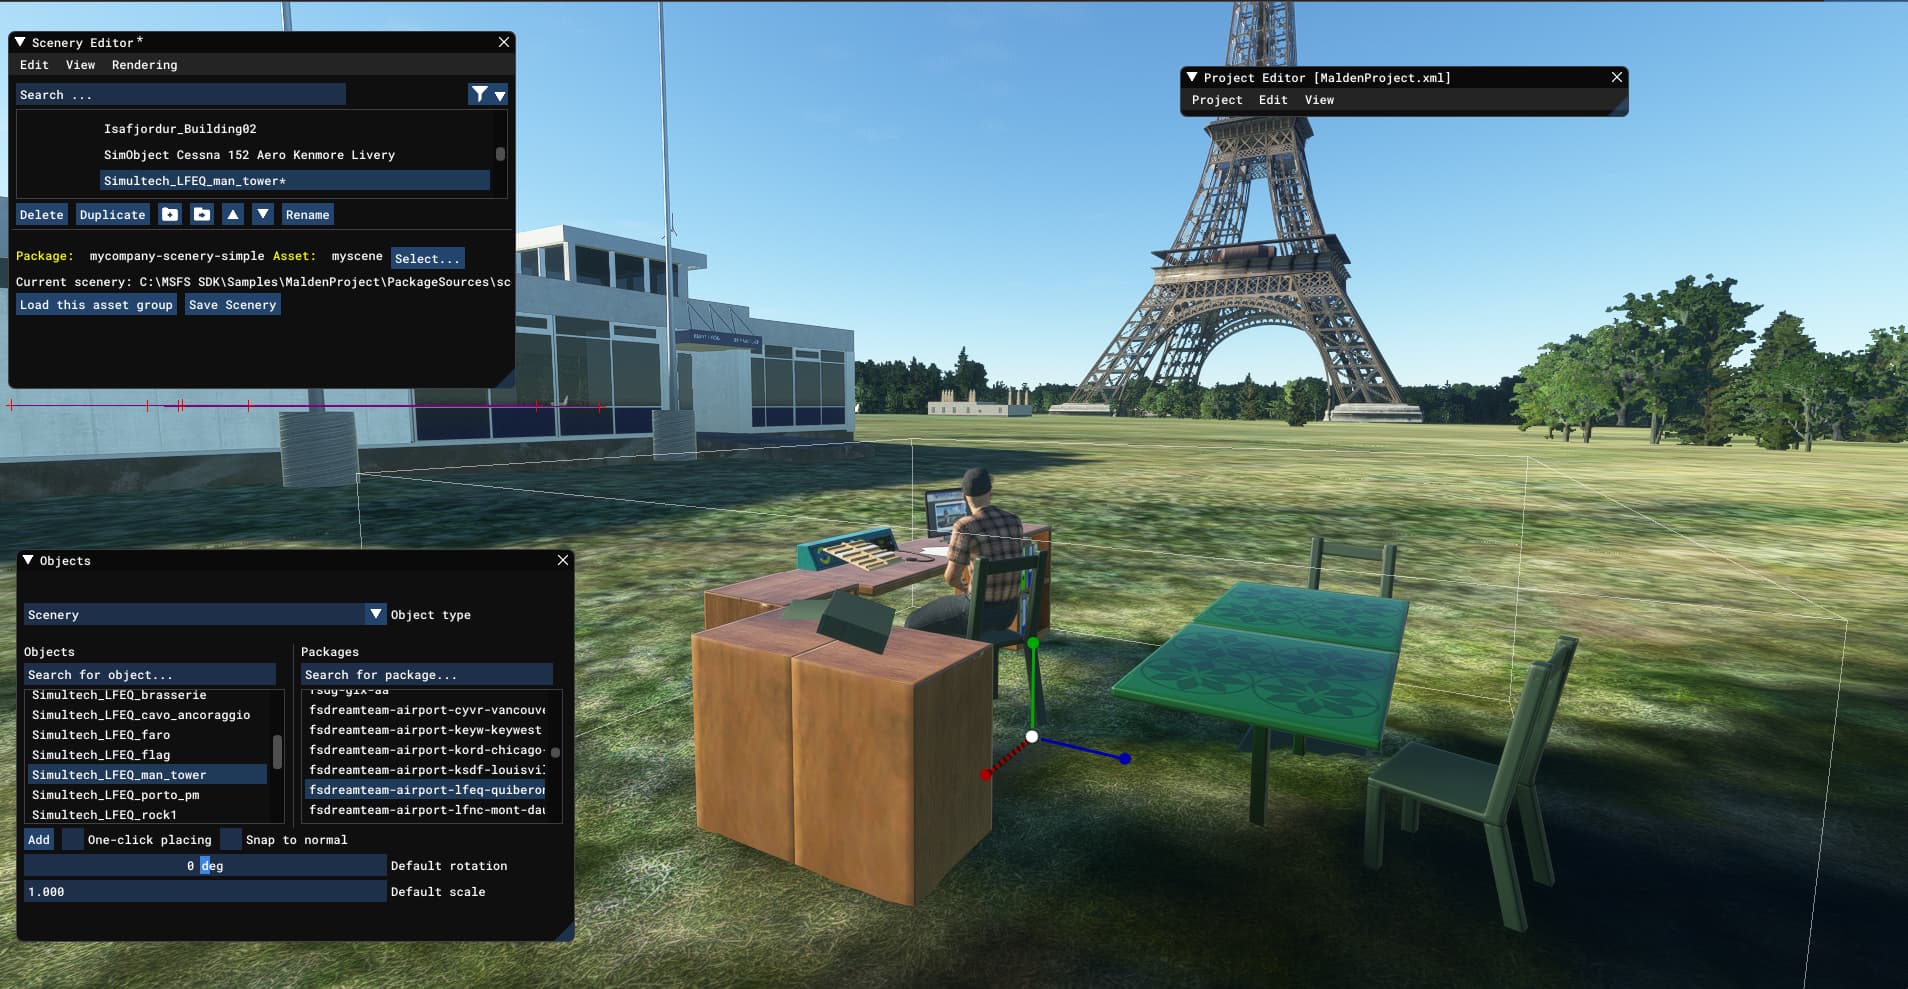
Start MSFS, open your project and Build it first. Rebuild until you see 0 errors in Console. Then, open Scenery editor and click Load Assets. Wait until your scenery is loaded. Then go View Objects, find your object name and place the object.

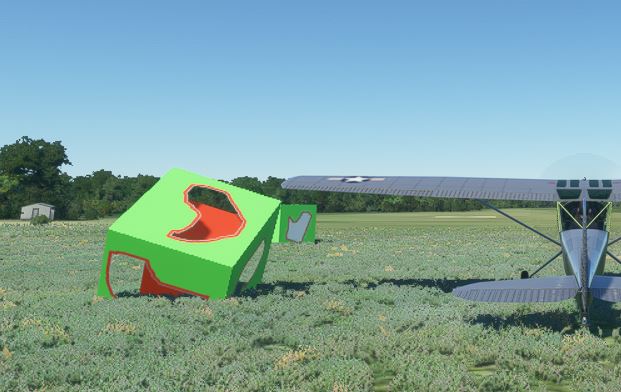
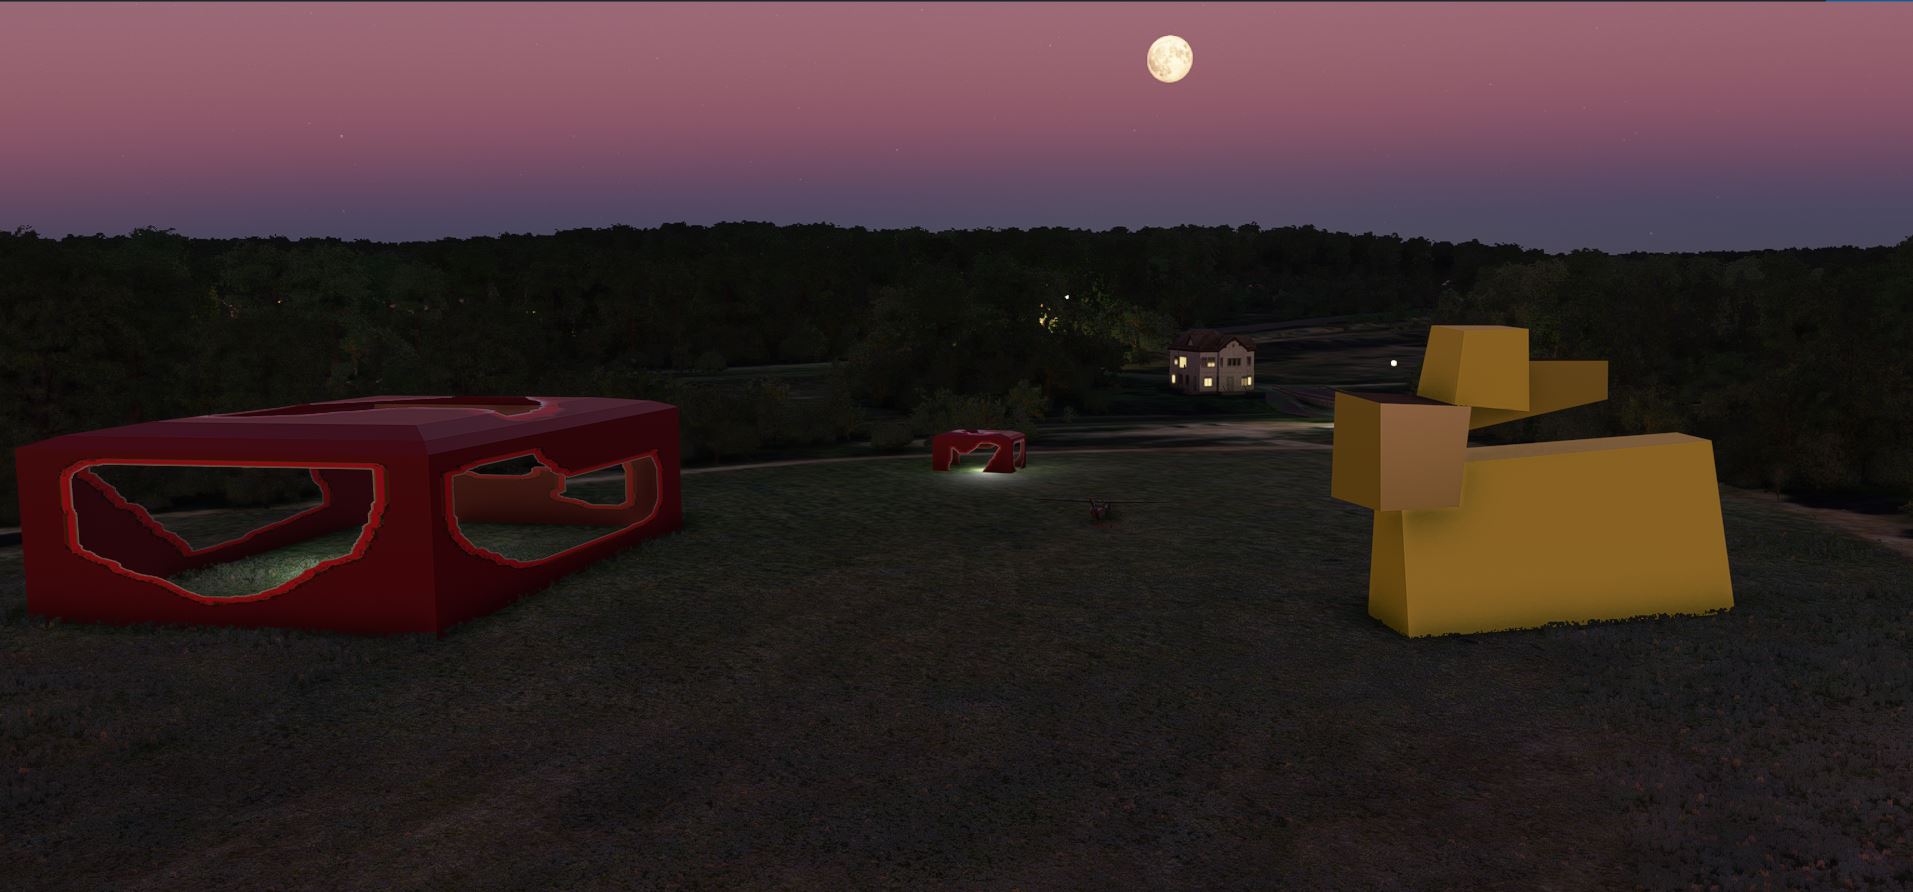
Note: in the background see what happens if Alpha channel in “window holes” is left to 100% you get opaque holes, in this case white. You “puinch” these holes by setting Alpha=0 inside the holes.
Mind the checkbox for back face culling in Blender. When you do back face culling, you get the object like above, which is actually one-side transparent. in Blender, you can also get a version with opaque wands. To do that, switch off back face culling in Blender and export again. It will show the inner wands see below the object on the right. But keep in mind MSFS will not shade that correctly from any looking angle… Better use wands instead !
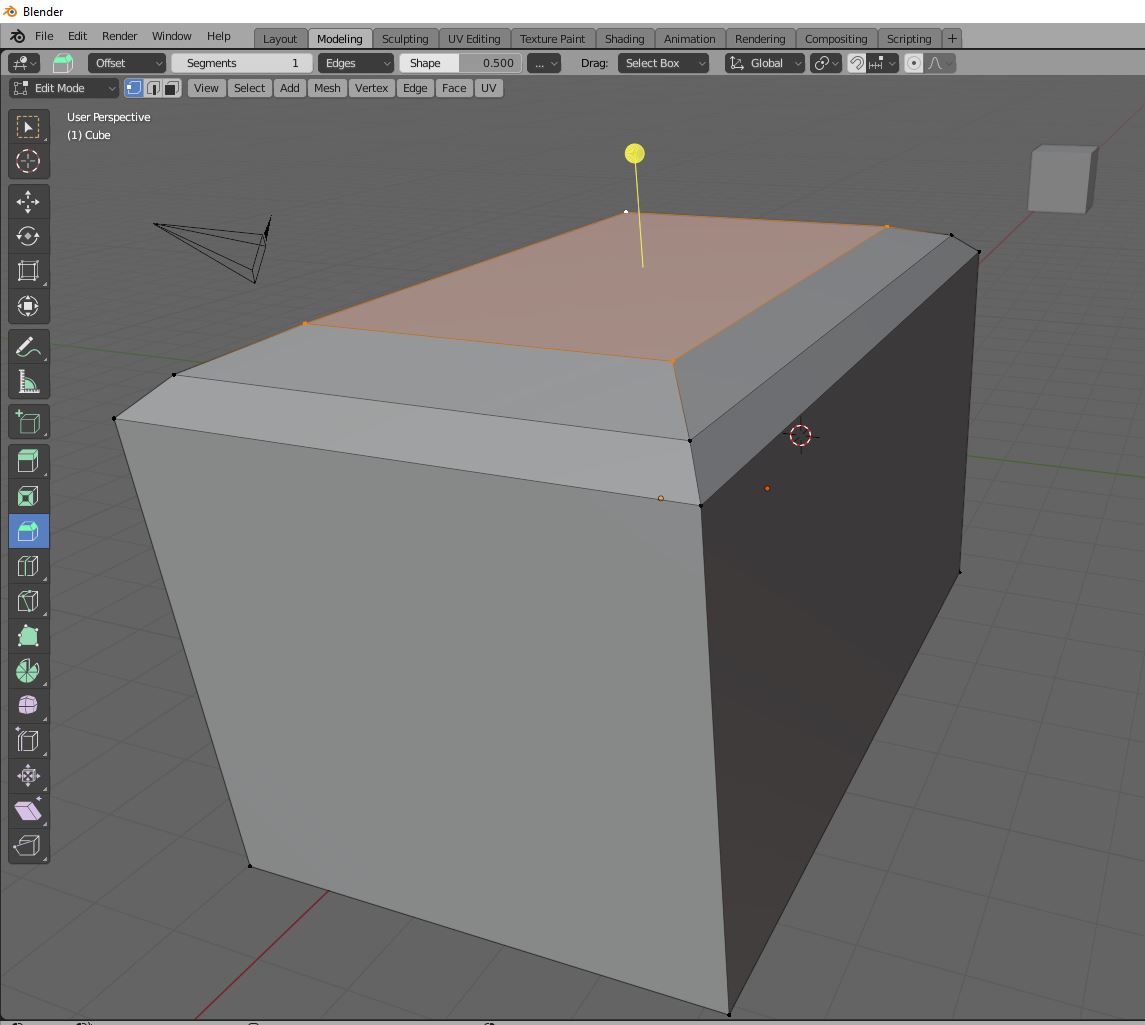
Blender has a Bevel option in Edit mode. Keep shift key, select 4 edges on the top and pull the yellow dot… see what happens.
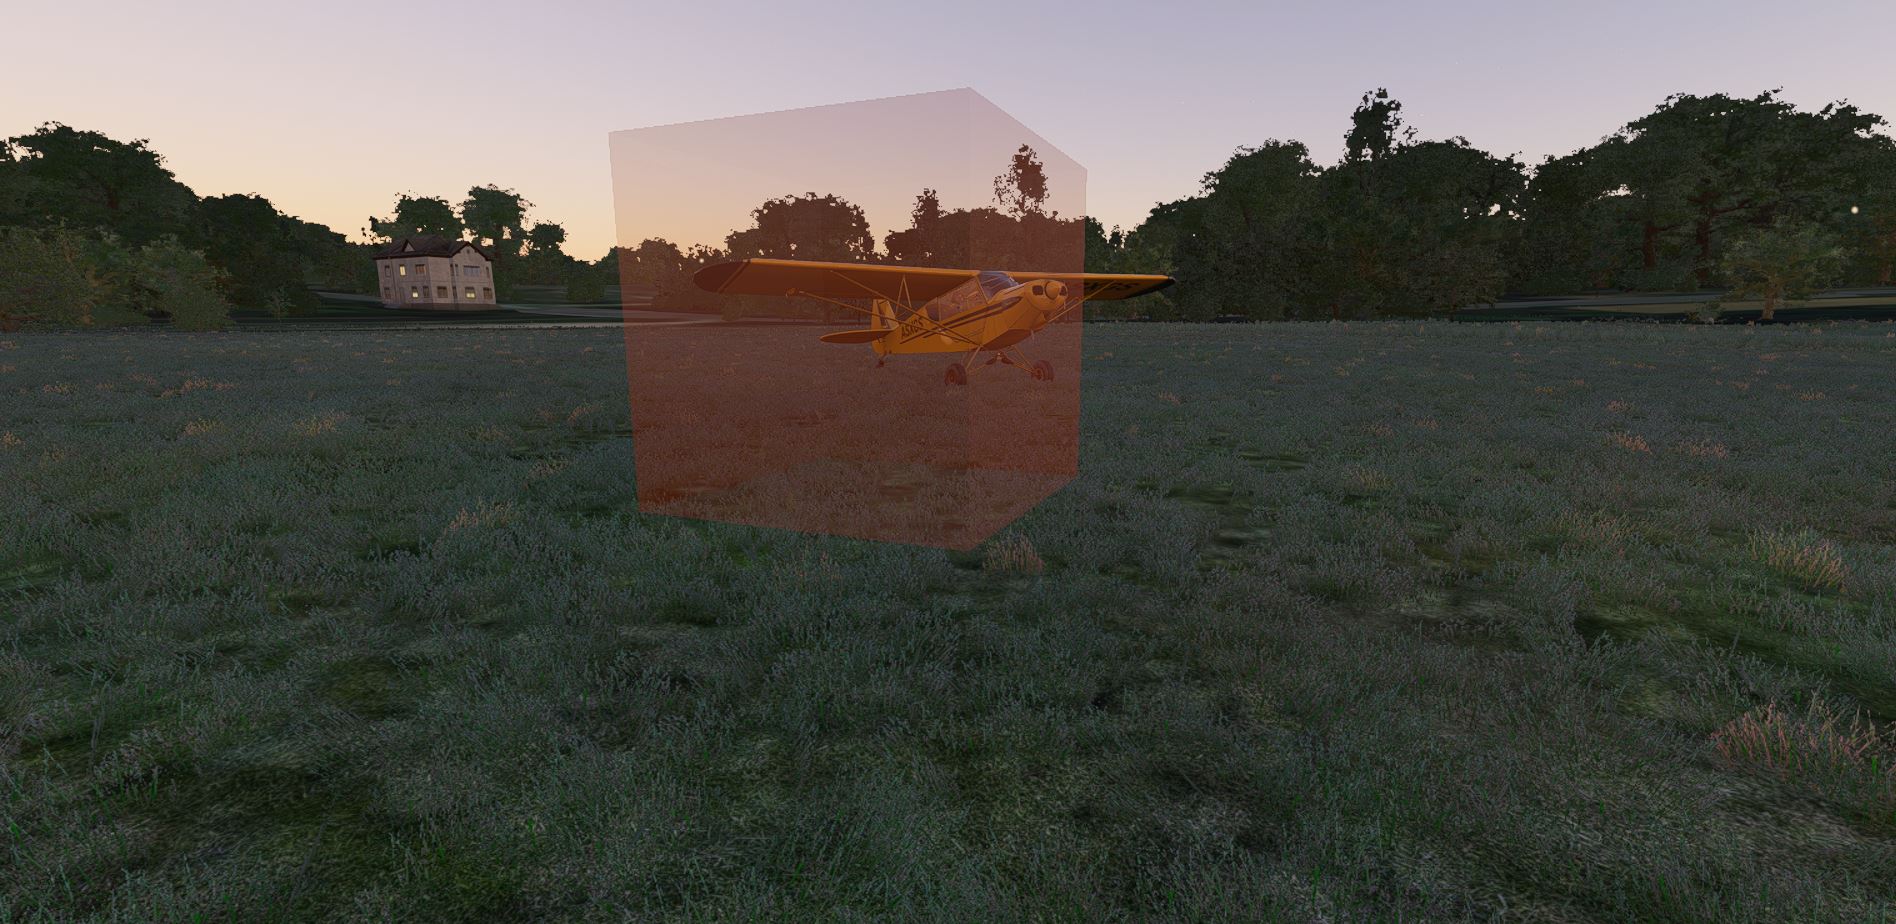
Elongate a bit… put a point light inside… and export again. You can stay in the game… give the object another name, add a subdirectory in \modellib, copy the files there… copy texture to \modellib\texture and build the project again in MSFS. The new object will be available after you close and open the scenery editor and click “Load Assets”. That gives a long wait again… but you’ll not have to leave MSFS.
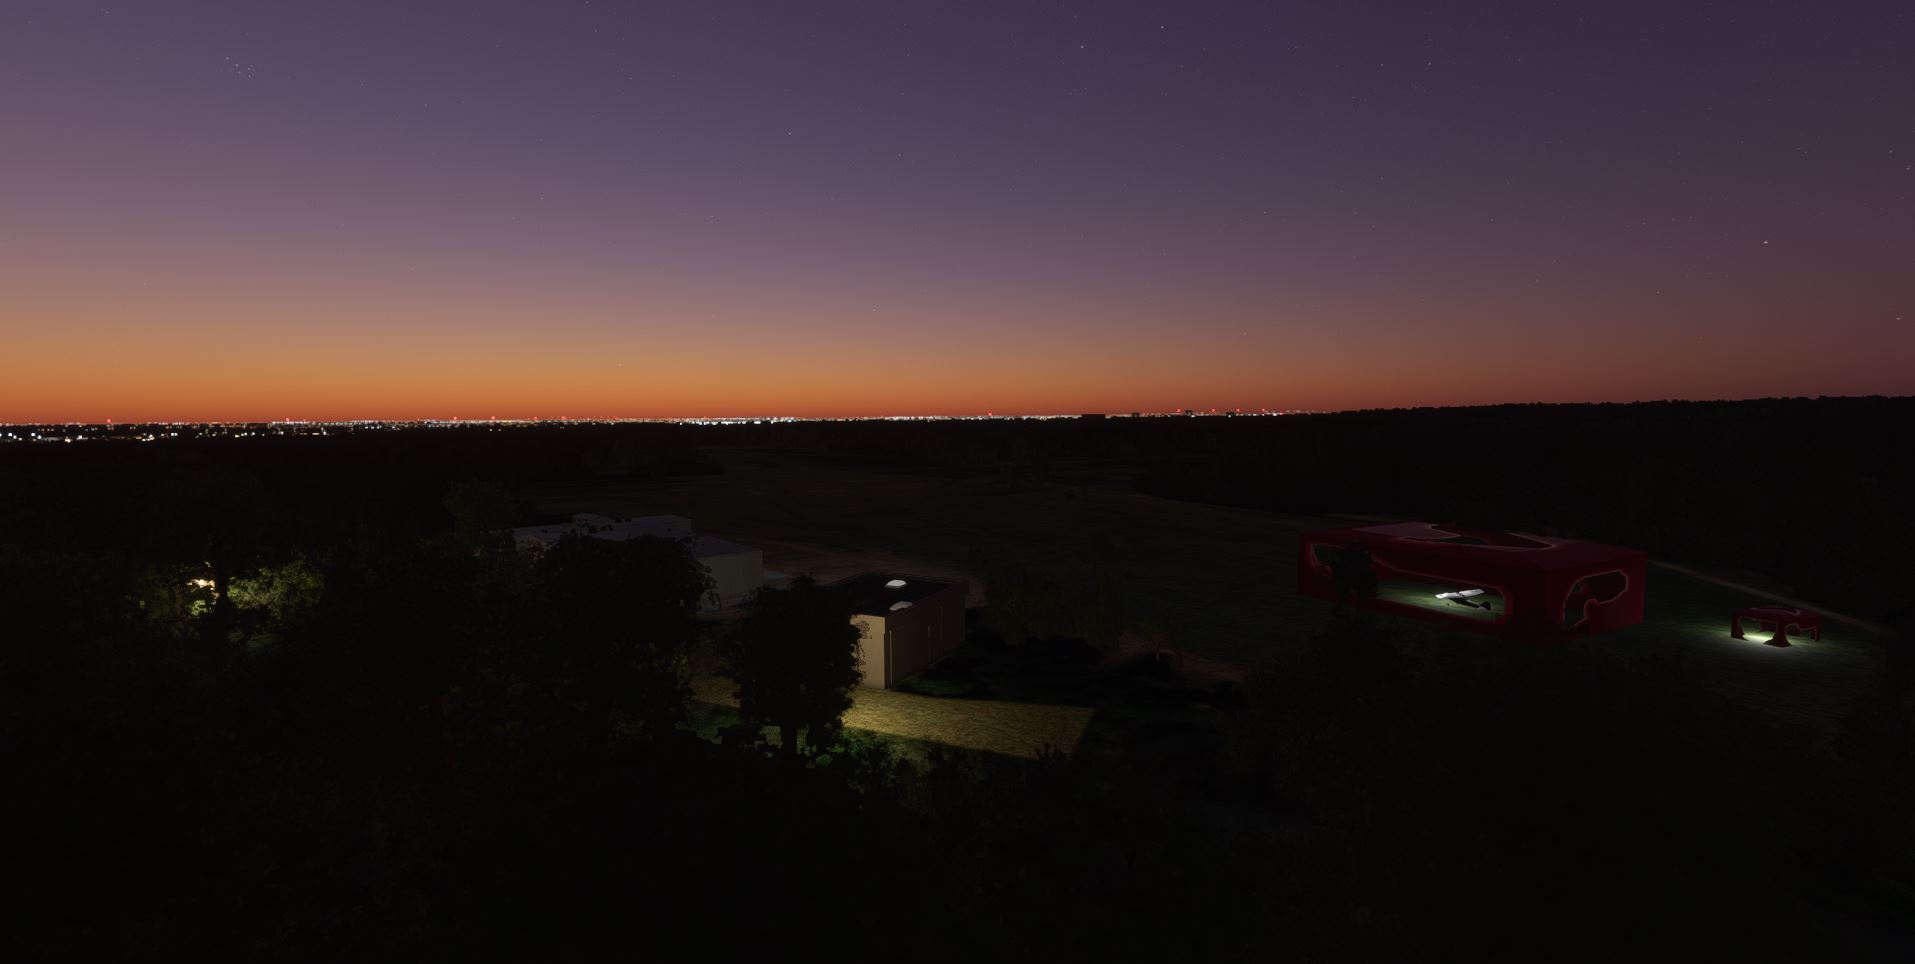
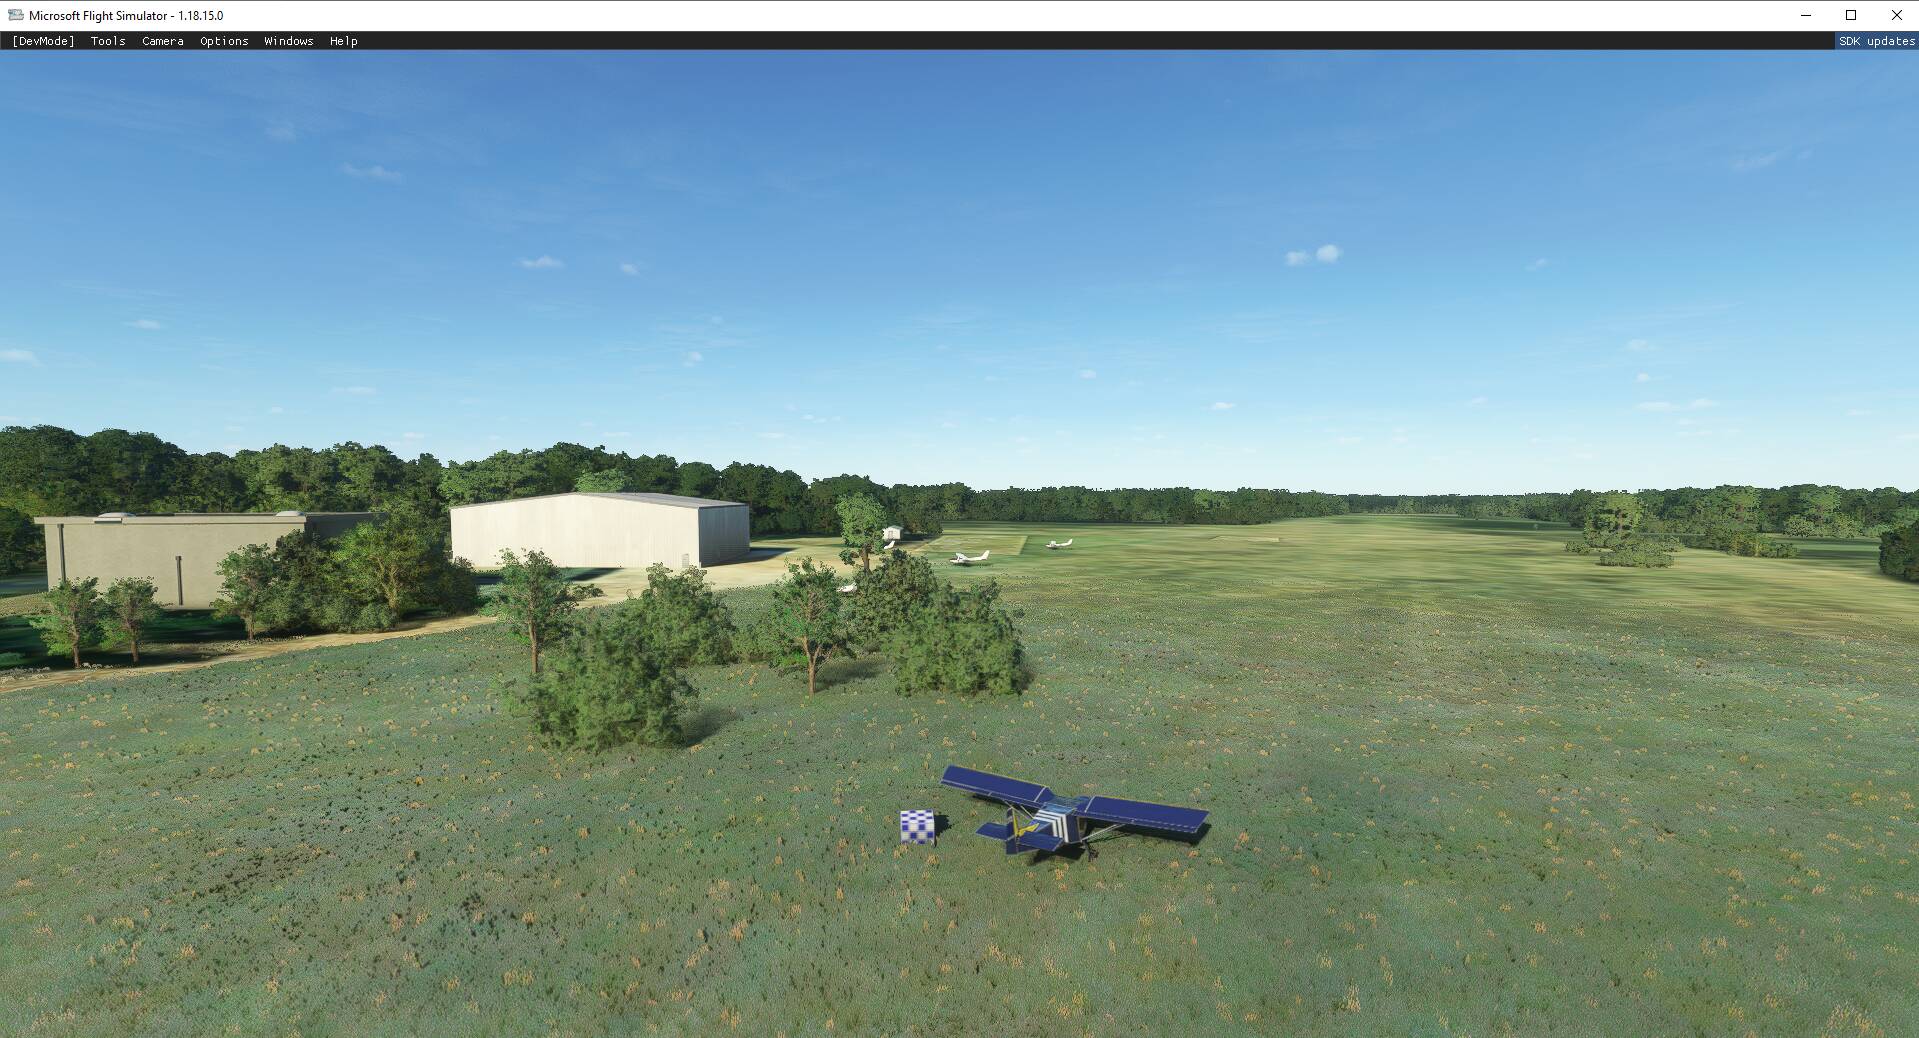
I put the box around the airplane… and put evening light to test the Blender point light effect. You get this:

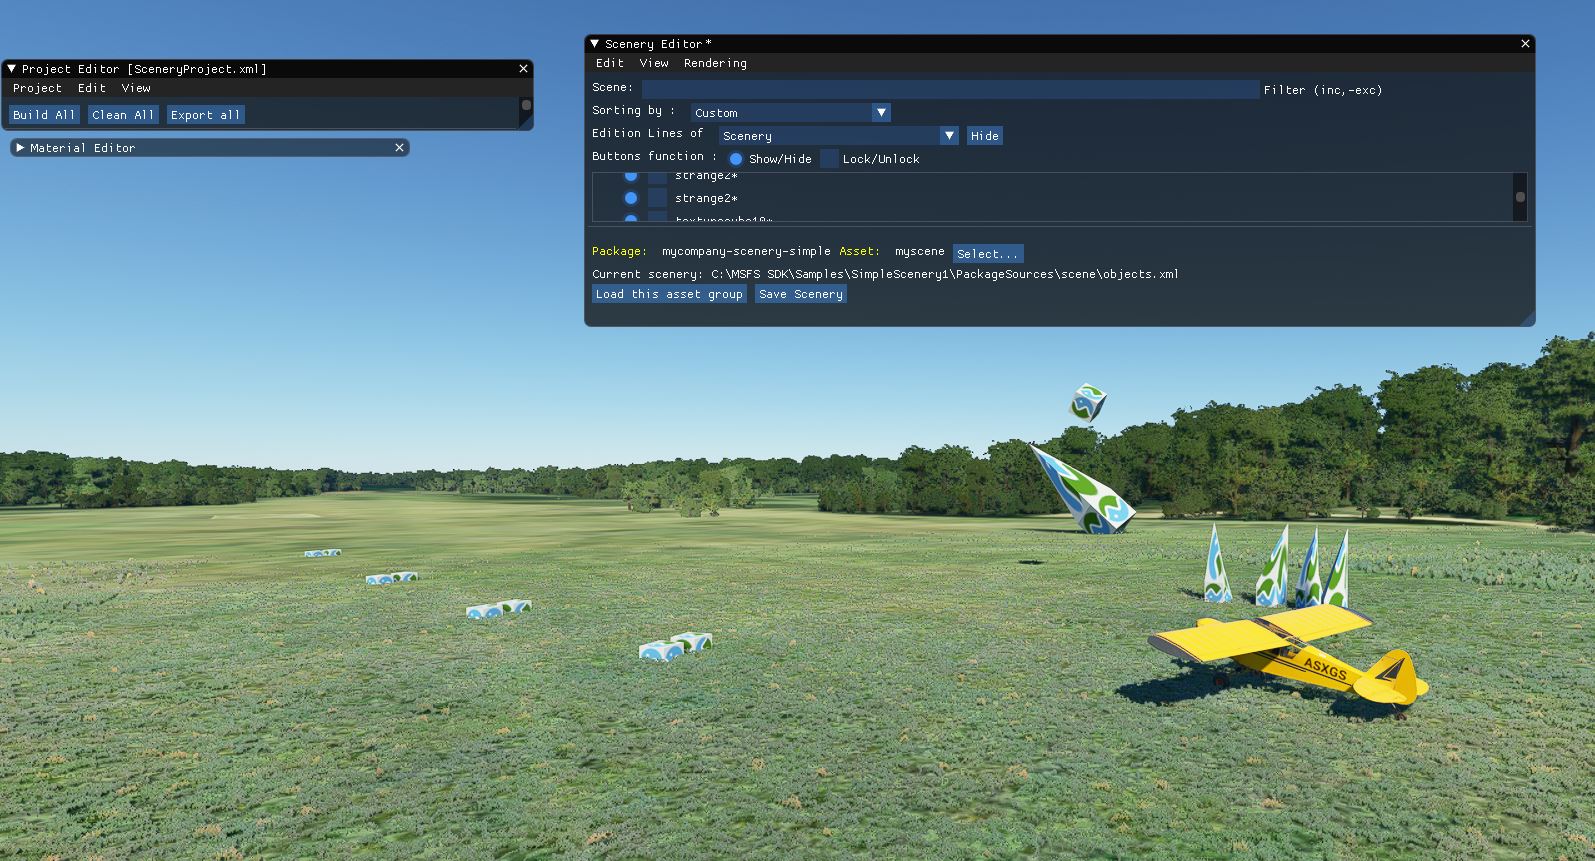
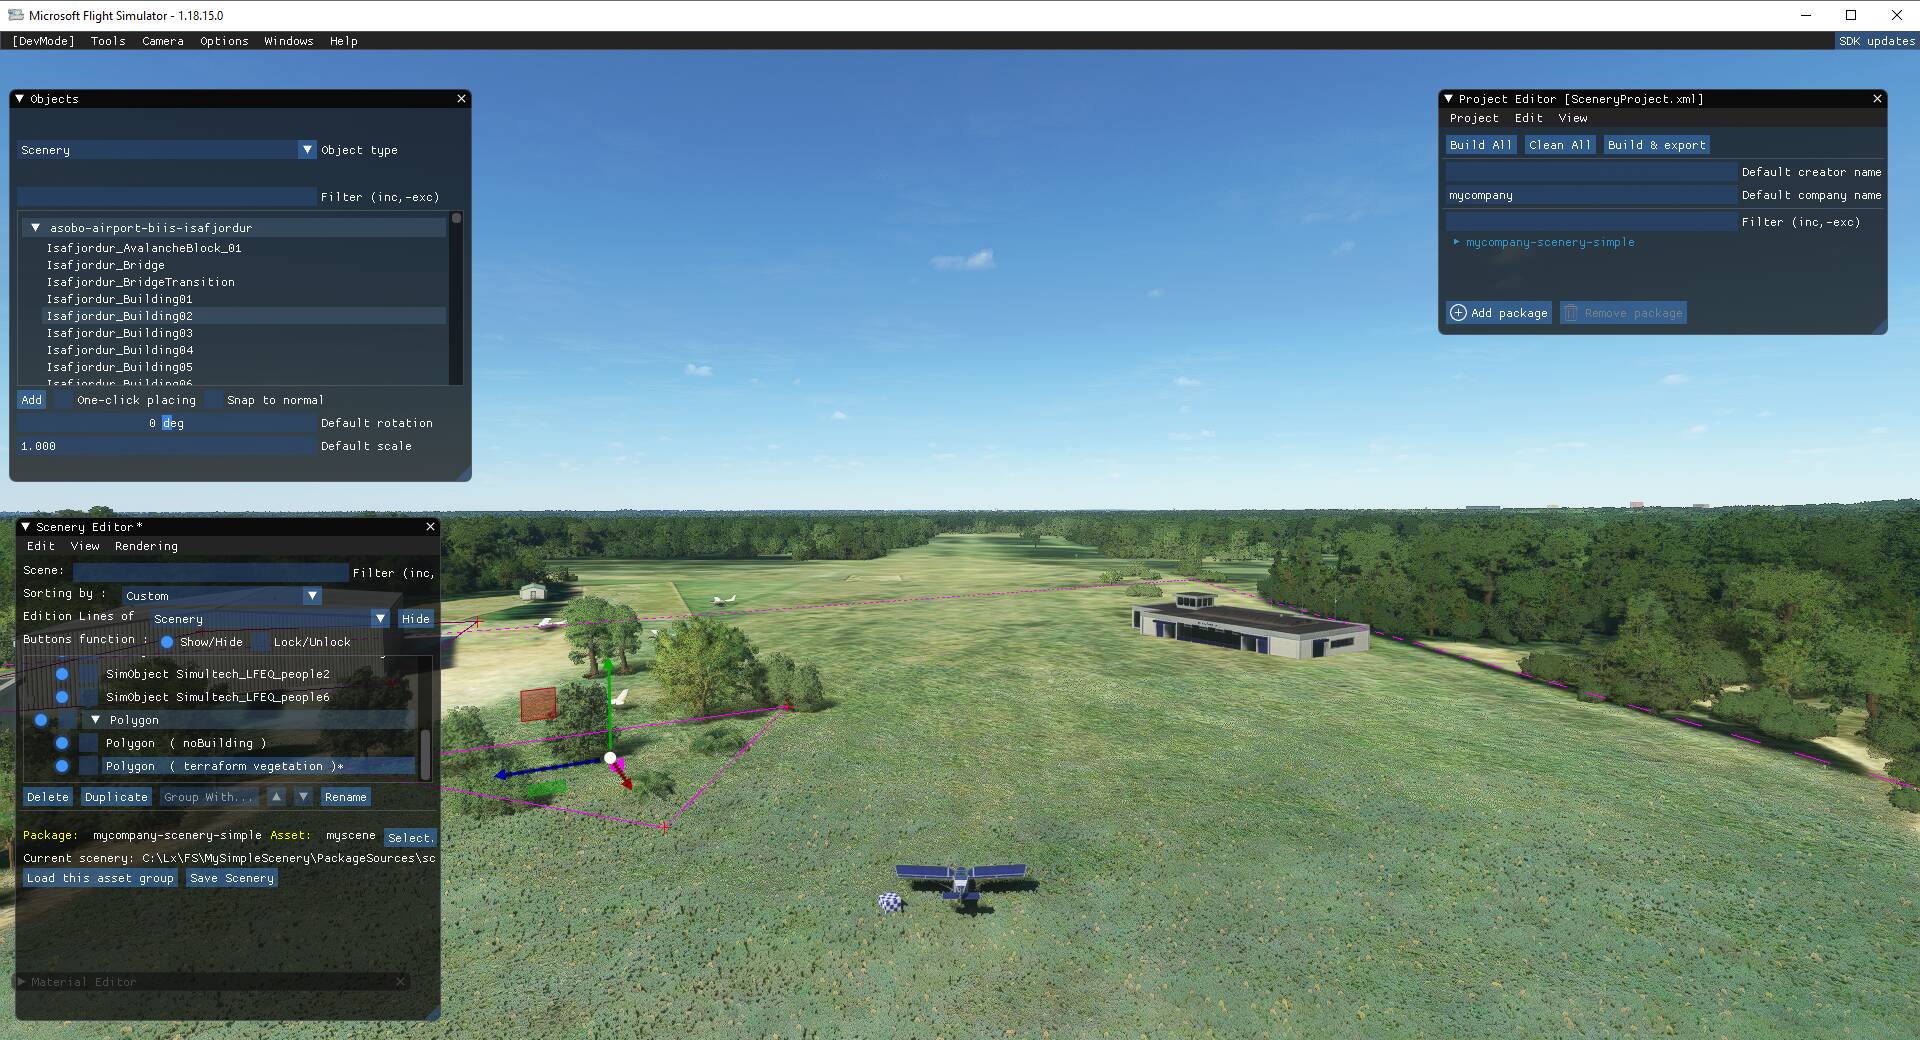
Let’s create some more trees… always good for the climate
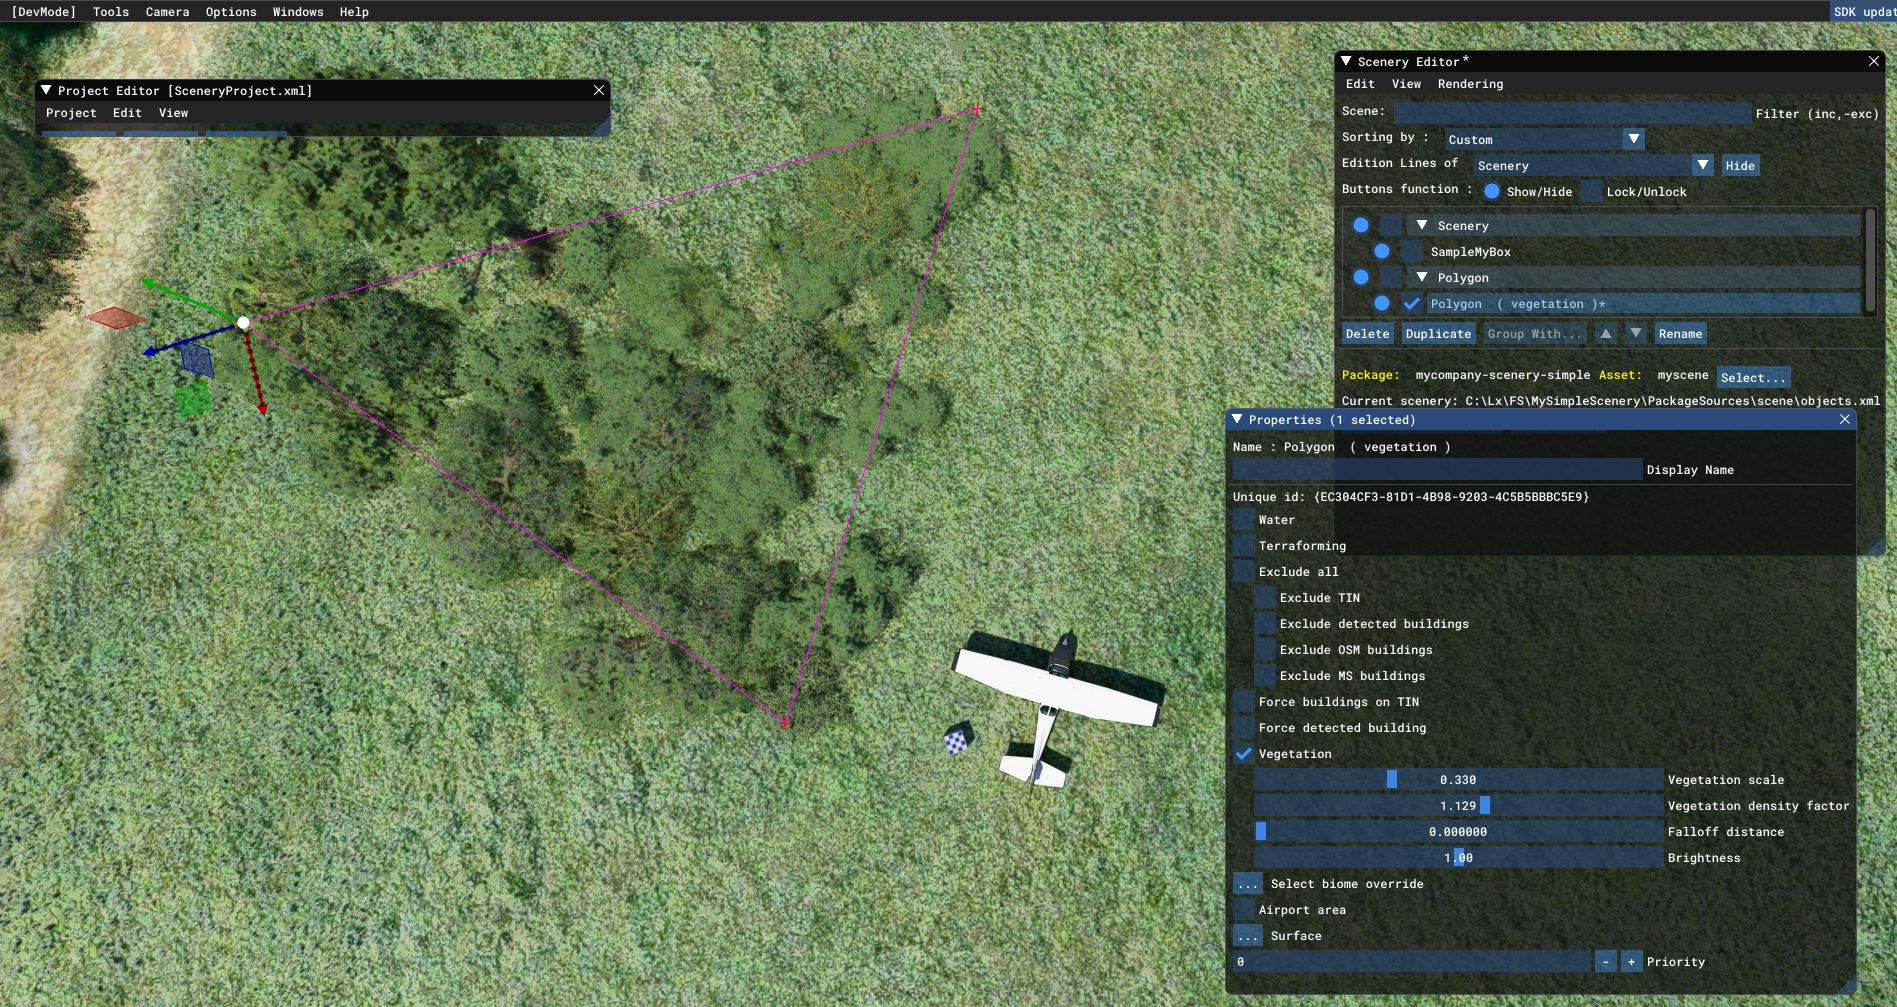
- in Objects, choose type Polygon
- Go up, let camera look down
- Click Add
- Left Click + key Control sets points you want to connect (a surrounding border)
- Finish key Enter
You can always change the points. In scenery editor, click on the Polygon object. Then you get thicker violet lines (see below). You can click on an edge and move it.
To get trees, click Right on the Polygon in the Scenery editor. You get Properties. Use “Vegetation” or other properties you want to set. Changes appear immediately. In this case: some trees.
Tip: if you want to do things like this and you have starting problems with the SDK scenery part, you may want to look at my work in progress… I’m writing a tutorial for the above MSFS/Blender experiments… it is far from ready, but you will find an example project download and some step-by-step instructions here,
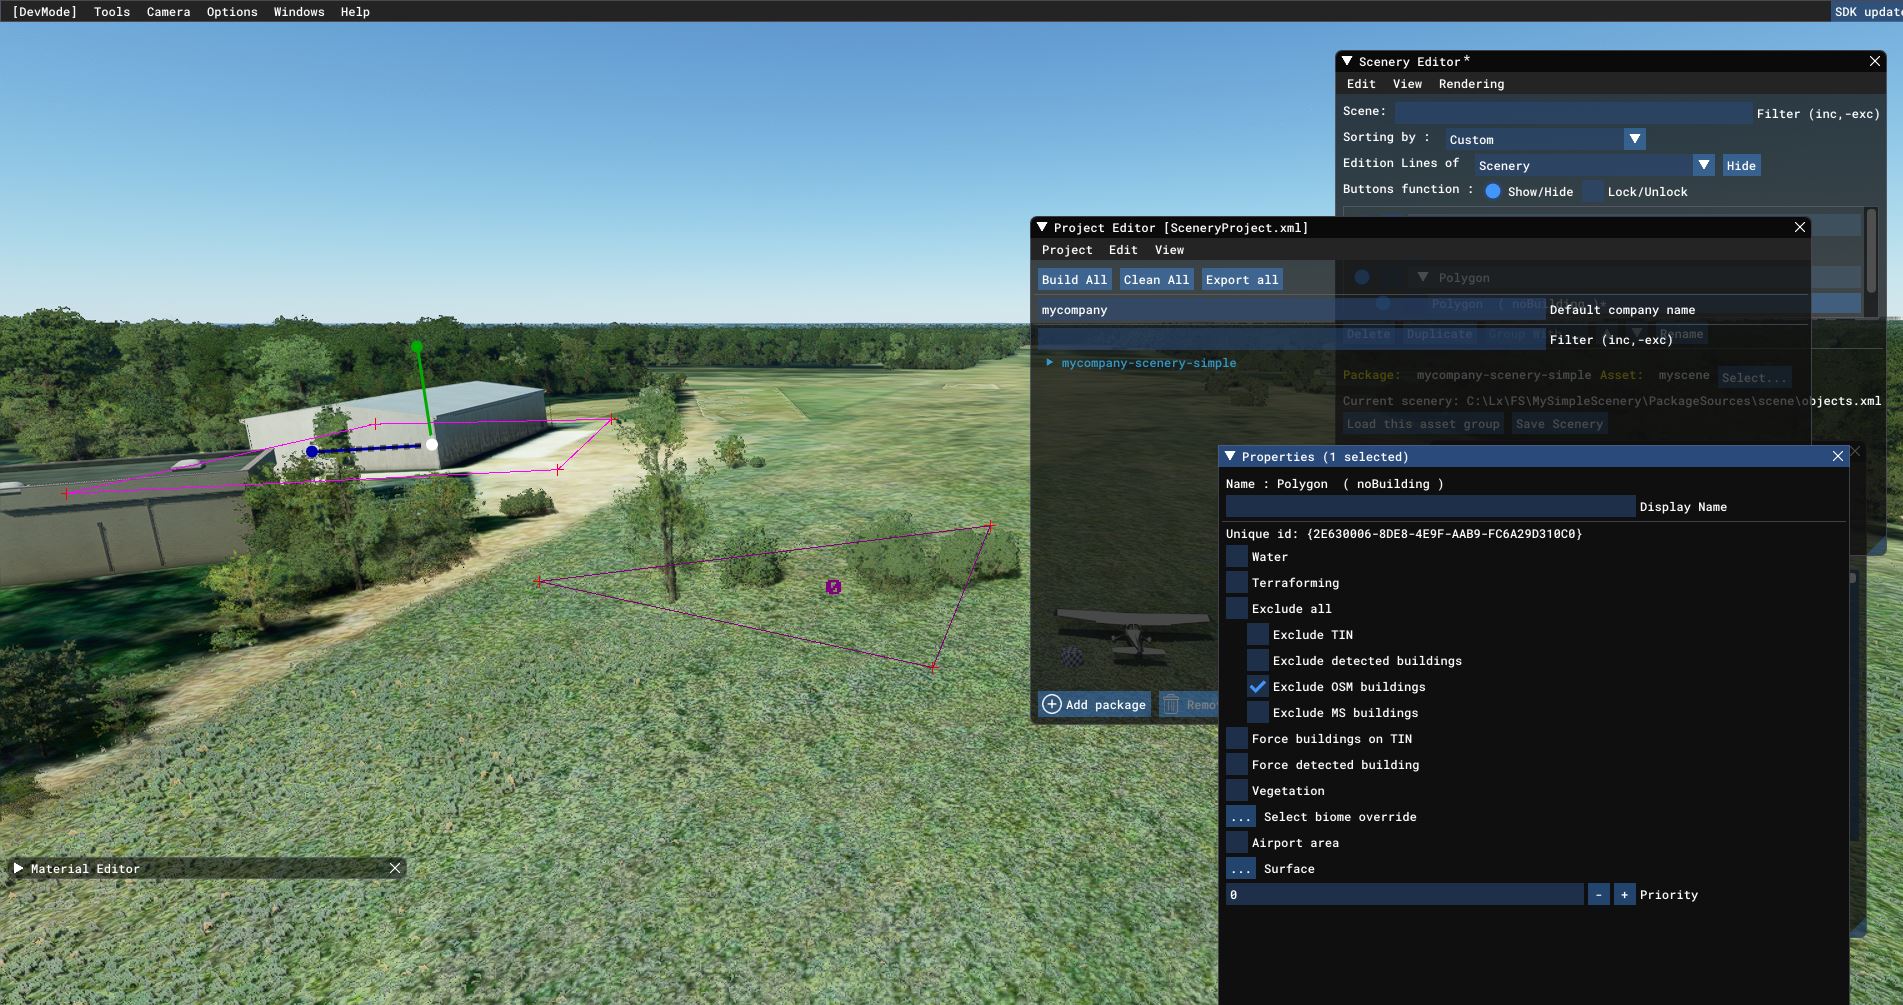
Ok remove an ugly building
Draw a new Polygon around the building…

… and set as property “Exclude OSM Buildings”. You’ll see the change immediately:
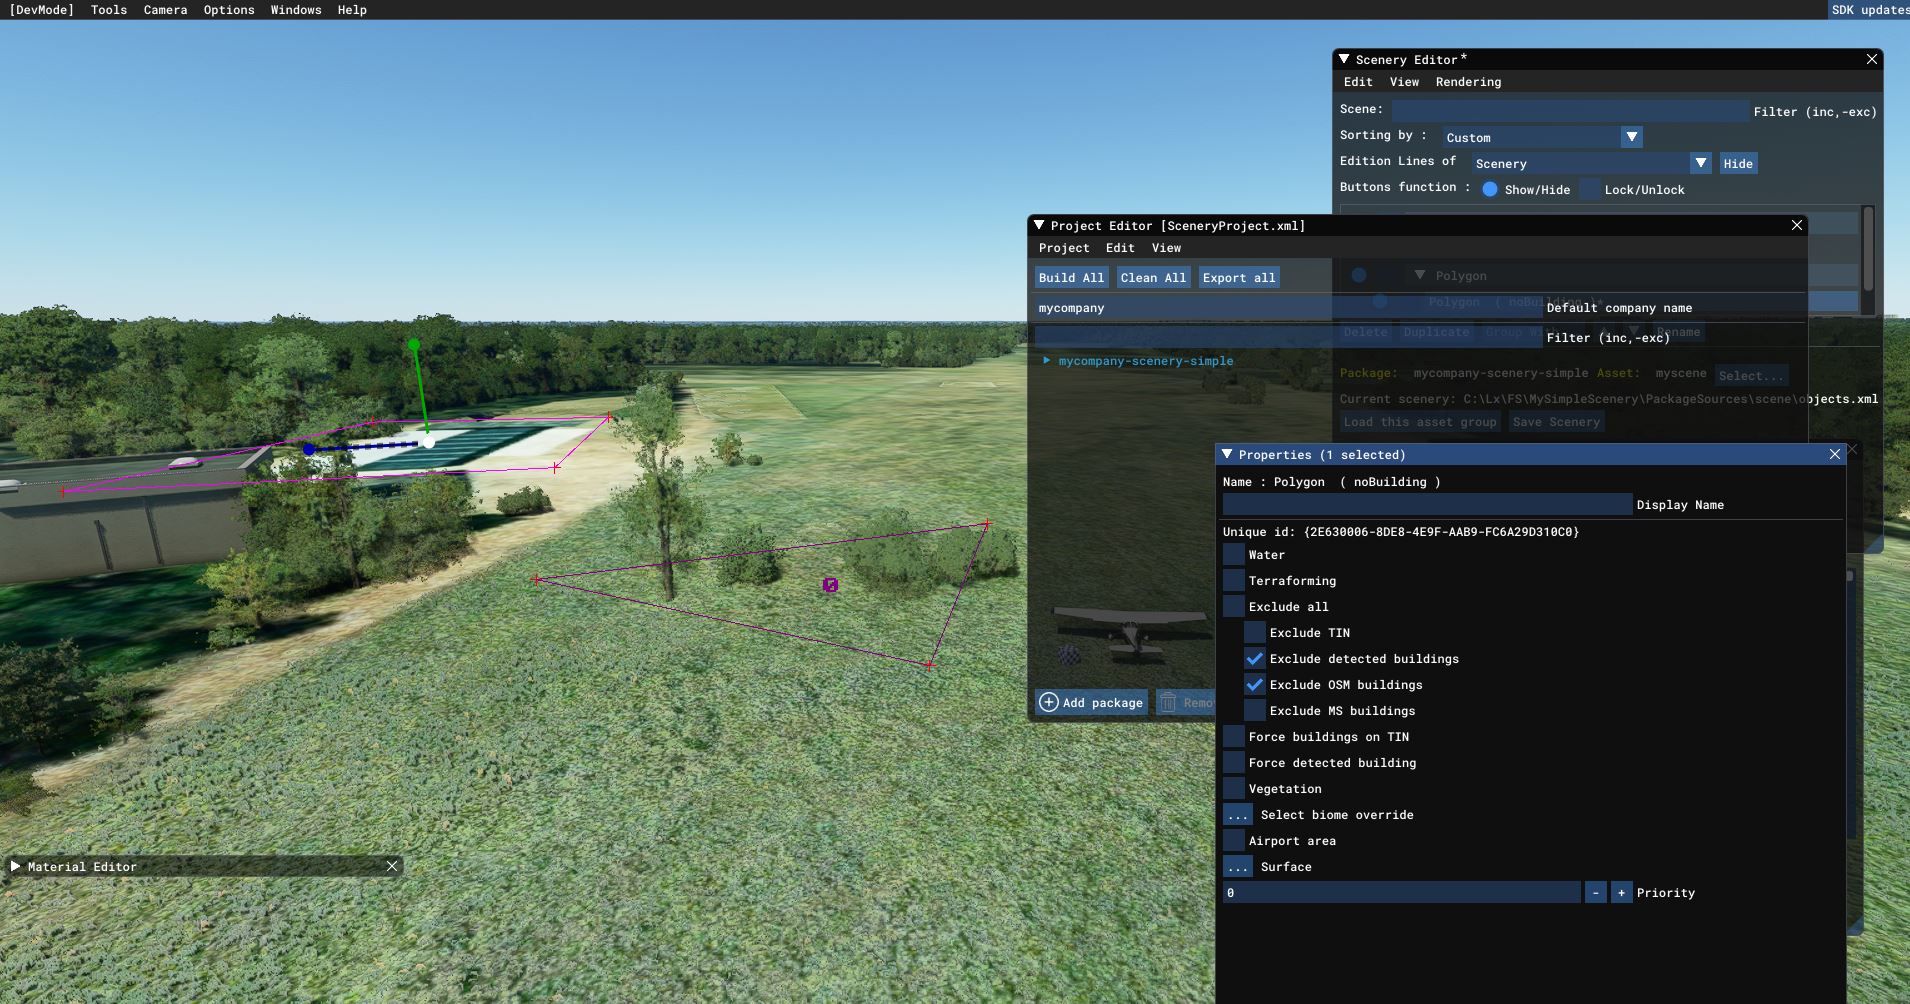
It appears underneath this grey block building resides a nice AI-building. You can leave it, or click Remove Detected buildings, to remove all buildings inside the polygon. Everything will disappear,
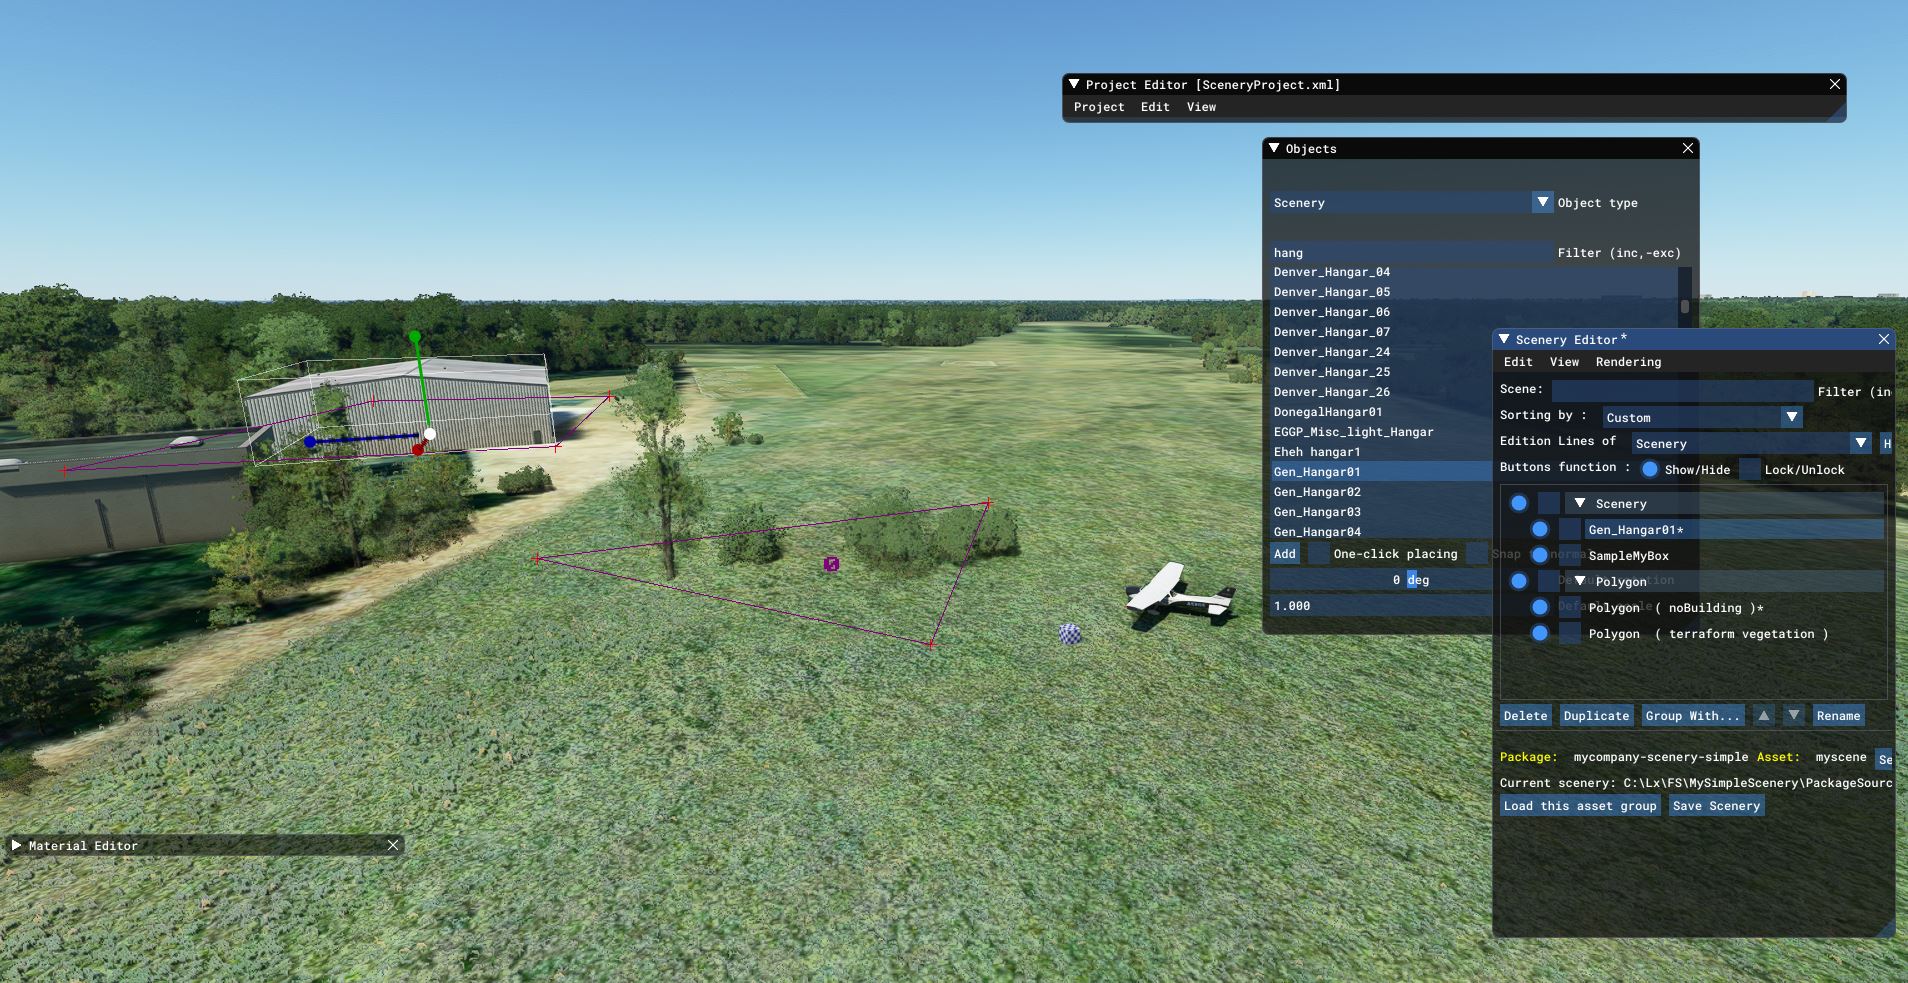
Let’s replace it 
… for this, you can use Scenery editor View Objects to popup Object dialog… find a replacement building, in this case a Hangar of some kind, click once…
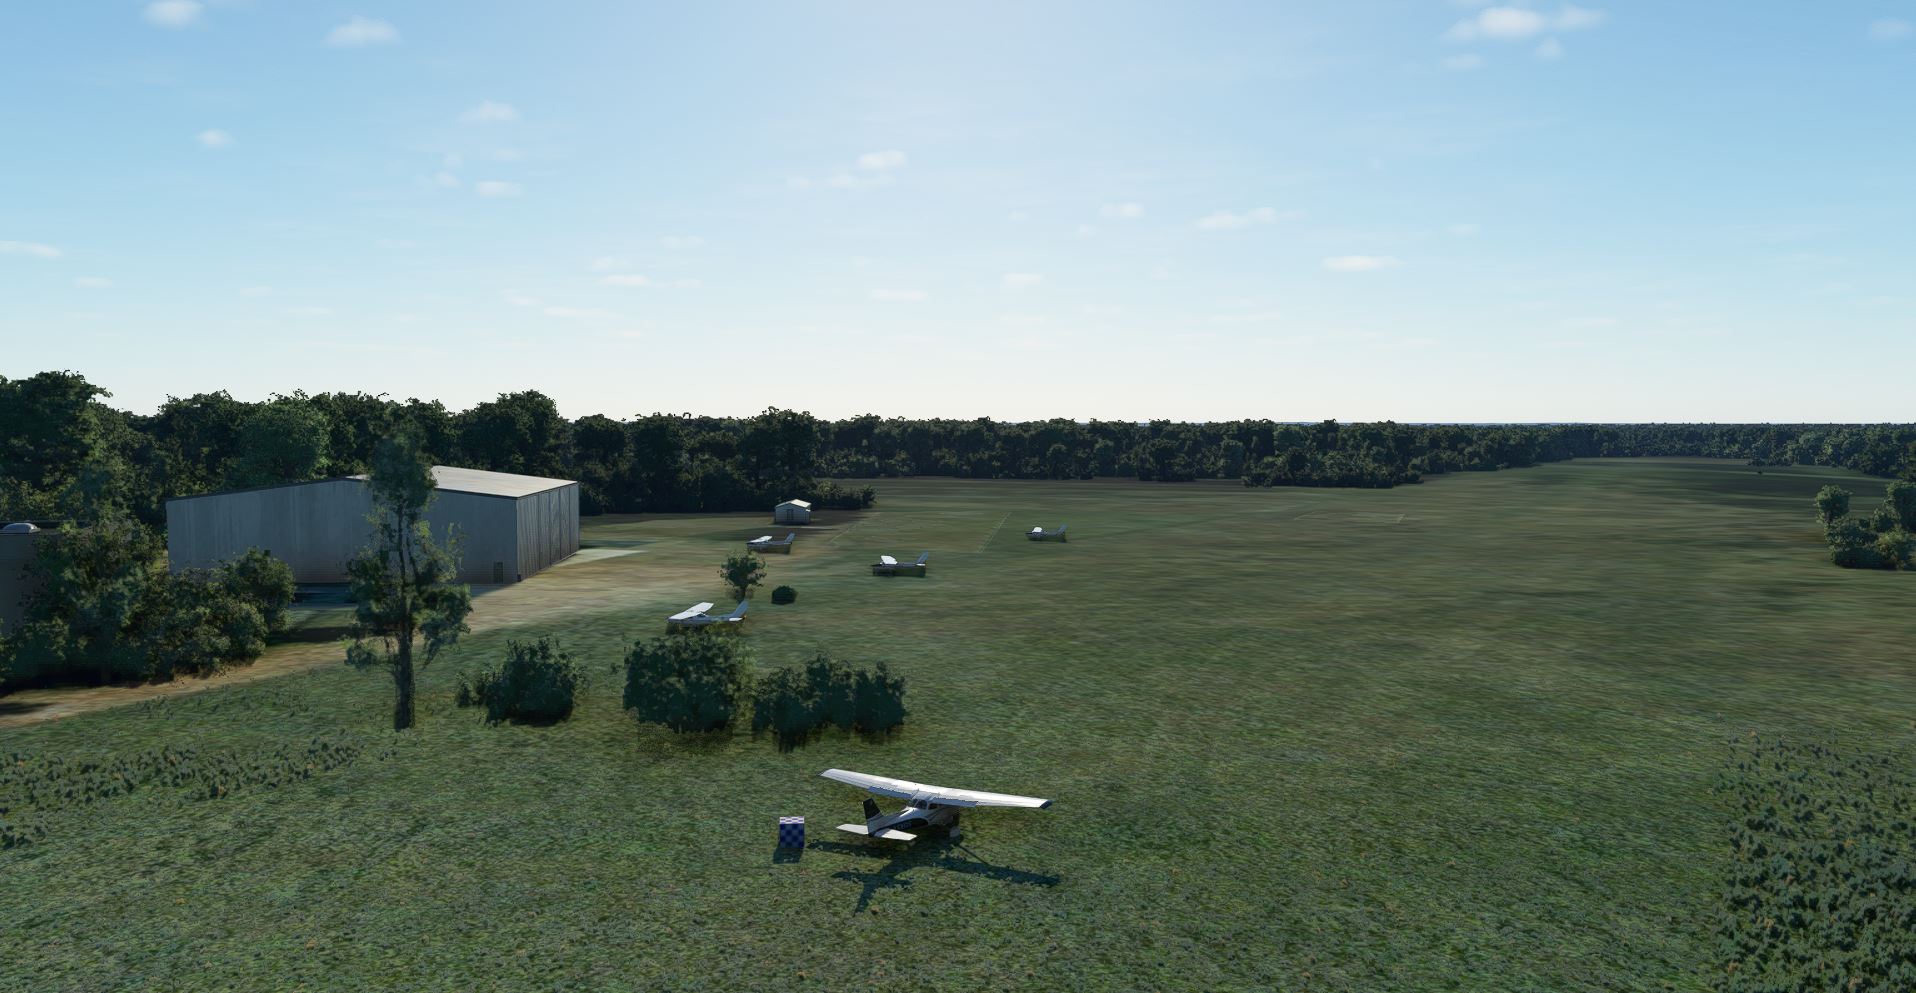
Click Save Scenery, you’ll get a File save box. Give your collection a name (any name), and choose directory \PackageSources. Now click Export. In the directory that MSFS shows, you will find a file Export.zip, which contains the directory for your Community folder. Install it and restart MSFS…
1 Like
New SDK. First time SDK was updated since SU-4 Hotfix. Developer mode / Help sais Xbox samples

Actions: Downloaded SDK 0.14.0.0 update via menu Help/SDK Installer (Core), that started the Edge browser with a download. If you haven’t set Edge as default browser, do it… else it does not work. Installed it from \Downloads by running the exe, then I left the sim, leaving SDK mode on… then I reentered the sim, I had SDK menus, Open Project (see above) and Build. Leave the project open… then go where the project has objects registered, click FLY. I see my project where I left it
Found no issues yet, but these are objects I already had…
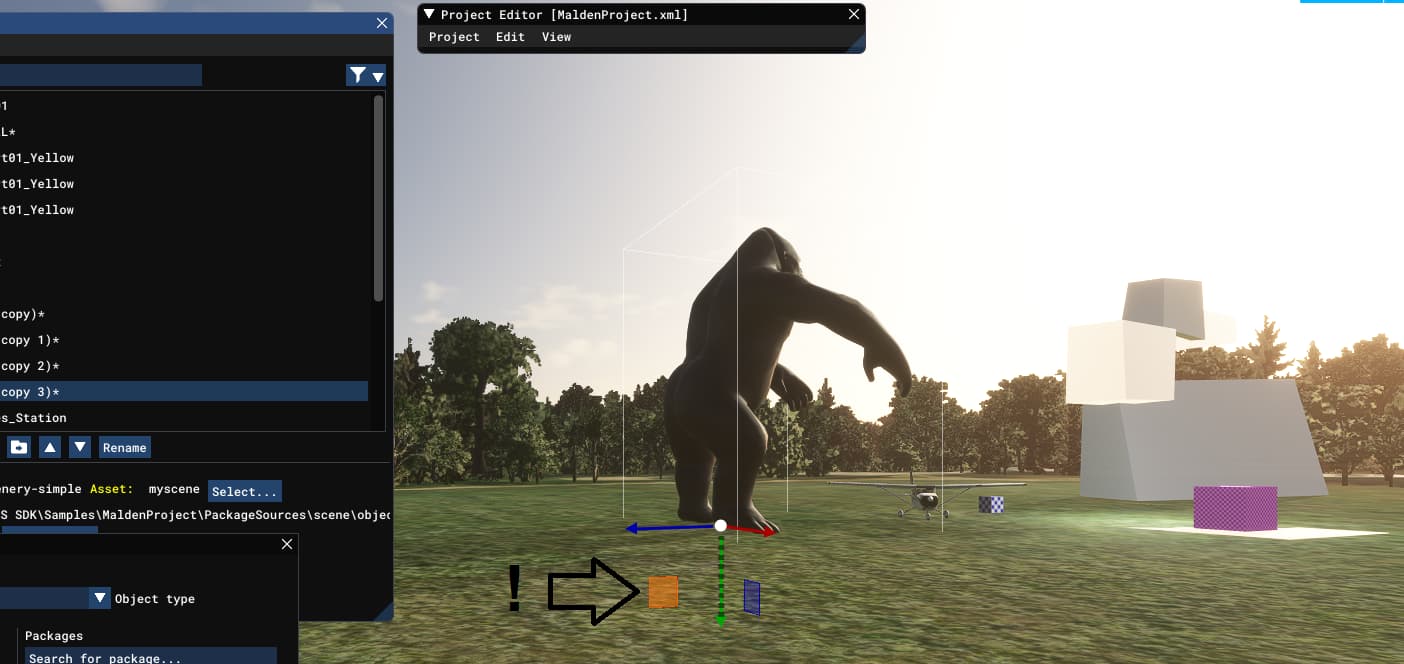
I tested some very basic object placement stuff. It seems to work on a few very simple tests: open the project, find and select an object, placement and move (select and key: W) , right click Properties… Below image shows how to set Properties, to lift a cube in the air. Switch off “snap to ground” !
Library objects can be picked (Isafjordur building) and my new trees can be moved 
Try Build & Export…
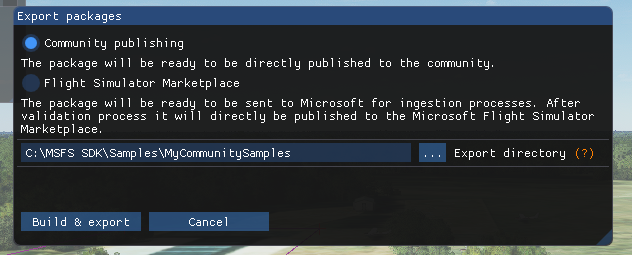
Check the new box (?)

… and copy the result content of Export.zip to \Community. On return to main menu, I got a CTD at this point… maybe it gets confused because of this “ingestion process” ?  Anyway, restarted the sim, scenery found loaded. So far so good.
I’ll try Blender tomorrow…
Installed 13.9, the toys don’t work… moving objects works only on initial placement, after that, blue, red and green gizmos don’t listen to mouse clicks for some reason (??) also the project does not seem to build ![]() I wonder if something changed,my old project is incompatible, or if I’m doing something else wrong. I haven’t touched the SDK for a year or so… I’m sure I previously I could modify object positions with the scenery editor, after initial placement !
I wonder if something changed,my old project is incompatible, or if I’m doing something else wrong. I haven’t touched the SDK for a year or so… I’m sure I previously I could modify object positions with the scenery editor, after initial placement !
This was cool, reminds me of my early blender days.
You should be able to move your objects about, maybe try starting a new scenery project and importing the old models.
1 Like
Thx Nethiuz… well “early” for me is an understatement. I am not a 3D-designer, and I think I am very green in 3D drawing actually… I just like to play around in MSFS with internal objects and GlTF objects ![]() sometimes they have to be converted from .obj like below King Kong.
sometimes they have to be converted from .obj like below King Kong.
I convert the object in blender and the create a subdirectory for it like PackageSources\modelLib\kingkong1
When the project opens and builds, the SDK will include the object.
… and yes, objects CAN be moved of course, I just forgot how… move the right gizmo… the squares, not the arrows
Also I solved the build issue by removing the Japanese house, dated april 2021. Ihave to convert it again in Blender, or the special lighting is not compatible anymore with the current MSFS, or the current MSFS SDK…
1 Like