The same problem, and it’s not in the simulator, in the settings I see the shaking of the mini stick when I lower or raise the steering wheel, has anyone solved the problem?
Hi Maestro6405, nope, so far everything I’ve tried has not solved the problem unfortunately.
Mario
1 Like
Neither do i. I don’t know how to solve it.
Drivers - Package 2022_TFHT_1 + Firmware
I installed this driver from Thrustmaster and seemed to solve the problem for now.
2 Likes
Hi ManneredDoor745,
Thanks for the input. I will try it and see how it works for me. Once I install it, I will report back. Thanks again!
Mario
I’ve had this driver version for a long time, and the problem appears again by accident, I tracked that the mini stick somehow starts to make noise, or the wire catches in the interior or something else, I think that the mini stick has ordinary resistors, not magnetic ones, and it makes noise, I made a dead one in the game settings zone by -2
Hi Maestro6405,
Thanks for the input, for a while, I have also suspected the possibility of some wire or something catching inside the Boeing Yoke and not software related. But who knows. I have to ask a stupid question, when you say : “Mini Stick”, what are you refering to? Also, what exactly did you do regarding a dead zone?
Thanks,
Mario
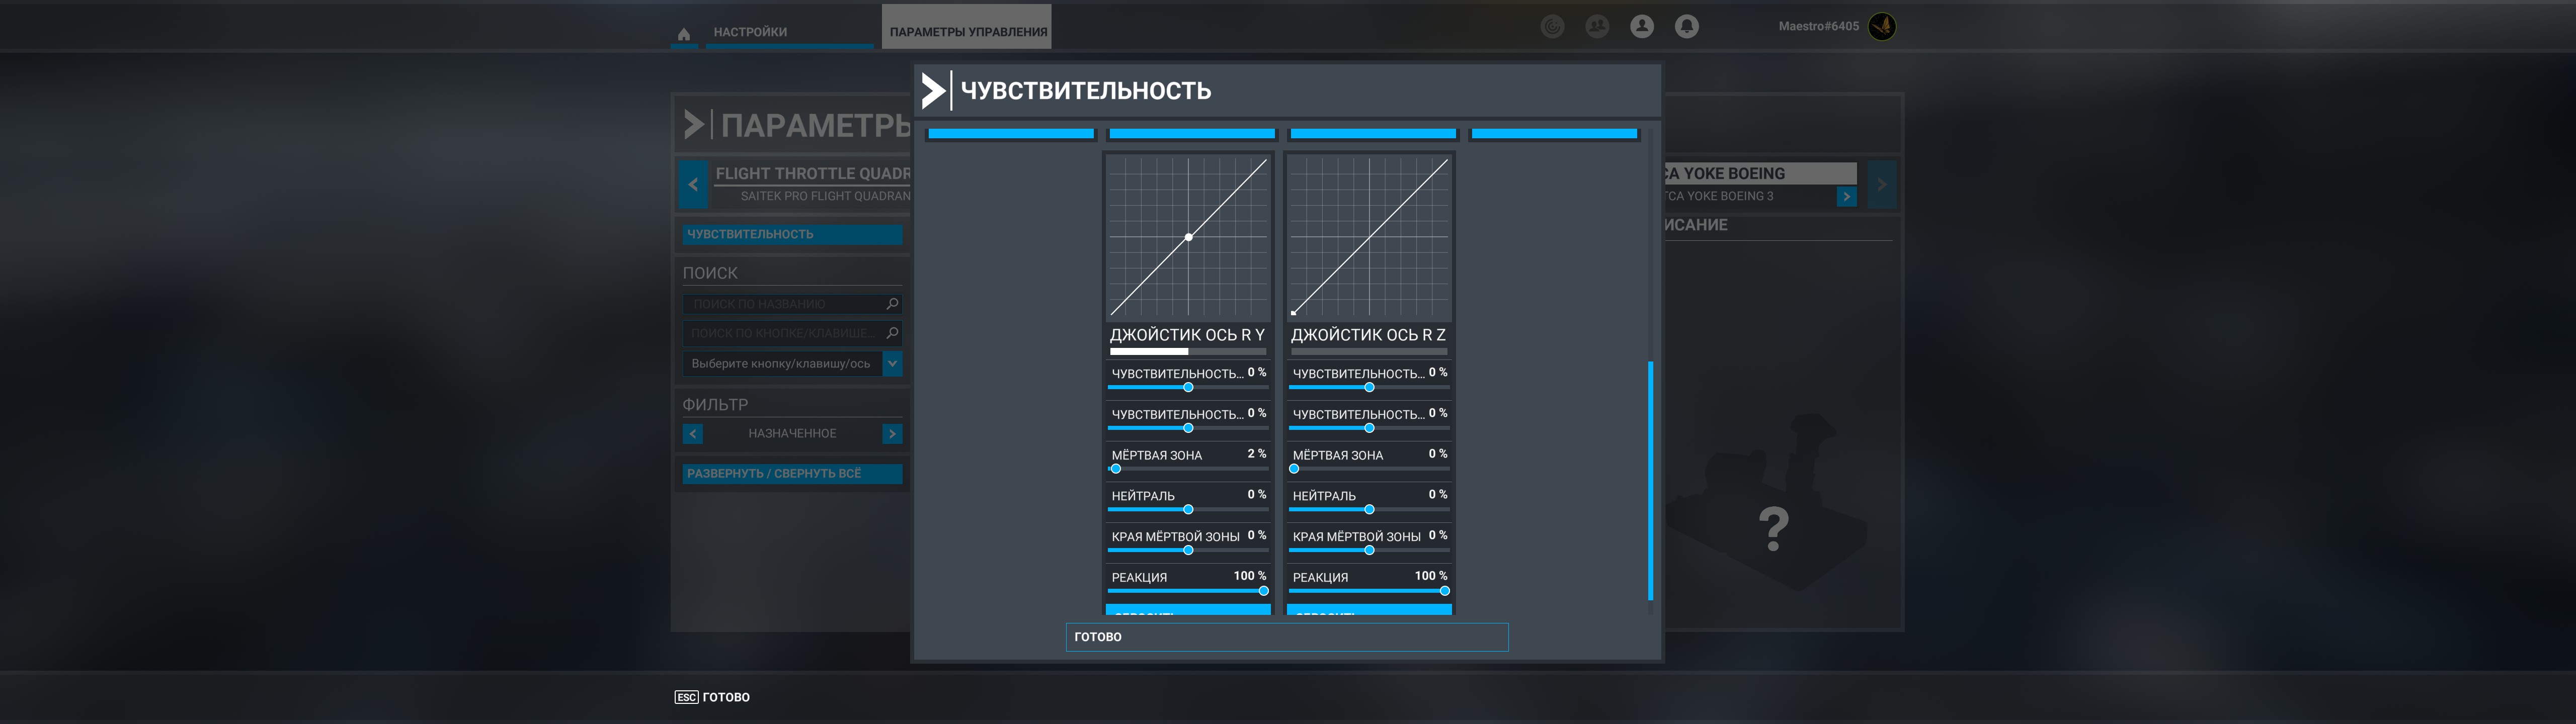
play around with the dead zone, both 2 and 3 or more may suit you, it twitches a little when you move the steering wheel
1 Like
Mini stick is the small swivel thumb hat switch on the right hand side of the Boeing thrustmaster yoke. Dead zone setting is in controller settings of MSFS. You will see “dead zone” and set it to -2.
1 Like
Maestro6405, Thanks for the clarification. I’ll try it.
Mario
ManneredDoor745, Thanks for the clarification.
Mario
I just noticed this issue today (PC user). My mini stick twitches in the down position and when in flight sim, it makes the view slowly look down. I also notice the right mouse button (usually to pan and look around) does not work. I am assuming the ministick looking down is taking over.
I notice some say to set the dead zone to -2. Is that a temp fix for this? I will try and see if it works, but with my old CH products yoke, an easy calibration would fix these issues. is there a way to calibrate the TCA Boeing Yoke?
Edit: Setting the dead zone to 10 fixed the issue for me. Thanks for the help.
Boeing thrustmaster yoke behaving erratically with a sudden high bank to the left, randomly, unexpectedly for no reason. I uninstalled the T.flight Hotas driver and just used the “joy.cpl” driver by itself. My problems seem to have gone away. I also tried making deadzone for all axis settings, but it helped at first then the problem came back. …
1 Like
Hi ManneredDoor745,
I’ve had so many problems for so long with the Thrustmaster Boeing Yoke that I had to revert back to my Honeycomb Yoke. I don’t know anymore if the control problems stem from within MS2020, or the drivers, or any short or connection problem within the yoke itself. It’s too bad because I really enjoyed this yoke when it worked properly.
Mario
Did you I uninstall the T.flight Hotas driver and just use the “joy.cpl” driver by itself. My problems seem to have gone away, finally. Erratic behaviour with camera views and aircraft control have completely gone away. If you need more help let me know.
2 Likes
Yup same here. I’m not sure if it was happening before I noticed it. When I first got the yoke and set up sticking out from the desk I accidently bumped it once, my hand swung out and hit the right handle Where the mini stick is! Well I did not think much of it other than my hand hurt. Soon after it started… Not all the time but it can occur @ any time in the flight especially when LANDING! And screw things up. I’m gonna open up the yoke and inspect the wires. One note to make is that when the camera starts bugging out and I use the mini stick to correct it acts fine and responds as expected? Also the one thing that corrects the problem temporarily is full deflection of the yoke up and down? In autopilot that’s fine…However that also messes things up when I’m manually flying the sim! WHat to do? I’ll report back…
1 Like
I opened mine up and found the main ribbon cable, that runs from the front of the yoke to the rear, passes through the metal body of the yoke via a hole.
There is no abrasion protection on this cable or hole to protect the vinyl insulation on the ribbon cable. I found a small place where it seems like the cable had been rubbing against the edge of the hole and it cut the vinyl insulation on the edge of the ribbon cable.
Repositioning and protecting the cable has, for the most part, cured the anomaly for me. I still very occasionally have to disconnect the USB cable and reconnect it to cure other behavior oddities, though.
2 Likes
How hard is it to disassemble it?
It’s not too bad.
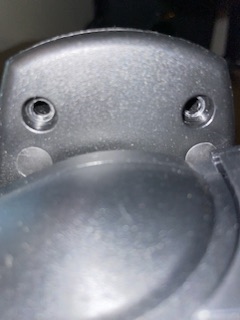
You need to remove 6 screws that secure the face plate. To reach 4 of them you have to turn the yoke to see the screw access holes on the back side. Then, remove the 2 screws at the bottom of the yoke.
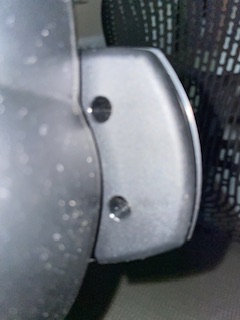

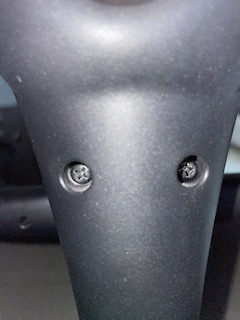
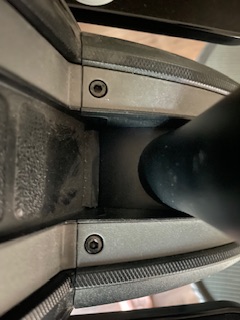
Then on the pedestal there are four screws that have rubber covers over their heads. Two of these are at the top facing you. You can see them when you rotate the yoke left and right. Two more are on the face of the pedestal also facing you. The final two on are midway up the back of the pedestal on the backside. (The rubber covers and screws have been removed in these photos)
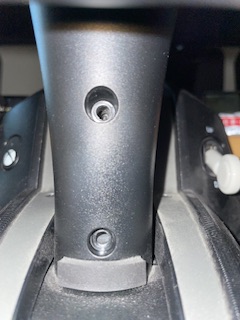
Lastly, remove the two hex head screws that secure the cover that allows you access to the tension springs. The back side of the pedestal cover can then be removed.
Once you’ve done this, you can see the ribbon cable’s connector at the front, behind the first cover you removed and on the back where it runs through the center of the face of the yoke.
Incidentally, if you do this and can document some visible damage to the cable, I’d contact Thrustmaster Support and provide images of the issue.
I am, quite literally, right now in the middle of working with them over this and they are being receptive to helping me obtain parts to repair the issue.
4 Likes