I think you can get 3rd party heat sinks or heat pads to cool the m.2’s down. You just have to make sure they fit the MB/M.2 drive and don’t obstruct other components on the MB.
Might be worth a look. Maybe others here can advise better?
I think you can get 3rd party heat sinks or heat pads to cool the m.2’s down. You just have to make sure they fit the MB/M.2 drive and don’t obstruct other components on the MB.
Might be worth a look. Maybe others here can advise better?
Yes, not an expert here but it might also be worthwhile looking at your MB manual here too before switching your M.2 drive.
Sometimes MB lanes might be shared limiting performance of the drive or some other component.
As I said, not an expert. TenPatrol or BegottenPoet for example are likely to offer far better advice than me ![]()
Exactly, the power should be connected to GPU using a single 600W cable, without a splitter. This will ensure more stable and safer power delivery to GPU When connecting this cable (from the MSI power supply), if I remember correctly, I heard a click when plugging it into GPU, which suggests a proper connection.
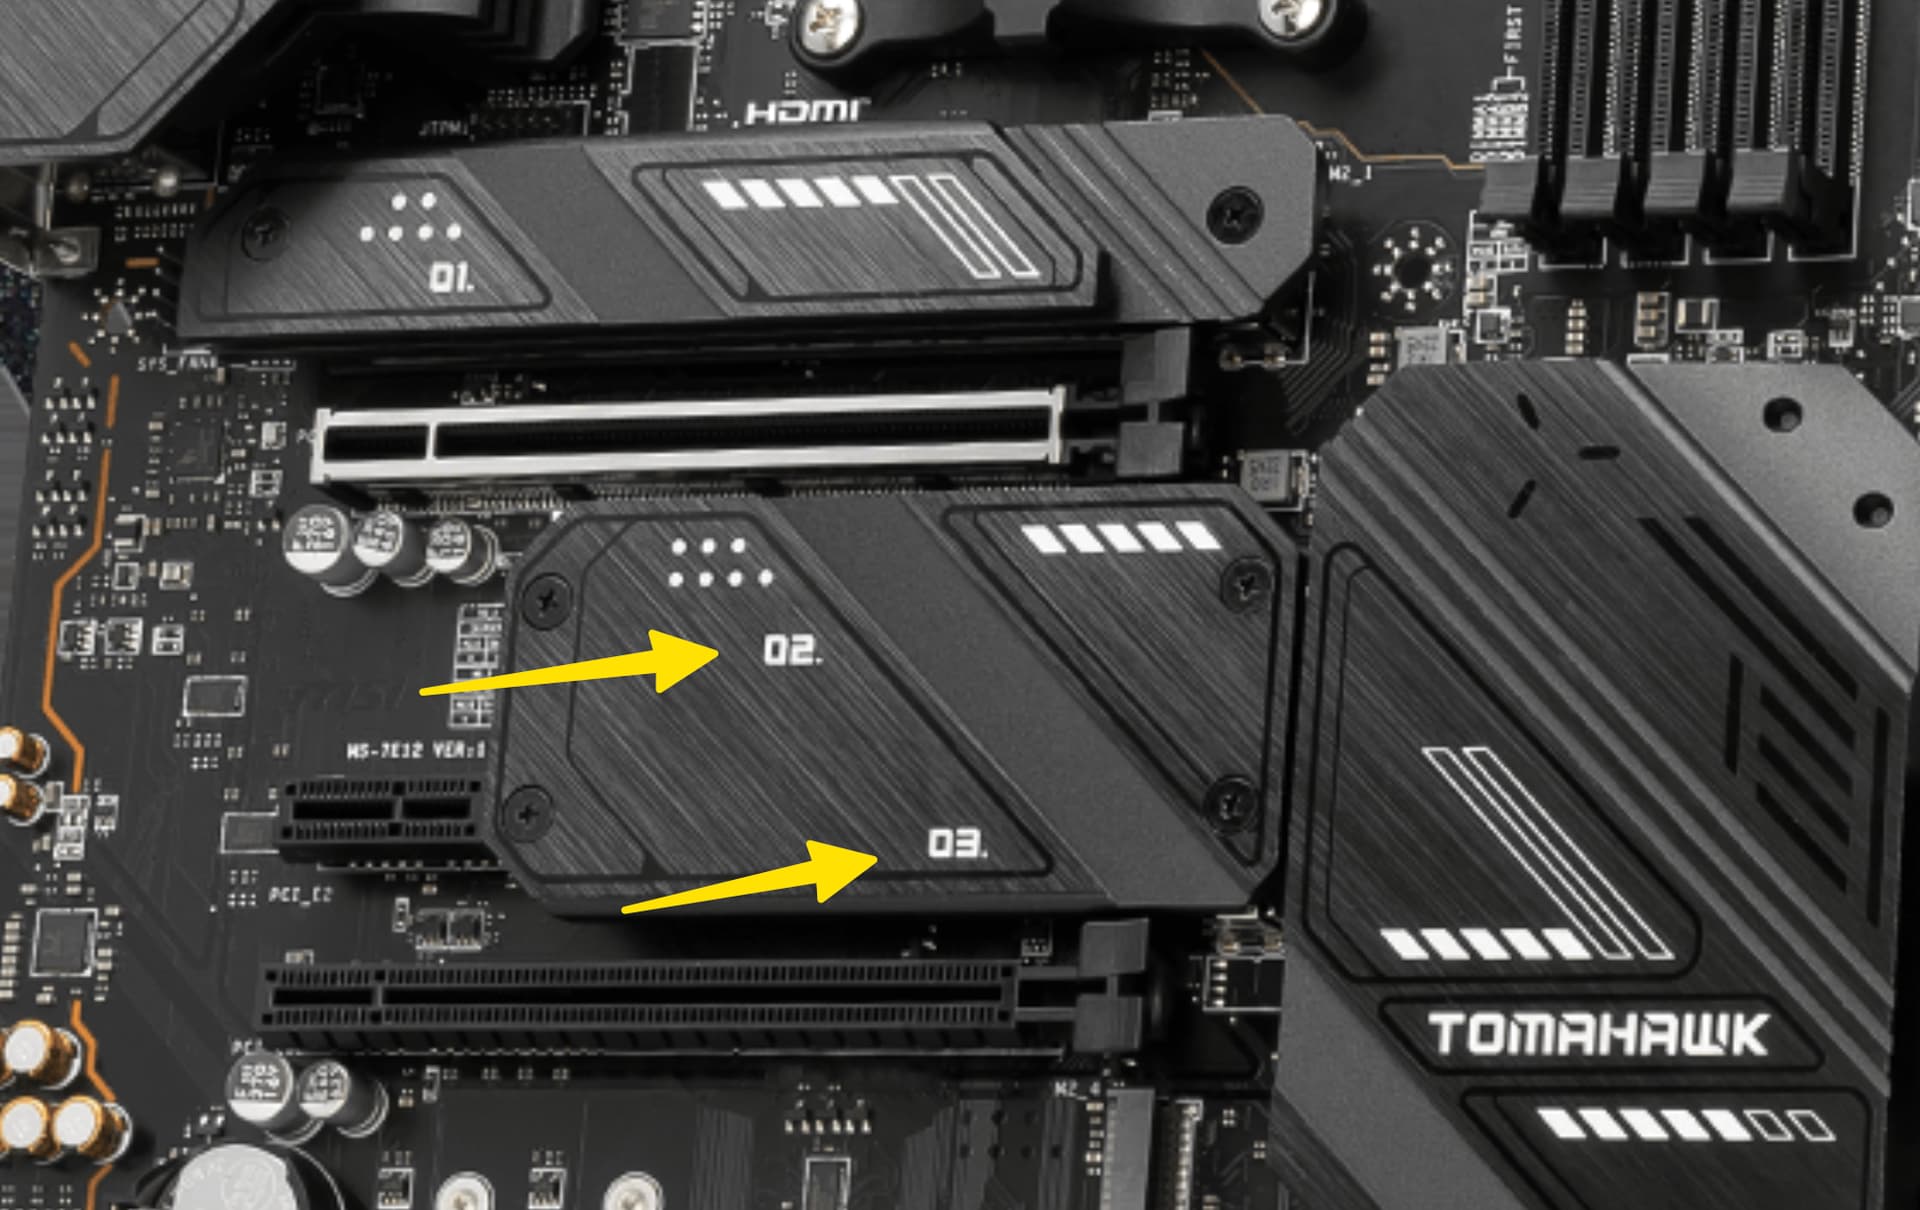
I used to have this motherboard. For slots M1, M2, and M3, you don’t need additional cooling for the M.2 drives. There are thermal pads included. When installing the M.2 drives in these slots, make sure not to forget to remove the protective film from the pads.
edit
In the case of the motherboard purchased by OP, he can install 4 M.2 drives without any issues. Nothing will be limited, such as lanes or bandwidth.
edit
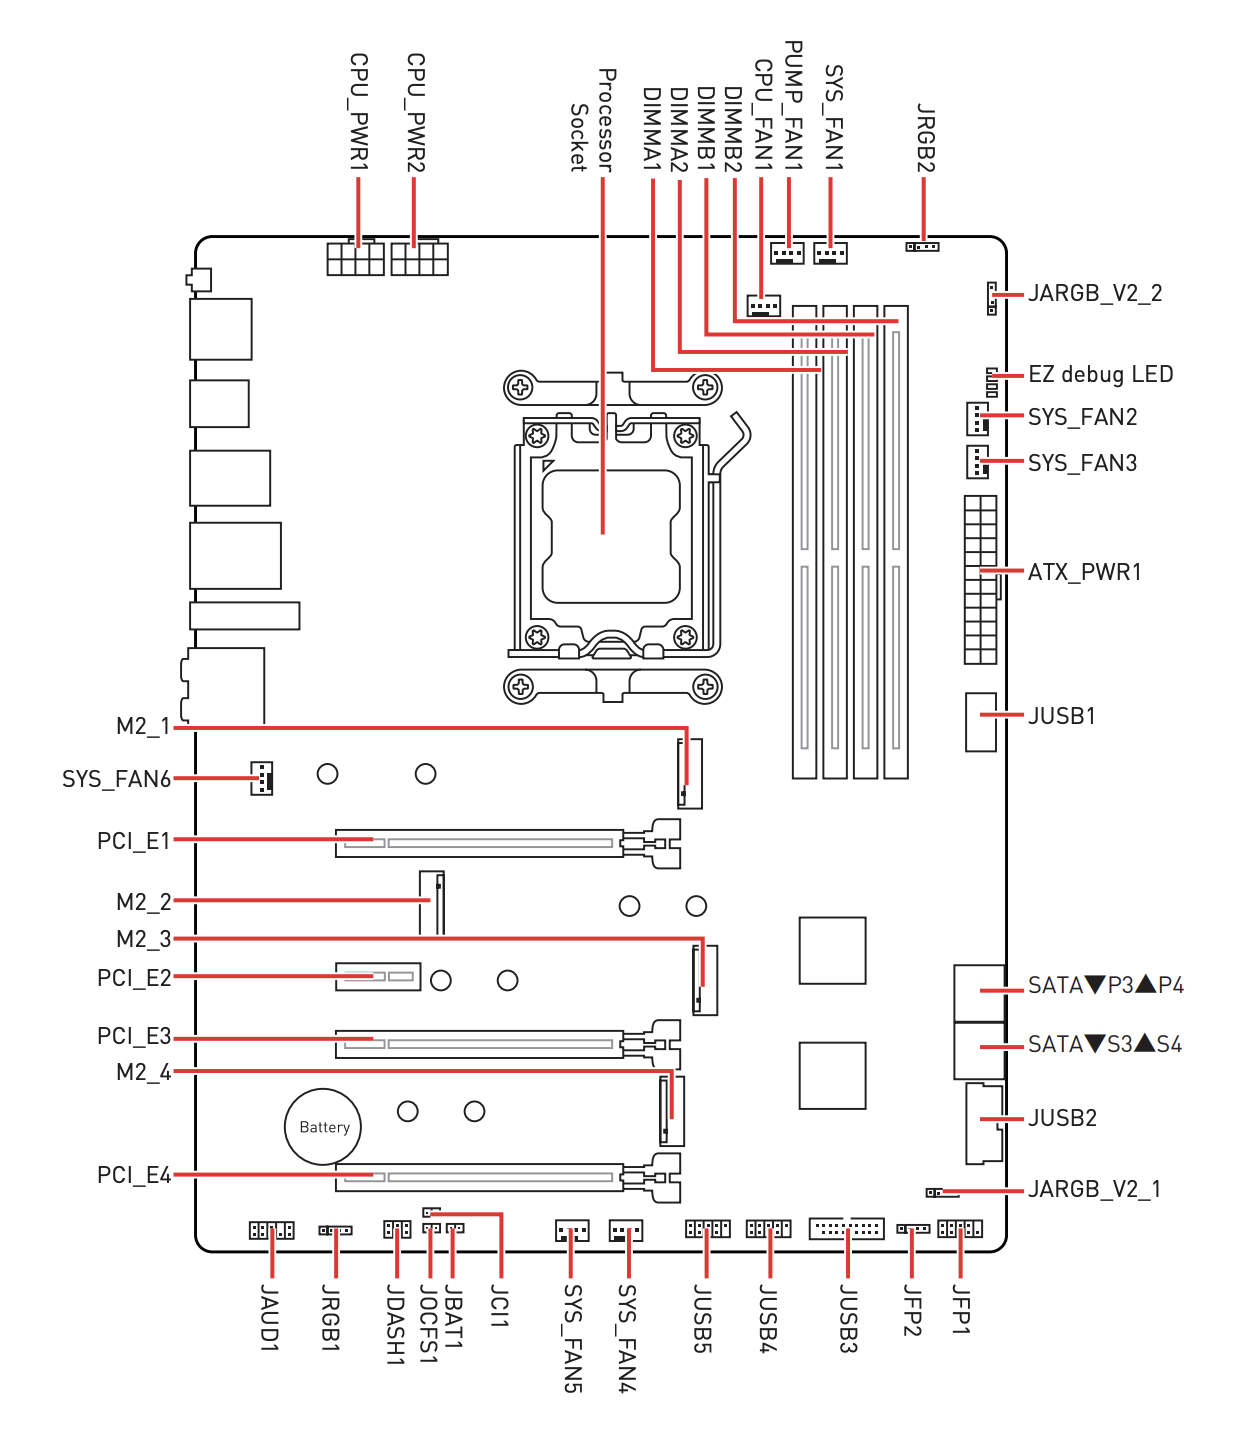
However, there is a limitation - if OP decide to install hardware in the PCI_E4 slot. In that case, the speed of the M.2_4 slot will be reduced to x2. This means that the bandwidth of the M.2_4 slot will be limited if the PCI_E4 slot is occupied by another device.
I see there is a hole at the back of the graphics card for a screw. I’m wondering why you didn’t screw in the one that should secure the Anti-sag bracket?
Yeah I was unsure about this, there is 3 holes altogether but the instructions only tells you screw in one screw.
I screwed in all three screws.
Thanks, yeah seen some videos as well, rubbish instructions just showed 1 screw, I thought that was odd, but went with it, will screw in the others later.
You are spot on.
Hi have one last fear…This is the cable plan of my fans
This are the connectors of the Mother Board..
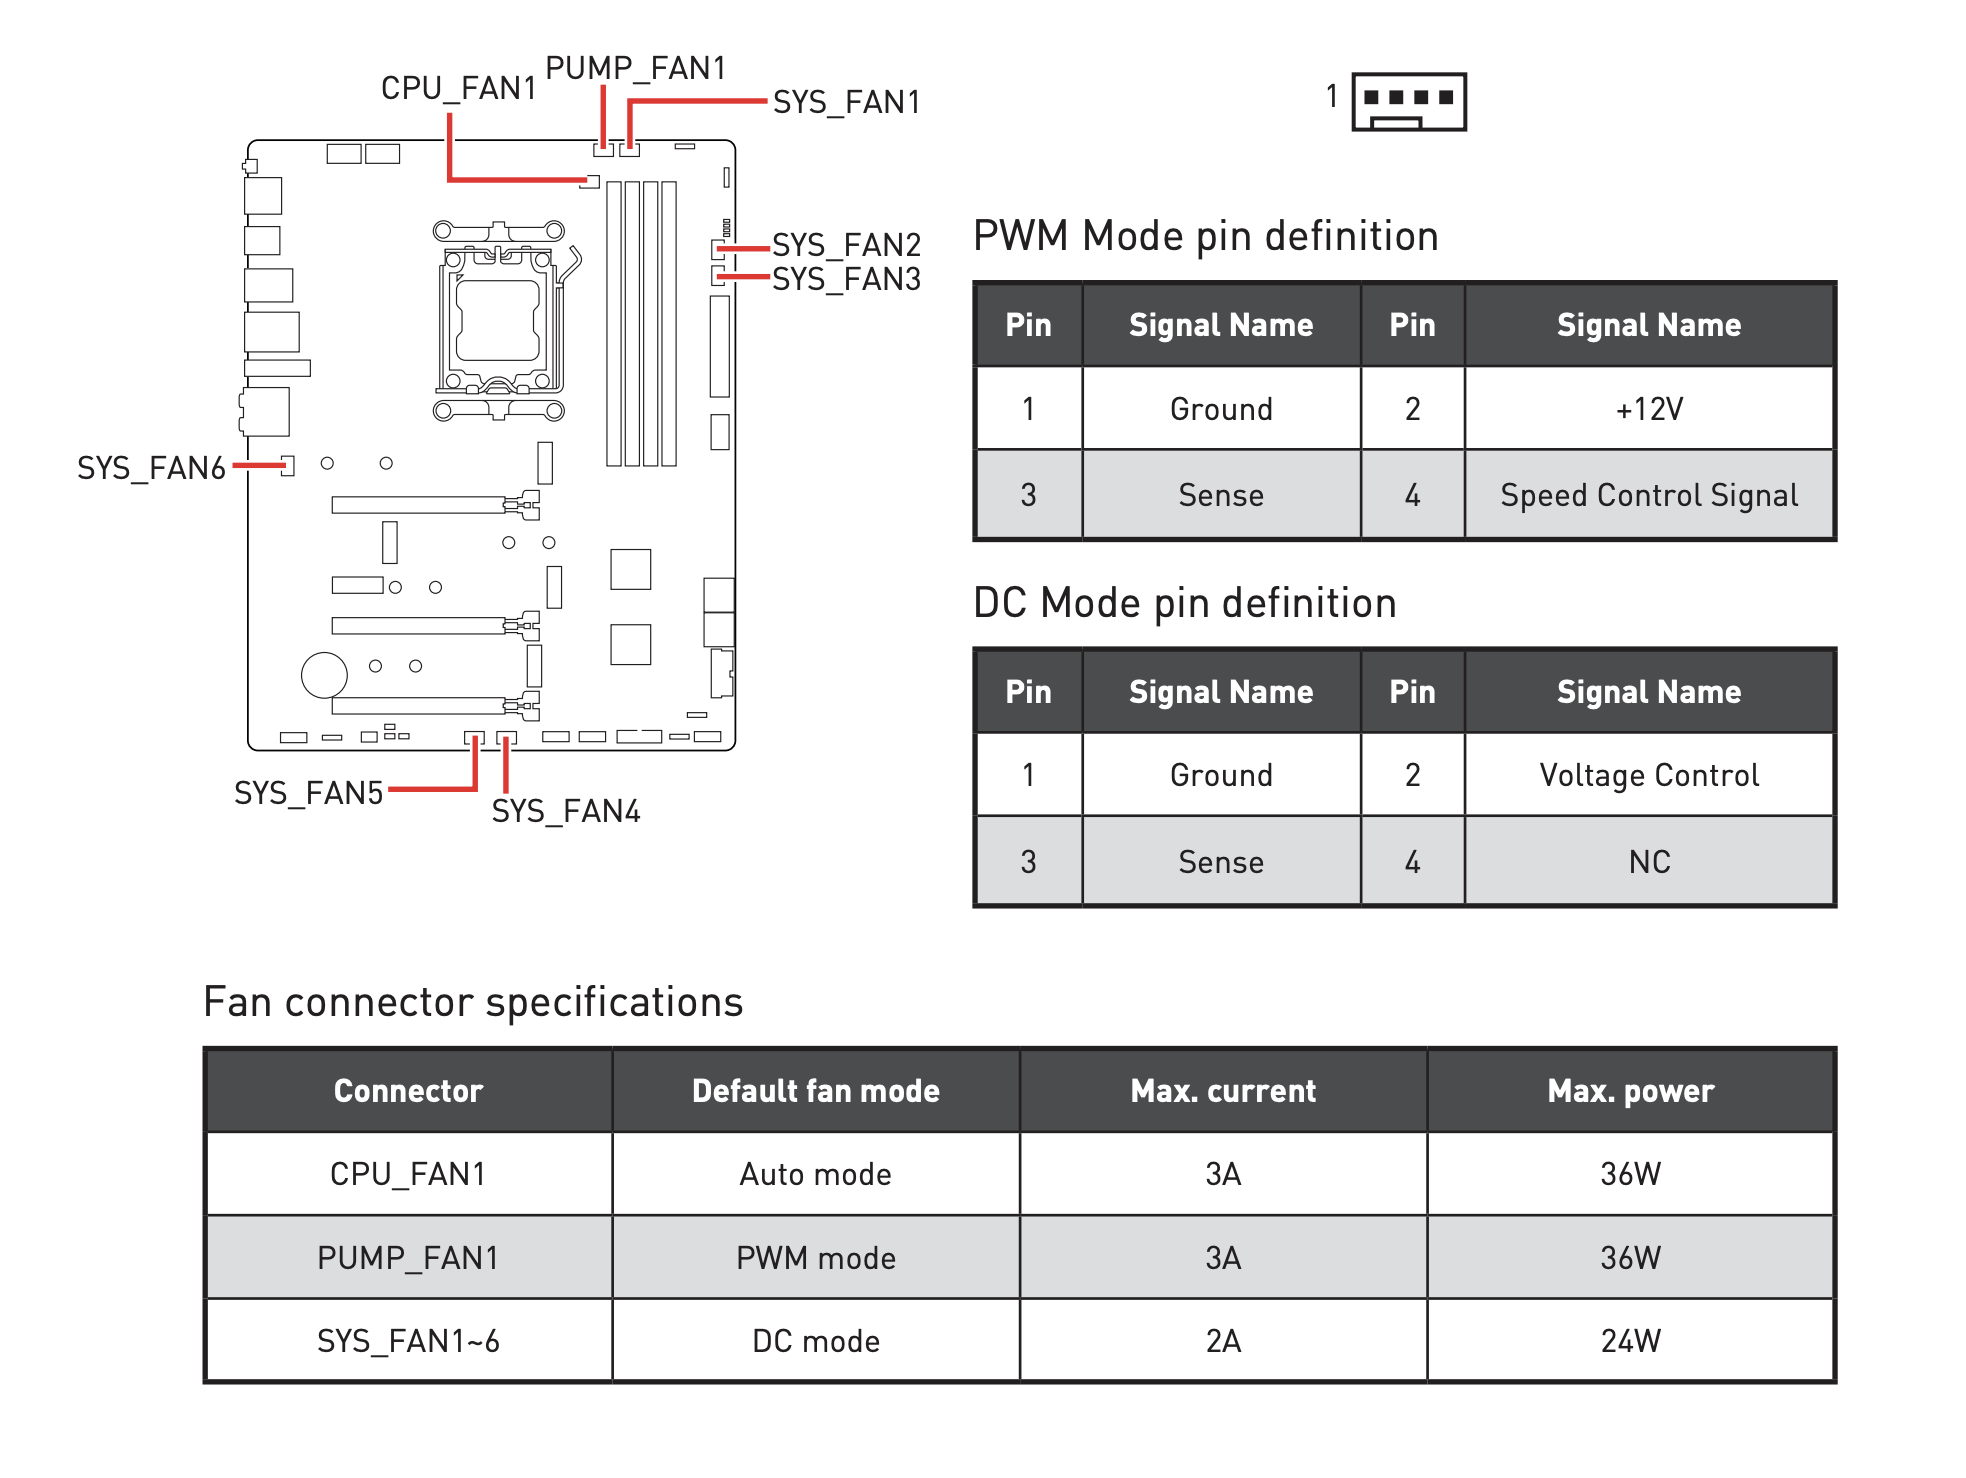
These are come instructions on the Manual
Where each cable should be plugged? In some youtube video they call the lug on the MB in different way, like IAO or similar…
@TenPatrol save me
If I read your diagram correctly, the Arctic AIO cooler has a 3-in-1 cable with the motherboard end terminating in a 4-pin PWM connector. If so, I’d plug that one into the ‘Pump_Fan1’ header just above the RAM. The AIO probably has some internal logic that sends the appropriate voltages to the pump, radiator fan, and VRM fan (although that last one is confusing, since I’m unsure how the AIO cools the VRM.)
After more study I think I sould procede like this
Pump → Pump_Fan1
VRM → Sys_Fan1 or any number (it doesn’t change anything)
Radiator → CPU_Fan
Yes, this is the correct connection AIO cables to the motherboard.
If each thing has its own cable, then yes, those connections make sense.
It is workingggggggg! I am setting up!!!
Question: I see the top FANS working but not the CPU cooler…does it turn on only when needed?
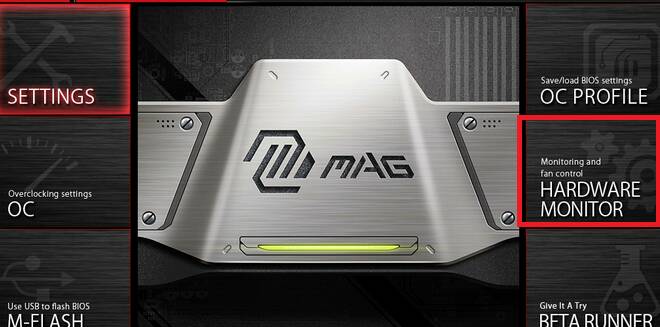
I am downloading the MSI CENTER, can I do it from there or I have to restart press DEL and access Bios anyway?
Rsstart → DEL
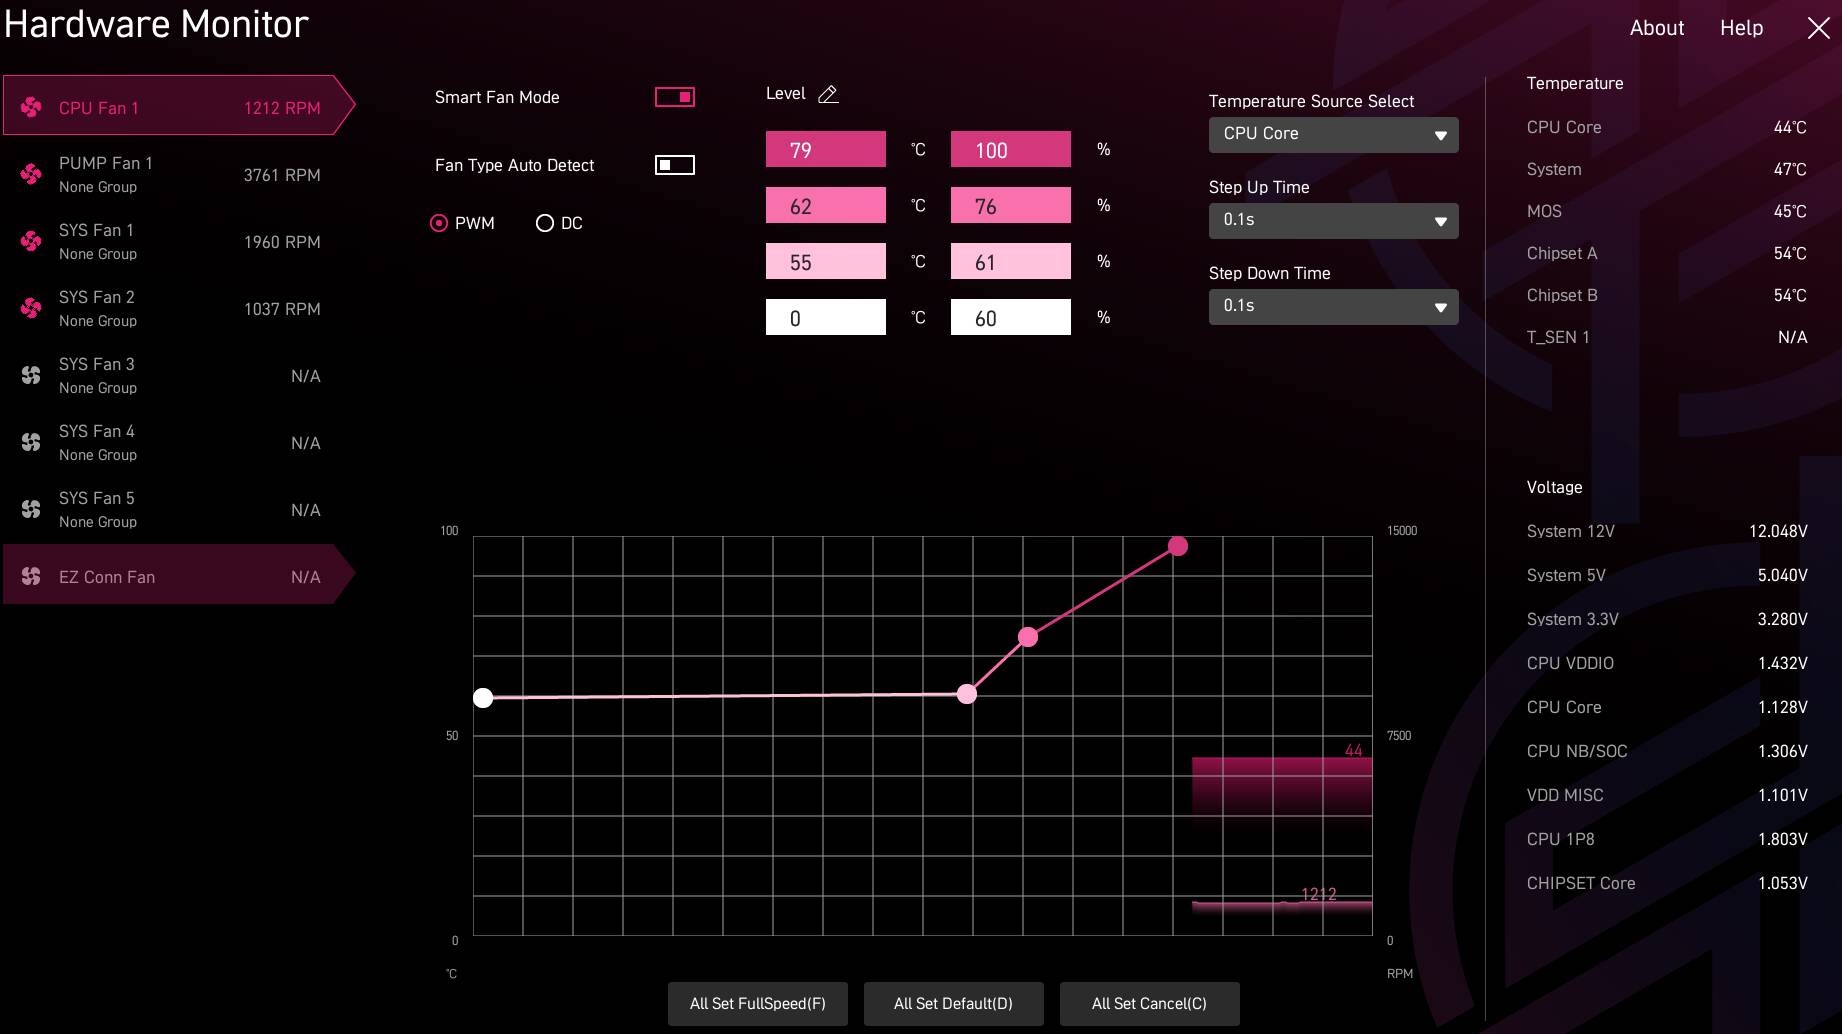
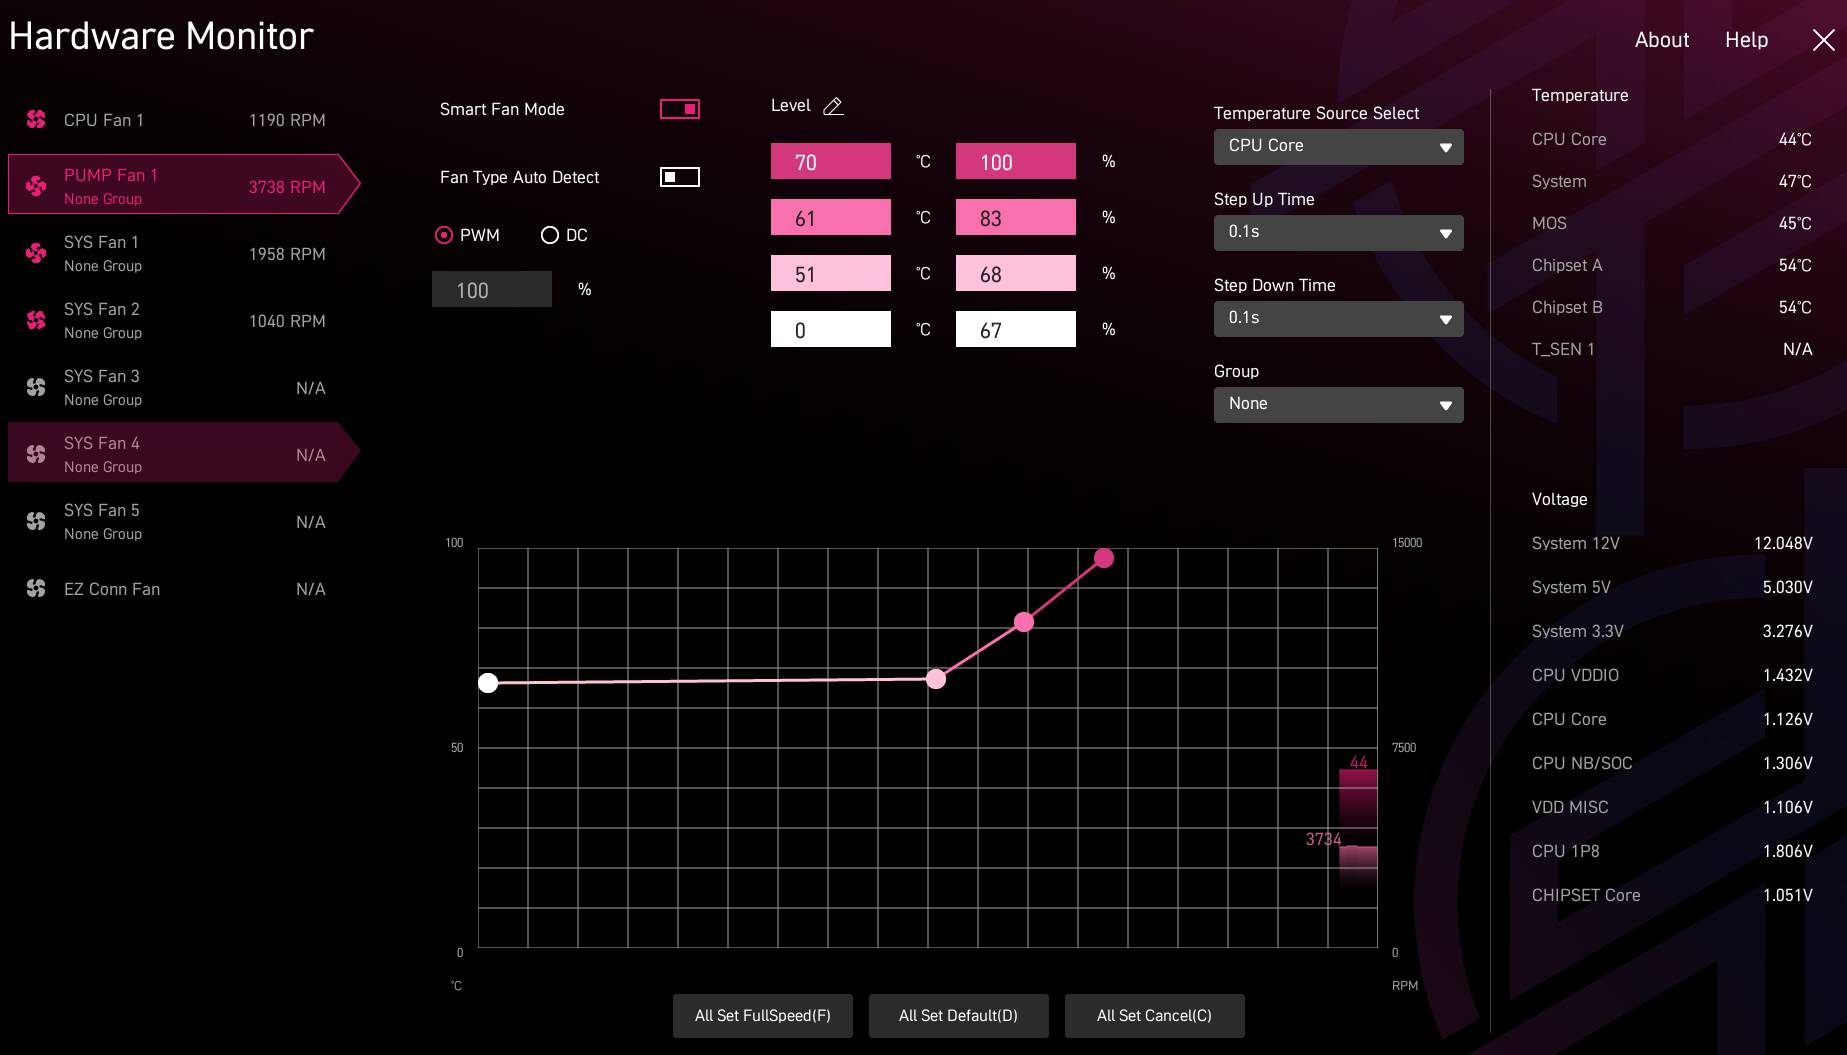
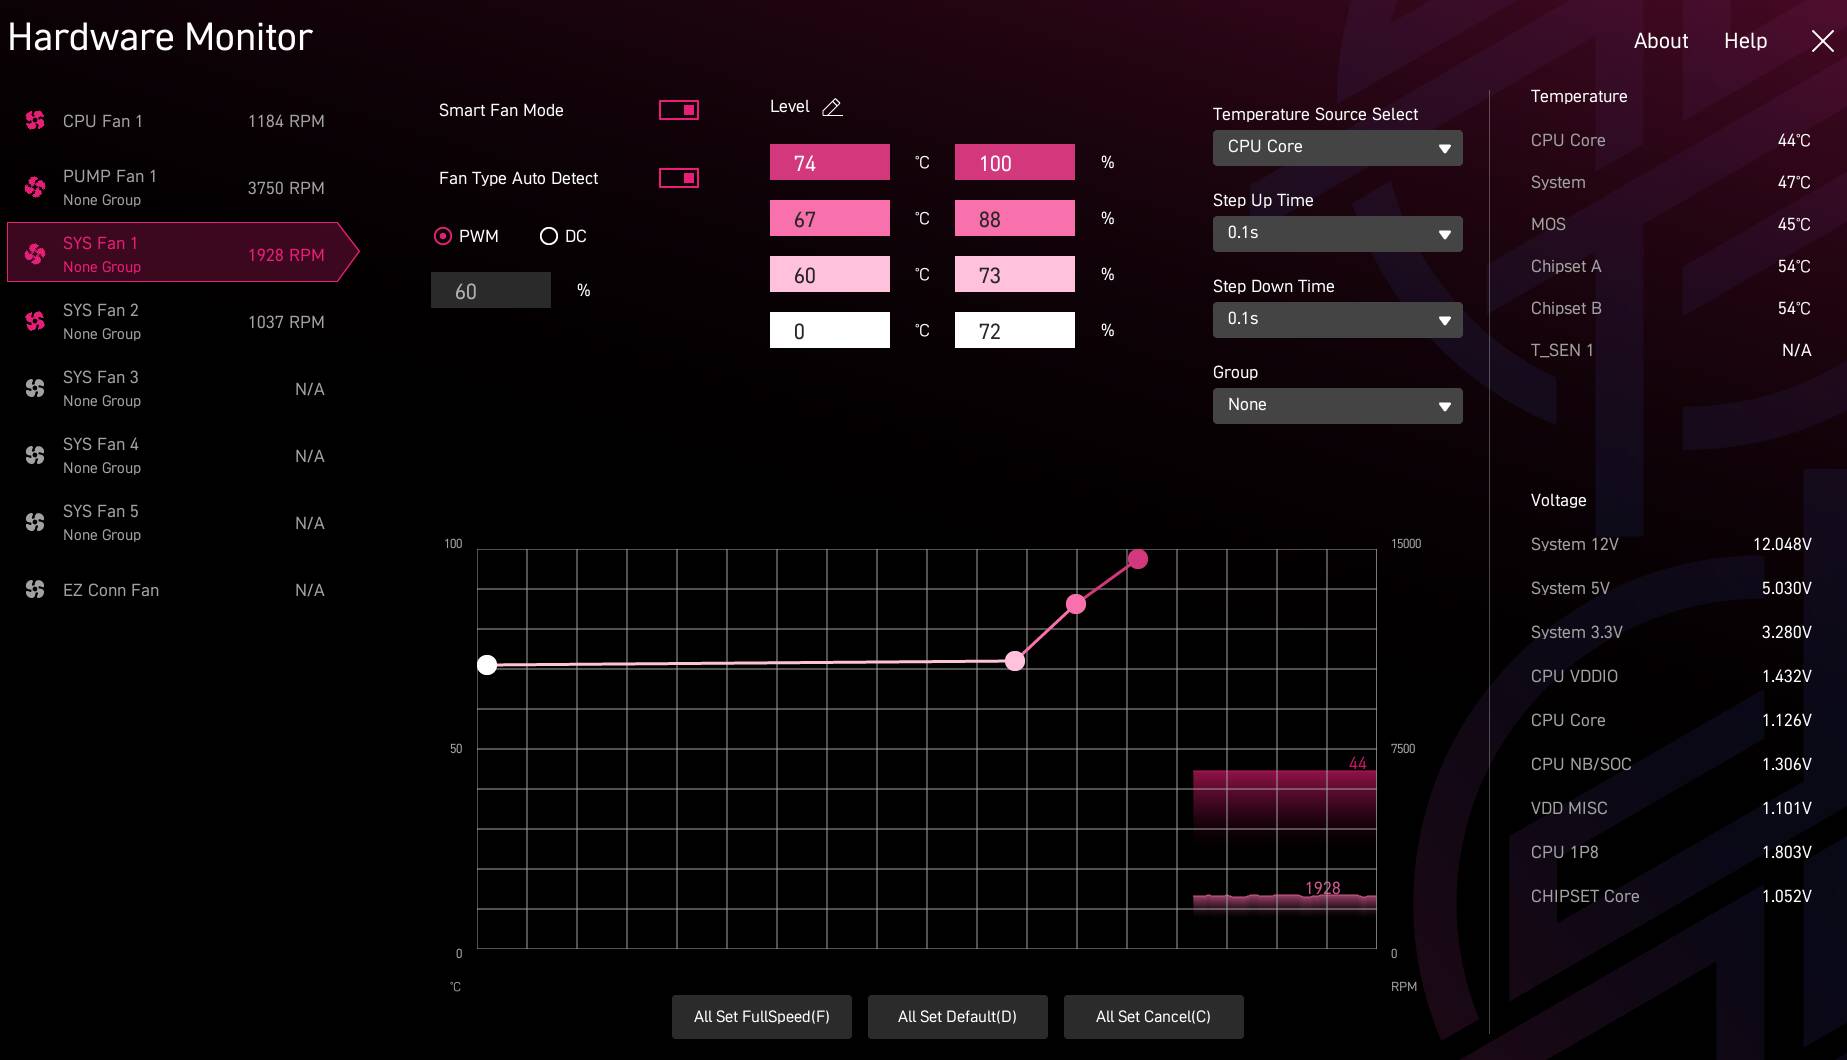
Also, make sure your fan curves are configured as well.
Example below.
edit
After configuring the fan curves, don’t forget to save the changes before exiting.