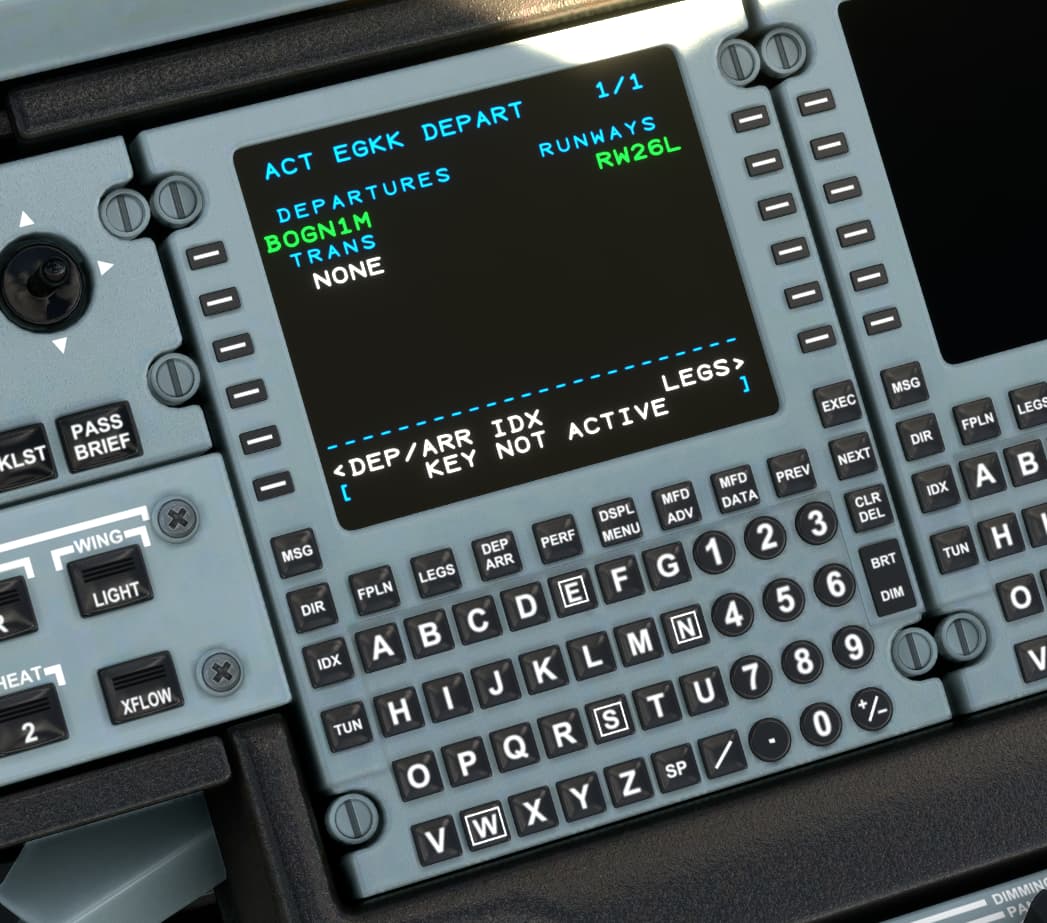
This is a rough draft for learning the FMS in the CJ4. Note, this is a work in progress, so will try to update as I get time. Also, since this will require a lot of screenshots, the sections are broken up into pieces. Click the triangle to expand parts as desired. Since the guides section is read only, feel free to PM me with any questions and I can add to this as necessary.
As a side note, the FMS in the 787 is made by Collins as well. Some of the same logic applies, even though they are quite different.
Also, for those who would like to improve the overall look, feel, and operation of the FMS so that it matches the real airplane, I would highly recommend checking out the improvement project located here: CJ4 Community Mod by Working Title Released
ENTERING DATA
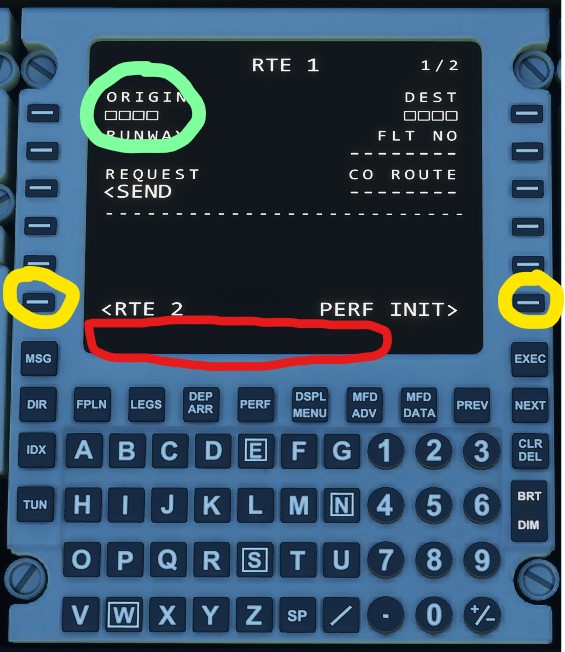
Here is a sample page. Note the area in light green. Anytime you see a blank square box like this, it means it is a required field. In this case, airport identifiers.
The yellow circles are called Line Select Keys. Sometimes abbreviated LSK. In this guide, I may mention LSK L6. That would be the left side, 6th key down.
The red area is called the Scratchpad. This version of the Collins FMS works by typing into the scratchpad, and then “pasting” what you typed into the required field up above. You may also copy some fields from up above, down into the scratchpad using the line select keys.
To delete an item, first press the CLR DEL key in the lower right side. This puts “CLR” into your scratchpad. Then you paste CLR on top of what you want to delete using the line select keys (LSK). Note that there is a bug and you cannot delete your origin or destination in the sim.
MAIN BUTTONS
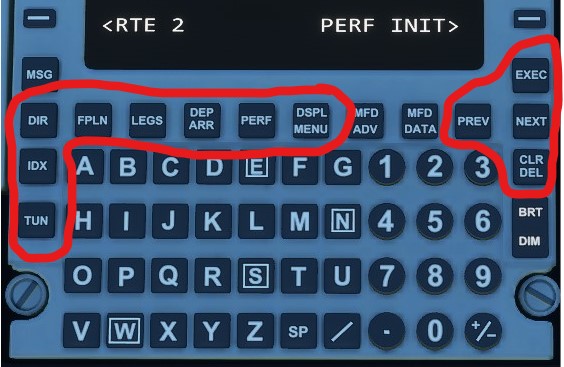
The main buttons that you will use are circled in red. Normally you would use the IDX key to return to the Index page, but there is currently a bug that requires you to use the DISPL MENU key to go to the index. This can be confusing, so please report this to [ZenDesk]
(https://flightsimulator.zendesk.com/hc/en-us), as the more attention it gets the better.
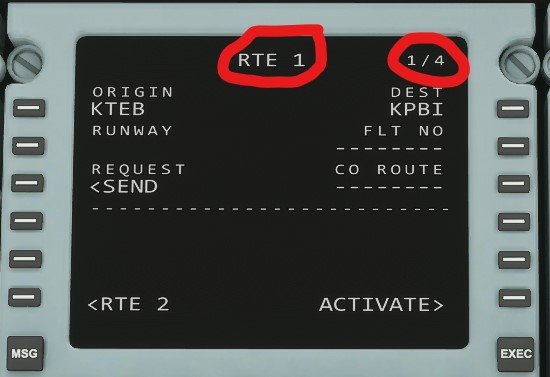
Also, take note of the page header. Especially for indications that there are additional pages to be displayed. In this example, we are on the FPLN ROUTE page, and there are 4 total pages with data on them. Advance to the next page using the NEXT button on the far right side.
FMS SETUP AND INITILIZATION
The first screen that you will see on startup is the STATUS page (incorrectly labeled IDENT). This page is where you will check the date of the Nav database (AIRAC cycle).
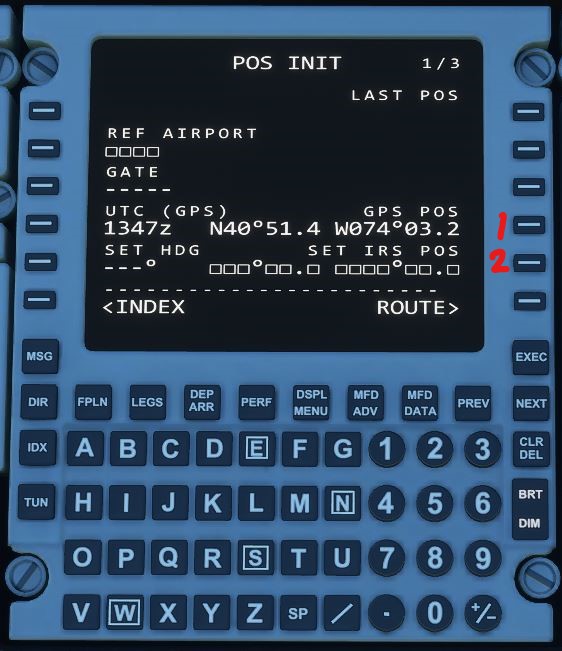
Pressing the R6 LSK (Right line select key next to POS INIT) will take you to the next step.
While the CJ does not have any IRS to align, it is still recommended to set the GNSS startup position using a copy and paste procedure listed below.
Push LSK R4 (Right side, 4th down) - labeled with a red 1 in the screenshot
This copies the Lat/Long into the “scratchpad”
Now push LSK R5 to paste the position into the empty boxes.
To move onto the next part, push the FPLN button below the screen (the R6 softkey next to Route does not work for some reason)
FLIGHT PLAN ENTRY
The main flight plan is entered from the FPLN page (until Datalink gets modeled!). Type the 4 letter airport identifier into the scratchpad (circled in red) and then paste it into the Origin and Destination fields using the L1 and R1 line select keys. Note: Currently a bug that won’t allow you to clr/delete these fields. So make sure you enter what you want .
LOADING A DEPARTURE PROCEDURE (SID)
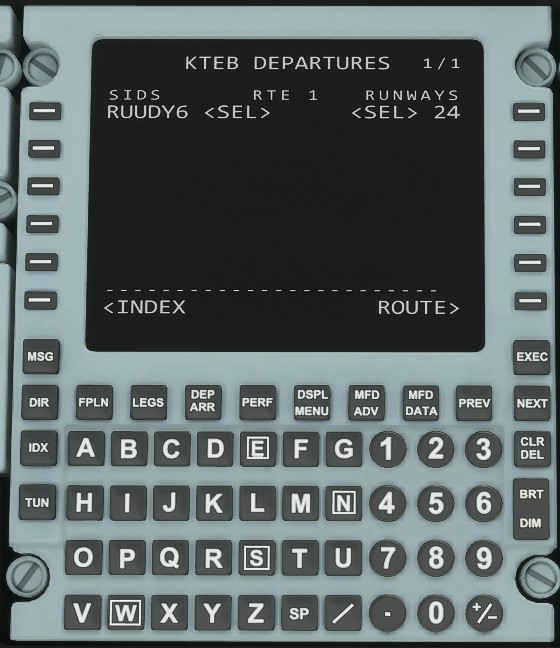
Next go to the DEP / ARR page to load any applicable departure procedures (SID), if available for your airport. (Any missing procedures from the database should be reported to ZenDesk)
After pressing DEP / ARR select the departure airport on the left using LSK 1. If you do not see both the departure and arrival airport on this page, check the main flight plan origin and destination fields from the FPLN page.
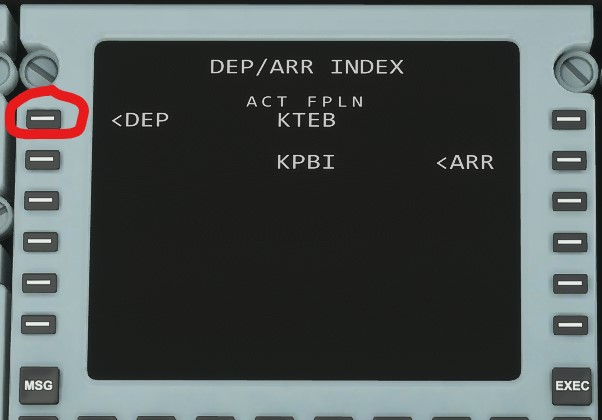
Choose your Departure procedure (SID), transition, and runway. Note that once you select a SID it will hide the runways that do not apply to that departure procedure (and vice-versa)
FLIGHT PLAN COMPLETION
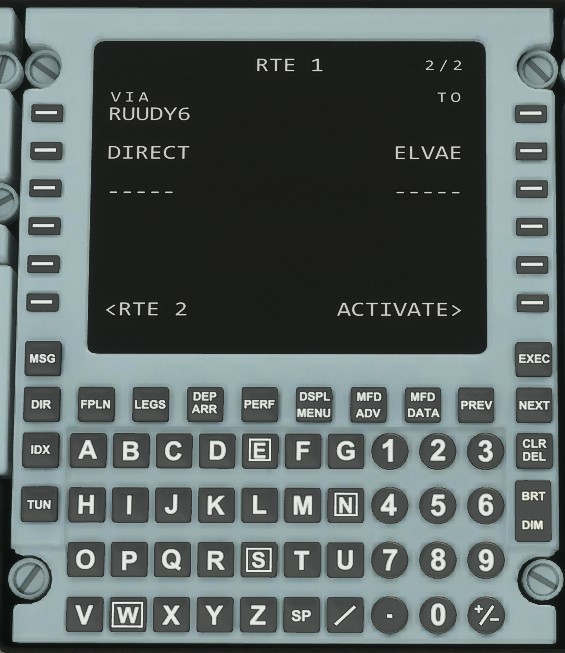
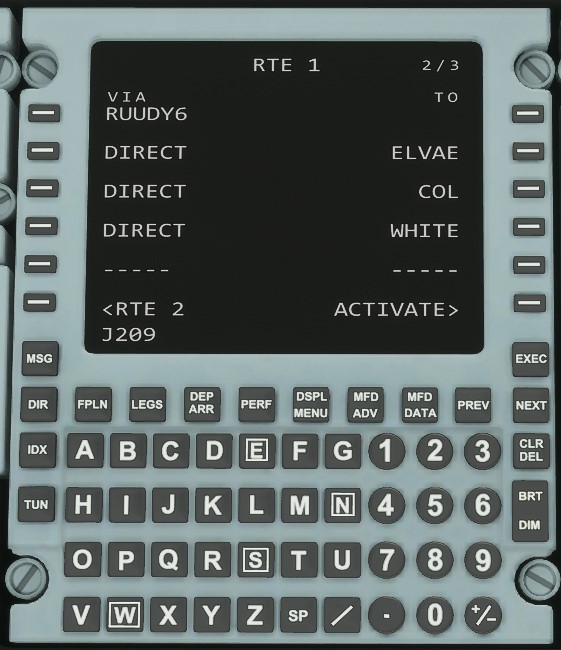
Now go back to the FPLN (Route) page. It will show the departure procedure on the left. Enter the remaining waypoints one at a time using the scratch pad, and paste them into the right side. (Example below shows ELVAE intersection entered)
Note the left column is labeled VIA and the right column is labeled TO. Normally airways can be entered in the left side, but the sim is picky about what entry and exit points you can use to enter an airway. Please report a bug using ZenDesk if you encounter one.
DUPLICATE WAYPOINTS
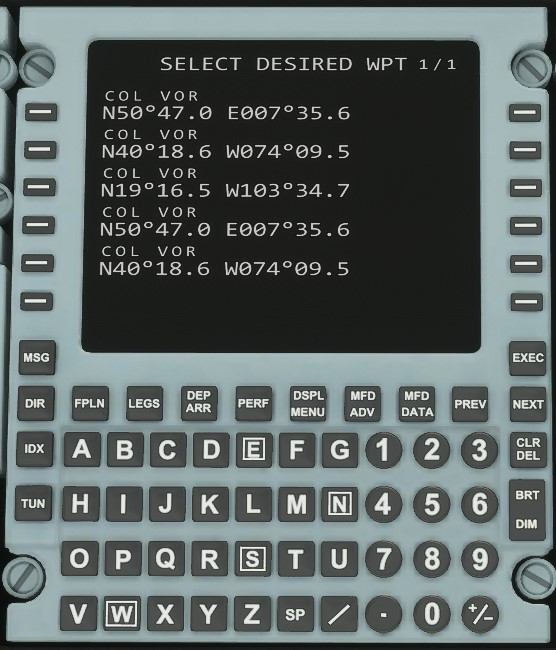
Sometimes when entering a waypoint you may see a box like this:
This means there are multiple waypoints in the nav database that have the same identifier. Pick the correct one (normally this is the top one, which should be the closest)
ROUTE REVIEW
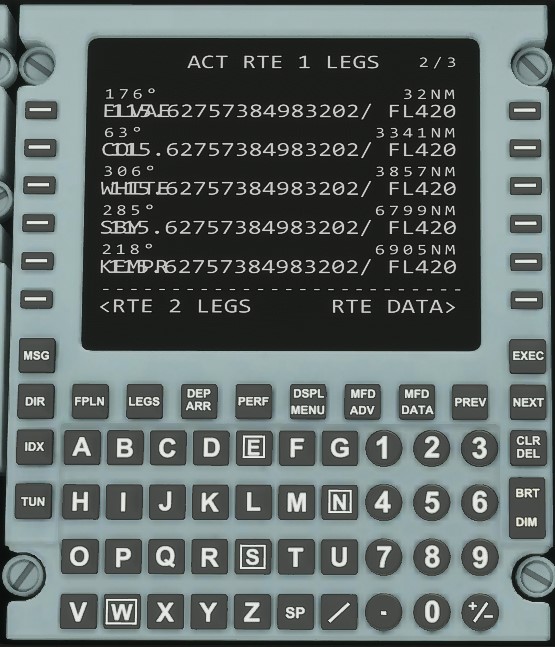
Pressing the legs page will allow us to review what we entered in the flight plan page. For the most part, all modifications after takeoff will be done from the LEGS page, and not the FPLN page. This is also where you enter VNAV altitudes, once implemented. Due to a bug, occasionally the route page may look like this (not sure why):
TAKEOFF AND LANDING PERFORMANCE
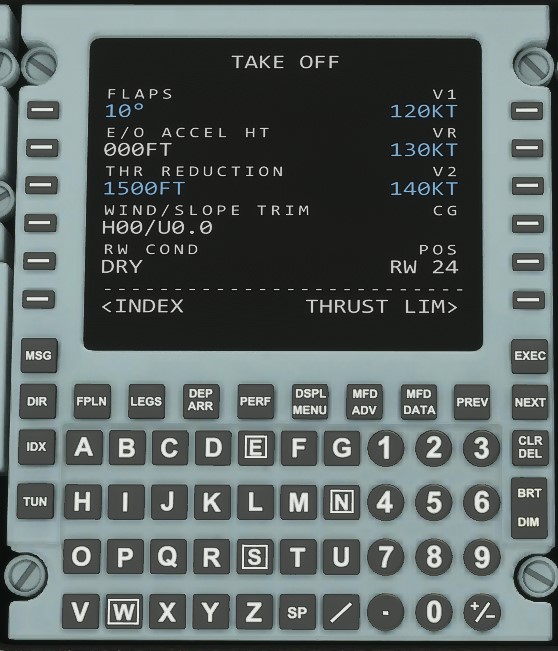
The FMS has the ability to compute takeoff and landing speeds based on weight and weather conditions. Unfortunately this is not modeled in the sim. You can, however, use the PERF page to enter manually calculated V-speeds (the calculated speeds aren’t accurate). There are 2 caveats however. You can only enter takeoff speeds (not landing). And due to a bug they do not come up when pressing the PERF button. Instead you must hit DISPL MENU and then the L5 Line Select Key for Takeoff.
Form more info on takeoff or landing speeds, see the Performance Numbers section below.
LOADING AN ARRIVAL PROCEDURE (STAR)
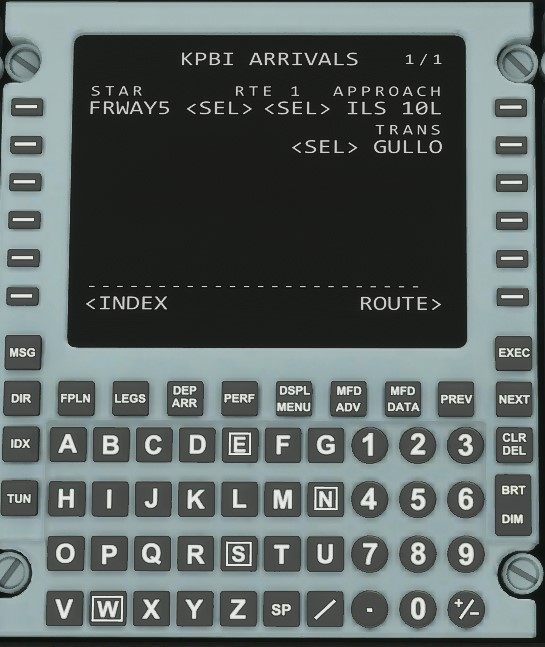
If the destination airport has an arrival procedure, it is loaded in the same way as the departure procedure (except using the right side after pushing the DEP ARR button)
GOING DIRECT TO A WAYPOINT
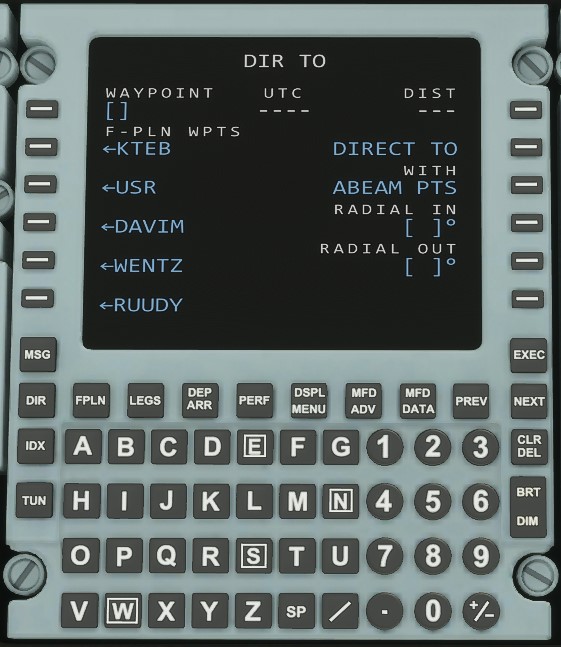
To go direct to a new waypoint or one that is in your current route, use the DIR key on the left side. Then you can either type in a new waypoint in the scratchpad and paste it into L1. Or, if the waypoint is already on your route you can select it to bring it into the scratchpad, and paste it into L1. Note you may have to use the NEXT key to pick waypoints further down on your route.
TUNING THE COMM AND NAV RADIOS
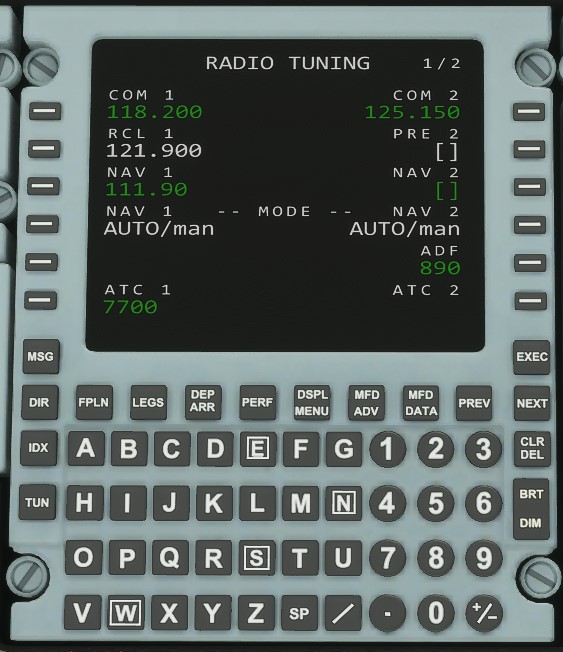
All radio tuning in the sim is done through the TUN page of the CDU (FMS). This includes radios for BOTH communications and navigation, such as an ILS. Press the TUN button to bring up the following page:
In the sim, you must use a decimal point, example 121.5 will work, but 1215 will not. Also, after loading an approach in the FMS, the sim will not auto tune the ILS frequency and set the inbound course like the real airplane.
ADF Tuning is done on page 2 of the Radio Tuning page.
ADJUSTING PFD / MFD MAP AND RANGE, ETC
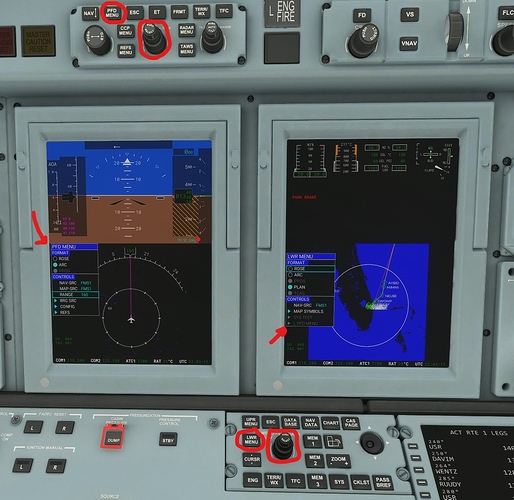
This section is a work in progress, but to get the ball rolling, the left side primary flight display (PFD) is mostly controlled using the control panel above it. The button labeled PFD menu will allow you to change the format and range of the PFD. You can also change the altimeter units (Hpa, inches, meters). Note that changing the range also affects the center MFD as well.
To adjust the MFD map orientation, etc, use the LWR MENU button on the control panel under the MFD. The knobs in the screenshot (inner and outter) can be used within the menu on the PFD/MFD. While in PLAN view, you should be able to sequence the map center along your route (Next / Previous waypoint), or center it on any waypoint in the database. Unfortunately this has not been implemented yet, but is normally done using the MFD ADV button on the FMS.
AUTOPILOT
The Autopilot section is a major work in progress. A few quick notes however.
- TO/GA mode is not included at this time.
- Arming HDG and PIT is recommended for takeoff
- Can climb in VS or PIT (or FLC).
- FLC maintains selected vertical speed by adjusting the pitch.
- The CJ does not have an Autothrottle (the speed bug is for reference and FLC adjustment)
- VNAV is not implemented at this time
To Capture an ILS, you must change the NAV SRC from FMS 1 to VOR/LOC using the PFD menu button on the control panel above the PFD. Also, no autopilot will capture the glideslope from above (if you are too high). You must use VS to dive down and capture it in that scenario.
Do not press the ALT button! About the only exception is if you want to immediately stop your climb / descent at the current altitude. General order is to set the altitude preselector first, then pick a vertical mode (VS, PIT, FLC) and then adjust your rate (and engage the autopilot)
PERFORMANCE NUMBERS
Here are some ballpark numbers that should work in sim world. Not real world. ( I know this is an FMS Guide, but figured I would add it here for now)
Takeoff Speeds -
17,100 lbs (Flaps 0°)
Sea Level - 15° C temp
V1:108
VR: 115
V2: 128
Distance: 3920’ takeoff roll
Takeoff Speeds - 17,100 lbs (Flaps 15°)
V1:99
VR: 104
V2: 117
Distance: 3410’ takeoff roll
Retract flaps at V2 + 10 kts
Climb
Normal Climb: 240 kts transitioning to Mach 0.64
Single Engine Climb: 140 kts (VENR)
Cruise:
FL410 (ISA Temp)
99.0% N1
Fuel Flow: 1154 lbs / hr total
220 kts indicated / 431 true (Mach .75)
Range: 37 nm / 100 lbs of fuel (no wind)
Descent: (no wind)
21 min / 130 nm at 2,000 feet per minute VS.
17 min / 100 nm at 3,000 feet per minute VS.
Approach
Approach speed Ref + 10 kts
Approach setup: 55-60% N1 for 200 kts, configuring gear and flaps to slow to approach speeds
Circling approaches: Flaps full
Approach power setting: (once fully configured inbound on glide slope)
55% - 2 engine
65% - 1 engine
Landing Speeds - VREF (Flaps 35°):
113 kts at 15,660 lbs (max landing weight)
98 kts at 12,000 lbs
