In this guide we will be going through the steps of getting your new Super Hornet started up and ready for a basic flight. While there are likely plenty of guides up on Youtube, etc. by now, I know some people still learn better having it in writing, so here we go.
For this guide we will be starting up the jet then doing a short hop from MCAS Miramar (KNKX) to Nellis AFB (KLSV) via a series of TACAN stations. While the information can be applied to any flight, bear in mind as of the time of this guide the World Map does not provide the TACAN channel information, so you have to obtain that via 3rd parties. Also outside the Continental United States some of the in sim TACAN stations either do not function, or only function when more than 28NM from the station.
First, we need to find our TACANs so we can plan a route. On your maps you’re looking for something like this:
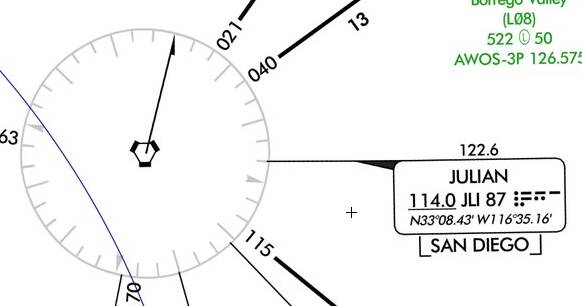
This is the Julian VORTAC northeast of the San Diego area. What’s important for us here is the station ID of JLI, and to the right of that the TACAN channel of 87. By default the channel will be on the X band, if it is on the Y band the chart would indicate. For example instead of 87 it would show 87(Y)
For the first flight I recommend using the Clear Skies weather preset and not using ATC until you get more comfortable with the jet.
Our Flight plan will be departing KNKX via Runway 06L and begin climbing to 15,000 ft MSL
Direct to JLI (87X)
V208-514 (Outbound 021 Radial) to TRM (109X)
V208-514 (Outbound 021 Radial) to TNP (89X)
V514-538 (Outbound 028 Radial) to JOTNU (18 NM)
V514-538 (Inbound 185 Radial) to GFS (91X)
V538 (Outbound 346 Radial) to LAS (116X)
Direct to LSV (12X)
Visual Landing KLSV Runway of choice
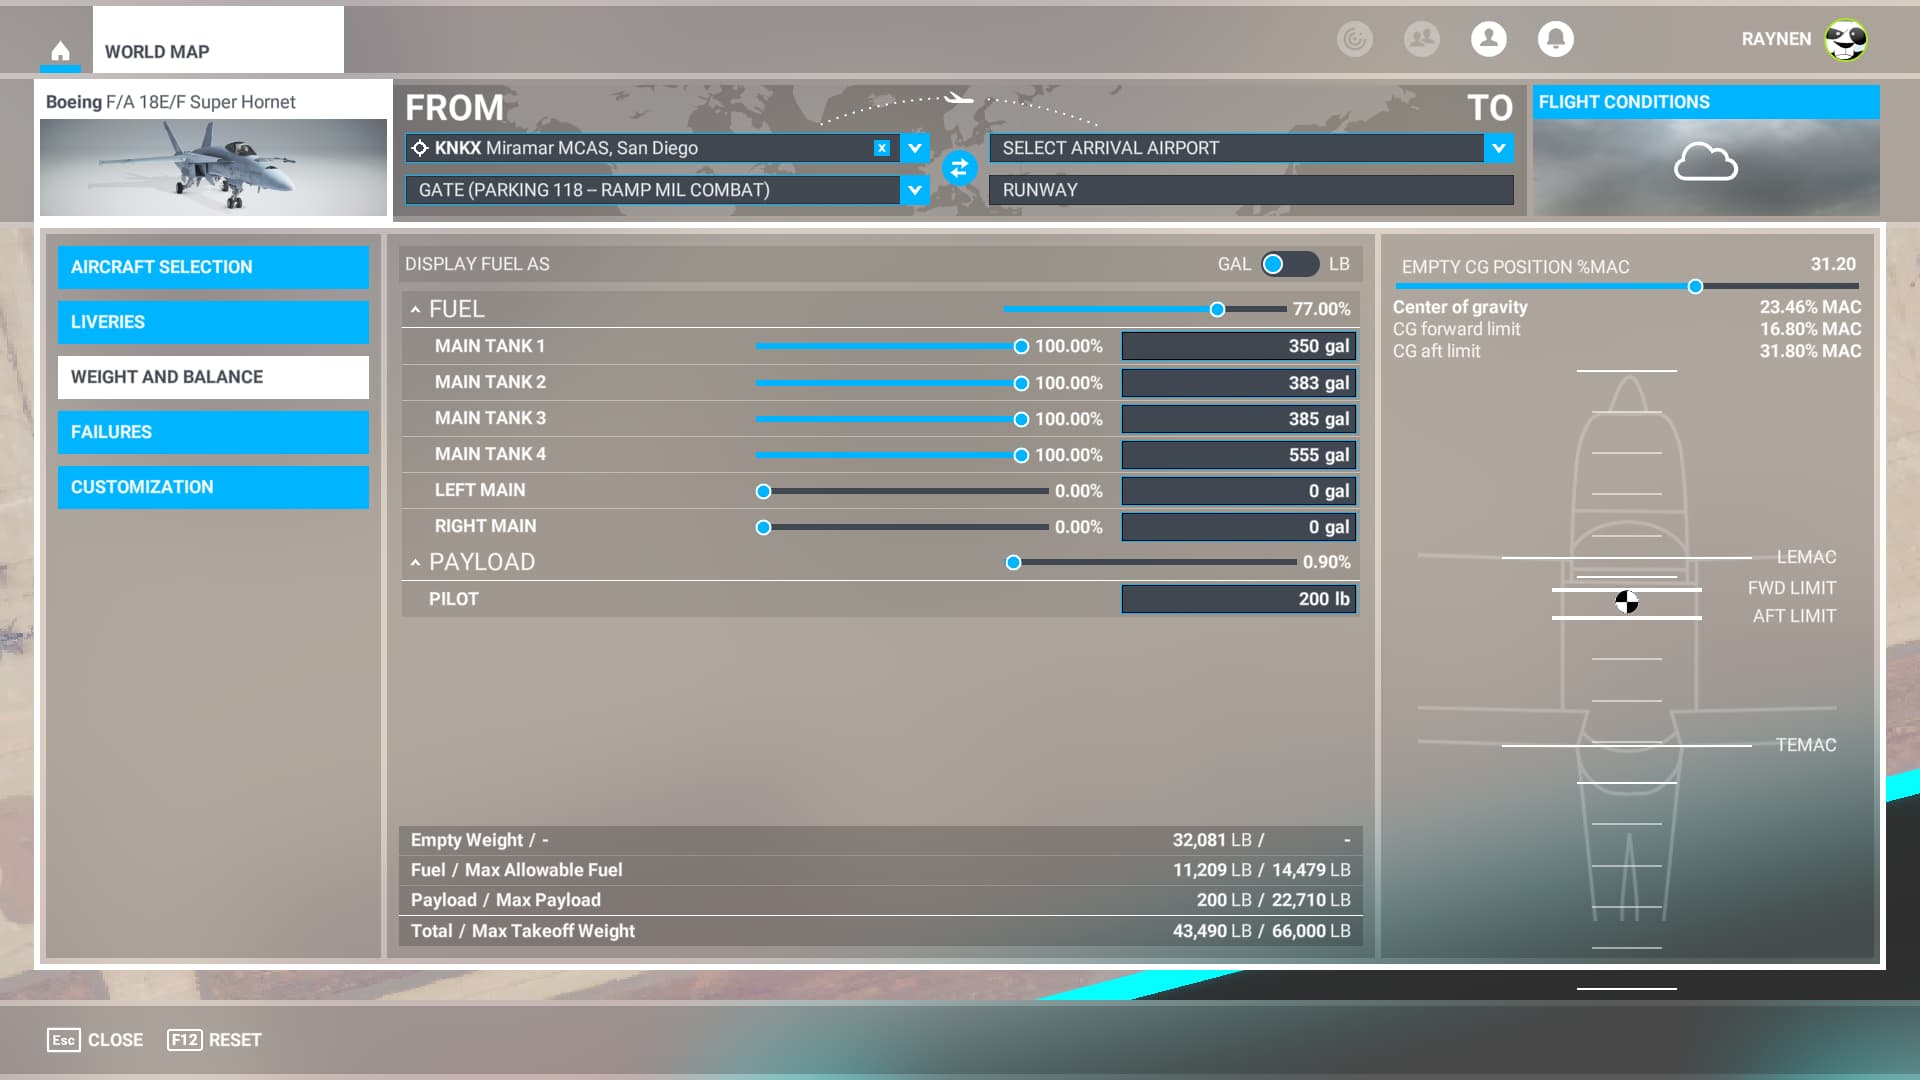
For fuel we’re going to fill the 4 main tanks and leave the Left and Right Main tanks empty.
Alright, now that you’ve had a chance to review the flight let’s hop in the jet.
We’re going to start by turning on the Battery switch on the lower right hand console.

Once the power is on we’re going to move over to the left hand console to turn on position/anti collision lights.


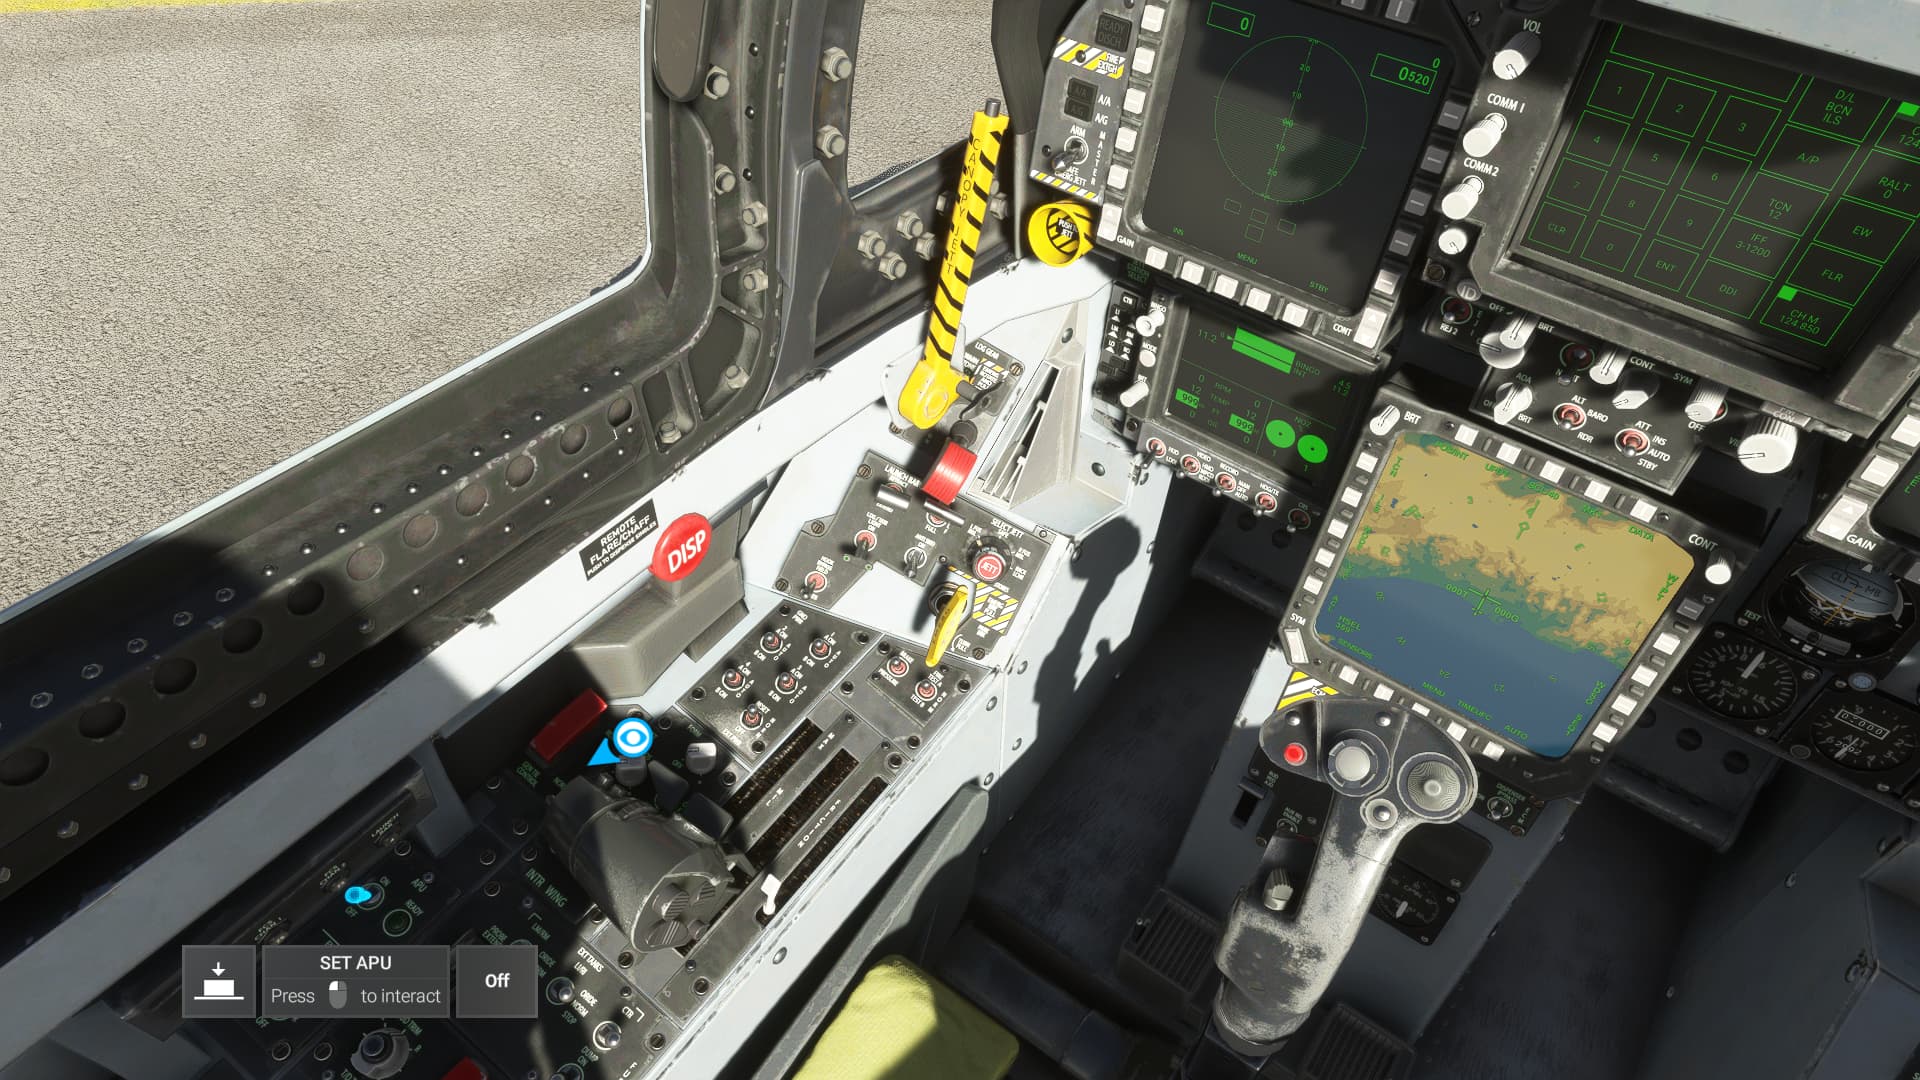
Next we’re going to switch on the APU.
Once the “READY” light illuminates green, it’s time to fire up the engines. First we’re going to set the ENG CRANK switch to R to start the Right Engine.

Once the right engine is stabilized at around 60% RPM, we’ll move the switch to L to start the left engine. The engine generators will come online once the left engine passes 25% RPM, the APU will automatically turn off 60 seconds after the generators come online.
Set Flaps to Half

Finally press the T/O Trim button on top of the rudder trim dial.

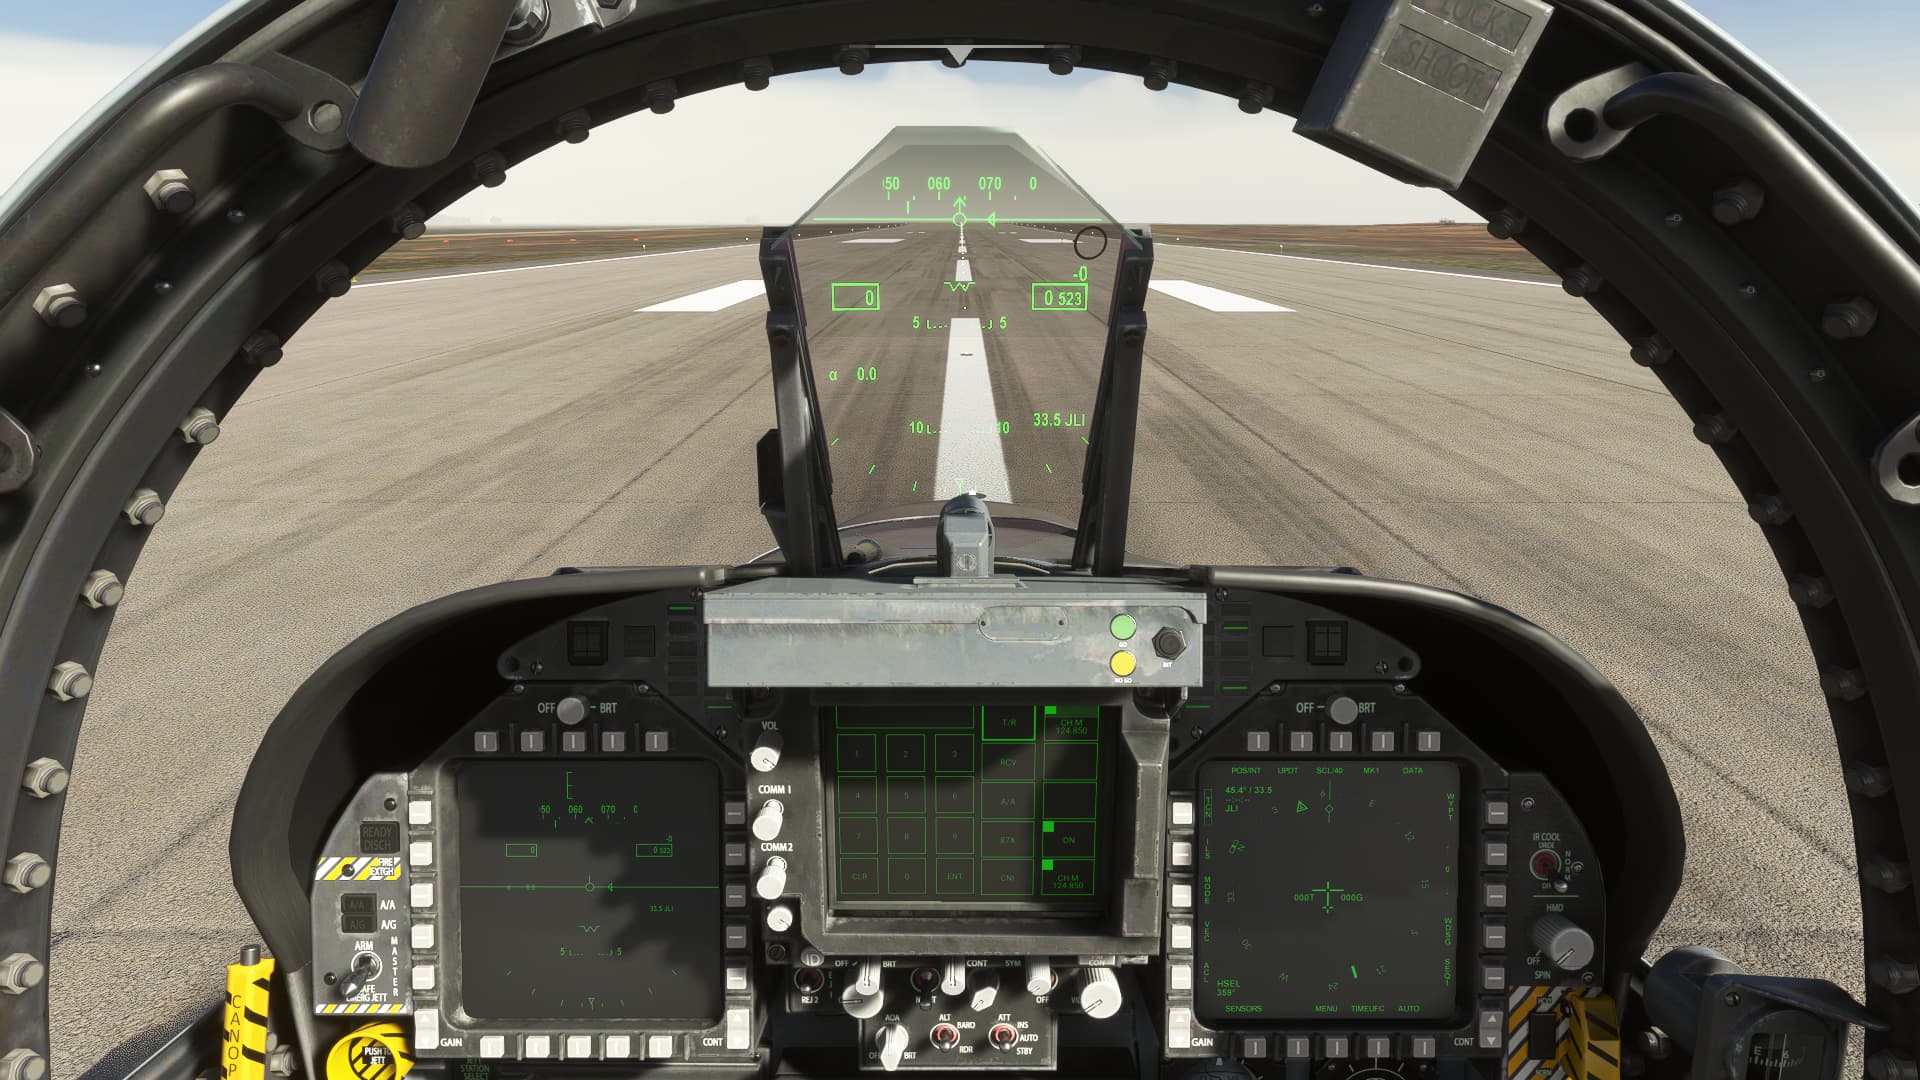
Now we’ll configure our displays. First we’ll setup our DDI’s, once familiar with the jet feel free to adjust these to your preferences. In this guide first we’ll press the MENU button on the bottom of the left DDI
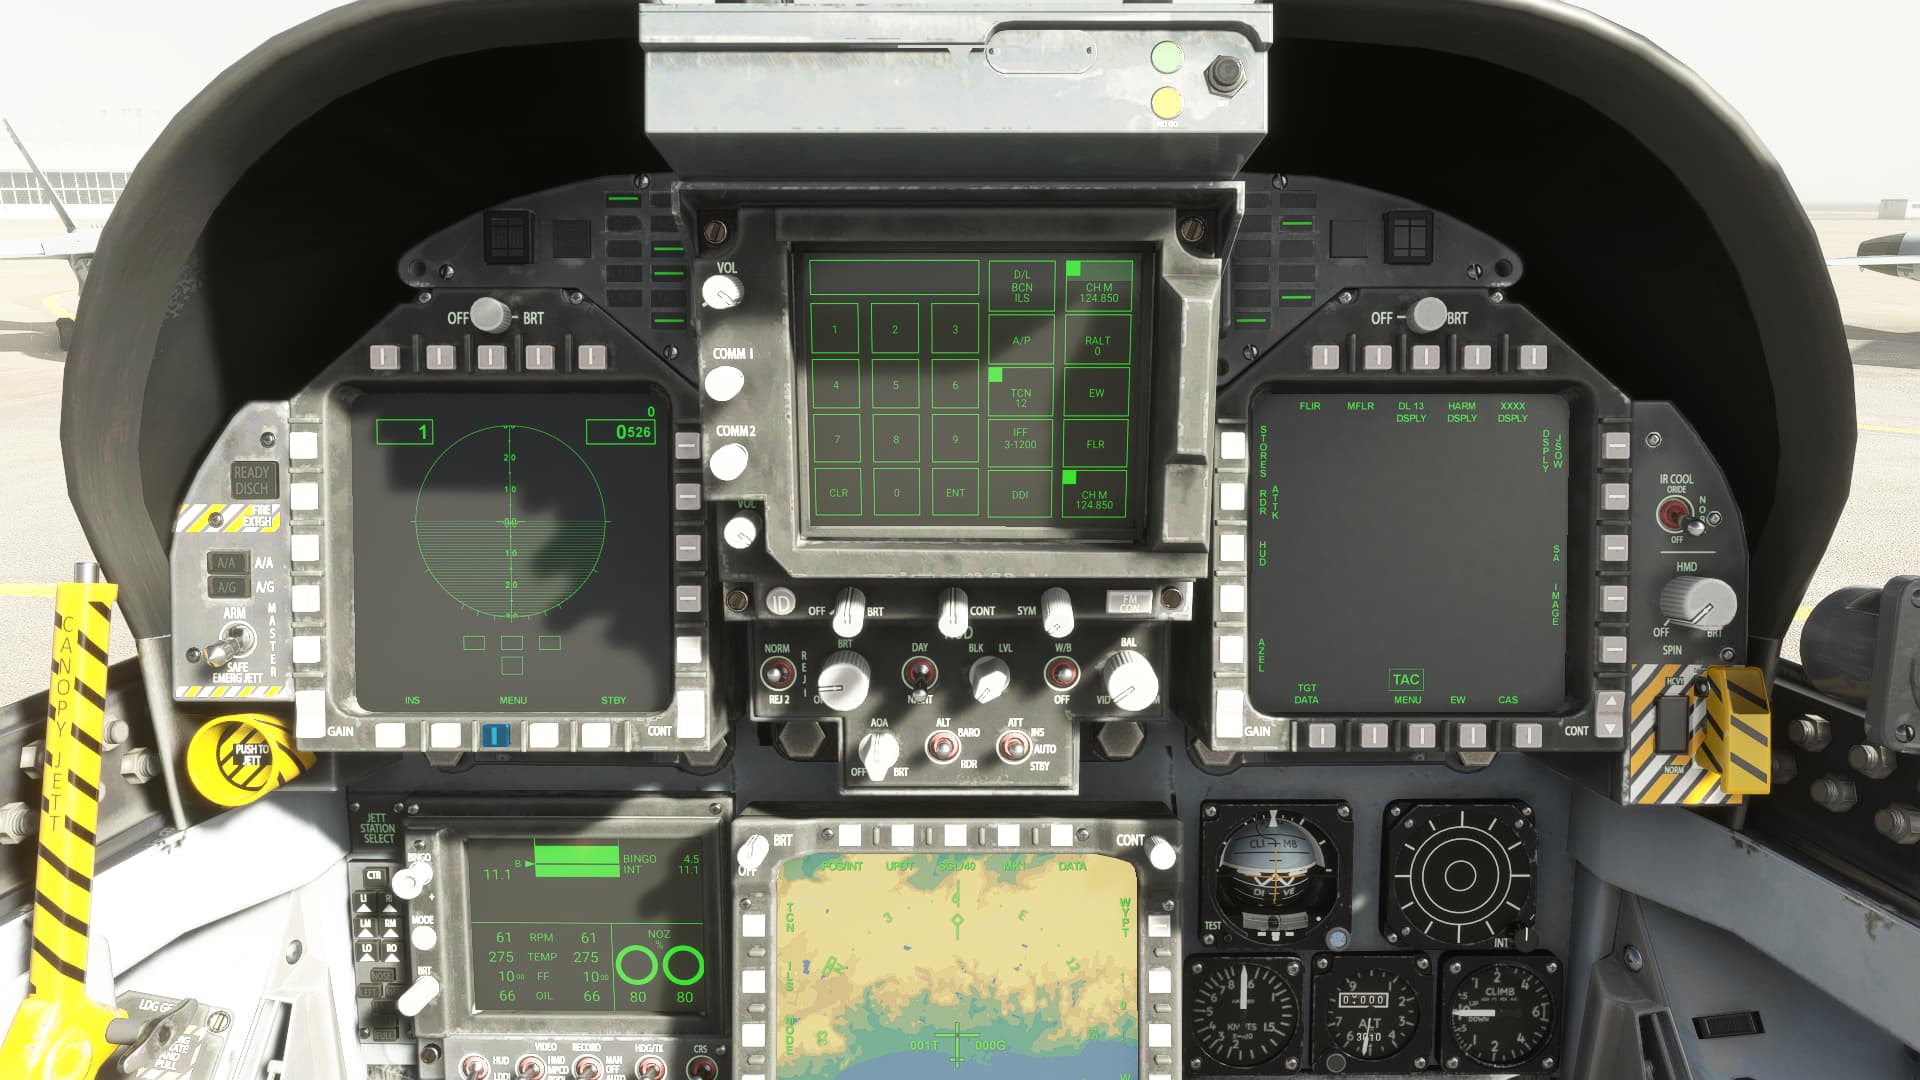
Then press the HUD button on the left side to bring up the HUD Repeater. Now Press Menu on the bottom of the right DDI then press HSI on the left side.
Now it’s time to setup our TACAN, on the UFCD you’ll see a box that says
TCN
1
Press that to open the TACAN menu. First we’re going to press the OFF button to turn the system on.

Now we’re going to enter our Channel number on the keypad, for this example we can enter 87, then press “1X” and the it should update to now read 87X. If you needed 87Y you would simply press “87X” and it will update to read 87Y now. Once tuned and in range you’ll see the information populate in the top left corner of the HSI. This will give you the Station ID, bearing TO and DME, and Estimate Time Enroute (ETE).
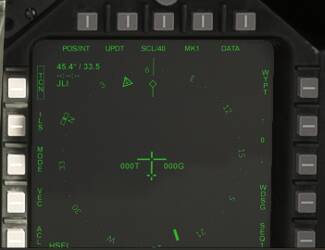
By pressing the TCN button on the left of the DDI, it will put a box around TCN and repeat the station ID and DME on the HUD.

Ok, we’re ready to get going now. Turn on the Anti-Skid,

The LDG/TAXI light

And release the parking brake.

Give it a brief touch of power to start rolling then bring the throttles back to idle, this should keep you taxiing at a comfortable 10-12 knots. Continue taxiing to 06L then line up and apply the brakes.
While holding the brakes, increase throttle to 80% RPM, once stable release the brakes and smooth increase to full throttle. Once at full throttle and the jet is rolling, engage the afterburners. The jet will practically leap off the ground for you at 135KIAS. Once established in a positive rate of climb, retract the gear and set the flaps to auto. Continue to climb while accelerating for 350 KIAS, reducing the throttle out of afterburner when passing 300KIAS. After passing through 1500ft MSL make a left turn toward JLI at around a heading of 050, you want the T inside the arrow in the HSI to be pointing directly to the top of the HSI.

Once established at 15,000ft MSL and 350 KIAS you have 2 options with the current build, you can either engage the ATC and manually manage your altitude, or engage BALT hold and manually manage your airspeed. Personally I find it less work to use ATC and manually manage altitude.
At this point, until the CRS switch is implemented, you are essentially flying like using ADF with a DME. When tracking a radial FROM a station, you want the T arrow pointing to the radial bearing, if tracking TO a station you want the T arrow pointing to the reciprocal.
We’re going to continue direct to JLI, as we close in on the station notice the T arrow begins to rotate around the display before briefly disappearing as we overfly the station. This is our queue to begin our turn to our next station. Turn right to a heading of 021, after about 5 DME the tail of the T arrow should be stabilized on our current outbound radial.
Now we may need to make some corrections depending on the timing of our turn and any wind drift. For correcting courses the following 2 rules of thumb apply. Tracking outbound you go from the Tail of the Needle to the Desired radial, then continue another 30 Degrees. In the example below, let’s say we wanted to track the 350 radial. We go counterclockwise from the tail to 350, then continue another 30 degrees to 320. So we would turn to a heading of 320 until the tail points to our desired 350 radial, then turn back to a heading of 350.
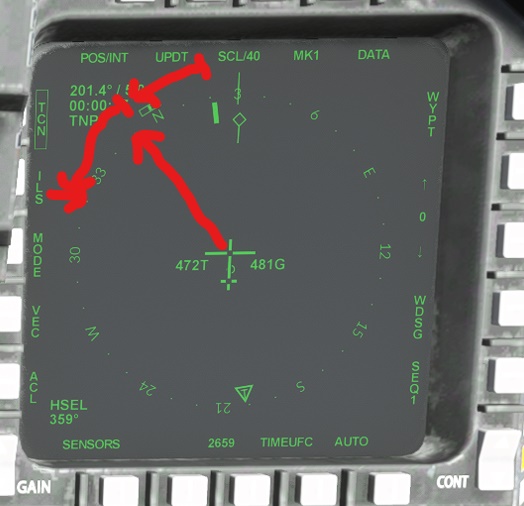
For tracking inbound to a station, we go from the desired track to the head of the arrow and continue another 45 degrees. In this example we want to track inbound on the 360 radial, so our desired track is the reciprocal track of 180. So we would go from 180 counterclockwise to the head of the arrow at about 201 and continue 45 degrees and get a heading of 246. We would then turn to a heading of 246 until the arrow points at our desired 180 track.

Using these methods we will now track 021 Outbound from JLI. at 16 DME we will tune our TACAN to TRM 109X and track inbound on the 203 radial. Continue tracking TACAN to TACAN like this until you arrive at KLSV.
Landing is a whole different topic that will be covered separately. At this time feel free to land the jet or just have fun flying around Vegas.

