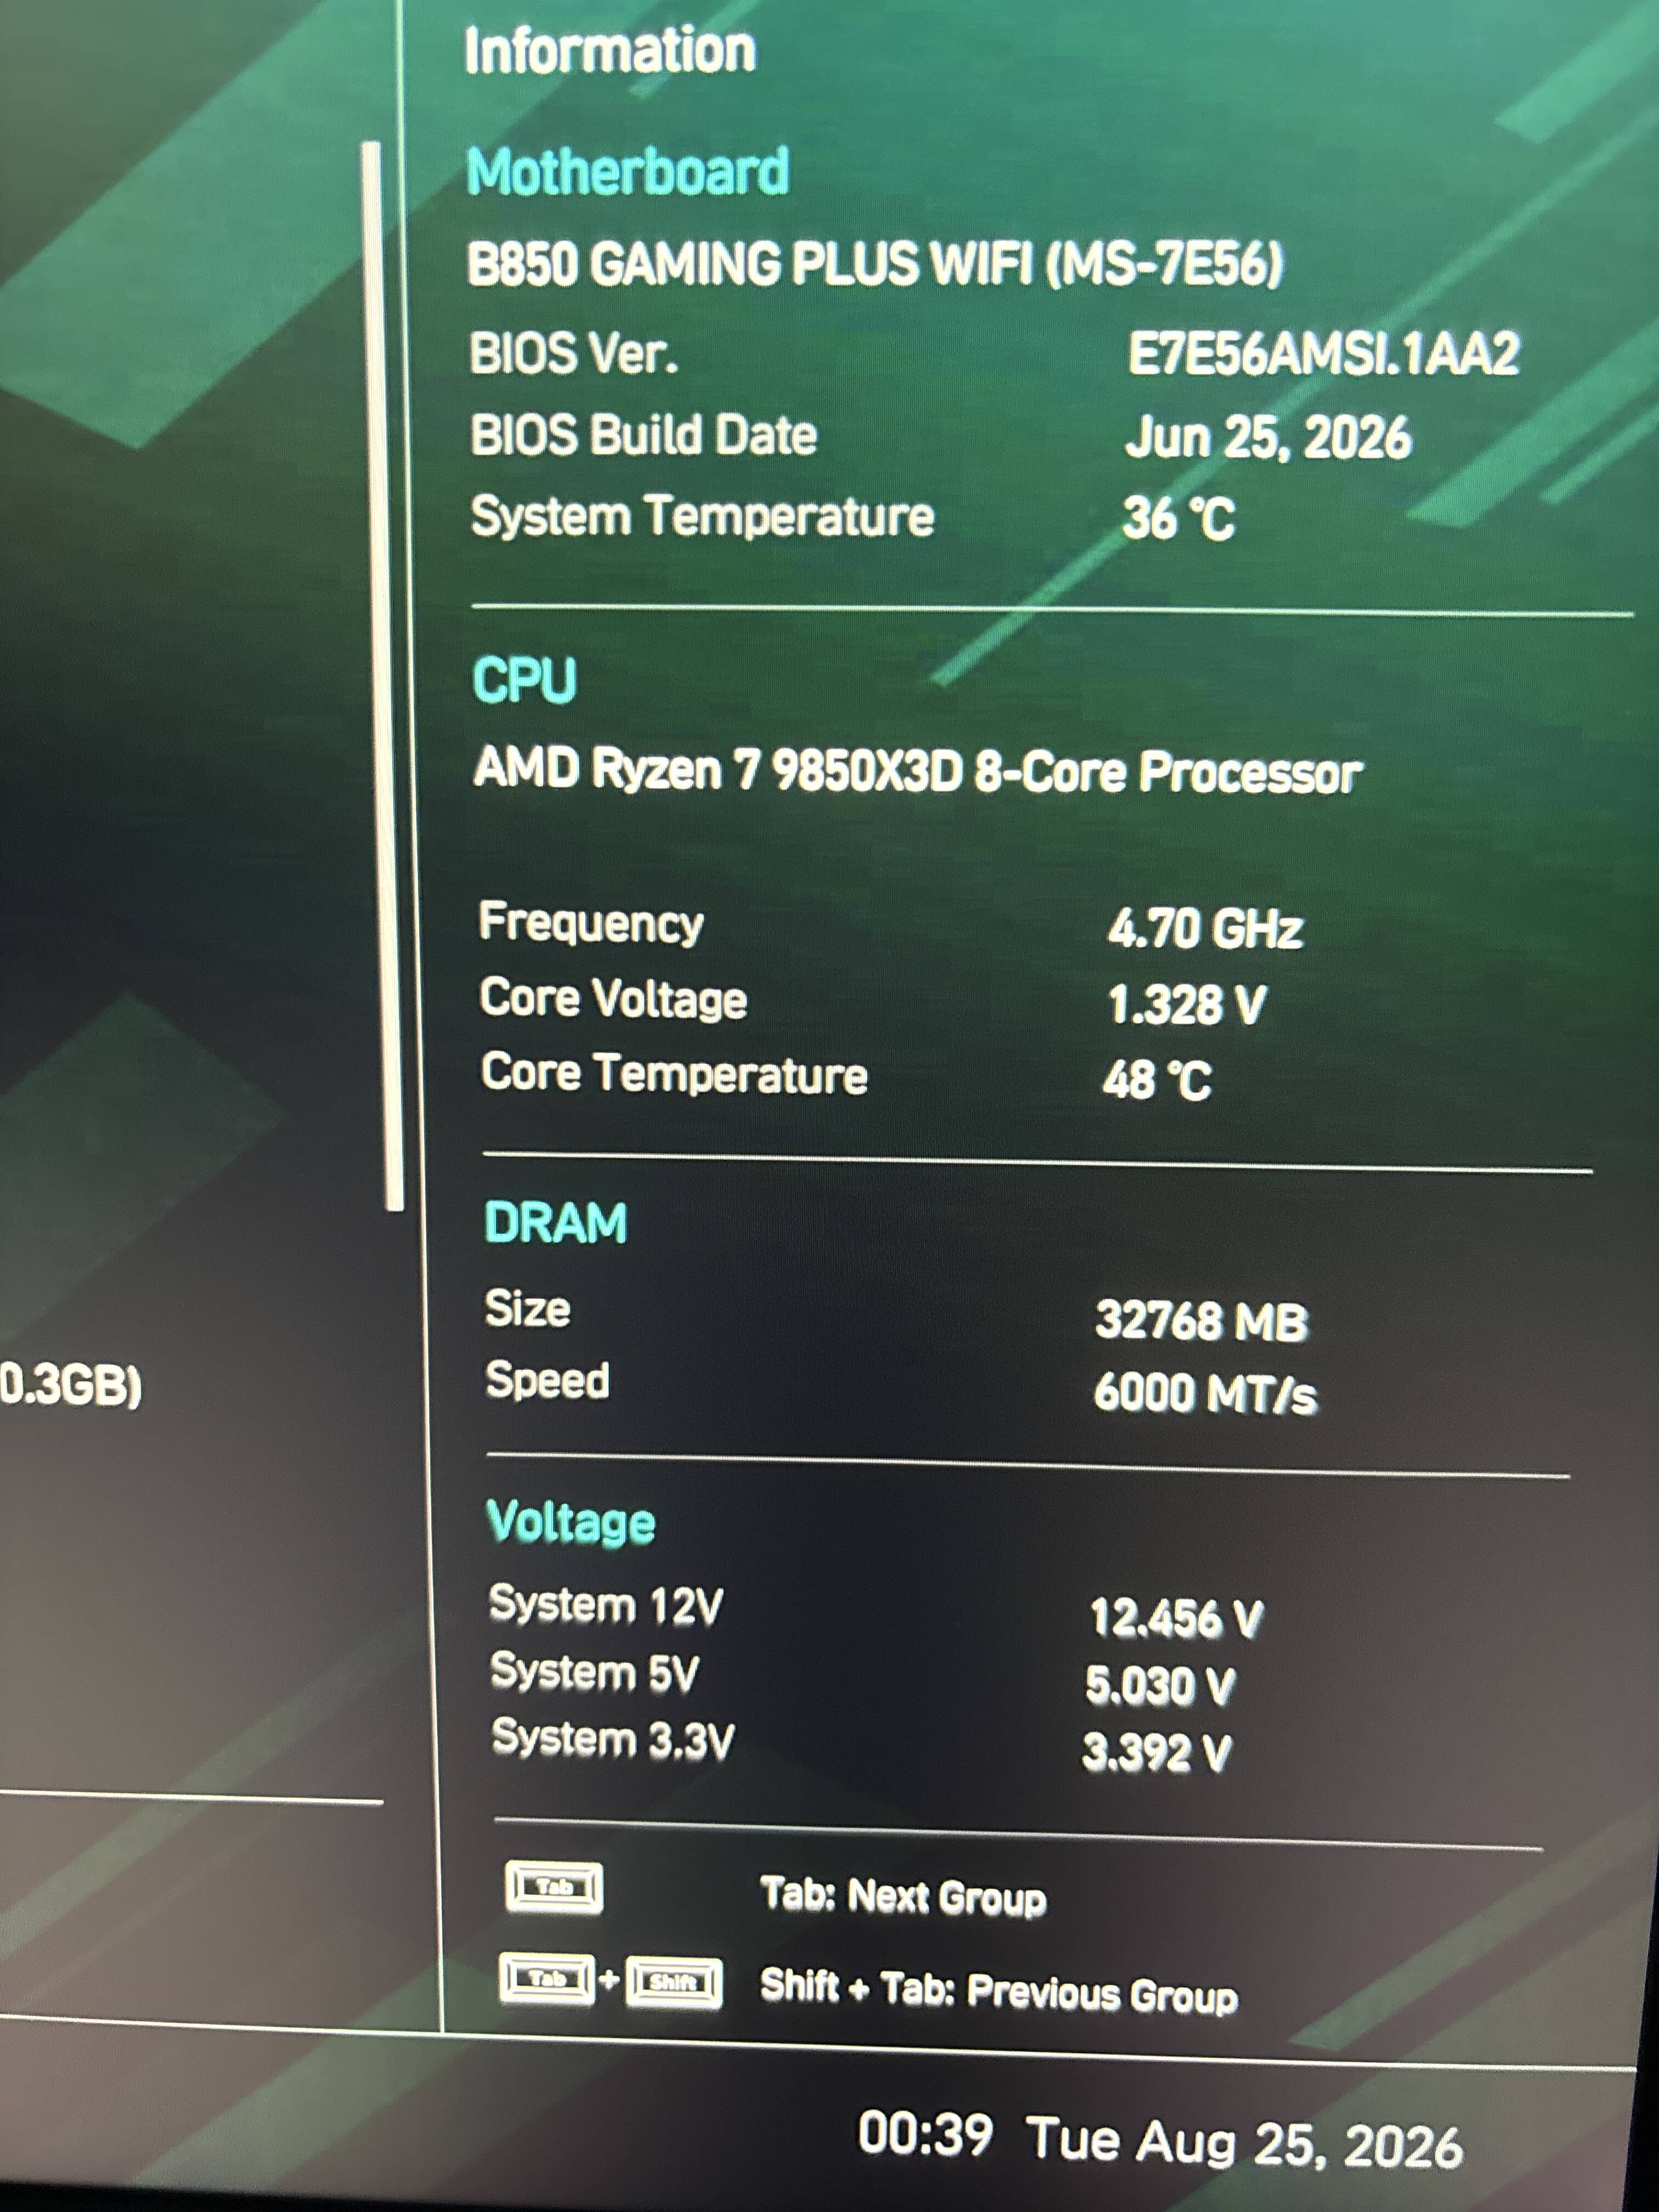
You’re running the latest BIOS version, but it’s a BETA BIOS. Beta BIOS versions are mainly intended for testing and are generally more suitable for advanced users who know what to do if the motherboard fails to boot, even after a CMOS reset.
That said, if you already have this BIOS installed and everything is working fine, I’d just leave it as it is.
On MSI motherboards, BETA BIOS versions have a number greater than zero at the end, such as 1, 2, 3, 4, etc., while stable BIOS versions have a zero (0) at the end. See the example below.
BETA BIOS
7E56v1AA2
7E56v1AA1
7E56v1A91
7E56v1A88
Stable BIOS
7E56v1AA0
7E56v1A90
7E56v1A80
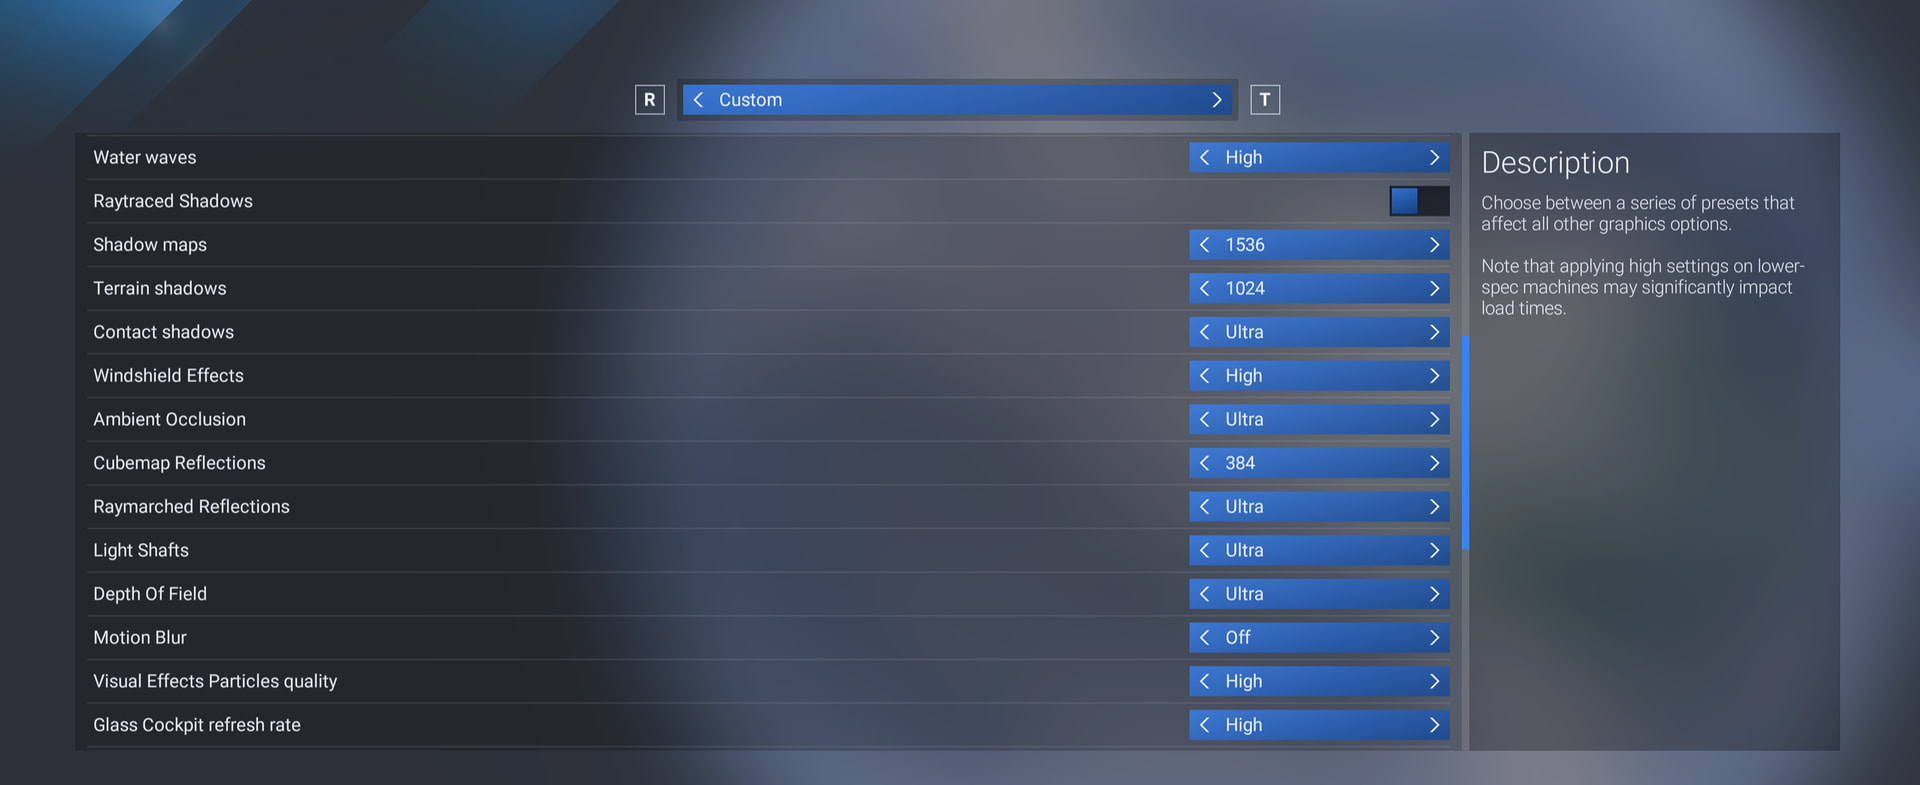
As for the MSFS settings, I would change DLAA to DLSS Quality. For testing purposes, try playing without Frame Generation - turn it off. In the MSFS settings, set the FPS limit to 70 or 60 and enable Vsync.
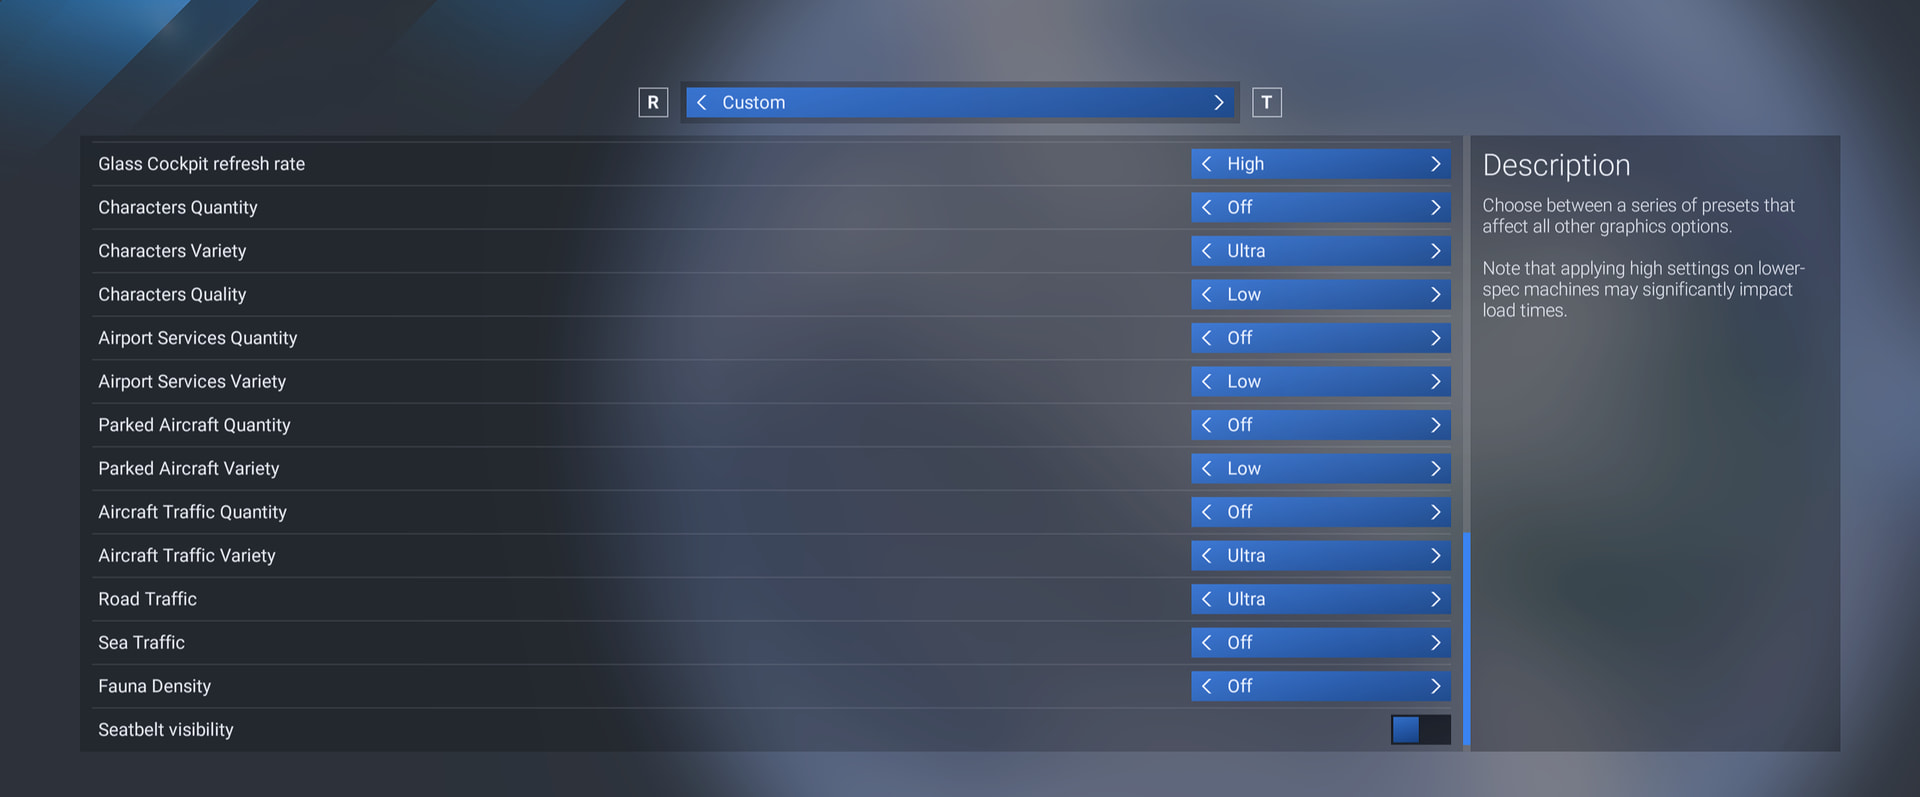
Set the Glass Cockpit Refresh Rate to Medium and turn off traffic and road traffic.
Traffic can have an impact on stuttering, so until you find the cause, I recommend turning it off.
Apply and save > Quit to desktop.
You have the same CPU as I do and an MSI motherboard - a different model, but the BIOS settings shouldn’t differ that much. So I have a few suggestions for you.
Start with the BIOS settings and fan curves. This CPU runs hotter than the 9800X3D, so keep that in mind when setting up your cooling.
A while ago, I created a thread about BIOS settings. These are what I consider the “must-have” settings, so I’ll paste them here. Set them as I describe, along with what you’ve already configured yourself.
Optimizing BIOS for MSFS (click to expand)
After installing the BIOS, we set the curves for CPU cooling and other fans. Another important setting is the Fan Fail Warning. On MSI motherboards, you can find it in the Hardware Monitor - the same place where you set the fan curves.
We should enable the Fan Fail Warning for all fan channels, including CPU, CPU Pump and SYS fans, or any other connected fans.
Save the changes, and restart PC. Next, we activate the CPU Over Temperature Alert - on MSI motherboards it has this name, on other brands it might be called differently.
We also enable System Power Fault Protection
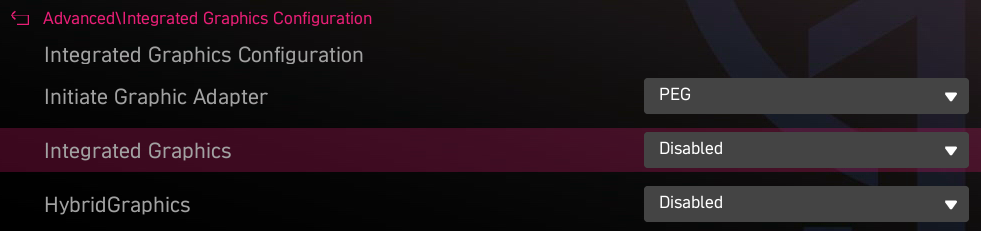
After the restart, we can disable the iGPU if it’s not needed
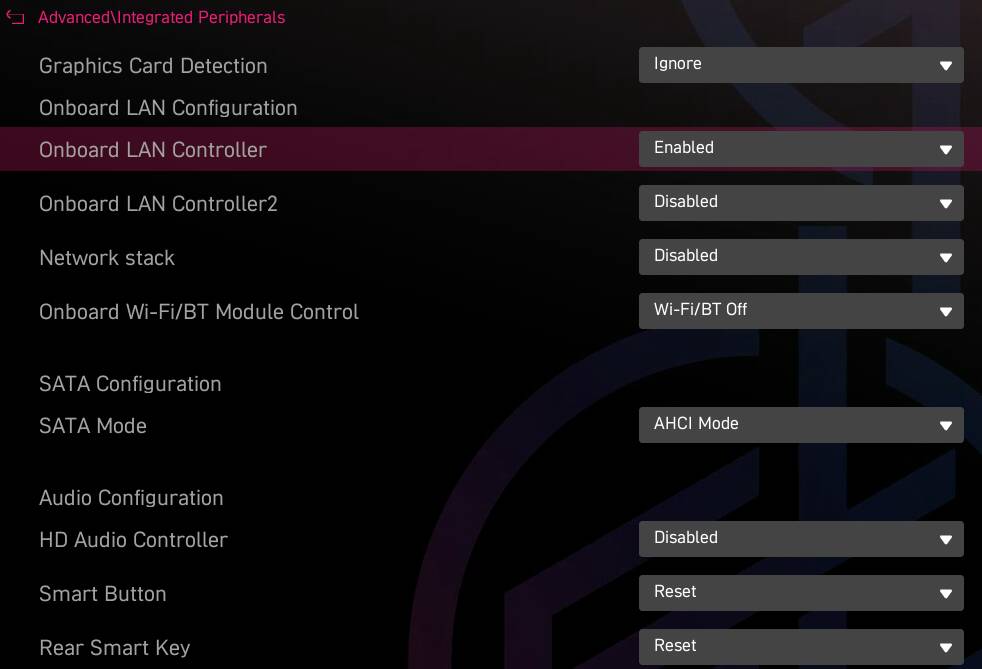
On the screenshot below, I disabled WiFi and Bluetooth - you can enable them if you use them. I also disabled the HD Audio Controller - you can set it to Enabled if you don’t have a dedicated sound card and need onboard audio.
Save the changes and restart.
At this point, we have our baseline settings - our default configuration. It’s a good idea to save a profile of these settings, so if we ever need to reset the BIOS, we can quickly restore them.
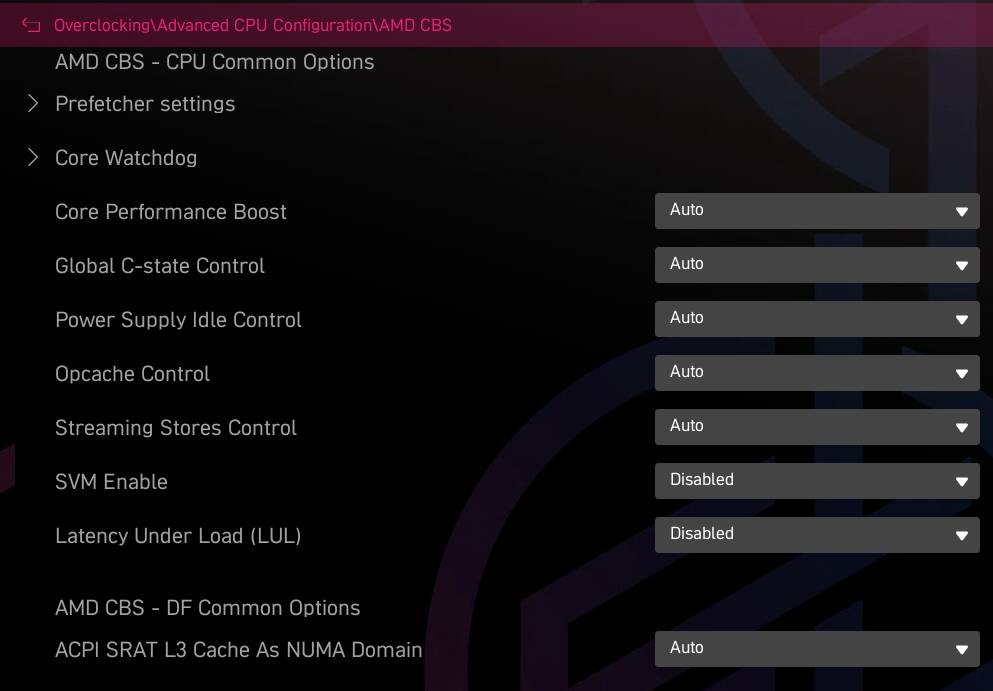
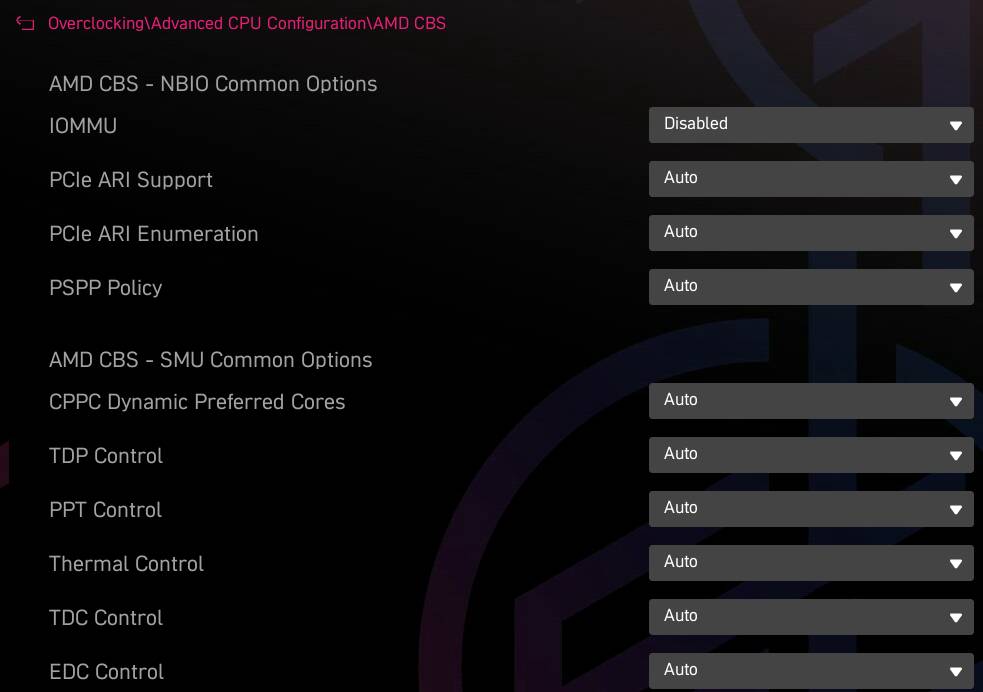
On the screenshots below, SVM and IOMMU (virtualization) are disabled. You can enable them if you use virtual machines or if you prefer system security over performance, because disabling virtualization also disables Core Isolation / Memory Integrity in Windows settings, making it unavailable there. That said, the PC won’t break or “explode” if you disable virtualization - it will generally run better - with less stuttering or even no stuttering in games.
Disabling SVM and IOMMU can improve overall PC performance.
Next, we should enable RAM EXPO profile (for AMD) or XMP (for Intel) for our RAM.
Save and restart.
After the restart, it is recommended to check whether the system and MSFS are running stably with EXPO/XMP enabled. If everything is stable, you can proceed with further BIOS changes, such as adjusting PBO settings.
At this point, you can save these settings as a second BIOS profile - essentially your baseline configuration before overclocking or undervolting.
- CPU Loadline Calibration Control
This is an important setting, usually used with overclocking to prevent VCore from dropping too much to stabilize the CPU.
On the screenshot below, I selected Mode 3 (flat line). It’s important that the line stays flat, not higher or lower. A flat line helps stabilize the CPU a bit by preventing voltage drops under load.
This setting helps avoid CPU voltage drops under load, which is important in games like MSFS and other demanding titles. So again - choose the flat line setting.
In the future, if you want to overclock the CPU, you can switch to Mode 2 for example.

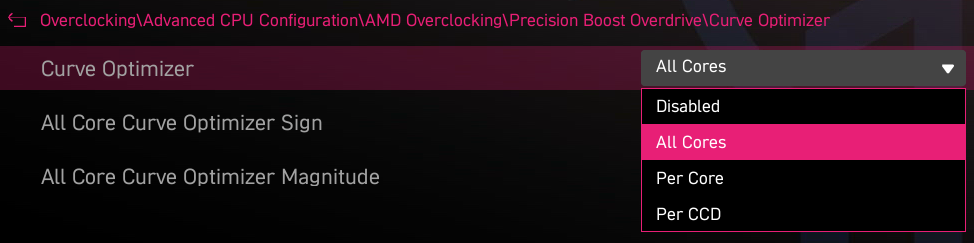
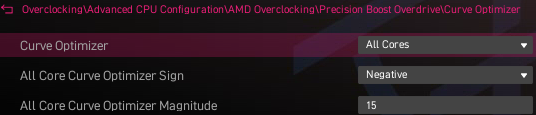
For PBO, the typical sweet spot for Ryzen 7 7800X3D, 9800X3D, 9850X3D CPUs is a negative offset of 15 on all cores.
For Ryzen 7 9850X3D i recommend starting with a value of 10 rather than 15.
-
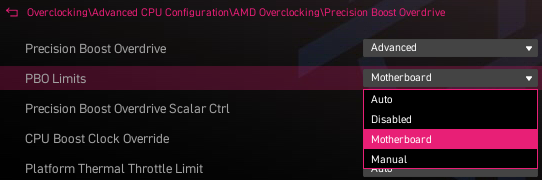
Auto: Same as option [Motherboard].
-
Disabled: Loads AMD default socket power (PPT), electrically-limited VRM current (EDC), and thermally-limited VRM current (TDC) limits.
-
Motherboard: Allows the processor to run according to increased PPT, EDC, and TDC limits defined by your motherboard.
-
Manual: Allows the processor to ignore AMD default limits for PPT, EDC, and TDC and instead use manual values (up to the maximum capabilities of the of the motherboard).
If you chose All Core Curve Optimizer and applied negative offsets
All Core Curve Optimizer Magnitude also lower the CPU VCore - the higher the number, the lower the VCore. Too low a VCore can make the CPU and system unstable, so keep this in mind when adjusting.
The above settings are shown here as an example on the MSI X870E Carbon WIFI motherboard.
Save the changes and test PC as well as MSFS with these settings.
There are, of course, many other BIOS settings. I haven’t described all of them - I’ve listed what I consider the most important ones, but some may have been missed. These settings are given as an example for the MSI motherboard and for AMD platforms, so ASRock, ASUS, or Gigabyte boards, as well as Intel platforms, may have different options.
Any additional important settings are welcome to be shared.
EDIT
If someone is using air cooling instead of an AIO, it actually makes sense to set a CPU temperature limit in that case.
Let’s say you cap it so that in games it doesn’t go over ~85C. On motherboards for AMD processors, this is handled by the “Platform Thermal Throttle Limit”.
MSI BIOS > Overclocking > Advanced CPU Configuration > AMD Overclocking > Precission Boost Overdrive (PBO)
Gigabyte BIOS
After making the BIOS settings, follow the instructions below in exactly the same order as they are listed.
1 Disable fast startup
2 Disable Hibernation.
Restart PC
1 Enable the ultimate performance powerplan.
2 Select ultimate performace powerplan and click change plan settings > change advanced power settings
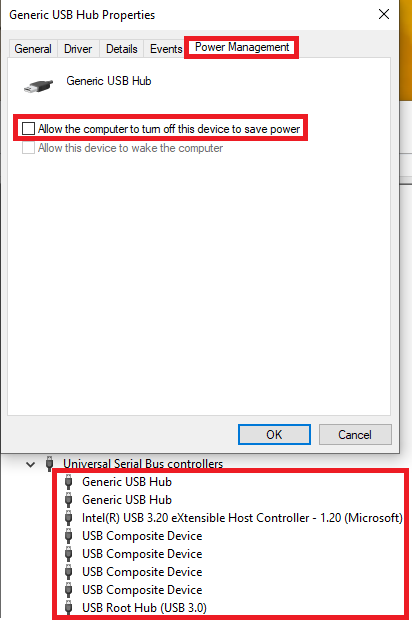
3 Expand USB settings > USB selective suspend settings > disabled > apply > ok
Uncheck Allow the computer to turn off this device to save power for USB
4 Right-click “start” > device manager
5 Expand Universal Serial Bus controllers
6 Right-click generic usb hub > properties > power management tab
7 Uncheck Allow the computer to turn off this device to save power > ok
Repeat if there are multiple USB Hub.
8 Expand PCI Express > Link state Power Management
Setting - OFF
Apply > OK
Restart PC.
Partial Windows Settings
-
Go to Windows Settings > System > Display > Advanced display.
Next to “Choose a refresh rate” set it to the highest Hz your monitor supports amd turn off Dynamic refresh rate.
-
Go to Windows Settings > System > Display > Graphics
Expand Advanced graphics settings
Turn on - Hardware-accelerated GPU scheduling
Turn off - Variable refresh rate
-
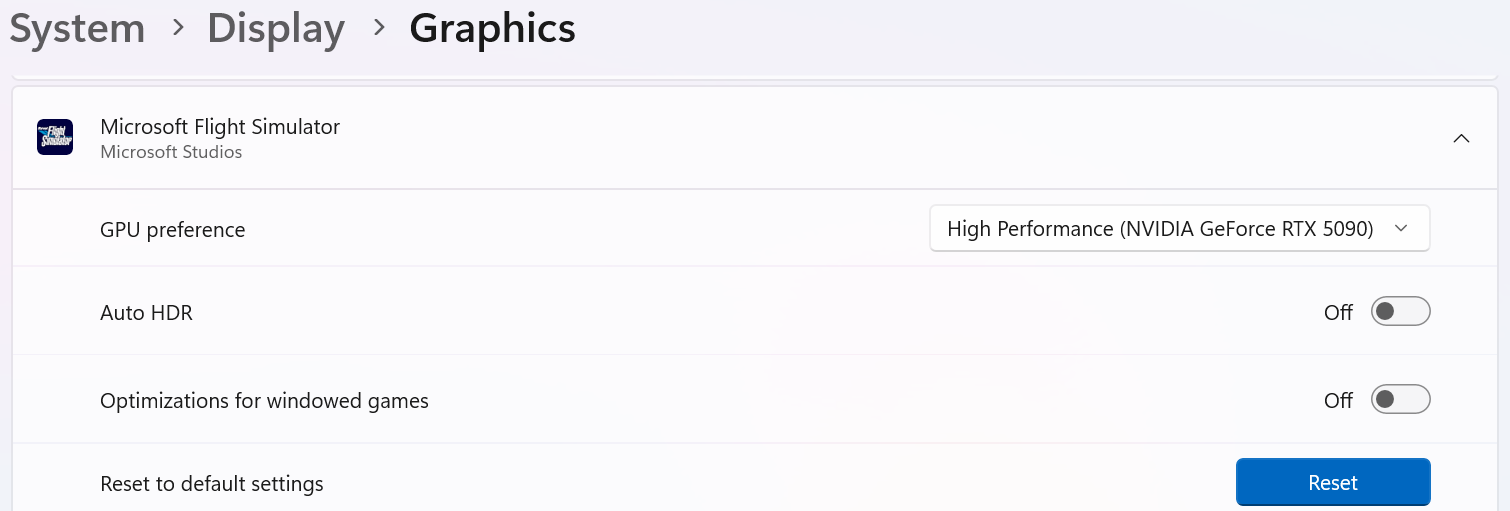
Go to Windows Settings > System > Display > Graphics. Click “Add Microsoft Store app” then select Microsoft Flight Simulator from the list. Click on Microsoft Flight Simulator to open it and expand the options, then set GPU preference to High performance (NVIDIA RTX 5080).
In my opinion, and I’m not the only one who thinks so, one of the more stable drivers for NVIDIA 50XX series GPUs is the older 577.00 version. I recommend installing it while testing MSFS.
Below, I’ve explained how to perform a clean installation of this driver.
How to perform a clean installation of NVIDIA drivers
How to perform a clean installation of NVIDIA drivers.
First things first: a proper clean installation of a GPU driver does not delete your games, apps, or wipe your C drive. It simply removes old driver files, registry leftovers and related components so the new driver installs on a clean base.
First, download NVIDIA driver and the DDU - Display Driver Uninstaller software.
NVIDIA driver 577.00
https://www.nvidia.com/en-us/drivers/details/250995/
DDU
Display Driver Uninstaller (DDU) V18.1.5.7 Released. - Wagnardsoft Forum
NVIDIA driver removal is best done in Windows Safe Mode - I’ve been saying this for a long time and I’m not changing that opinion. The only exception is when Safe Mode doesn’t work properly on someone’s system.
So before proceeding with any further steps, make sure that Windows Safe Mode is working correctly.
Also, there’s no real need to disconnect from the internet or disable your internet connection during driver uninstall or installation. What actually matters is Windows behavior - just set it so it doesn’t automatically install devices or pull drivers on its own. That alone is enough to prevent conflicts during the process, without having to unplug anything or go offline.
If you’re not an advanced user, don’t feel confident digging deep into Windows settings or simply don’t want to bother, there are easier alternatives.
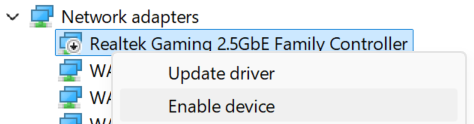
You can just unplug the Ethernet cable, turn off WIFI or disable your network adapter directly in Device Manager.
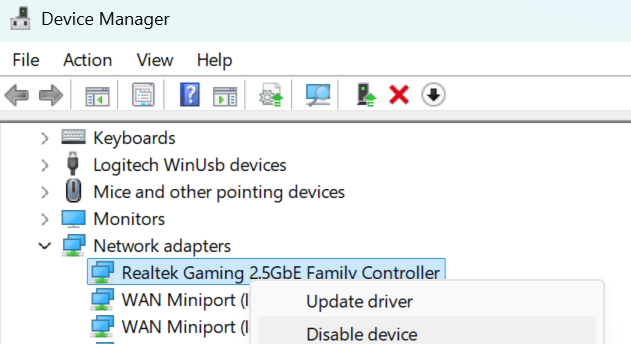
In that case, if your PC case is pushed against the wall or placed under a desk, disabling the network adapter is usually the quickest option. Just right-click the network card in Device Manager and disable it.
Right-click “Start” icon and select Device Manager.
Expand Network adapters
Then right-click your network adapter and select Disable device.
Disabling the network adapter in Device Manager is the most convenient and fastest method.
You can also, after launching DDU in normal Windows mode, go into the DDU settings and enable “Prevent downloads of drivers from Windows Update when Windows searches for a driver for a device”
While still in the settings, also enable “Enable Safe Mode dialog”
// Also, as I mentioned above, make sure to check that Safe Mode is actually working on your system before proceeding.

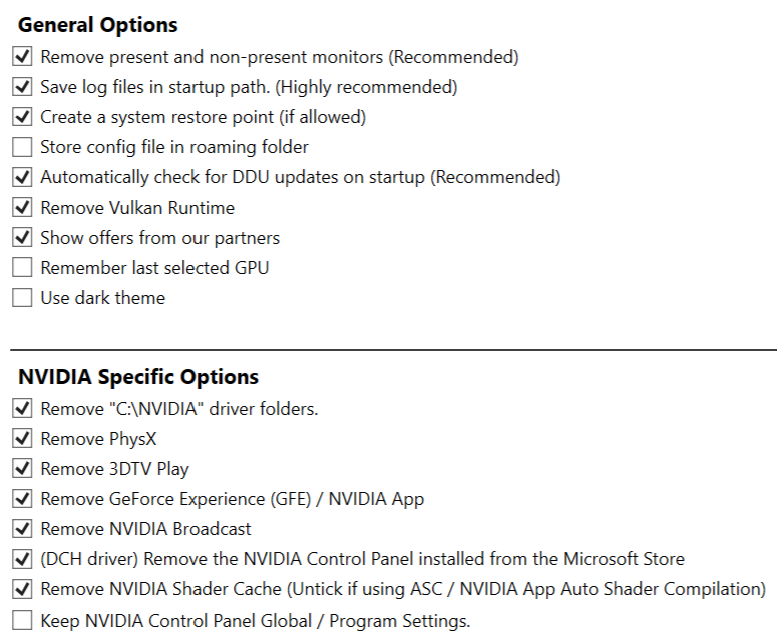
Under General Options and Specific Options, you can select the same settings that I have enabled here
Be careful with “Remove present and non-present monitors” - this setting removes monitors and their drivers. After a restart, they will still work, but Windows will not have proper drivers installed for them, so you may need to reinstall the monitor drivers.
Also note that after removing monitors and restarting the PC, Windows may change the refresh rate settings. Go to Windows Settings > System > Display > Advanced display. Check if “Choose a refresh rate” is set to the maximum Hz of your monitor - if not, change it to the max or set it to your preferred value (for example 120Hz instead of 240Hz).
I once forgot about this and Windows set my monitor to 60Hz instead of 165Hz. As a result, I had stuttering in MSFS 2020/2024 and couldn’t figure out why. It turned out the cause was exactly the refresh rate.
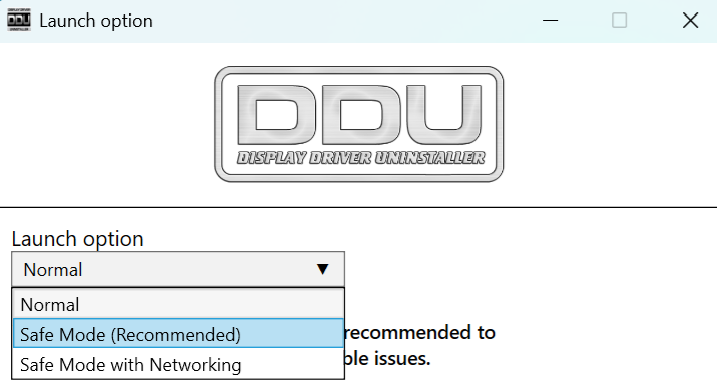
So now you already have DDU configured and know a bit more - it’s time to prepare for reinstalling the driver. Before switching to Safe Mode, download the NVIDIA driver you want to install. After downloading it, you can launch DDU and under “Launch option” click Normal and select "Safe mode (recommended).
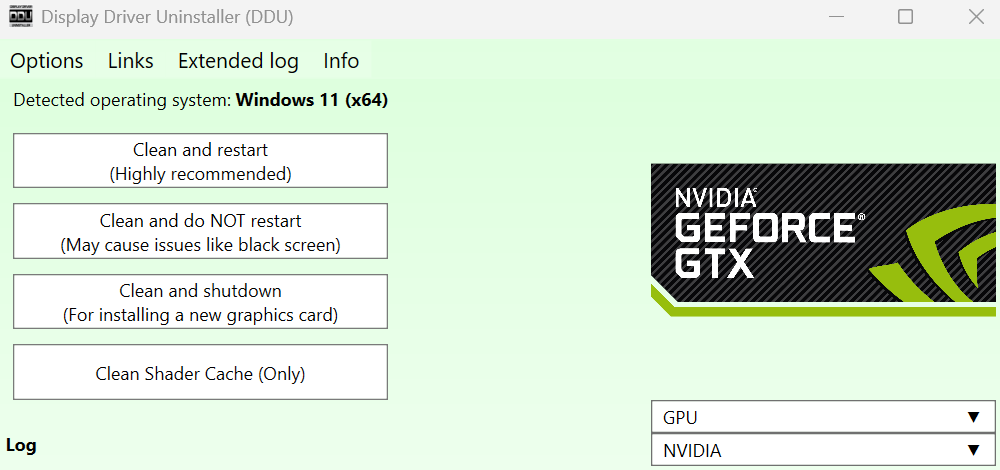
After the system switches to Safe Mode and DDU is launched, select the GPU you want to uninstall, in this case NVIDIA.
Then click “Clean and restart”.
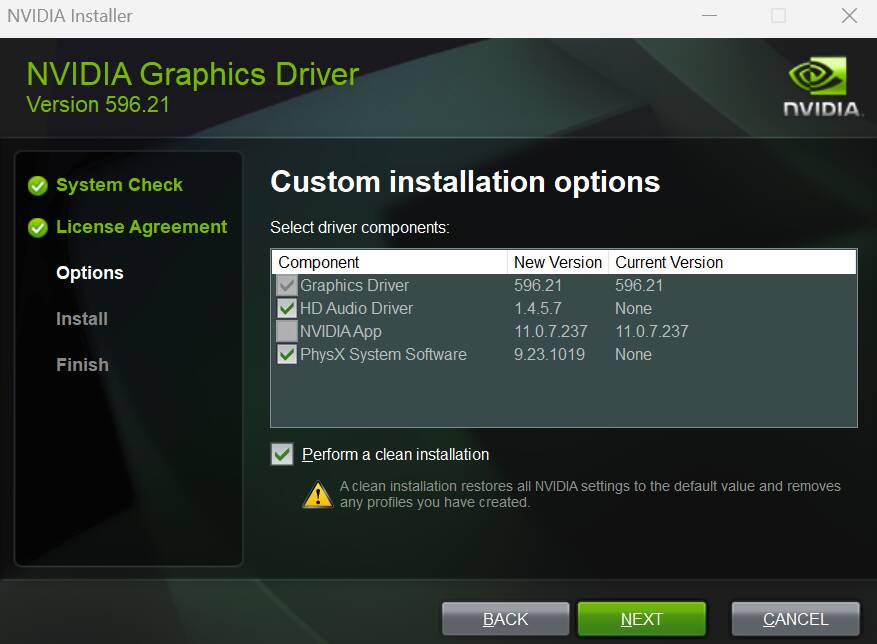
After the restart, you can install NVIDIA driver. I recommend installing the minimal version, meaning only the driver and PhysX - this way you can make sure everything works properly without NVIDIA app.
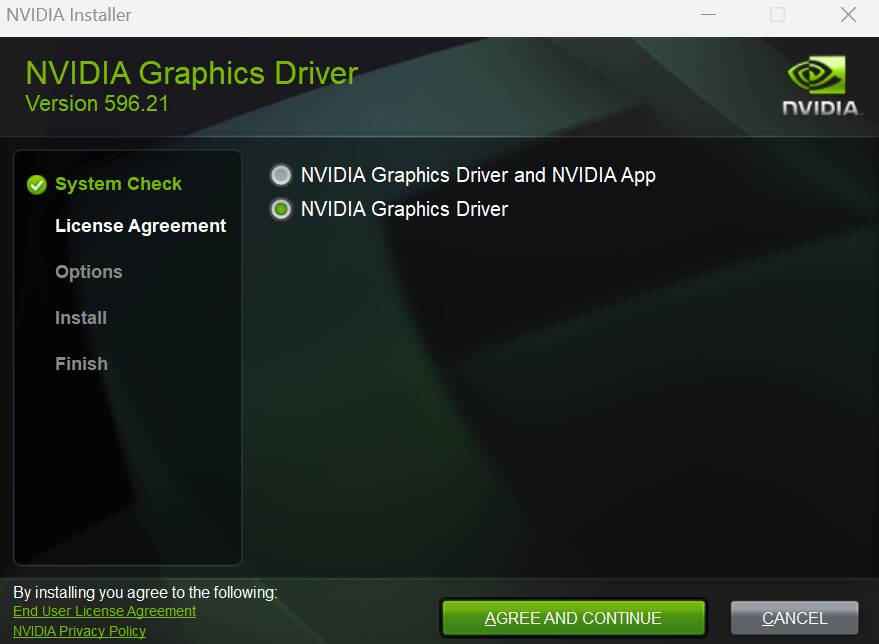
So run the previously downloaded installer, select “NVIDIA Graphics Driver”, then click “Agree and Continue”.
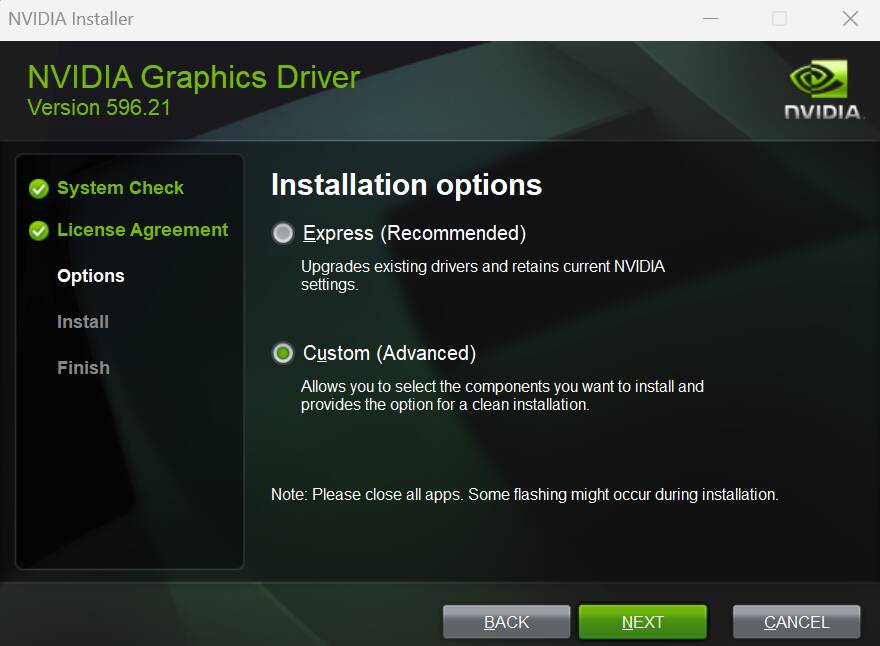
On the next screen of the installer, select “Custom (Advanced)” and click “Next”.
On the next screen of the installer, uncheck “HD Audio Driver” and make sure “PhysX” and “Perform a clean installation” are selected, then click “Next”.
After NVIDIA driver installation, restart PC. After reboot, I remind you to install the monitor drivers if needed and check the monitor refresh rate (Hz) in Windows settings, as mentioned above.
If you have checked in DDU

and want Windows to install other drivers again, launch DDU in normal mode and under “select device type” click
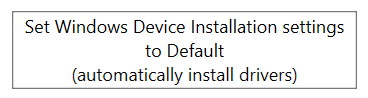
Now you can enable your network adapter in Device Manager. Open Device Manager, right-click the network adapter you disabled, and select “Enable device”.
Restart PC.
Now you can download and install NVIDIA app.
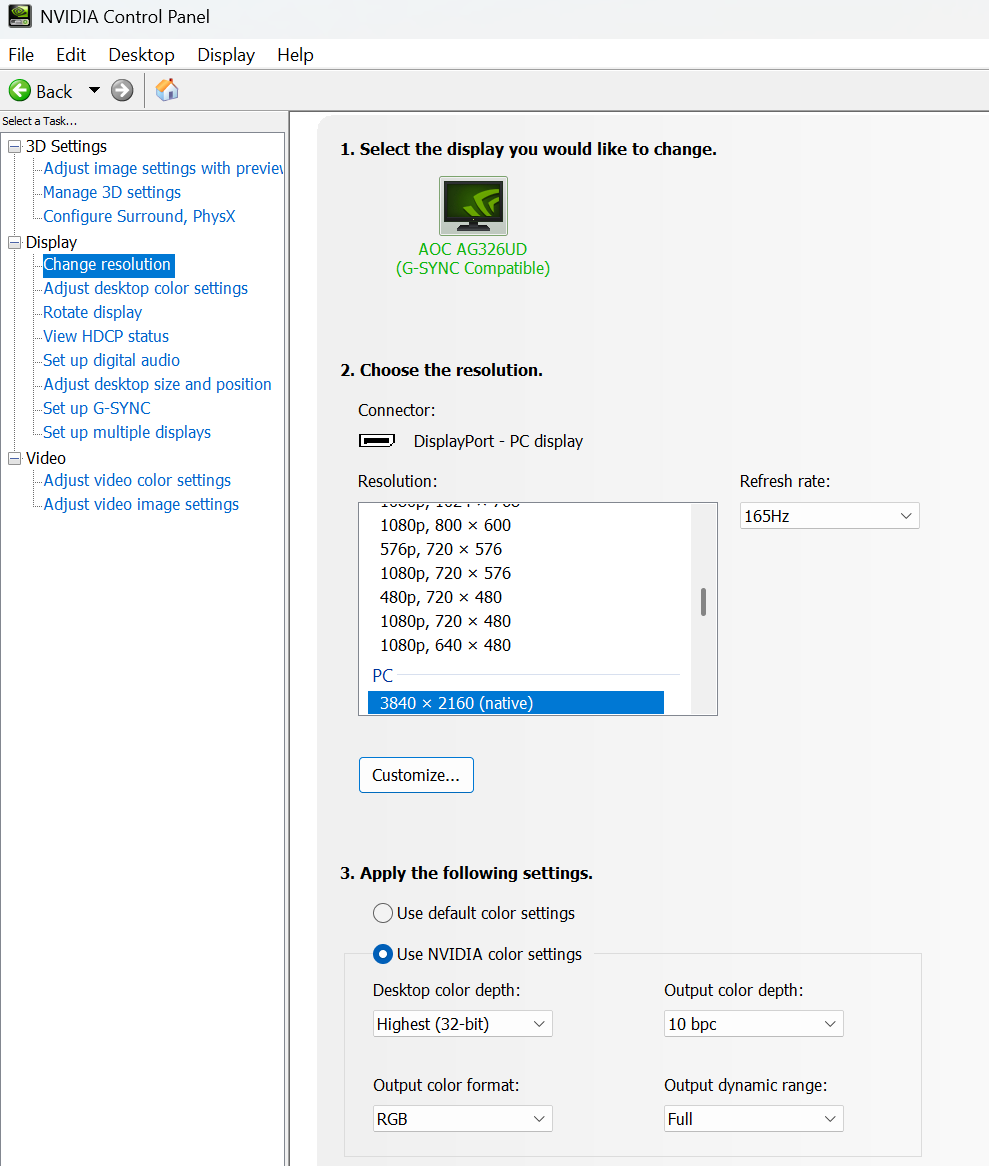
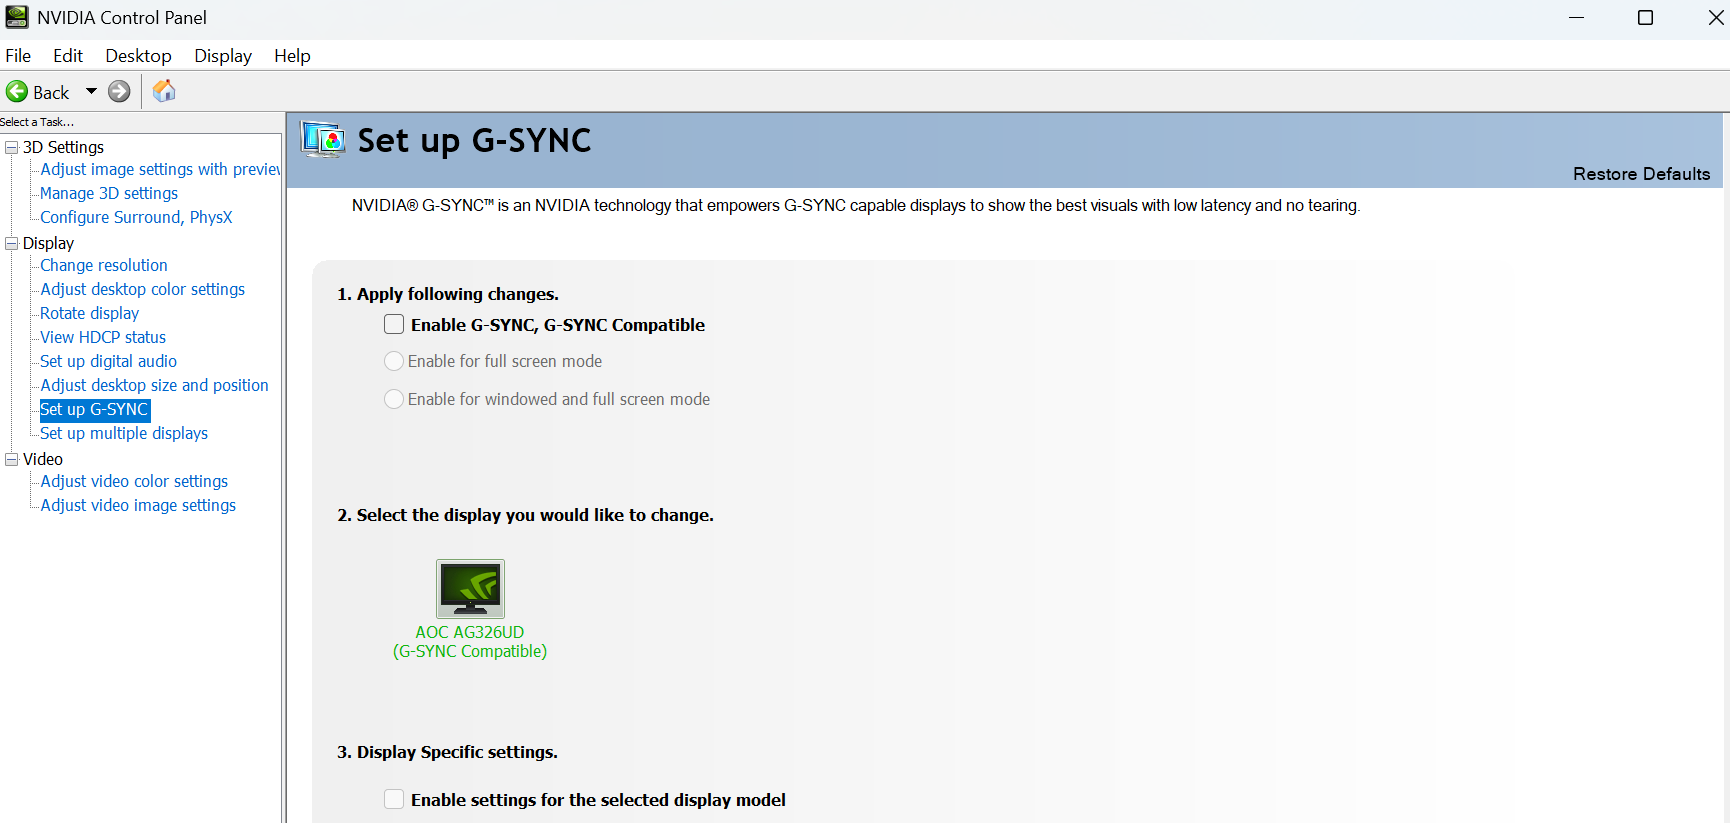
NVIDIA Control Panel Settings
Select the preferred resolution and refresh rate and set both to the highest available value and clik Apply
Turn off G-Sync
Manage 3D settings
Globa settings - DEFAULT
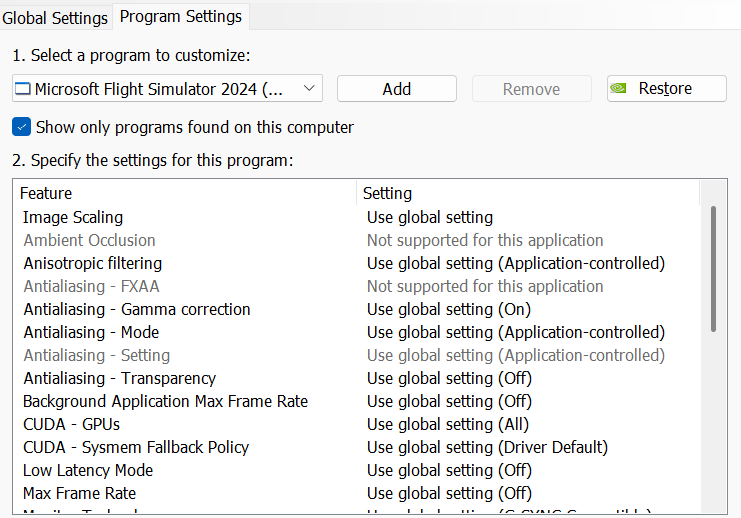
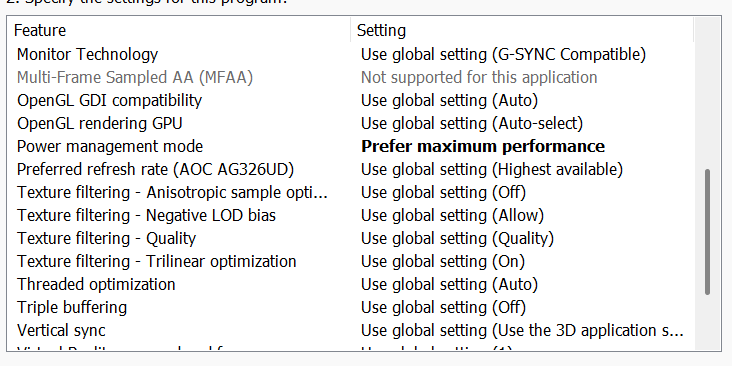
MSFS 2024 profile
My sources are the thousands of tips and troubleshooting posts I’ve shared over time, which you can find on the forum - for example, in the threads linked below.
https://forums.flightsimulator.com/t/optimizing-bios-for-msfs-2020-2024-tips-advice-and-discussion/756831
https://forums.flightsimulator.com/t/new-high-end-computer-awful-stuttering-at-certain-airports-help-advice-wanted-msfs2020/768788


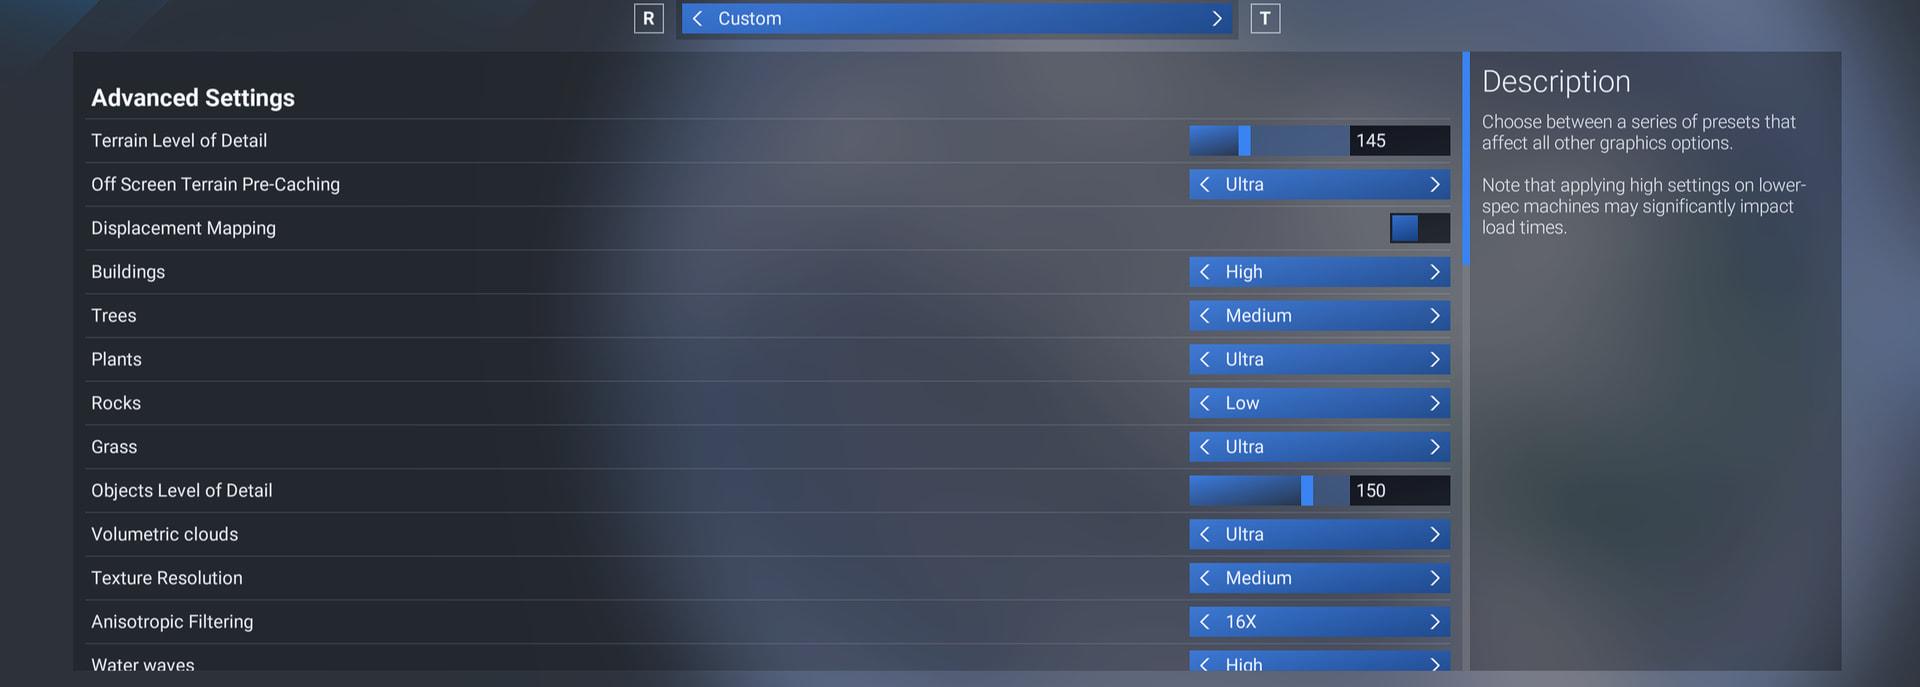
 but once I’m done I will definitely try your tips