Go to controller options, select the Tobii, click on the blue ‘sensitivity’ button in the top left, and increase the ‘position’ slider to 1.00
Thanks all.
The actual issue is that for some stupid reason, you need to literally be using the “Keyboard Default” profile for your keyboard. No other profile will work.
What is F12 mapped to?
The settings that were available in SU7 are still available today.
I have updated the original post with new guidance on how to make it work with SU8 
The Head position slider seems to define where you head is on a line between the dashboard/instruments and the back of the cockpit.
If I set it to ‘1’ then my head is behind my seat in an A320Neo 
I have run into something which I dont know if is an issue or a design:
When I set the Head position, so its not inside the seat (near ‘0’ in the slider), I hardly get any effect of leaning forward or sideways.
Is this an issue or just the limitation of the current setup? Whats your experience?
I’ve posted some set up tips here;
Tobii eye/head tracker in SU8 - Self-Service / Peripherals - Microsoft Flight Simulator Forums
Again thanks for all the work testing and figuring this out. One last question, does F12 need to be pressed again if head tracking is toggled off / on?
Asking because toggling off and on is something I usually do quite a lot with TrackIR.
No, you can toggle on and off as often as you want in a flight with no need to hit F12 again. I gave it all a good test last night and have actually been very impressed with how it is all working.
I did submit a zen desk ticket though raising the issue of the default keyboard profile being required to access the F12 in the first place. That is the only minor annoyance.
Iv updated the post with more details on the F12 possible “hidden” function.
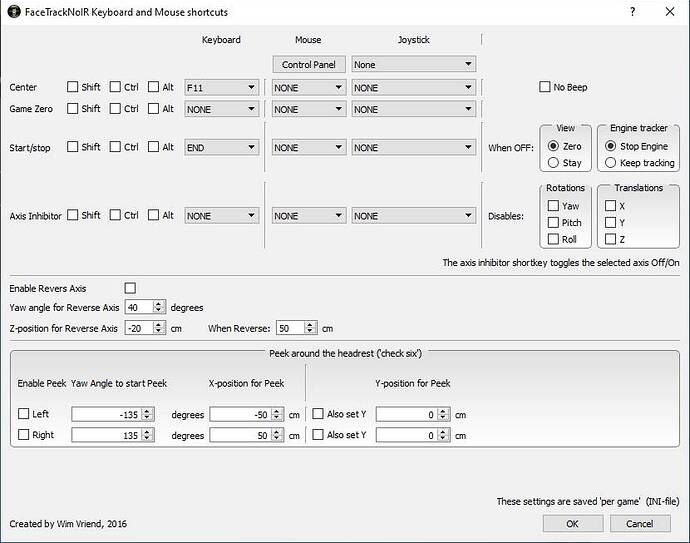
I’m still using FaceTrackNoIR V200 and in the settings you can choose a key for Center which I’ve chose F11 for:
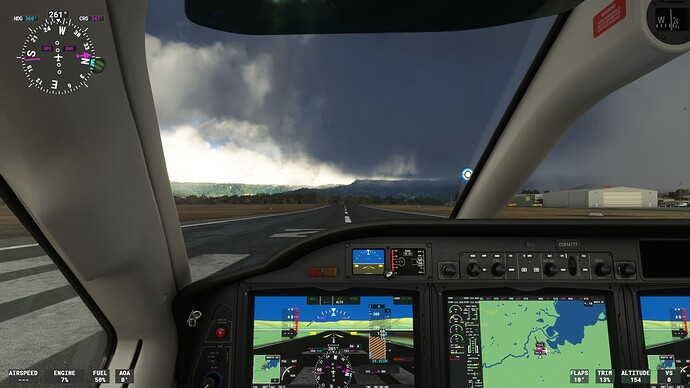
The way it works is once I’ve launched a flight the view looks like this:
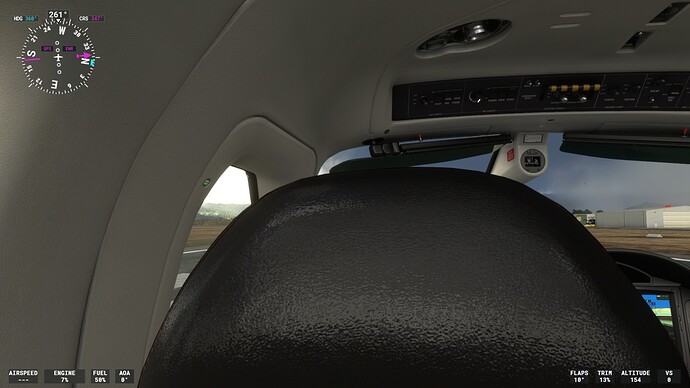
But if my seat is too close to the screen and I move my seat backwards my view ends up behind the pilot’s seat:
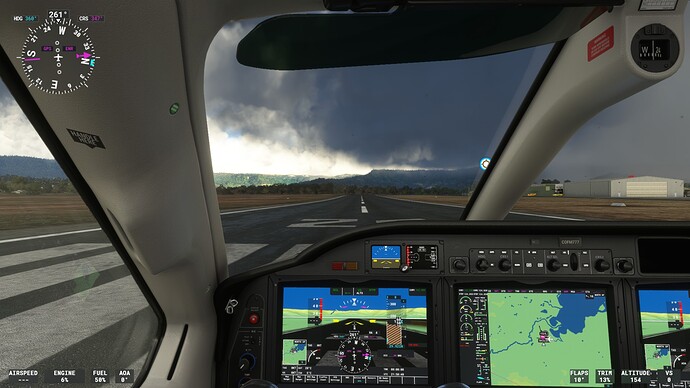
I can press F11 to make my new position 0,0,0 and the view is back to where it should be:
If I wanted to start using the native implementation of Tobii inside of MSFS, what binding is there to Center/Reset the view?
F12 with the default keyboard profile.
What’s F12 bound to? Can I bind it to something else?
Nobody seems to know what the F12 binding is. Can somebody involved in the development please stand up and explain what that bind is please? It’s a fabulous piece of kit but if us users are having so much difficulty making it work, well, then it will not be a fabulous piece of kit for long,
The (new?) controls available in the Controller Settings / Tobii / Sensitivity work great and are a huge improvement over the last iteration I tried.
With position=1 in C152 my head is locked behind my seat and the left/right/up/down translation speed is perfect. Unfortunately I am not willing to adjust camera every time I hit Reset Cockpit View, and the Cockpit Camera Settings menu only has height and left/right, so I will keep my position slider at 0 until I learn how to move the camera forward. F12 does nothing for me except take a Steam screenshot.
As a heads up for anyone trying to debug: “Toggle Head Tracking” bind is still a thing. If you press it, the tobii tracker no longer moves the camera. Press it again and it starts working again.
To make it perfect for me:
- the sliders (in controls/tobii/sensitivity) need tooltips explaining what behavior they control
- the position slider should be split up into three translation sensitivity sliders - I want half up/down sens, full left/right sens, zero fore/aft sens (but others may want to lean in to look at an instrument)
I use the Steam version as well. I think I will keep using FaceTrackNoIR V200 until they enable the hidden F12 binding to be bound to something else. It’s good to see the progress, it won’t be long until the native implementation of Tobii inside of MSFS will be able to replace FaceTrackNoIR V200.
Be sure to add your suggestions to this thread(and don’t forget to vote for it as well): Tobii Eye Tracking needs configuration options
Apparently, remapping screen capture to another key in Steam version allows F12 to function as intended for Tobii.
That’s interesting …
Any idea how to do that for the MS Store Version?
From what I have read after launching MSFS click Options, click Controls Options, click on Keyboard, keep clicking either the left or right arrow until it says Default, click the Home icon, click on Apply And Save, and now F12 should Center/Reset the view for you.
If you are using FaceTrackNoIR V200 then after running FaceTrackNoIR V200 click on the carat “^” on the taskbar, right click on FreeTrack 2.1 and then click on Restore FaceTrackNoIR. Click on the Shortkeys button and look for Center and then choose a Keyboard key(I use F11, DON’T USE F12) from the drop down menu and now it should look similar to this:
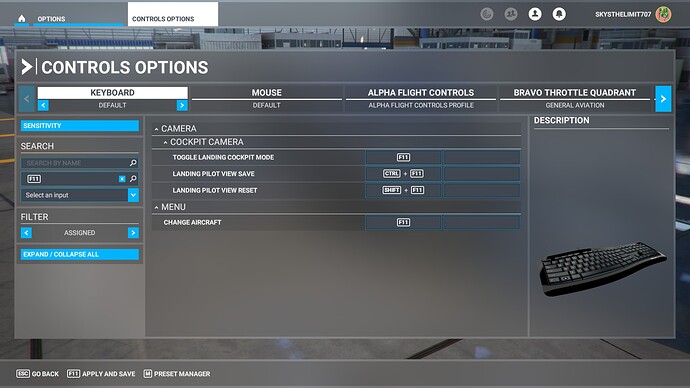
and click the OK button. Click on the carat “^” on the taskbar, right click on FreeTrack 2.1 and then click on Minimize FaceTrackNoIR. Launch MSFS, click OPTIONS, click CONTROLS OPTIONS, click on KEYBOARD, click on SEARCH BY INPUT, press the key that you setup for Center in FaceTrackNoIR (I used F11) and it should look similar to this:
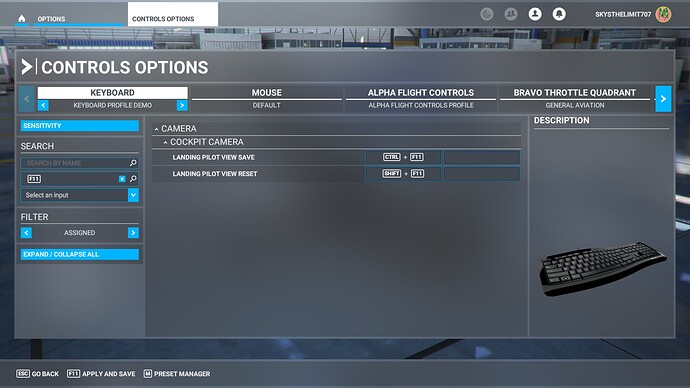
For each result that uses the same key that you chose for the Center key for FaceTrackNoIR V200 click on it then click on CLEAR CURRENT INPUT and then click VALIDATE, type in a new name for your new keyboard profile and click OK. Once you have cleared all the keys with the same binding it should look similar to this:
Now click on the Home icon, click APPLY AND SAVE. Go for a flight, then press your chosen key for Center (I used F11) and it should Center/Reset the view for you.
If you mean taking screenshots press the “Print Sc” button on your keyboard and then paste the image into one of these programs:
Paint (run command mspaint)
Paint 3D (run command ms-paint:)
IrfanView
and then save the image.
Alternatively to take a screenshot you can press Windows Key + “Print Sc” button on your keyboard. Look for the saved image(as a PNG file) in:
C:\Users\[Your User Name]\Pictures\Screenshots
