Guide – How to configure Cockpit Views / Cameras using Custom Camera controller assignments

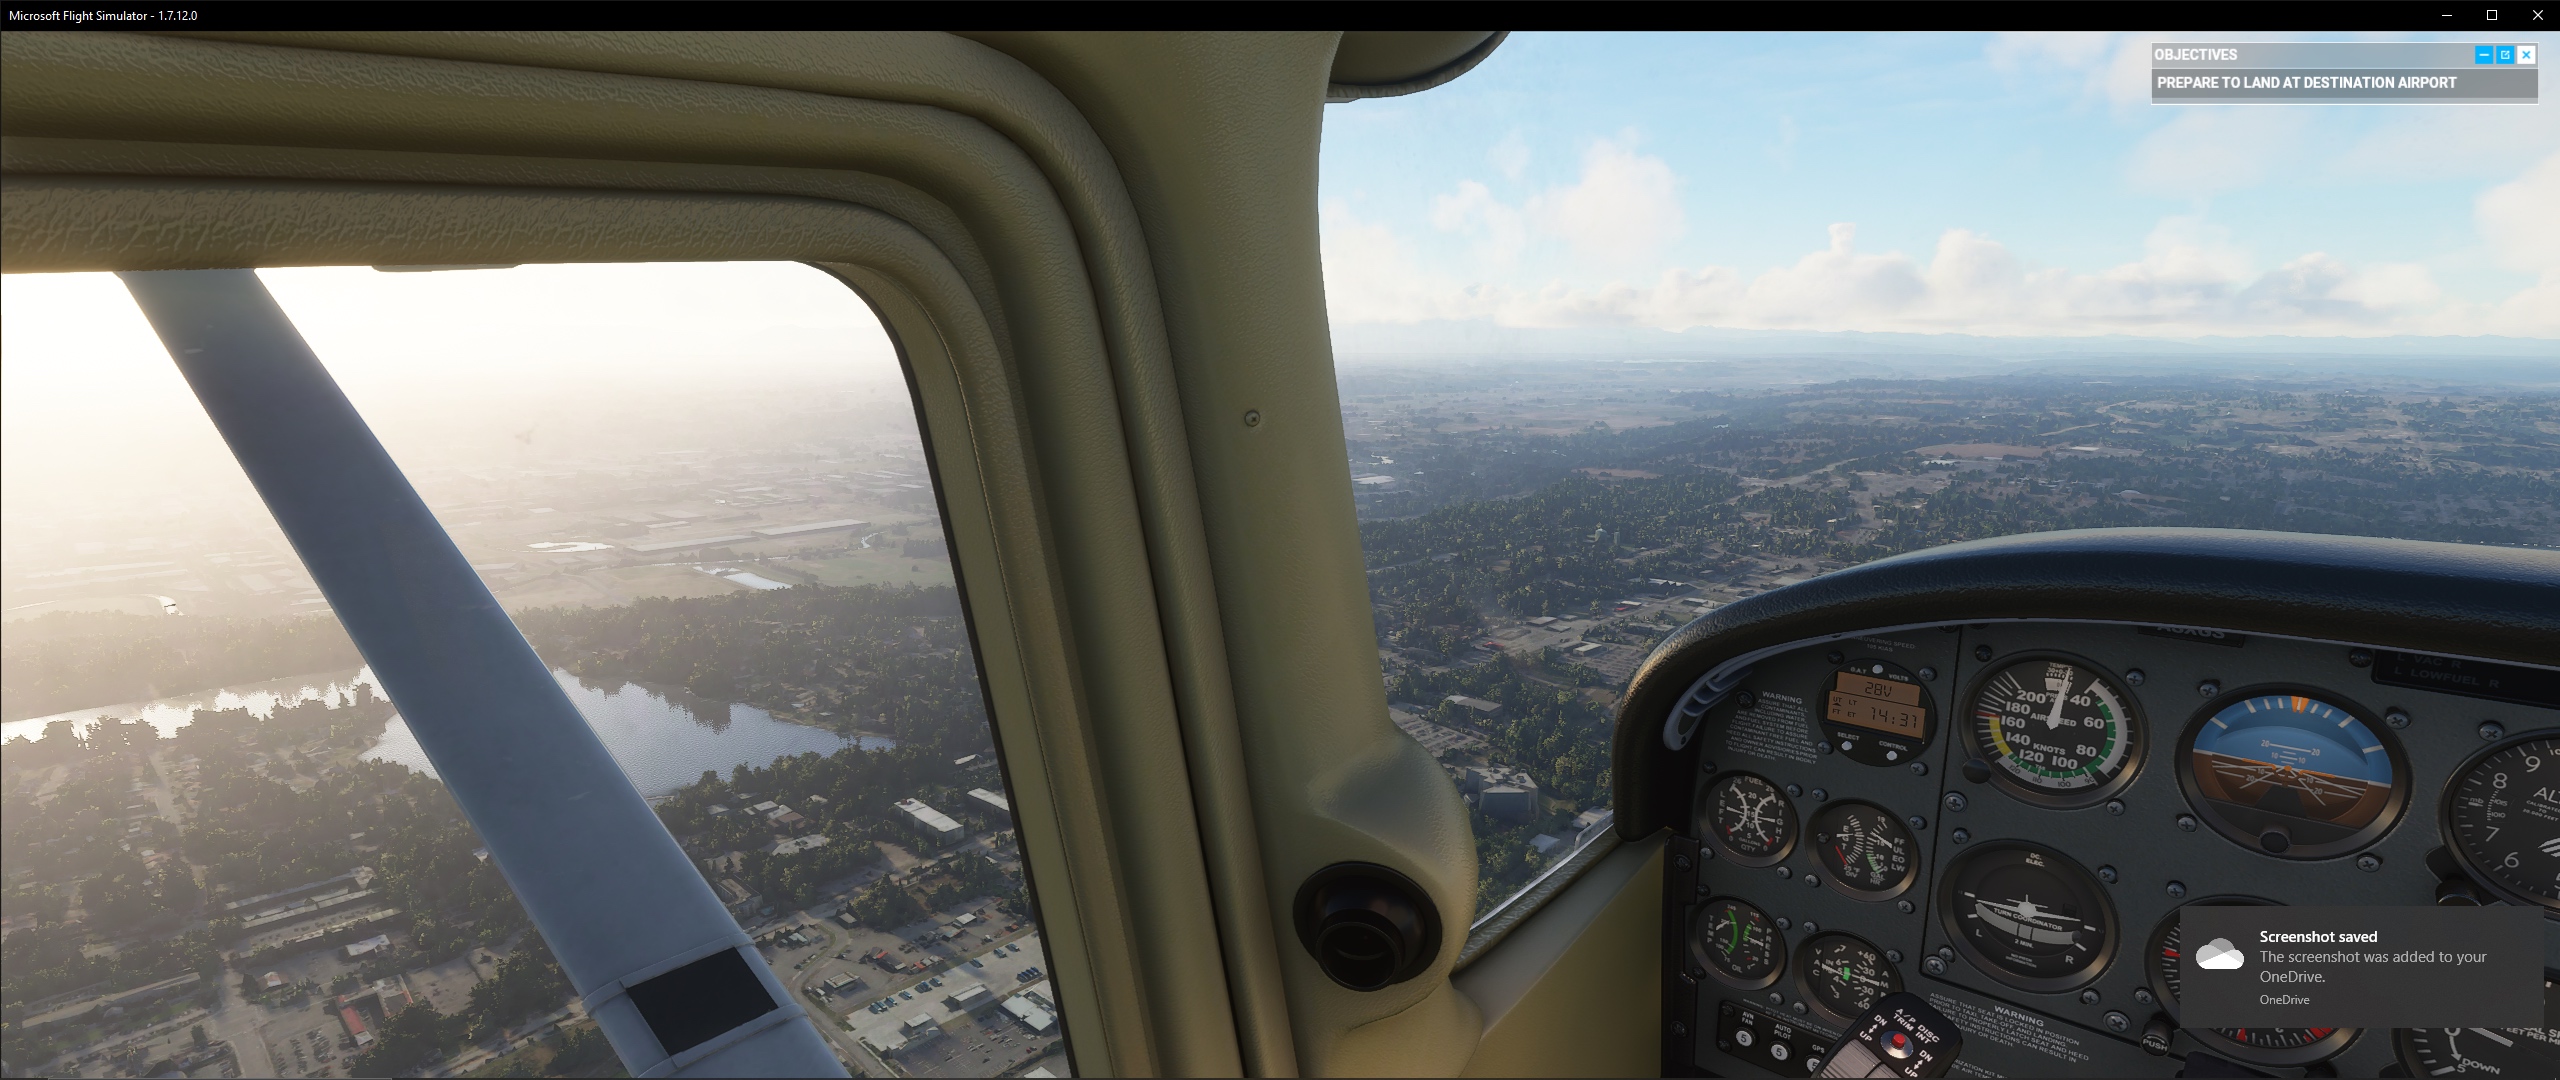
For a lot people, the cockpit views during navigation could be a challenge without head TrackIR / VR. Flight simulator has a robust camera system (if configured correctly).

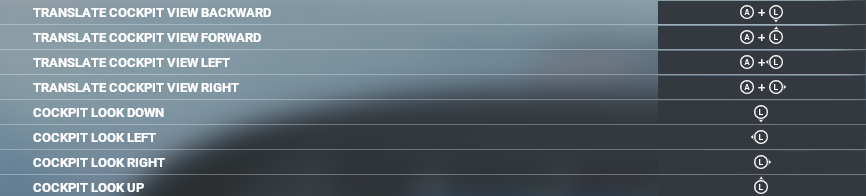
Of course you can configure your POV/hat switch to look around inside the cockpit. In fact, my configuration is to use custom camera first then to use the hat switch to fine tune my view. I’m also sometimes using Translate key to move within the cockpit.

  • This is because I found it irritating and not natural to move from extreme left to extreme right back position with just the hat switch.
  • for details on how to configure hat switch please refer to my response to a question below in the chain of this post.

As an alpha tester, I had several tries and I posted my setting which was liked by many. I’m reposting it here in the public forum since the alpha forum cannot be accessed by newcomers.

In the following, I’m sharing my configuration of custom cameras which made my experience much easier and enjoyable.

The idea is to use one hand on the numpad of the keyboard or on the throttle buttons (as in TWCS throttle) to control the views. Here are the details

num pad

(A) Configure the first camera by positioning, for example, your view to be 45 degrees front view (you may use the free camera using the mouse to make the configuration precise including the desired zoom), then use the shortcut Ctrl+Alt+7 to save it on custom camera #7

Important Note: use “LEFT” Ctrl and “LEFT” ALT. Also make sure to click the numbers above the letters NOT the ones in the numpad. (we will assign the load shortcuts later below)

(B) Do the same for every angle. My configuration is as follows

  1. Custom Camera 4 → left

  2. Custom Camera 6 → right

  3. Custom Camera 7 → 45 degrees to the front left view

  4. Custom Camera 9 → 45 degrees to the front right view

  5. Custom Camera 1 → 120 degrees to the back left view

  6. Custom Camera 3 → 120 degrees to the back right view

Note: there are already dedicated shortcuts for 45 and 120 degrees cockpit quickview in camera views menu, you may use them if you like but I find custom camera better as I can use my free camera while using the custom view (i.e., I can adjust custom camera when flying). Also 45 degrees are bit lower than what I want.

  1. Custom Camera 2 → look back

  2. Custom Camera 5 → look front with a little to the bottom to show the trim wheel (personally, I prefer to see the wheel while adjusting the trim to set it visually to certain a position).

  3. Custom Camera 8 → copilot view/ a bit closer (zoomed) to MFD/GPS screen

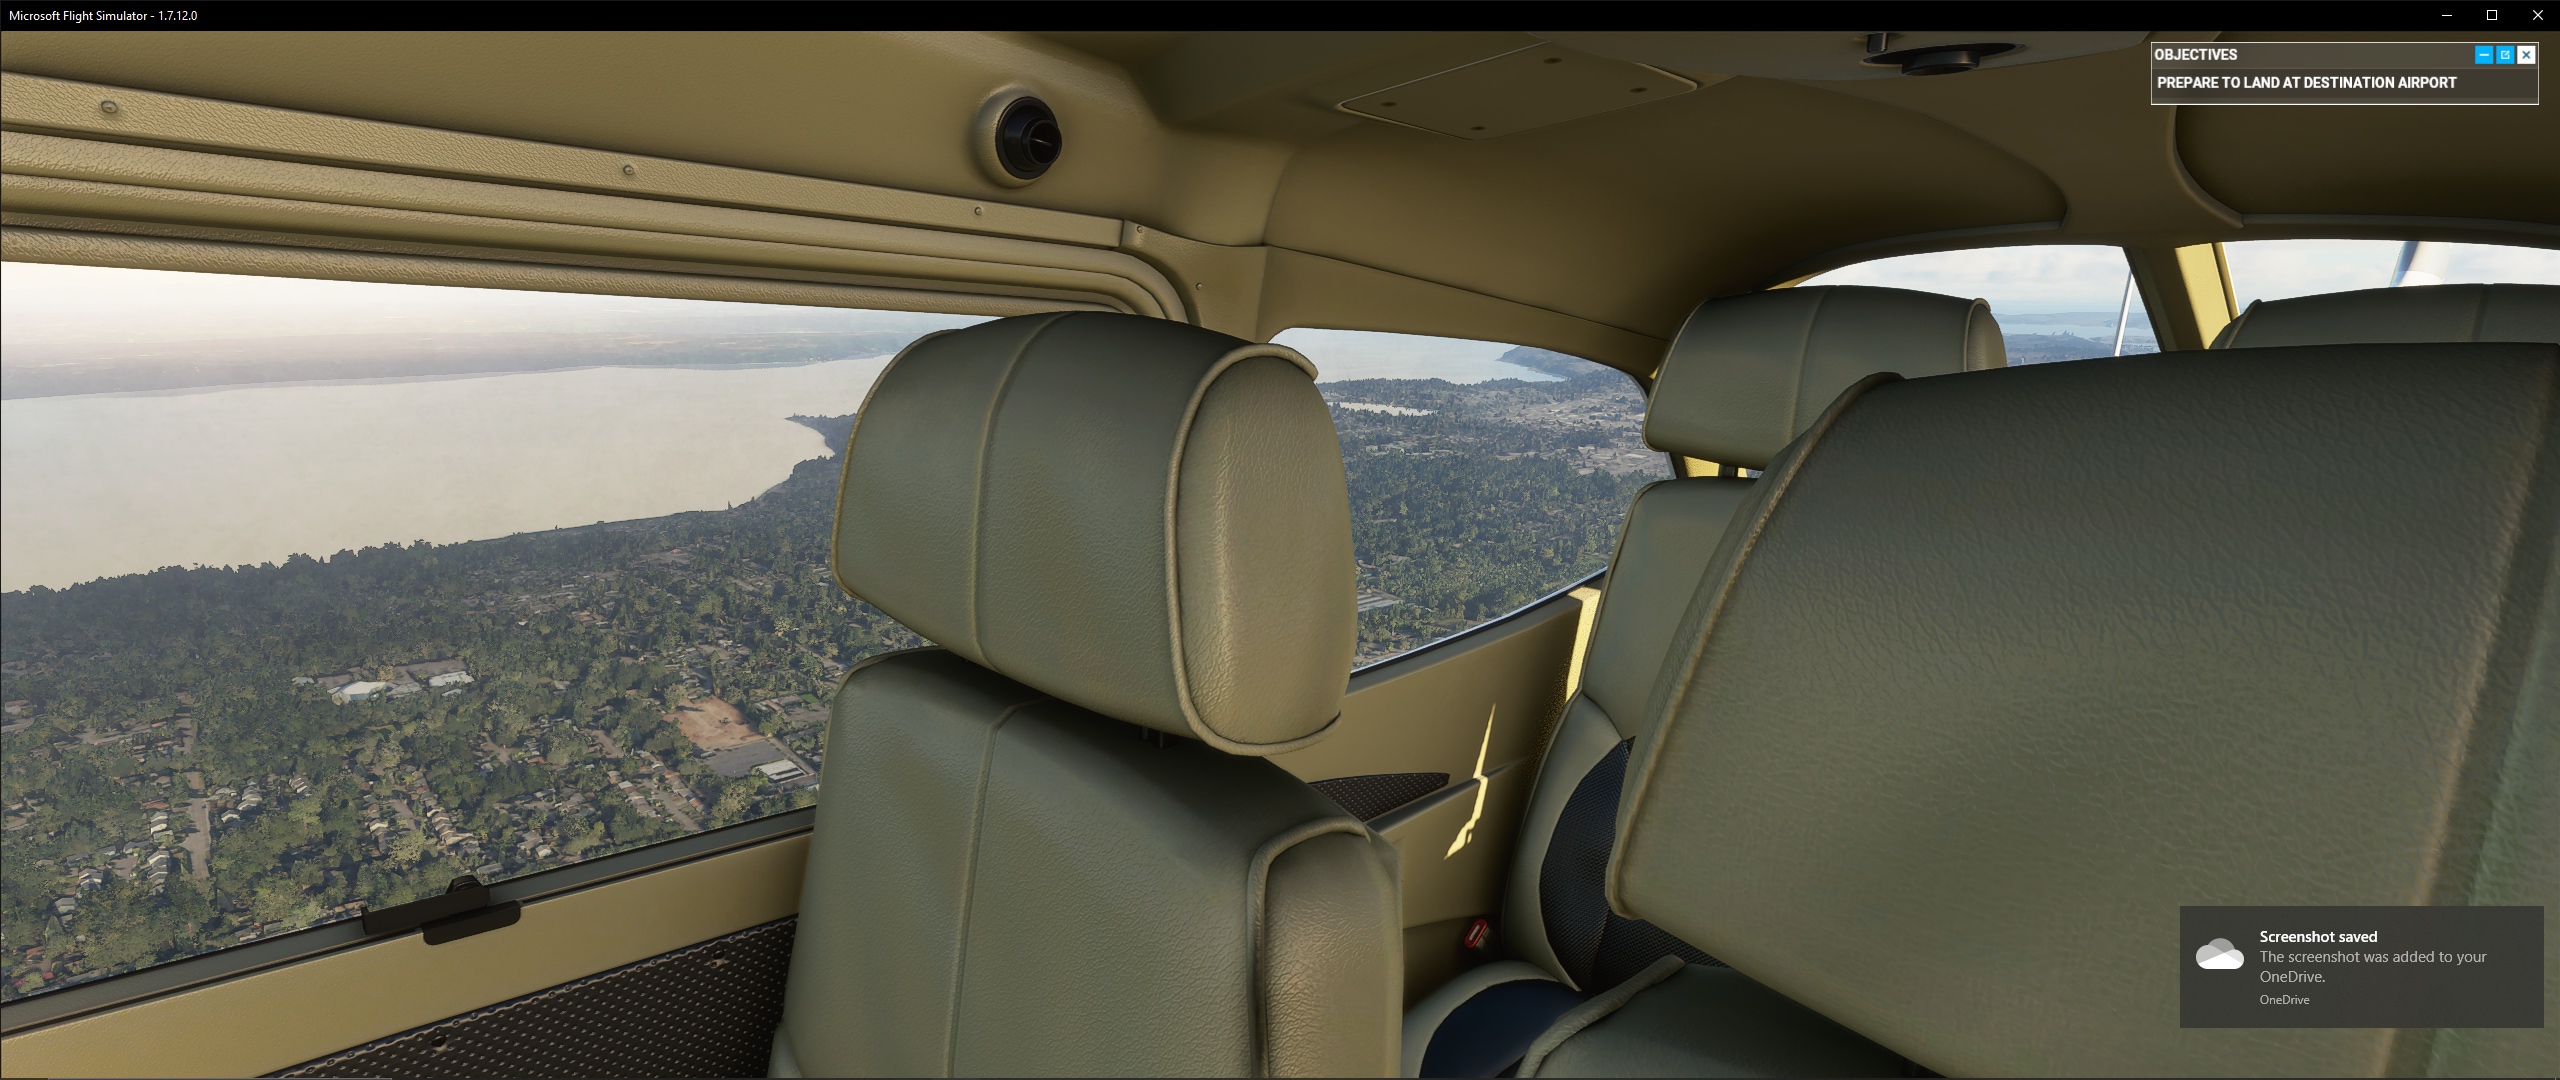
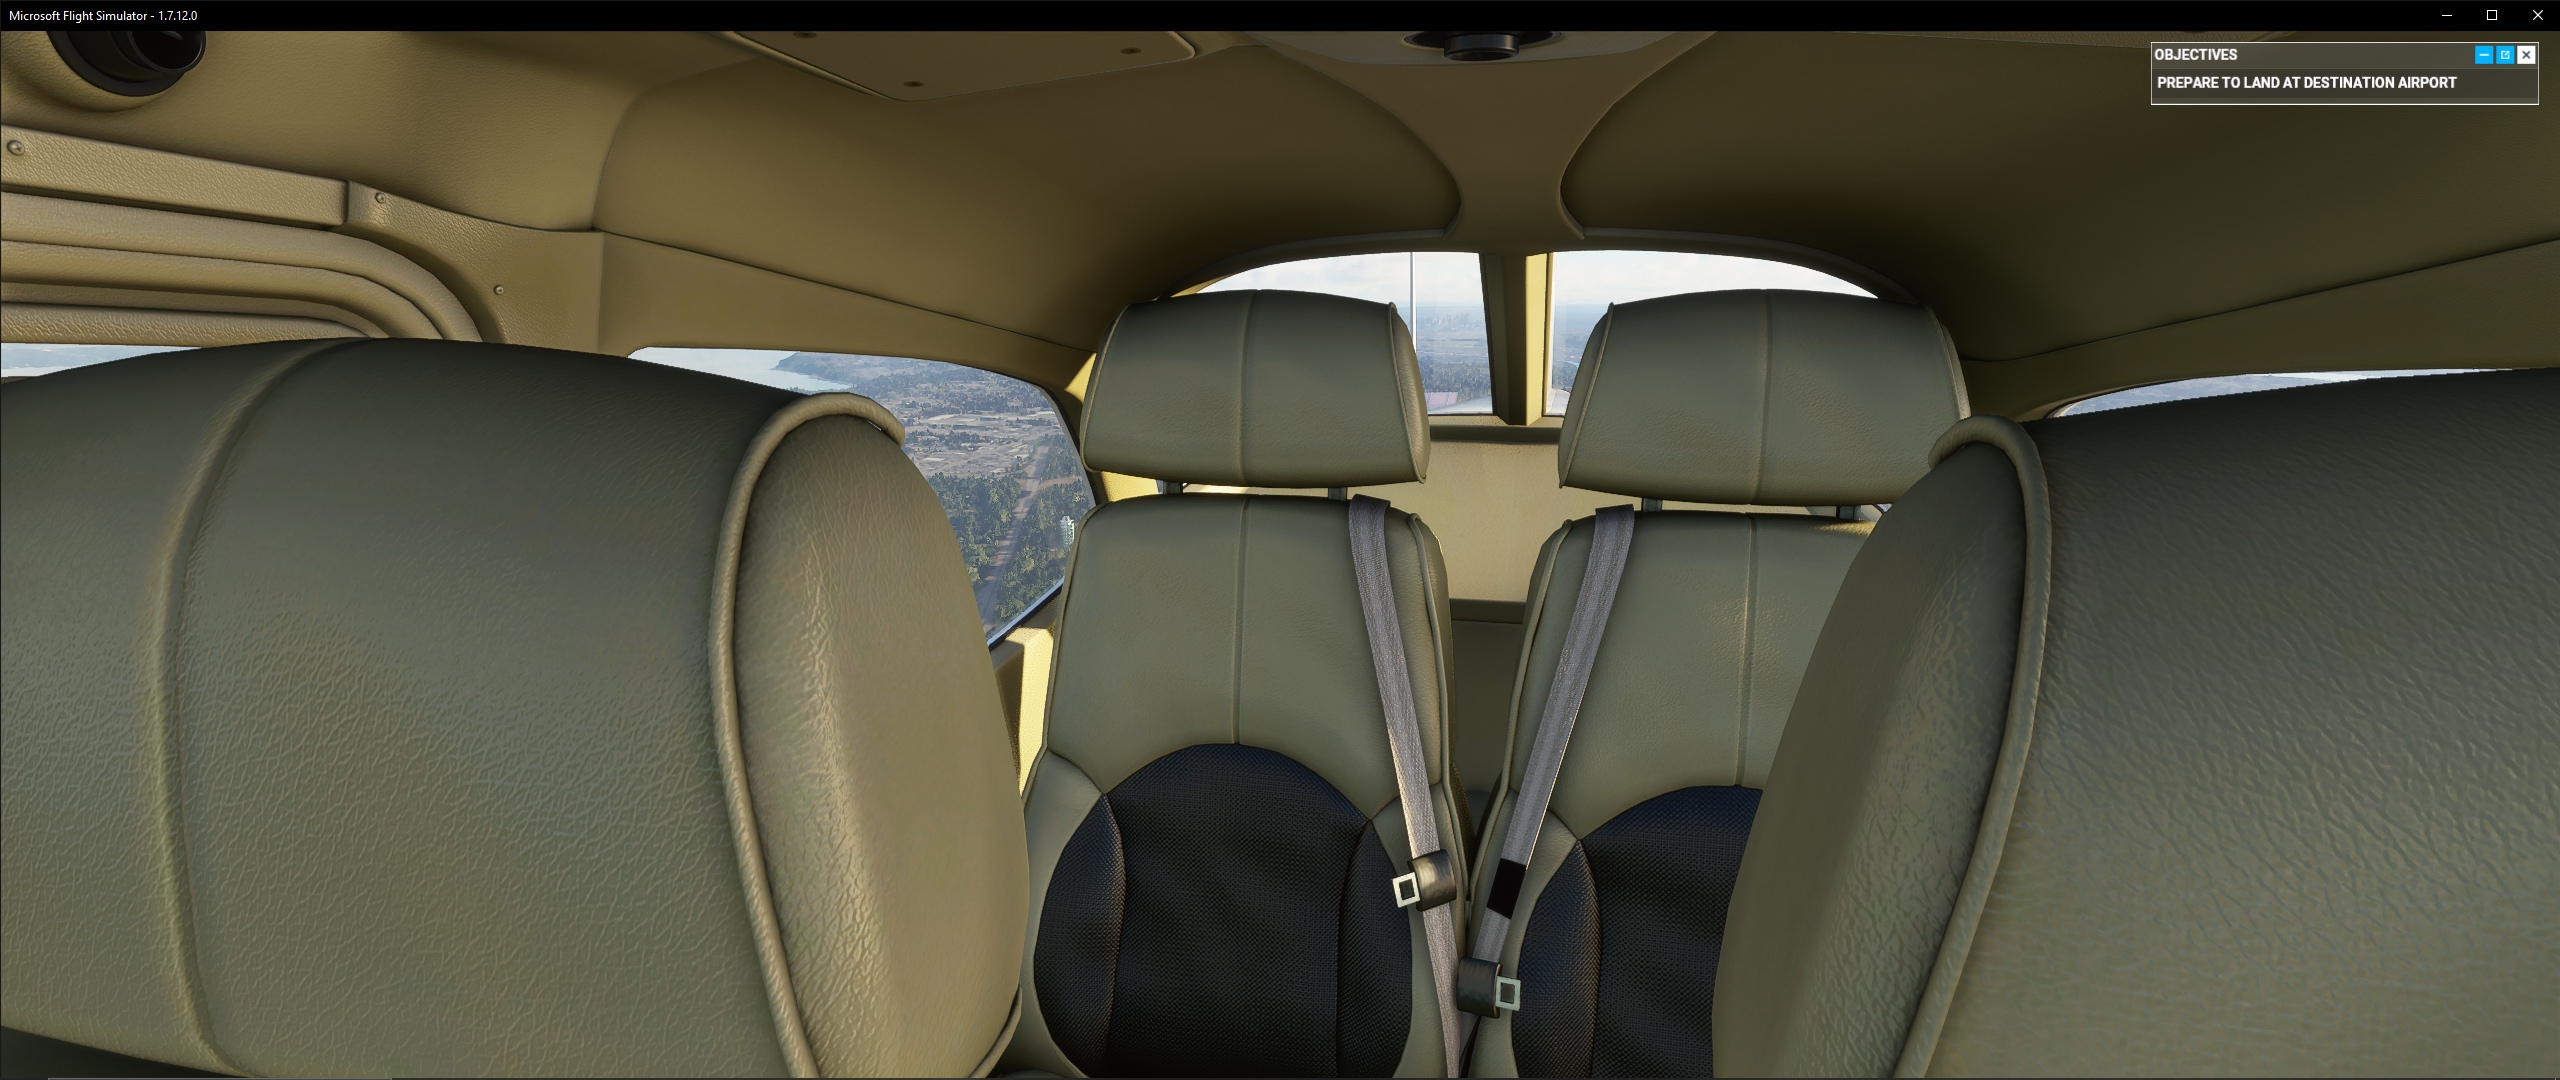
  4. Custom Camera 0 → back passenger view

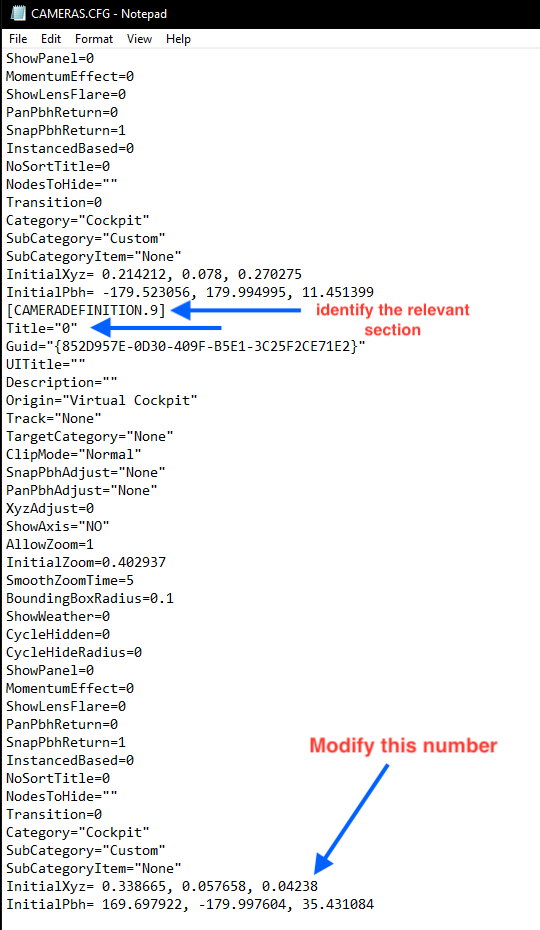
Note: some planes allow for moving to the backseat as in Cub while others like Cessna, it’s not possible. So, I’m keeping this for passenger view when possible (hopefully Microsoft will fix the movement inside the airplanes as I cannot do custom view for drone camera). Anyway, Thanks to AcktuNasrabi, there is a work around to make custom view for the passenger window camera “passing the invisible walls” by editing CAMERAS.CFG file of the airplane.
. . .

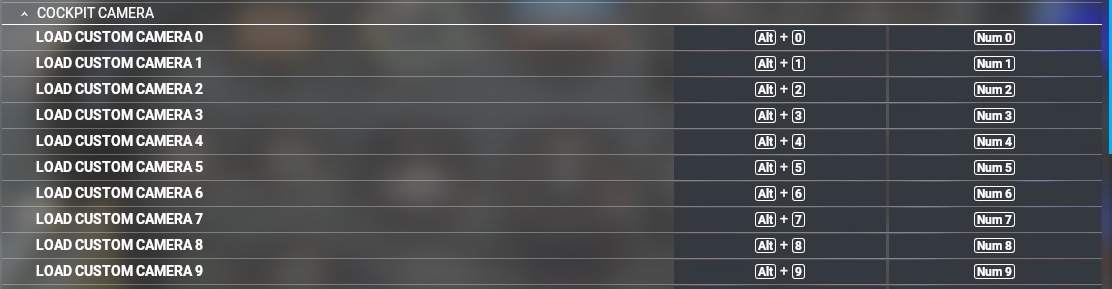
(C) Now, it’s the time to bind the custom cameras with the desired buttons.

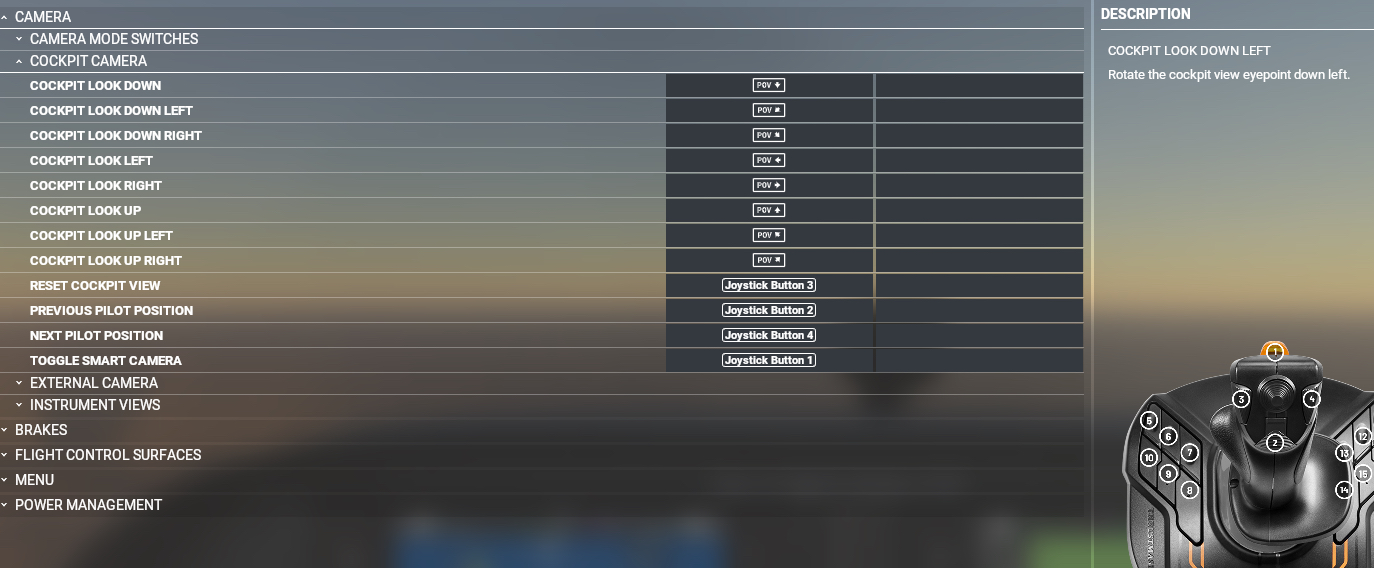
  • Open the controls menu and add shortcuts of the numpad for all created custom camera views as shown in the screenshot below. (I used num pad)

  • VERY IMPORTANT: Make sure to remove the old assignment of the numpad buttons. You need to search by input and remove the buttons you have just assigned from another functions.

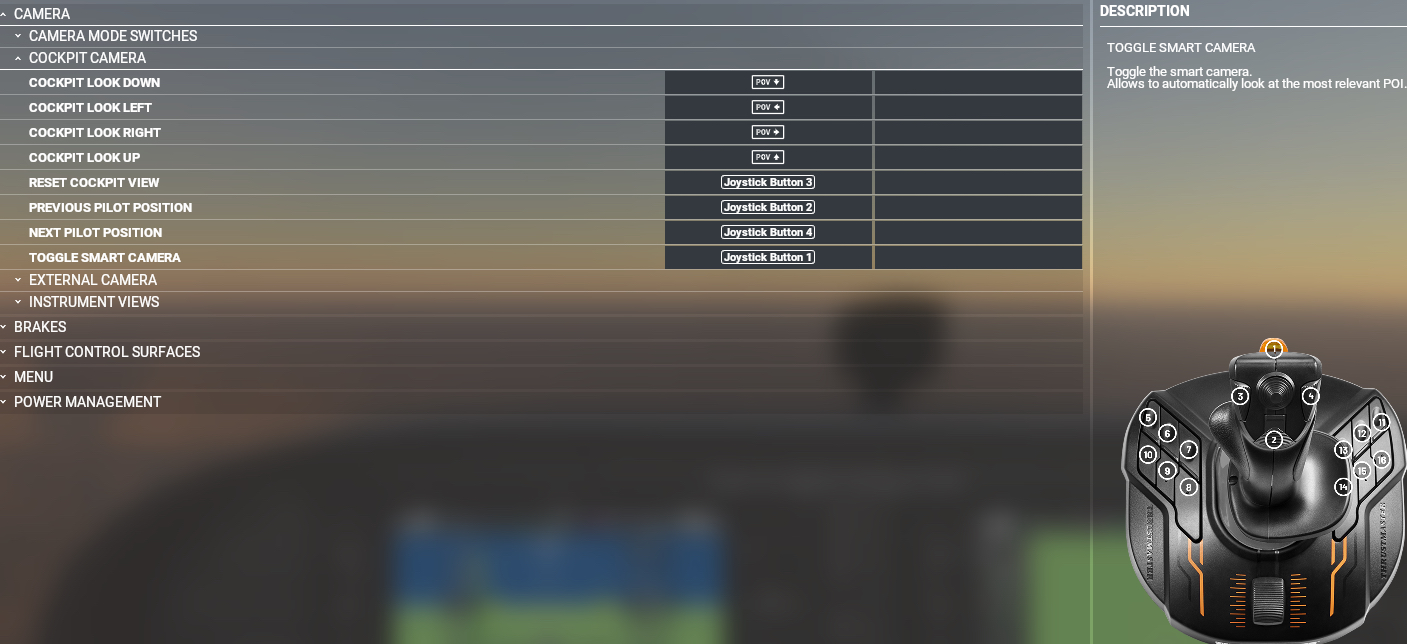
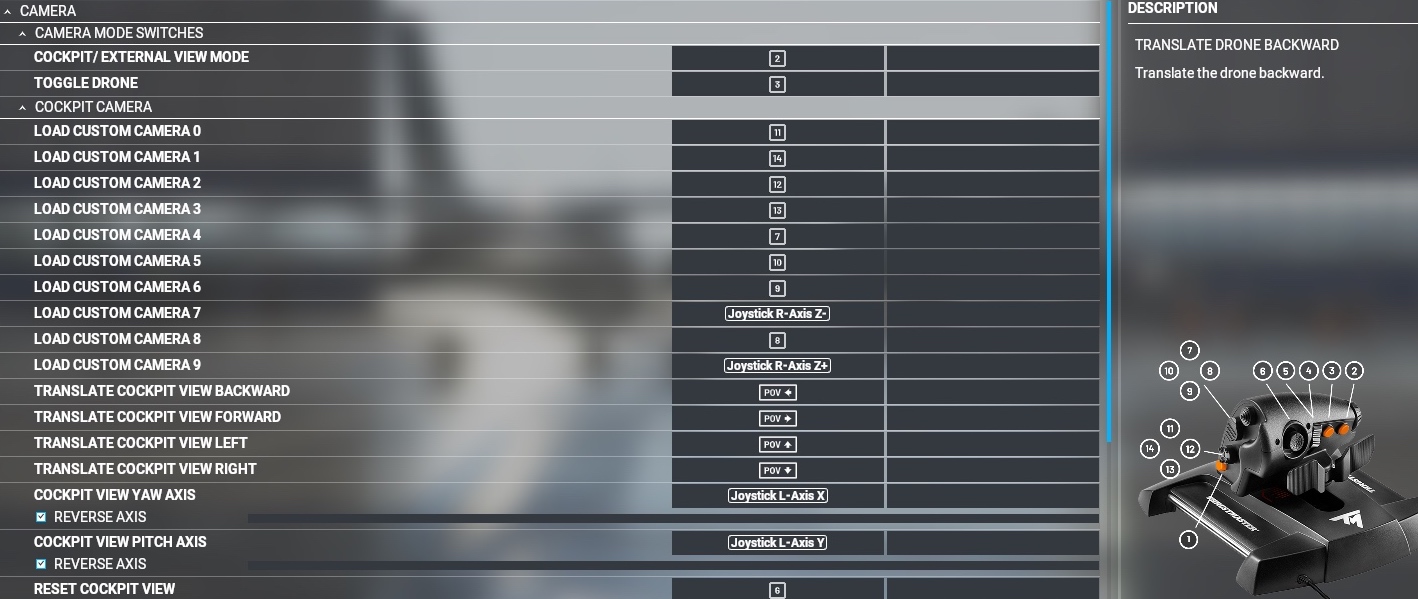
  • Alternatively, for people who have TWCS throttle, here is my suggested configuration. AND YES, you can assign an axis to a custom camera view very nice indeed. :grinning:

General notes:

  • When flying, you can press the shortcut of a specific custom camera once to activate it, then press it again to return to front view or press another shortcut of another custom camera. Personally, I use the button under my thump to reset view to front view (button #3 on T16000M joystick). it’s also useful to toggle between quick views and free camera when in external view

  • When configuring the view, it’s recommended to use the mouse (free camera) to show the view/zoom you want then press the shortcut of saving custom camera (Ctrl+Alt+ number)

  • The assignment of custom cameras must be re-done for each airplane which makes sense since the cockpits are different. Anyway, after doing it for the first time, it will be very easy. Just Ctrl+ALT+number …nothing more… the assignment of shortcuts is already done and it’s universal. So, you just need to configure the view not the shortcut

  • You can assign whatever button you like to load the custom view but make sure not to use ones that conflict with the keys of the external cameras (for example, left POV for left quick view). The shortcut of custom view override buttons inside the cockpit and external cameras. However, there’s no conflict with drone or fixed cameras

  • Personally, I prefer a little higher position, so I changed the height to 60% under the General/camera option then I configured the custom views. I also changed the zoom to 45 %.

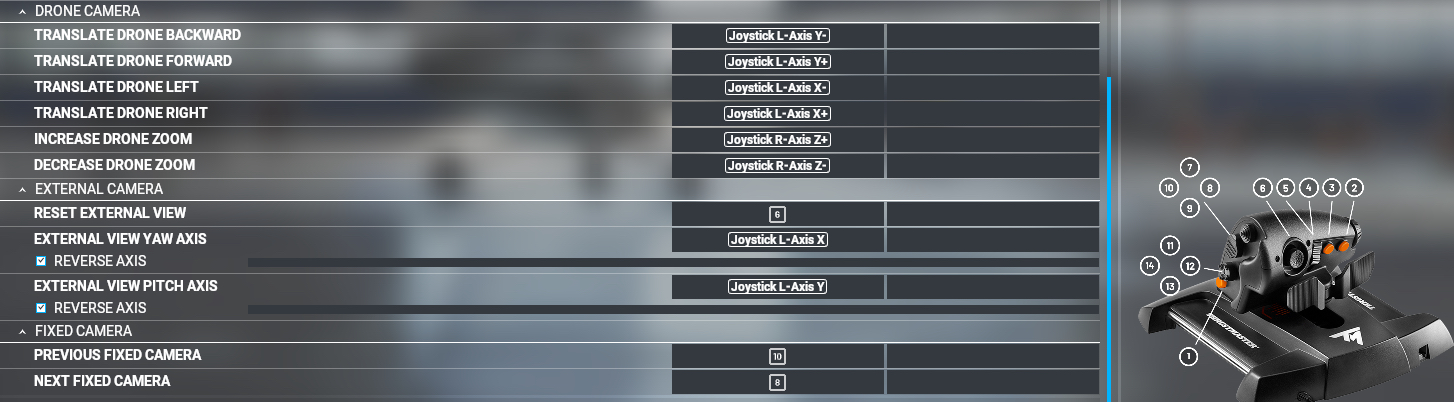
As per the drone Camera, it’s amazing. Probably best controlled by the Xbox controller. Just put the airplane on autopilot and use the drone to look around. Personally, I configure my Thrustmaster Joystick and throttle for that. Here are my settings (including fixed camera which are cool too):
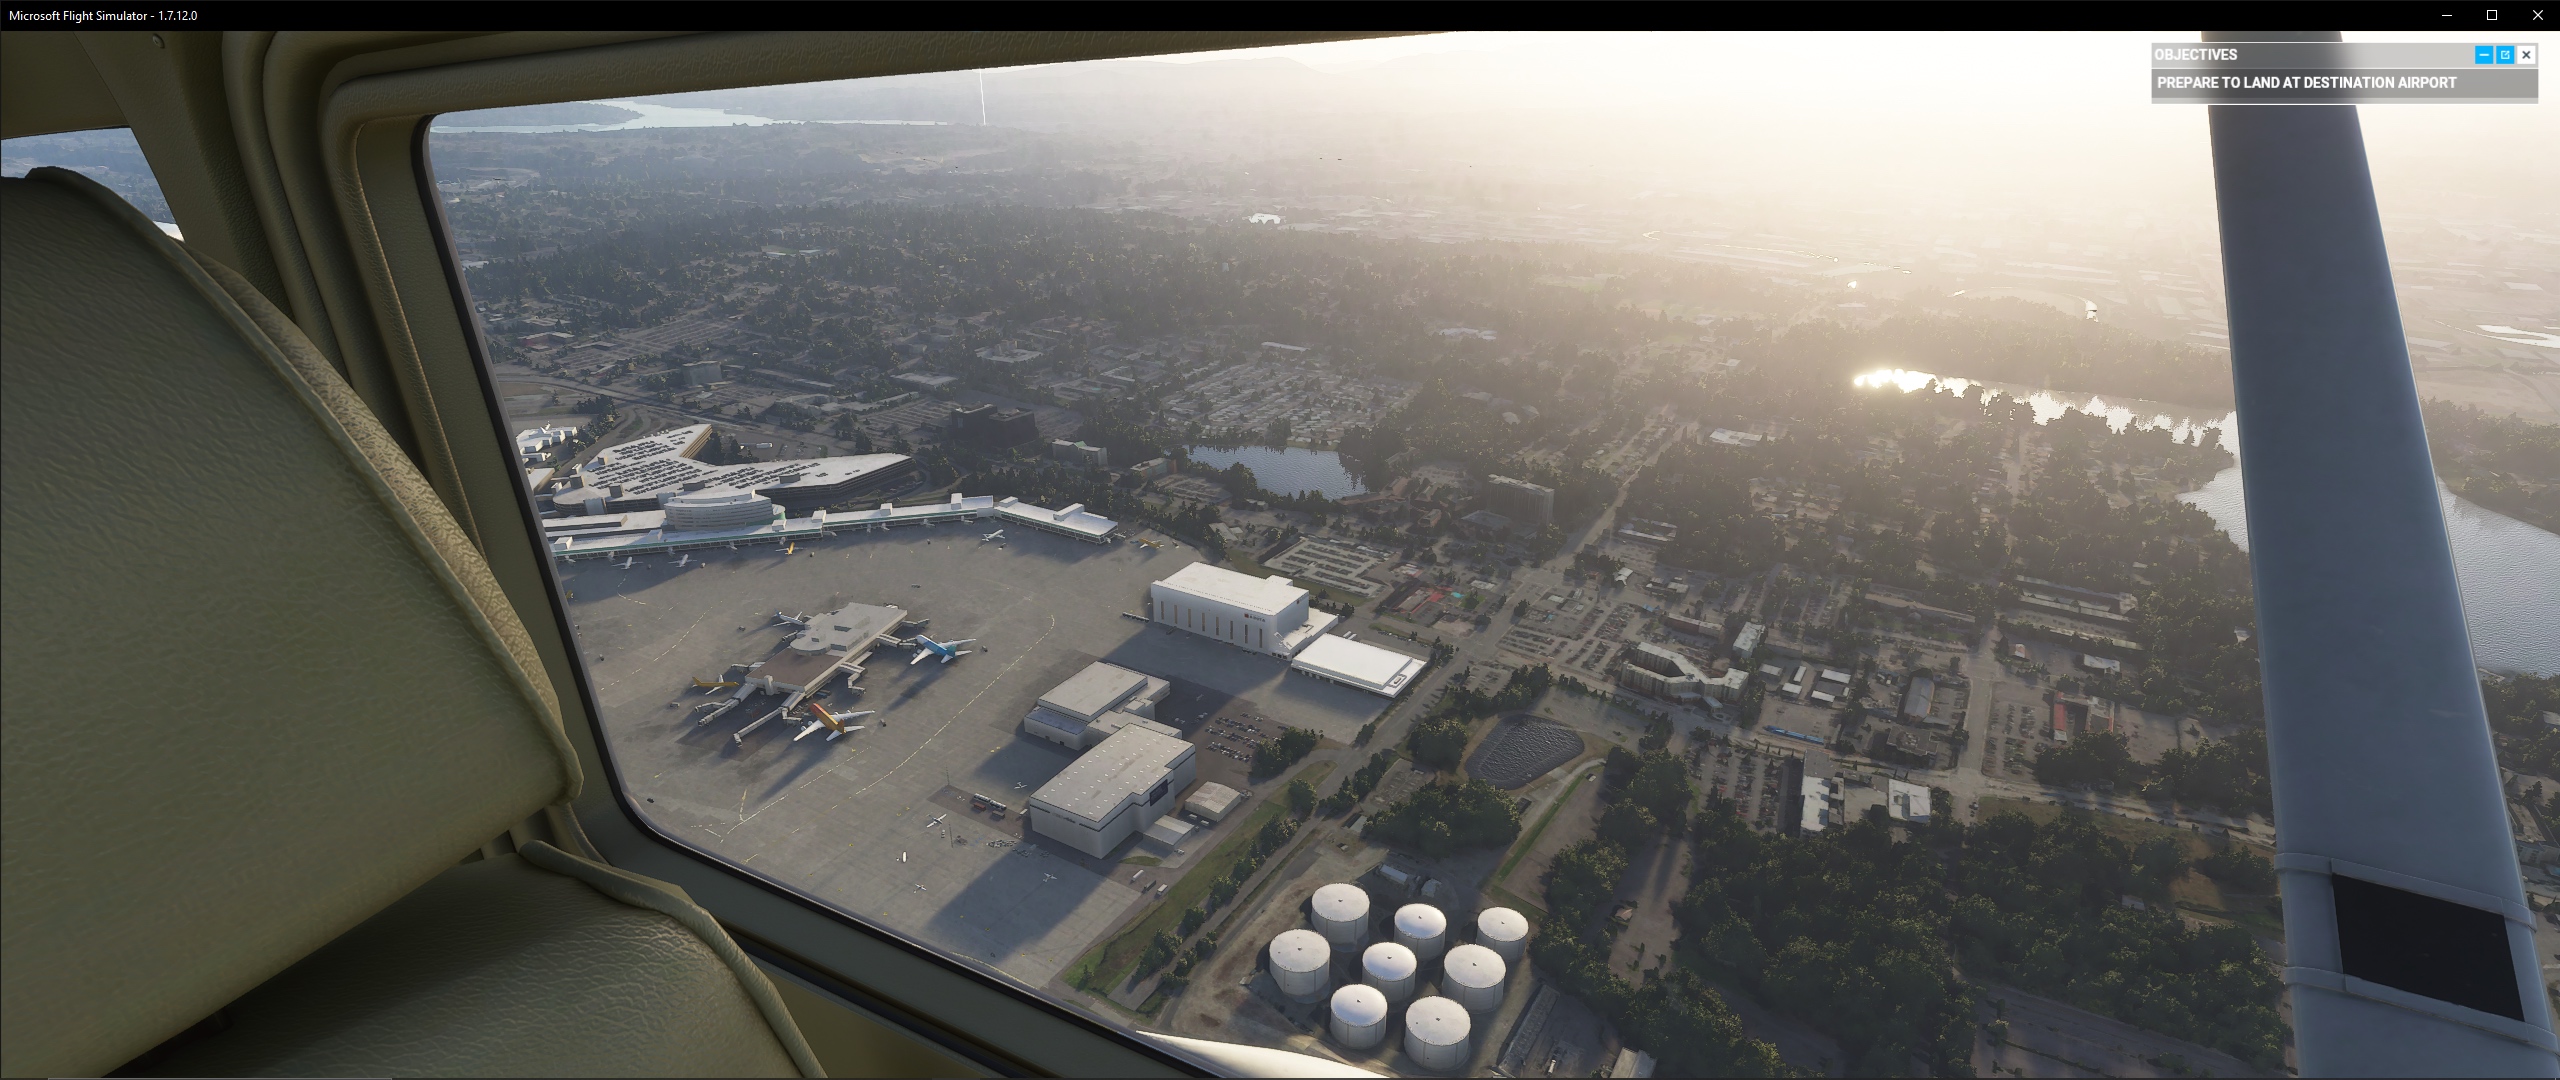
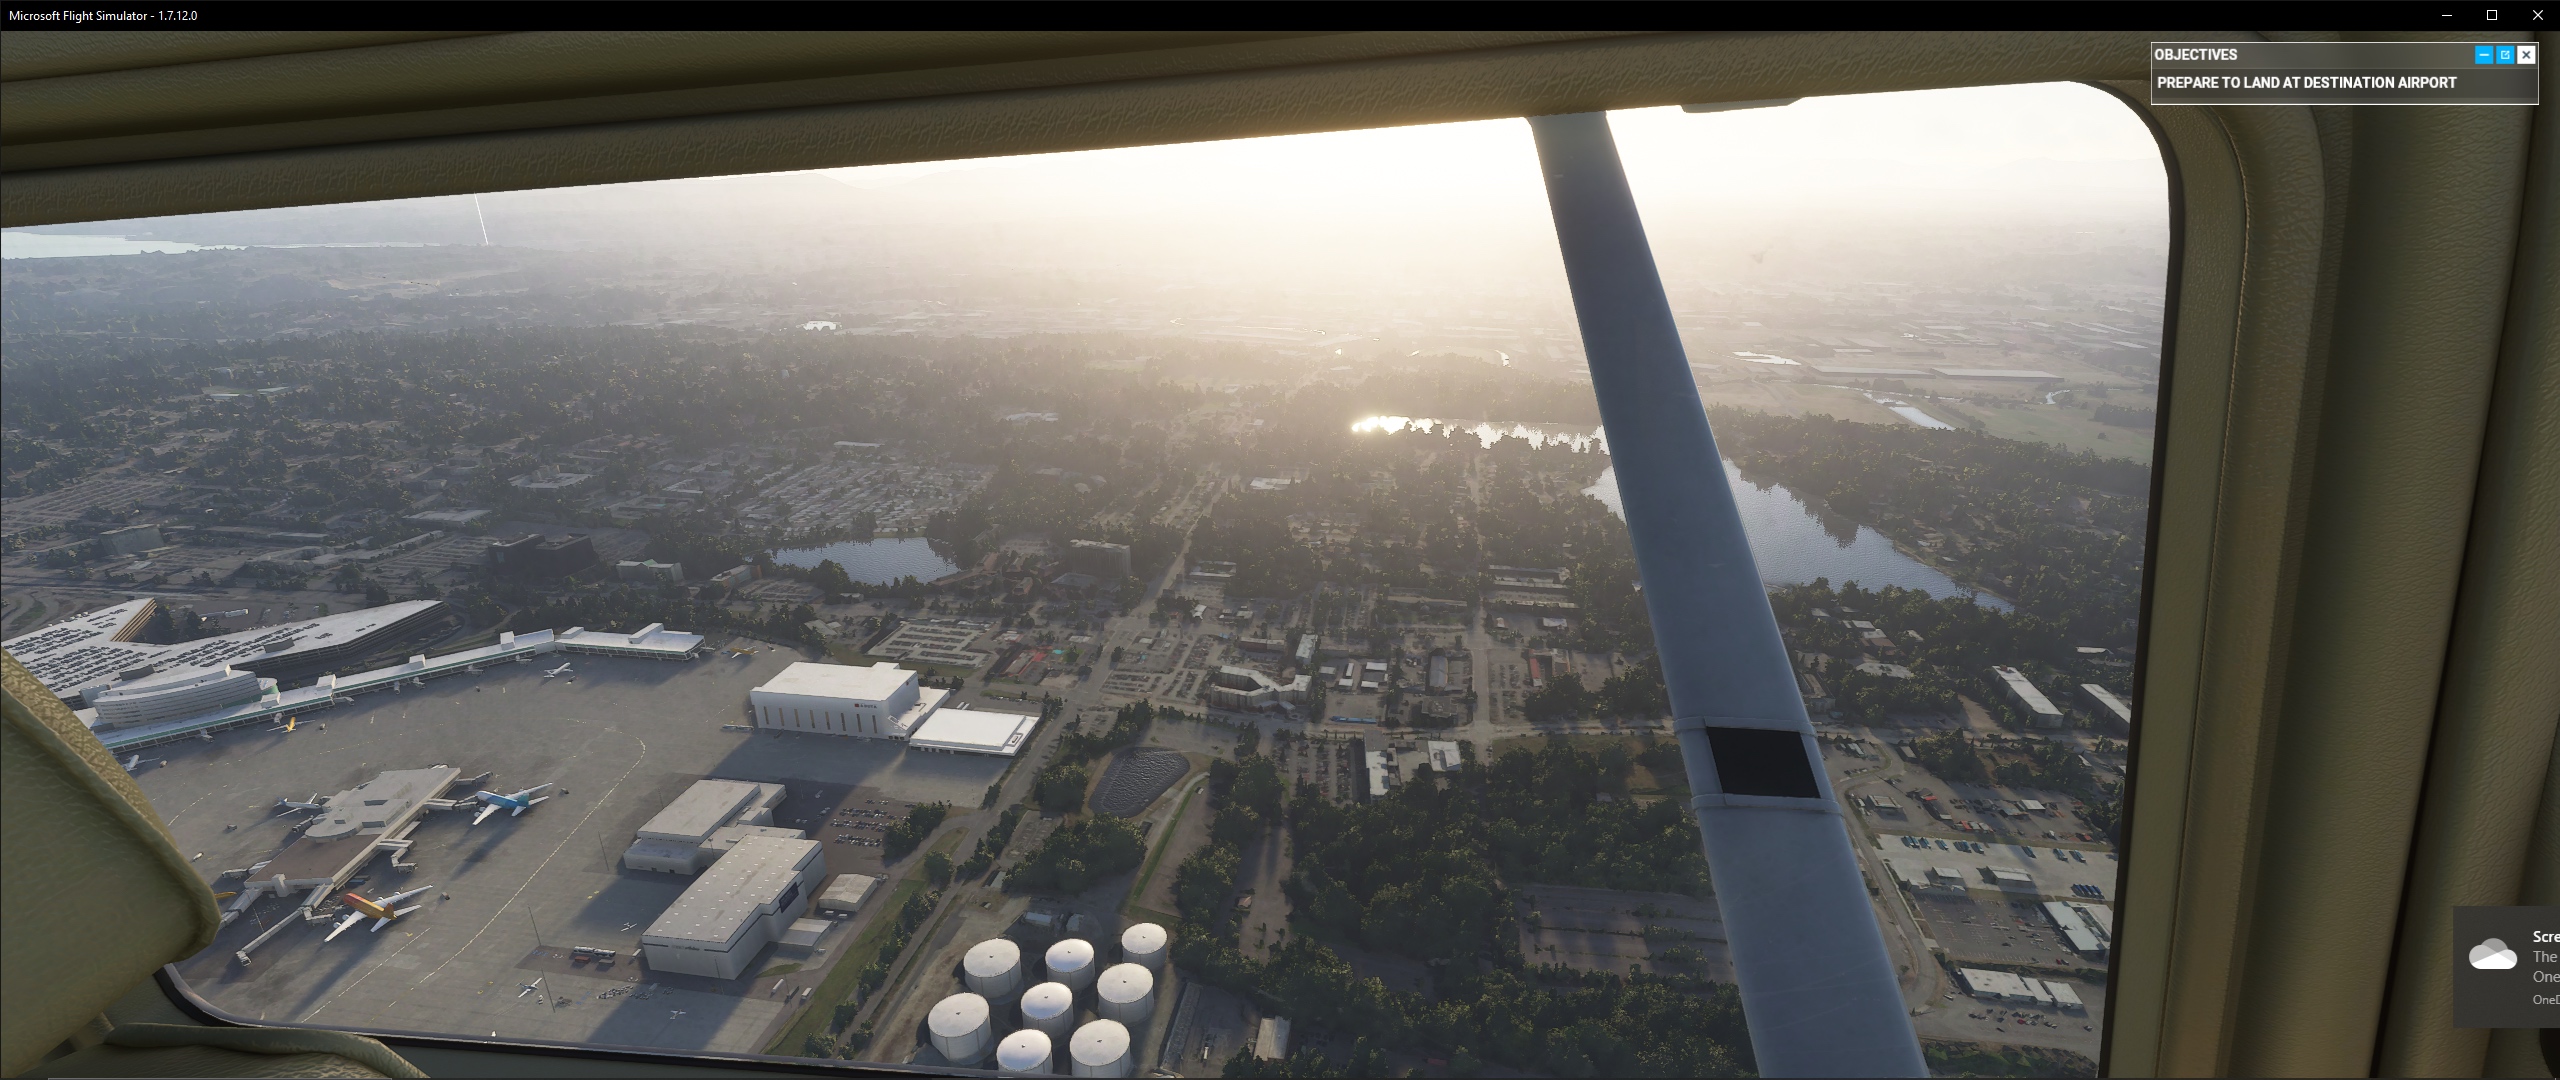
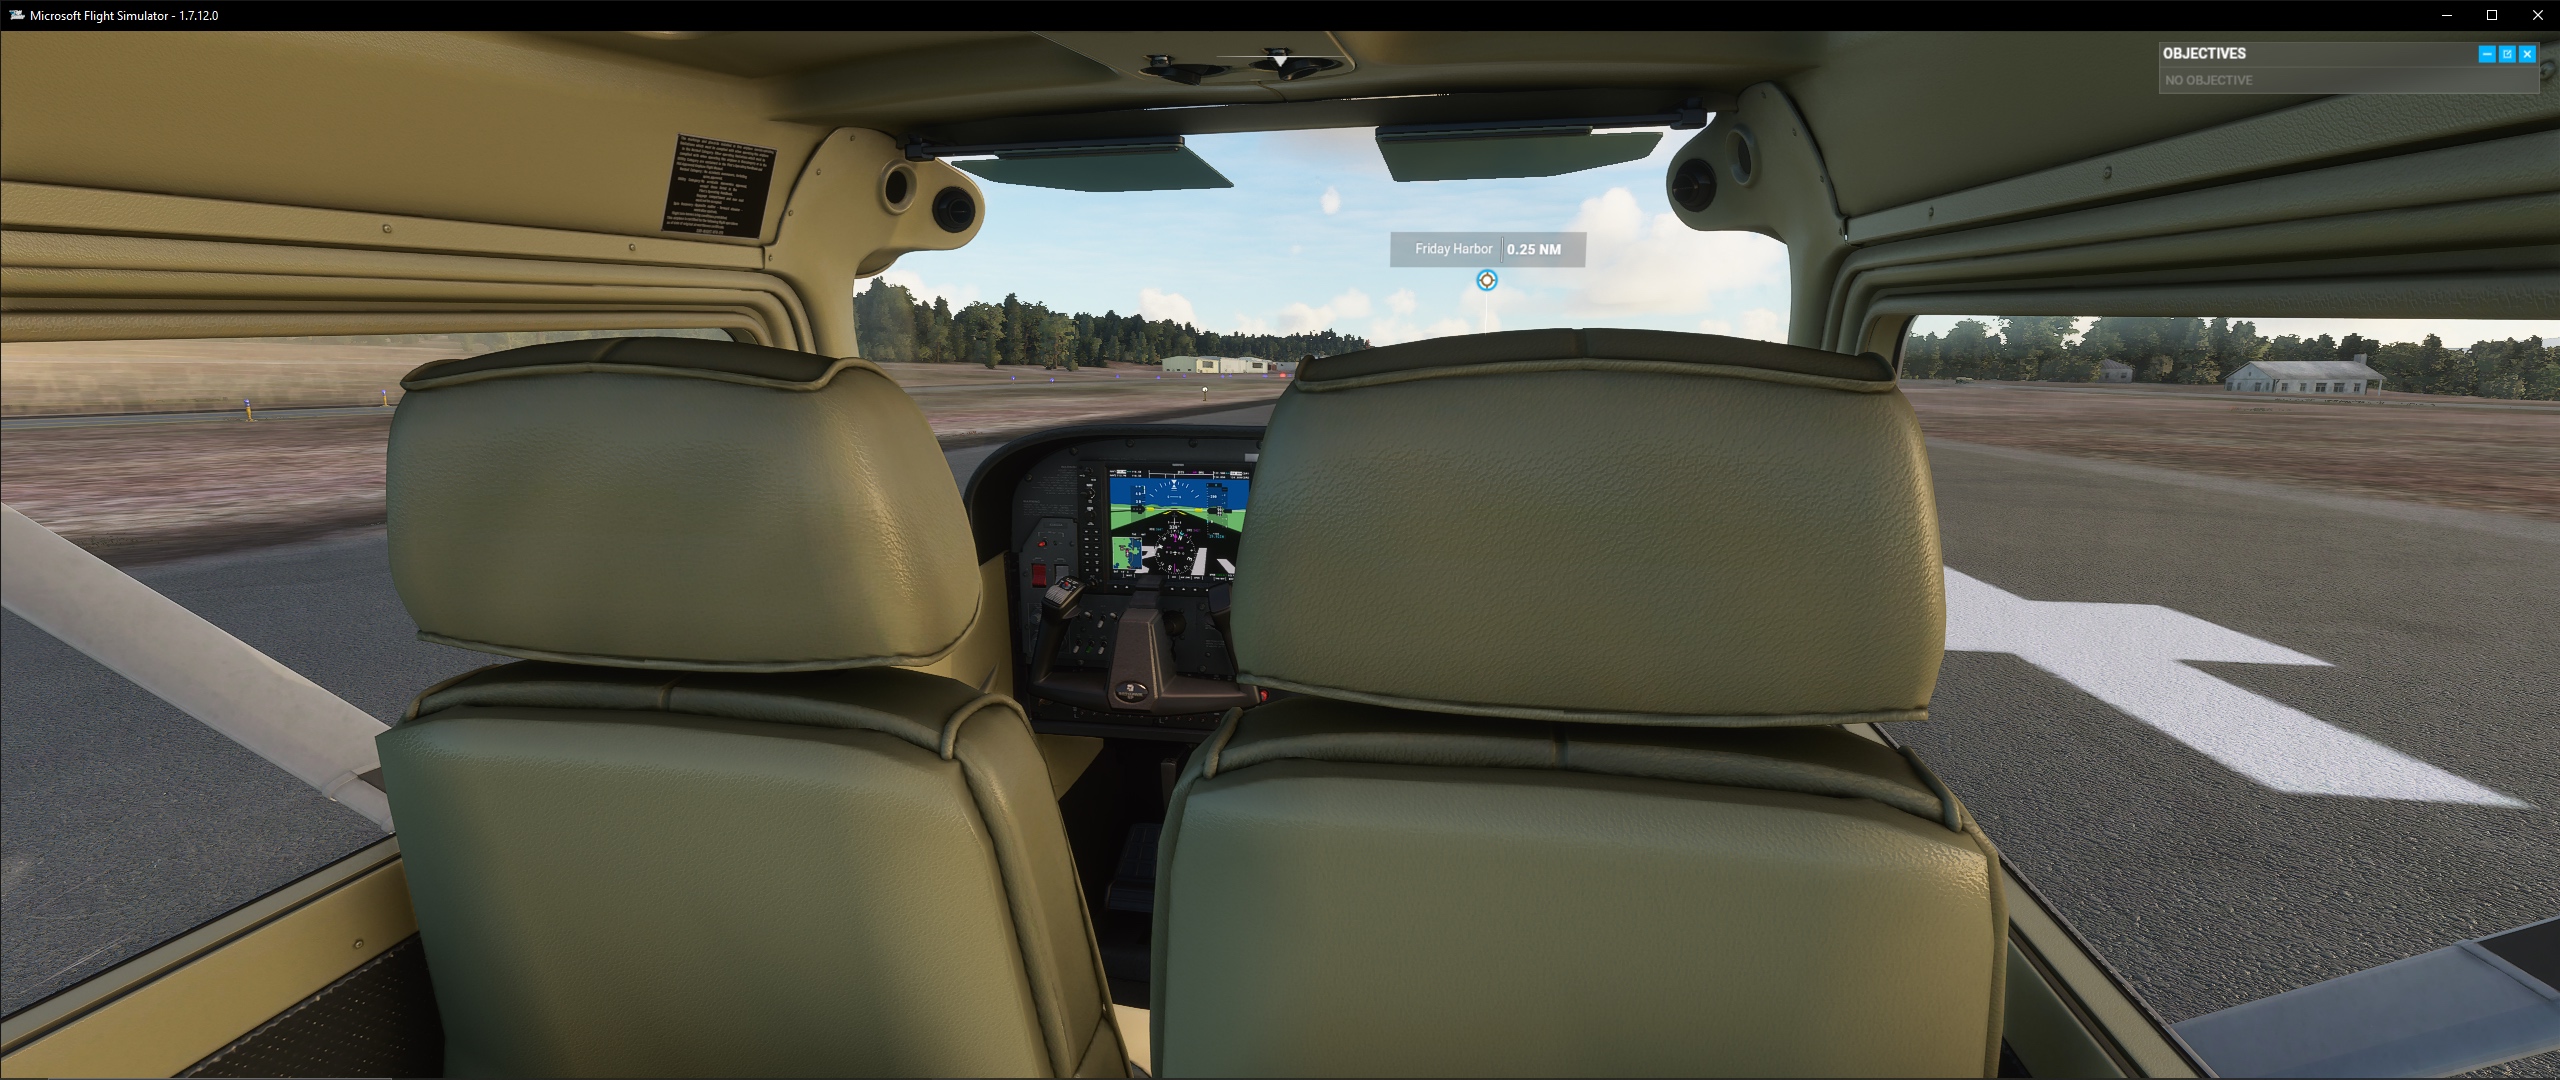
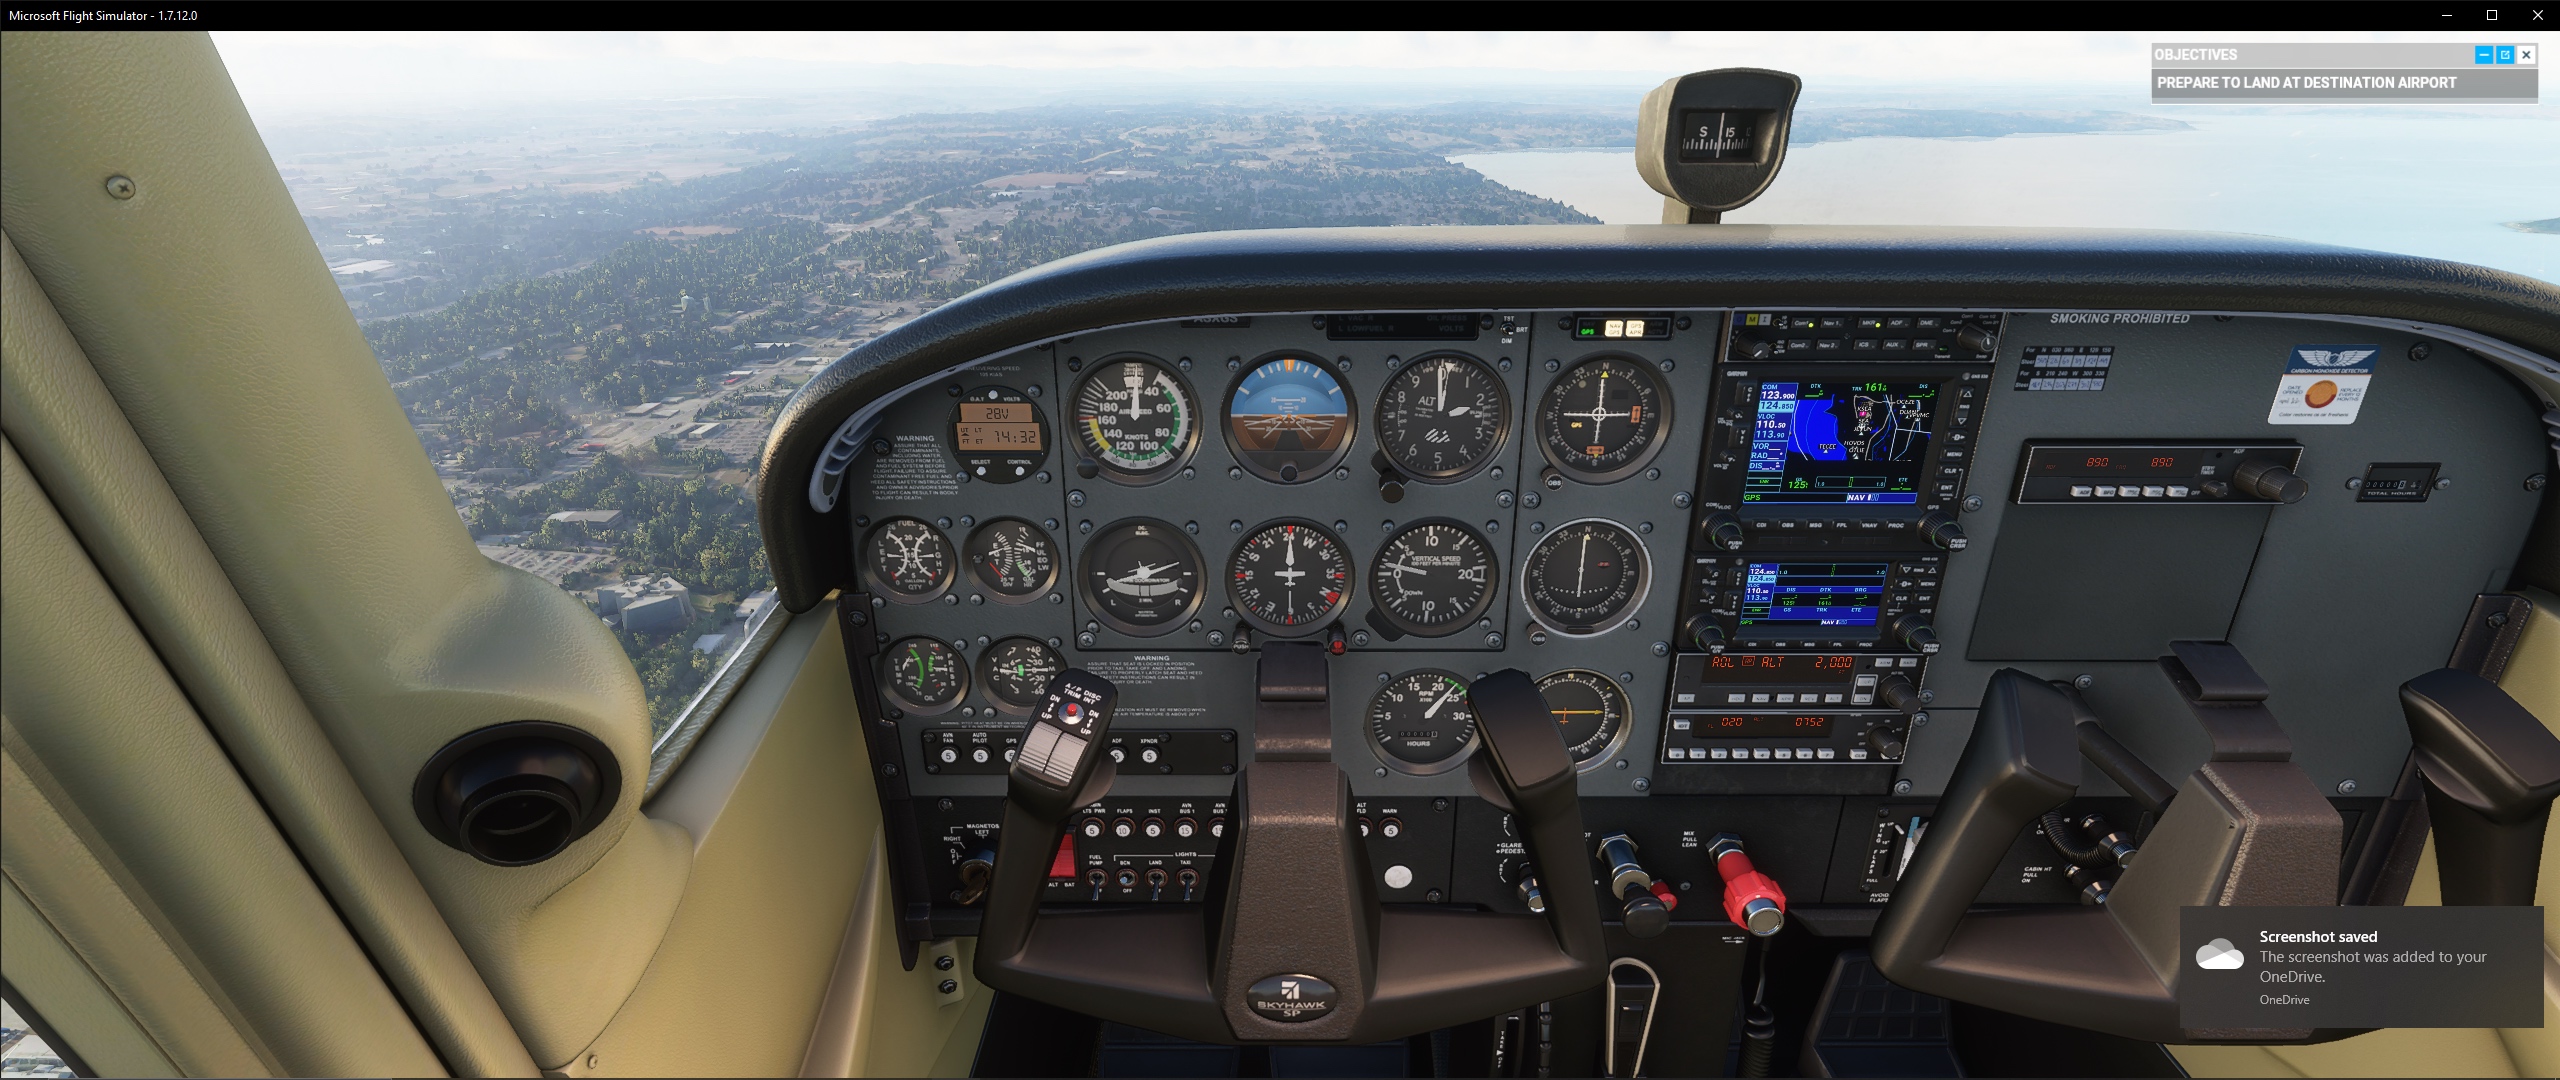
Here are screenshots of my cameras :smiley: Enjoy

a little down to see the trim wheel

copilot /GPS

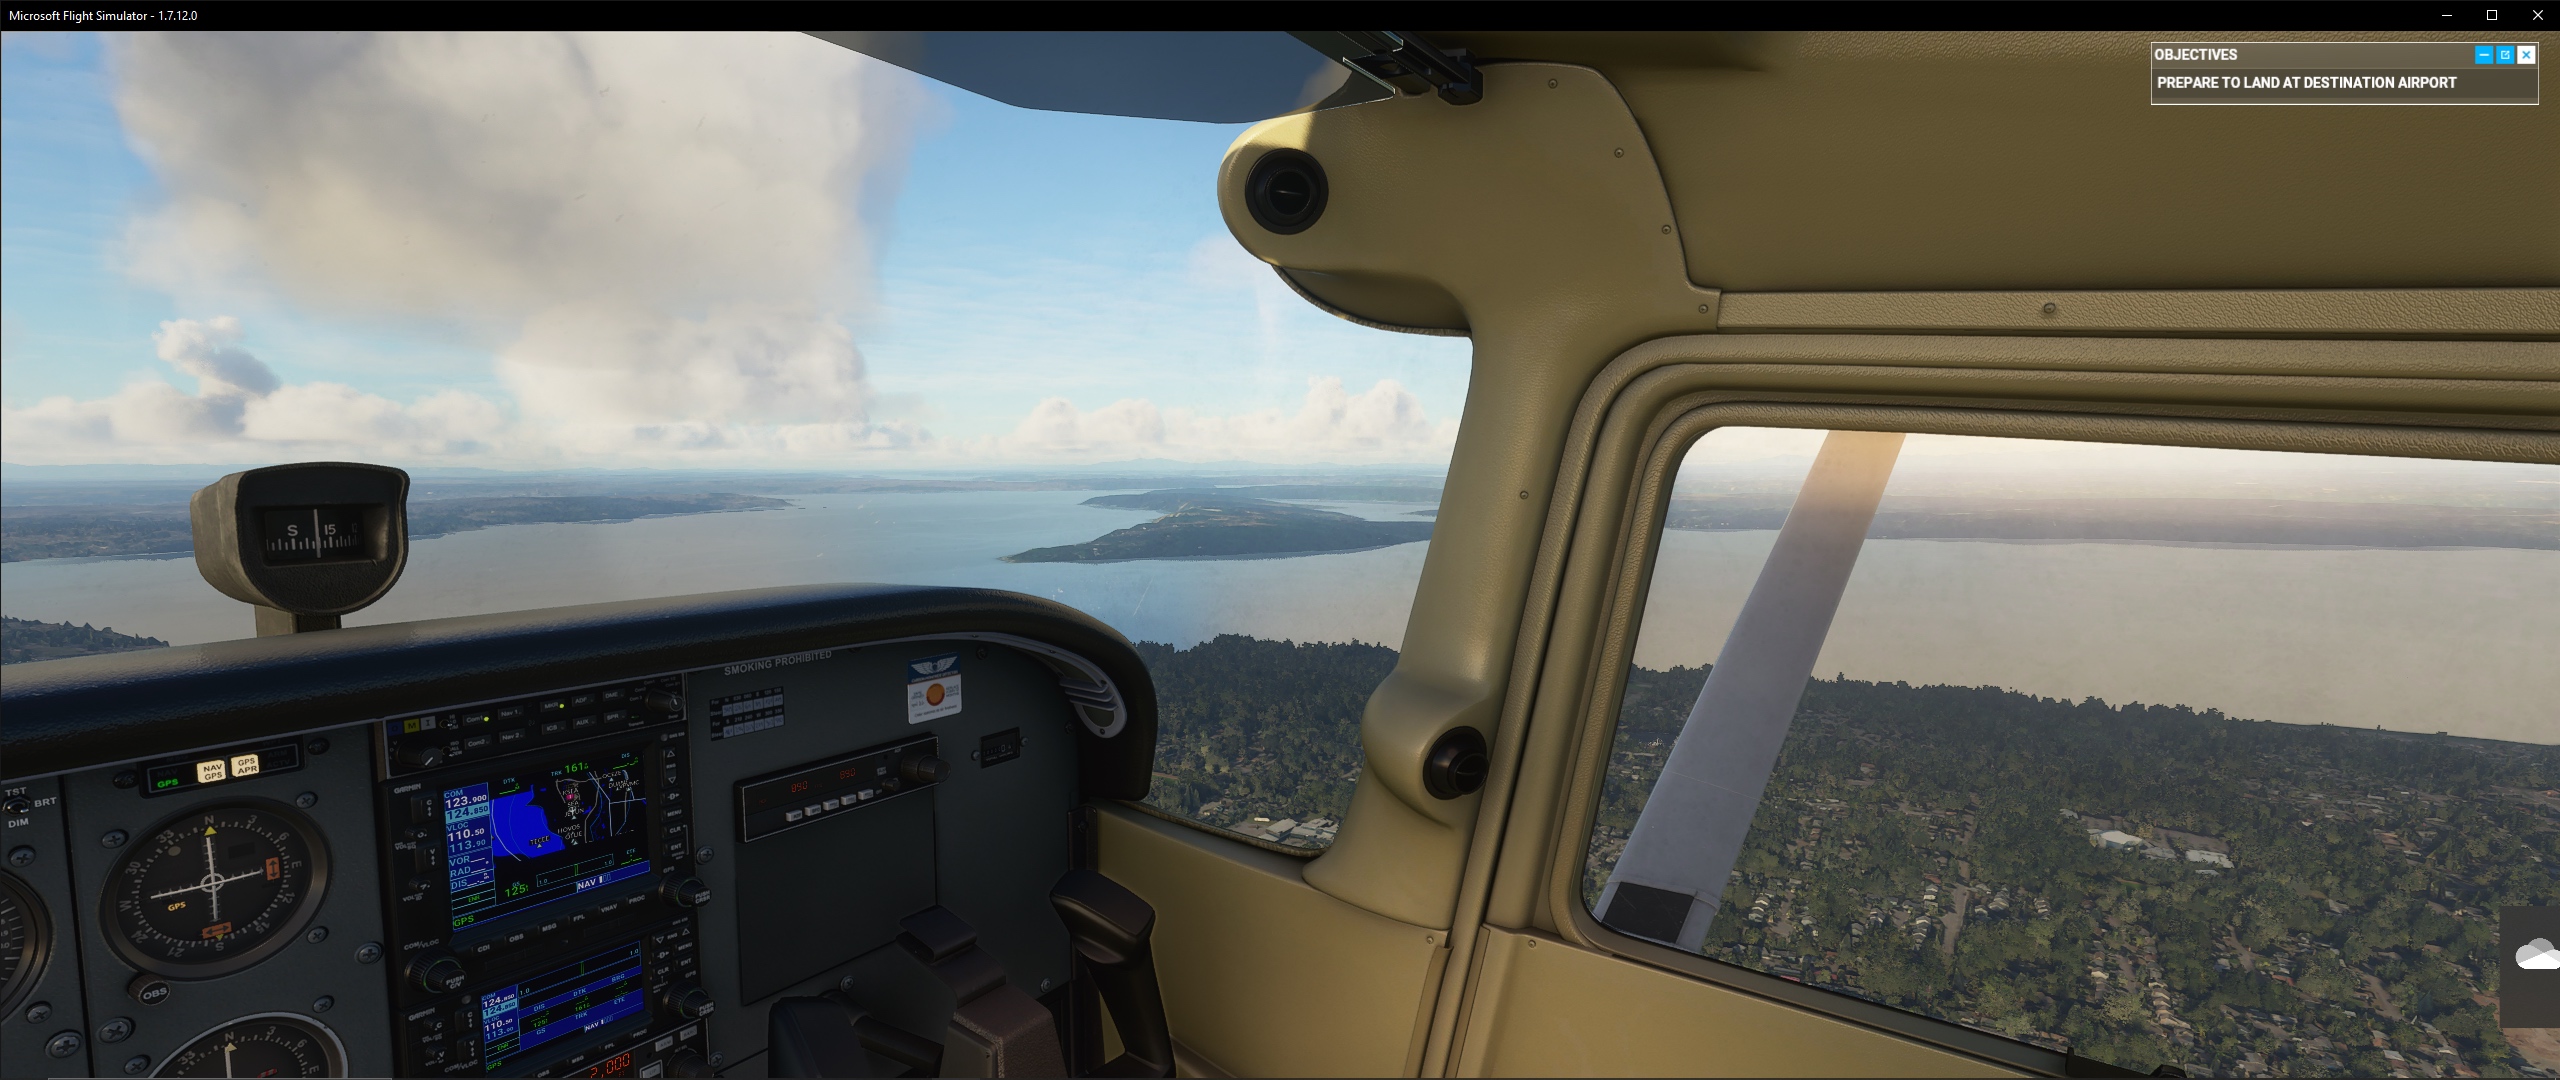
here’s right view, but I like to move the eye point to see closer in the right

31 Likes

I have tried to get the plane in the centre of the screen in SPOT Mode with no sucess. Camera positions are just stupid. Cockpit view is ok but not outside!!! Like I said in a previous post…this is desighned for the X BOX and not PC

1 Like

There are ways to do so using the External view mode. I’ve just created a detailed guide for that, I suggest looking into it at Guide -- How to use keys to switch between: Quickviews & Freelook camera ... Also Drone Camera & Fixed views - #2 by SirDanFlyBoy

Is there a way of having the hat switch in the joystick mapped to move your views around the cockpit ?
In FSX and XPlane it can be used in both internal and external views !!!

Yes. You can configure the hat switch to move your view around the cockpit. In fact, I use my 2nd hat switch (on my throttle) to do so.

My configuration is to use custom camera first then to use the hat switch to fine tune my view. Also, I found it irritating to move from extreme left to extreme right back position with just the hat switch.

Anyway, here’s how my 2nd hat switch is cofigured: the options to use are
"Cockpit View Yaw Axis" & “Cockpit View Pitch Axis” as shown in the screenshot below

By the way, my other hat switch (the one on the T16000M joystick) is not considered axis by the game. So, in order to use it I had to use the following keys "Cockpit look ...." keys


However, in my opinion, keys assigned to corners (such as down left) result in uncomfortable handling especially when doing it quickly. So, my suggestion is to use the following (i.e. remove corners)

Important note: the game assign hat switch by defaul to "Next Pilot Position" and "Previous Pilot Position" so make sure to assign them to other keys as I did in the above screenshot as they are really ueseful.

Final note, make sure no key is duplicate in two functions unless there’s no conflict, Ex. it’s ok to use same key for drone and cockpit view.

1 Like

is there a way to walk around in the cabin not with drone camera since it doent hold and bumps to much.

Yes. You can move around in the cockpit using the following commands using the keyboard:

Translate & view height:

yes but when i want to get to the passenger area the camera stops. in drone mode its impossible. i want to be able to sit like a passenger and enjoy the flight :slight_smile:

Well. There’s a way (a work-around)…
Unfortunately, currently, Microsoft does not allow moving in the passenger area in the airplanes. but you can do it if you update “CAMERAS.CFG” and each plane has a separate one.

There was a post by another member of the forum for doing it. First start by assigning custom camera to specific slot (for Ex. #0). Then open the CAMERAS.CFG file with notepad app and then look for the preset you have made (Ex. Custom Camera #0 – I think it will called cameradefinition0 or something similar) and modify the entry InitialXyz=xxxxx. (where xxxxx is the x, y, z location relative to a point on the aircraft) What you want to do is only modify the last integer to something like -6.

Then Save file and reload the sim and that plane then use the translate keys to the location you like and then re-assign the camera again. Note that the Z factor may put you far outside of the plane, just use Translate key to move inside it to the desired location.

Important note: make sure to backup you original file before modifying it.

Have fun :slight_smile:

could you send me some step by step tutorial images?? idont know

Sure, here are detailed steps of how to create a passenger view:

Note that you do it by editing the cameras.cfg which is a separate file for each airplane.
In the following steps, I’m doing it for Cessna Skyhawk G1000

Disclaimer: In the following steps, I’m doing a very minor change in a CFG file of the simulation but do this on your own risk.

  1. Run the simulator, load the Cessna G1000 airplane. Move the view point (using translate cockpit view keys) until you hit the invisible wall (just before the passengers area)

  2. Create a custom camera, for example under #0 slot, click CTRL+ALT+0

  3. close the simulator

  4. open the hard drive where you installed the game. In the windows search bar, search for cameras.cfg

  5. Important: copy the cameras.cfg file from the original sub-folder Asobo_C172sp_AS1000 to a safe location

  6. Edit the original cameras.cfg file (right click on the file, and select “Edit” to open the Notepad)
    Look for the camera you saved, in my case, it’s cameradefinition.9 with title=“0”

  7. Edit the file: replace last digit on the right in the lines that starts with InitialXyz (for example making it -6)

  8. Open the simulator and load the airplane Cessna 172 G1000 again

  9. Click the key you have assigned for custom Camera #0 (for example numpad button 0 in my configuration)

    • As you can see in the screenshots below, I’m outside the airplane (crossed the invisible walls).

    then moving the viewpoint around to get closer to airplanes

  10. Move the viewpoint using translate buttons to enter into the passengers area

  11. After arriving to the desired location, click CTRL+ALT+0 again to set the new custom camera

  12. Use the passenger custom camera as normal. Click the shortcut to get it (in my configuration is numpad 0). Ofcourse during flight you can always use the hat switch to fine tune it (look around) as normal

Finally, I should give credit to AcktuNasrabi who gave me the idea of how to cross the invisible walls to create the passenger view.

Have fun

4 Likes

I have look around mapped to my left stick, and I wanted to map translate left/right/forward/back to the left stick if I hold “A”.

Unfortunately when I hold A it still rotates the viewpoint in the direction I press as well as translating the camera.

Is there any way to make it so when I press “A” and move the stick, it doesn’t rotate the viewpoint and only translates the camera?

I understood from your post that you’re talking about the Xbox controller. I really like the idea of mapping the left the look around to the left stick.
To answer your question, yes. you can configure the sim to translate in combining A+LS

here’s a screenshot of my settings to demonstrate your idea

As usual, always make sure same shorcut/key are not used for two functions unless there’s no conflict (for example it’s ok to have same shortcut in both drone and external cockpit)

That is the way I have mine set up.

However, when I hold “A” and up to translate forward, it both tilts my head up and translates forward at the same time.

It doesn’t seem to “turn off” the non-shifted functionality of the left stick when I modify it by holding A.

This isn’t an issue with any other inputs, like I have several different shifted inputs on the dpad and it doesn’t behave that way. Seems to only happen on the analog sticks?

Weird. My Xbox controller functions as expected. I suggest doing the following

  1. under the control screen, search by input and make sure LS is not bound to another function
  2. make sure cockput view Yaw and pitch under the controller are not bound to any key

2020-08-25 (15)

  1. I suggest updating the Xbox controller itself. I remember I had a problem with my headphone when connected to the controller which was fixed after updating its firmware version.

here’s a link of how to do it if needed
https://support.xbox.com/help/hardware-network/controller/update-xbox-wireless-controller

i tried this but didnt find the camera in the cameras.CFG file.

what number did you choose to assign your custom camera ?
I suggest assigning it to 0 then follow the same steps as in the screenshot.

Ok, I got it working!

It turns out that you want the shift key modifier command in the same column as the non-shifted command. I had the shifted command in the right column and the non-shifted in the left, which caused it to do both commands at the same time.

I don’t know if this is a bug or intentional… I could see that behaviour actually being useful in some circumstances.

HOWEVER- now there is a new issue. When I hold “A” to modify my left stick from look around to translate, I get stick drift when the stick is centered. I did some experimenting, and it turns out if you have an analog stick on a shifted button, it doesn’t use the “sensitivity” set for that stick! When not pressing the A button I have correct deadzone and sensitivity. As soon as I press A, the deadzone seems to go away entirely and I immediately get slight random drift. How weird is that. It seems to default to an extremely small deadzone.

What about “unsetting” a custom camera view? I like to use the cycle forward / back through custom views. It will cycle through whatever views you have set. However, there doesn’t seem to be a way to “get rid” of a custom view that’s been assigned (so that it’s no longer in “the rotation” so to speak).

  • For Custom Camera views, you can cycle through them using “K” for next camera and "Shift+K" for previous camera

  • As per Fixed Camera views, you can cycle through them using “A” for next camera and “Shift+A” for previous camera … but you must first switch to the fixed camera view. I suggest reading my post about how to do it here : Guide -- How to use keys to switch between: Quickviews & Freelook camera ... Also Drone Camera & Fixed views

  • Finally, for “unsetting” custom camera, I guess, you may just click the reset forward view button (ctrl + space) and then hit the key used to assign the custom camera you want to reset/unset (Ex. Ctrl+Alt+1)