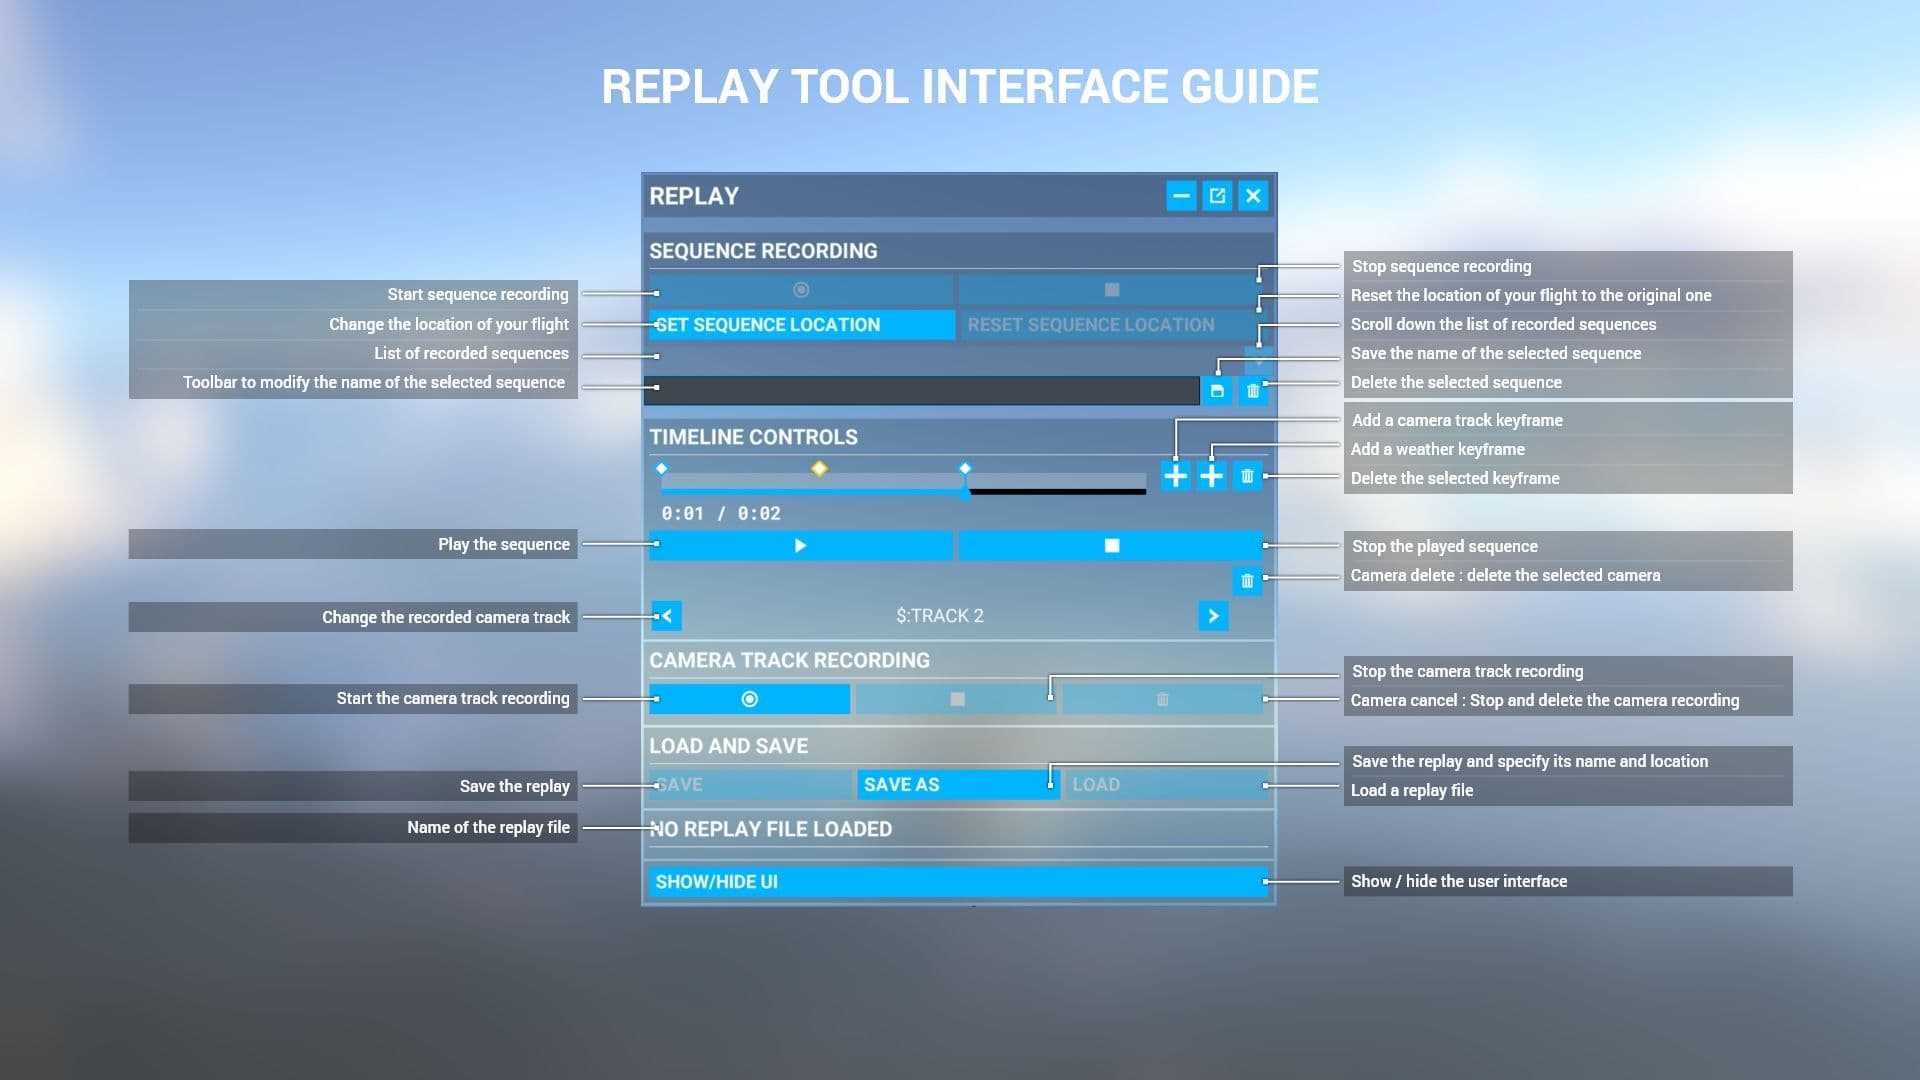
Replay is a powerful tool developed to allow you to record and explore your flight sessions. More than just capturing a flight session, it allows you to edit it by changing or adding new cameras, modifying the plane location, or even changing the weather!
We ask you to take into account that the replay is an experimental feature and still under development, we thank you for all the feedback you’ll give us in the following weeks.
Throughout this tutorial you will discover the basics of how to use the replay tool, as well as how it works. But first, let’s see how to activate the feature.
1 - Activating the replay tool
As an experimental feature in Flight Simulator the replay tool is not immediately accessible in the game. To use it, you’ll have to activate it first and to do so, some manipulations are needed.
1.1 - Activate the Developer mode
To display the replay tool panel during a flight session you’ll have to activate the Developer mode first.
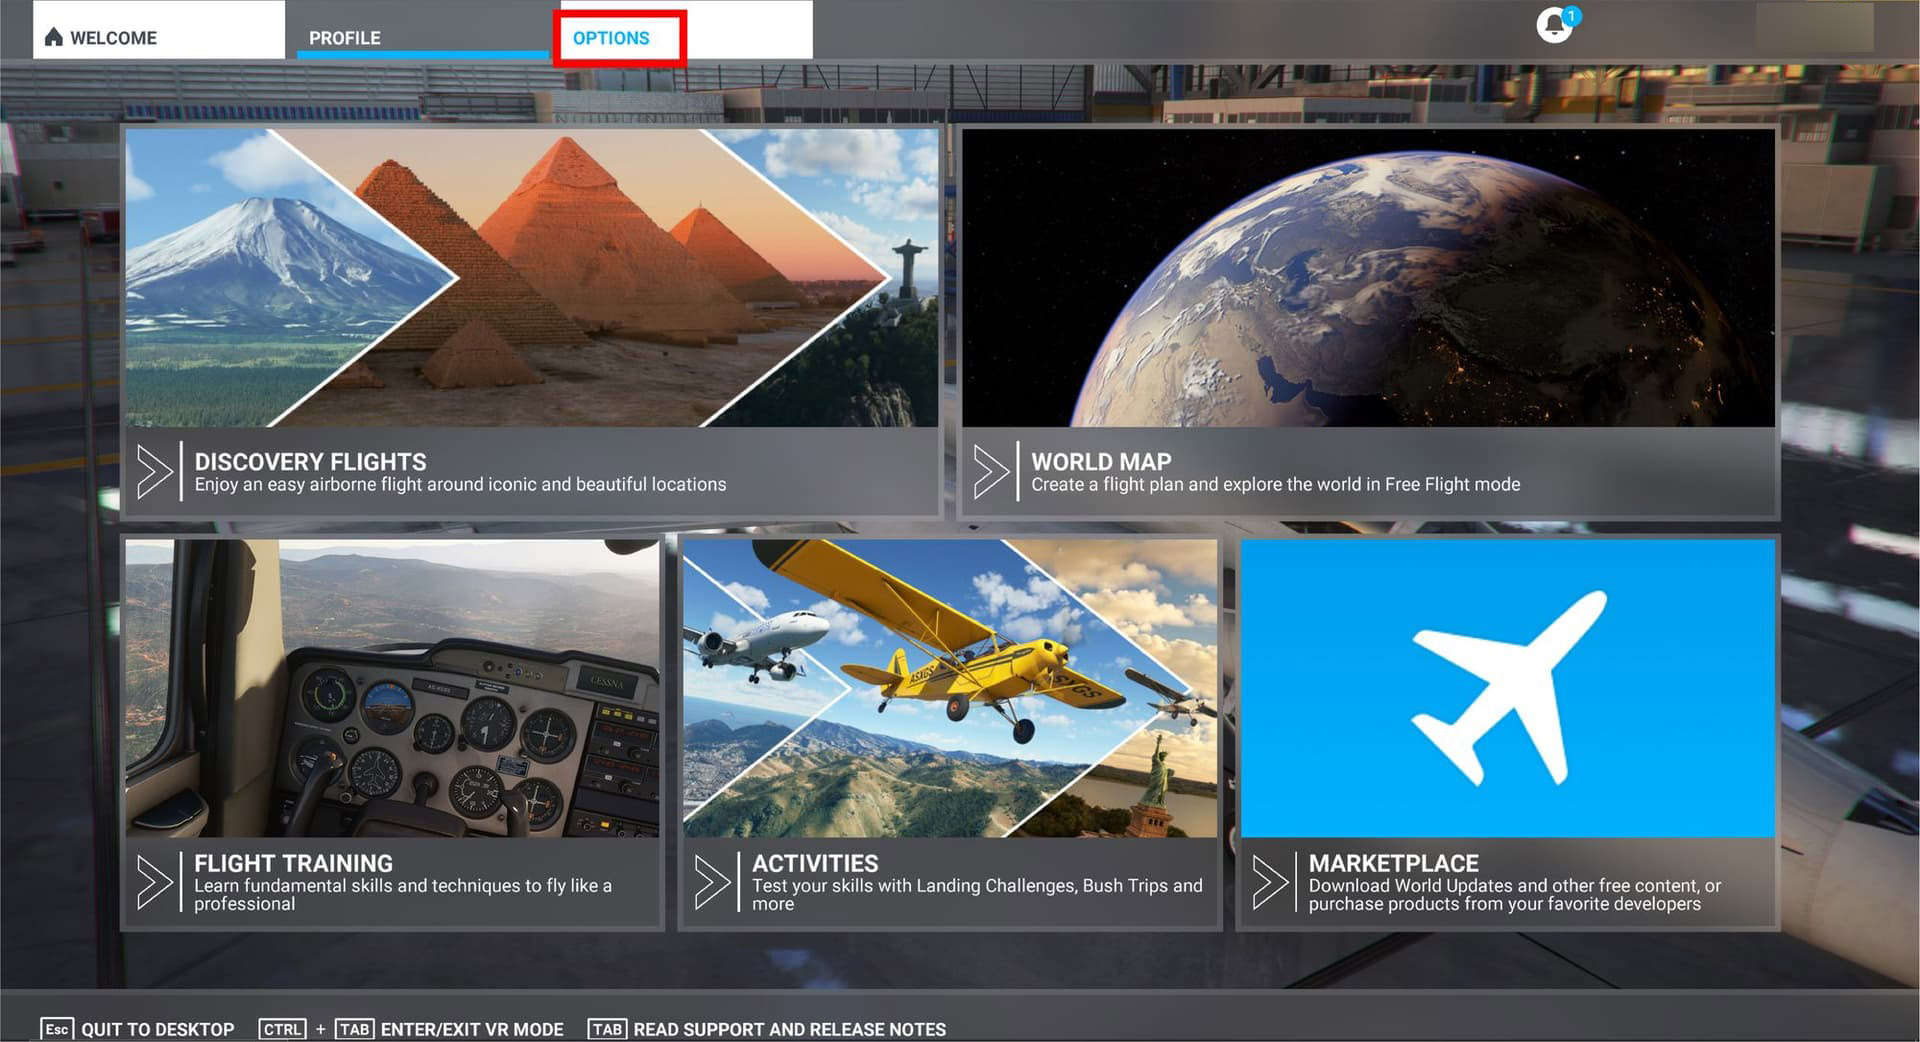
To do that, click on the Options tab .
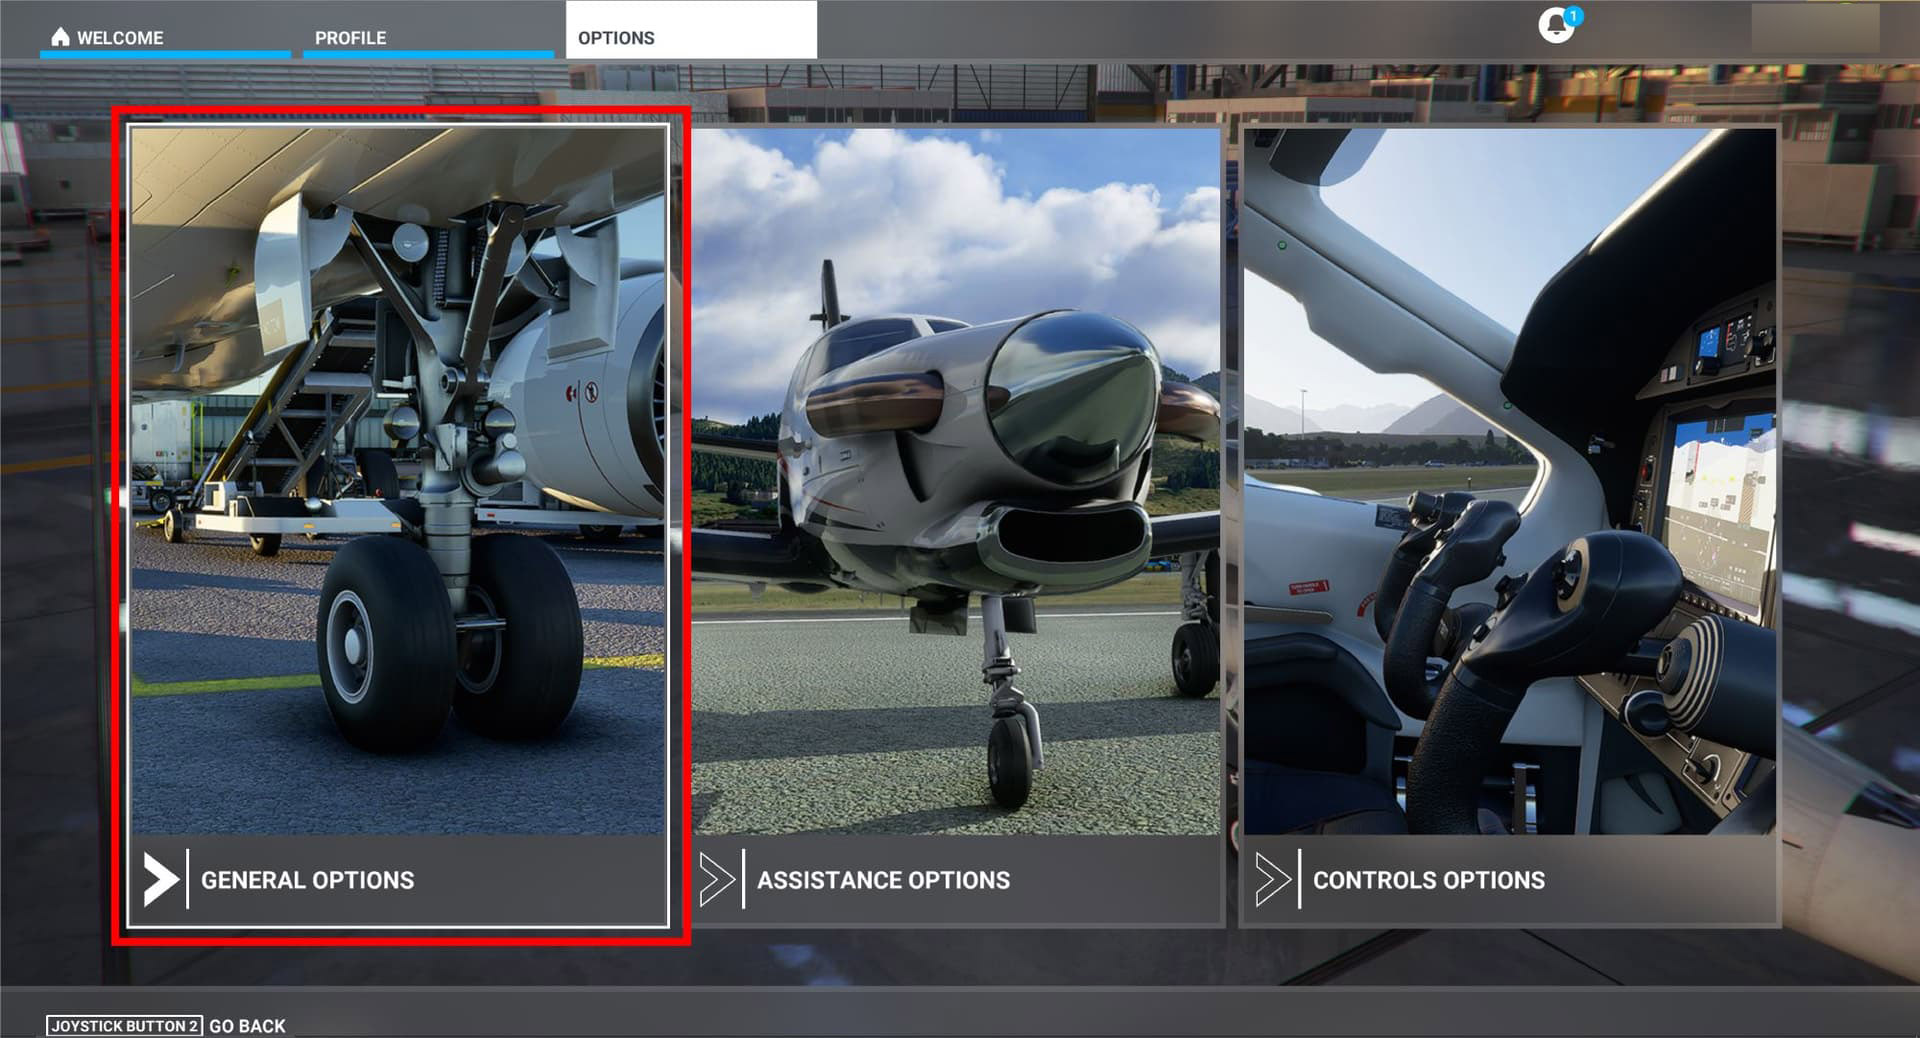
Then, click on General options to reach the developer mode.
You’ll find the Developers tab near the end of the list on the left of the screen, click on it.
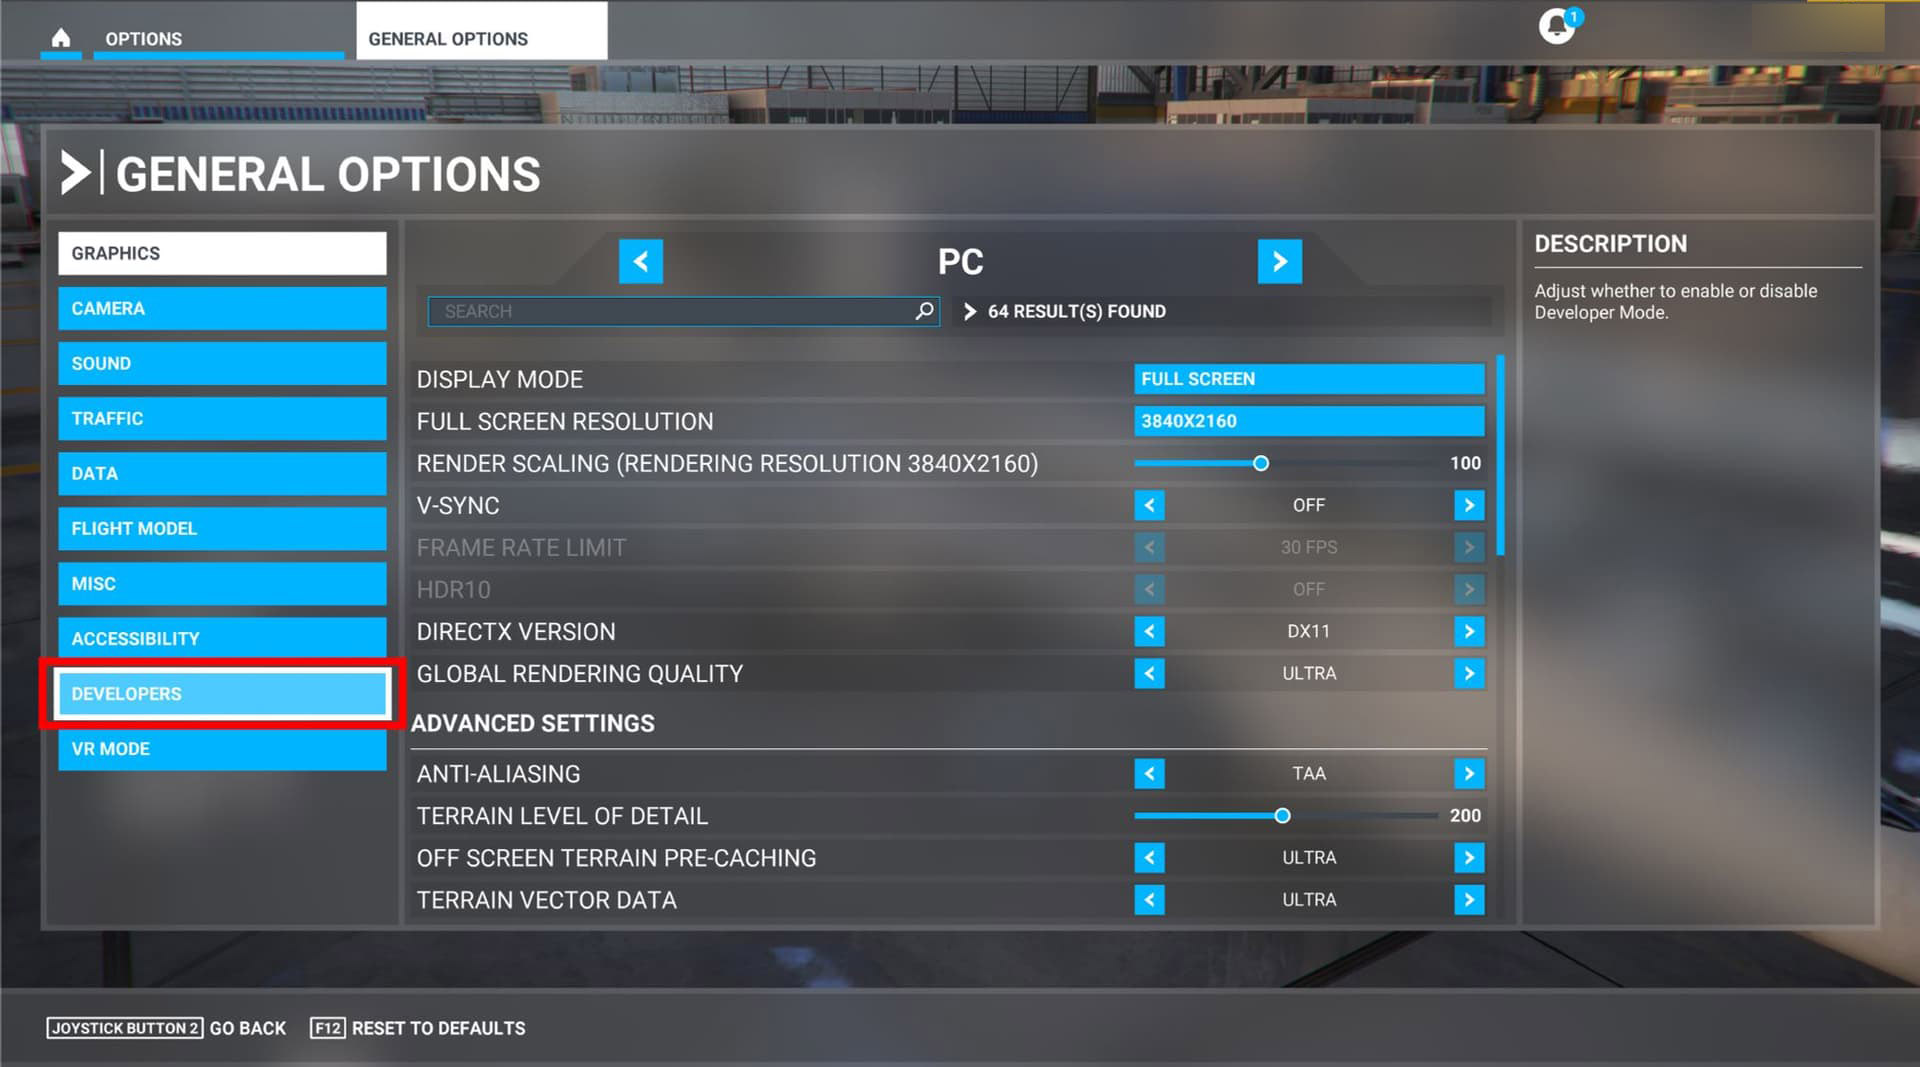
Now you just have to click on the right or left arrow to cycle the Developer mode status from off to on.

Congratulations! You have activated the Developer mode, you should now see a black toolbar with several tabs at the top left of your screen.

1.2 - Activate the Replay tool
ATTENTION, YOU MUST ACTIVATE THE REPLAY TOOL BEFORE STARTING A FLIGHT SESSION, IT’S NOT POSSIBLE TO DO SO ONCE YOU ARE IN A FLIGHT
Now, before starting your flight session, click on the Options panel in the Developer mode toolbar

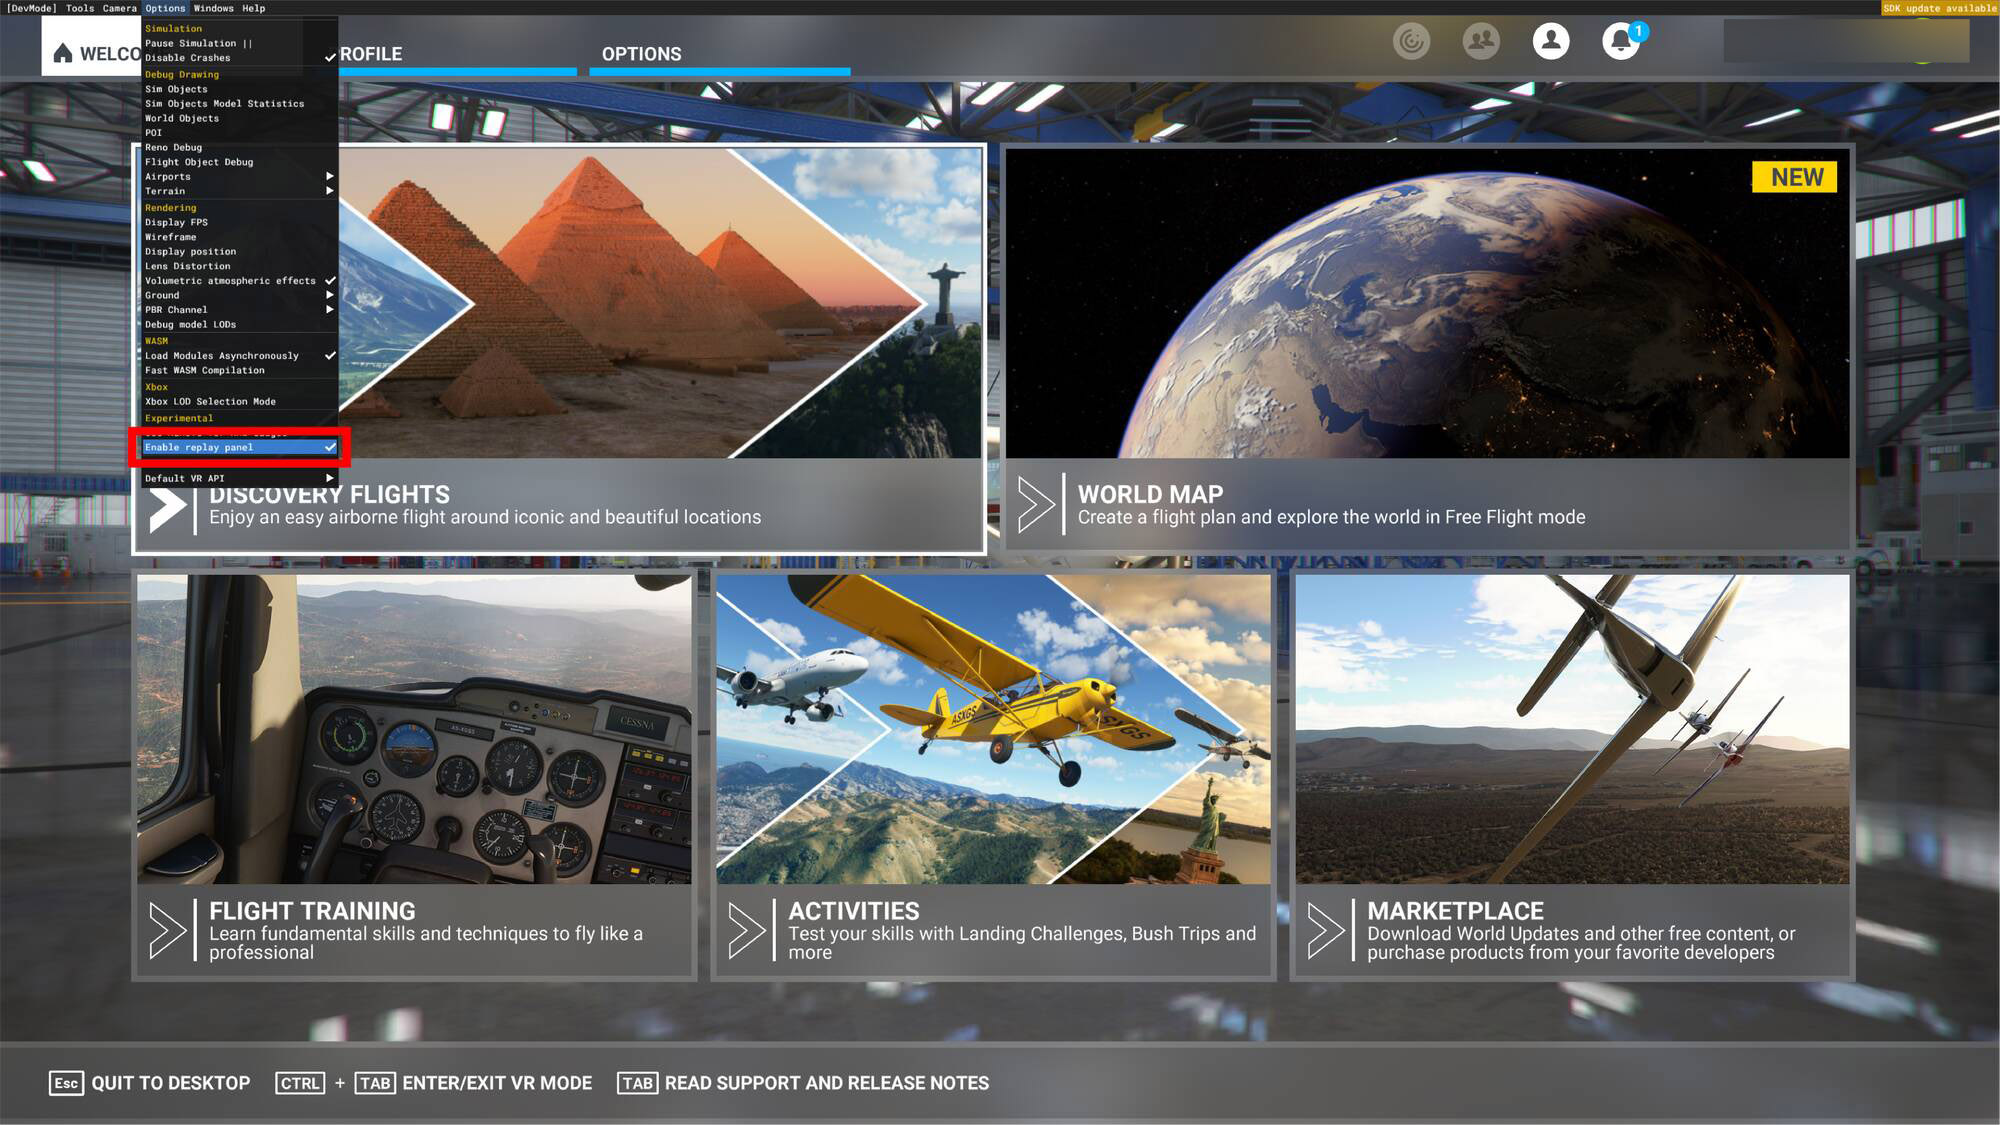
A large list of options will appear, click on Enable replay panel in the experimental part at the end of this list.
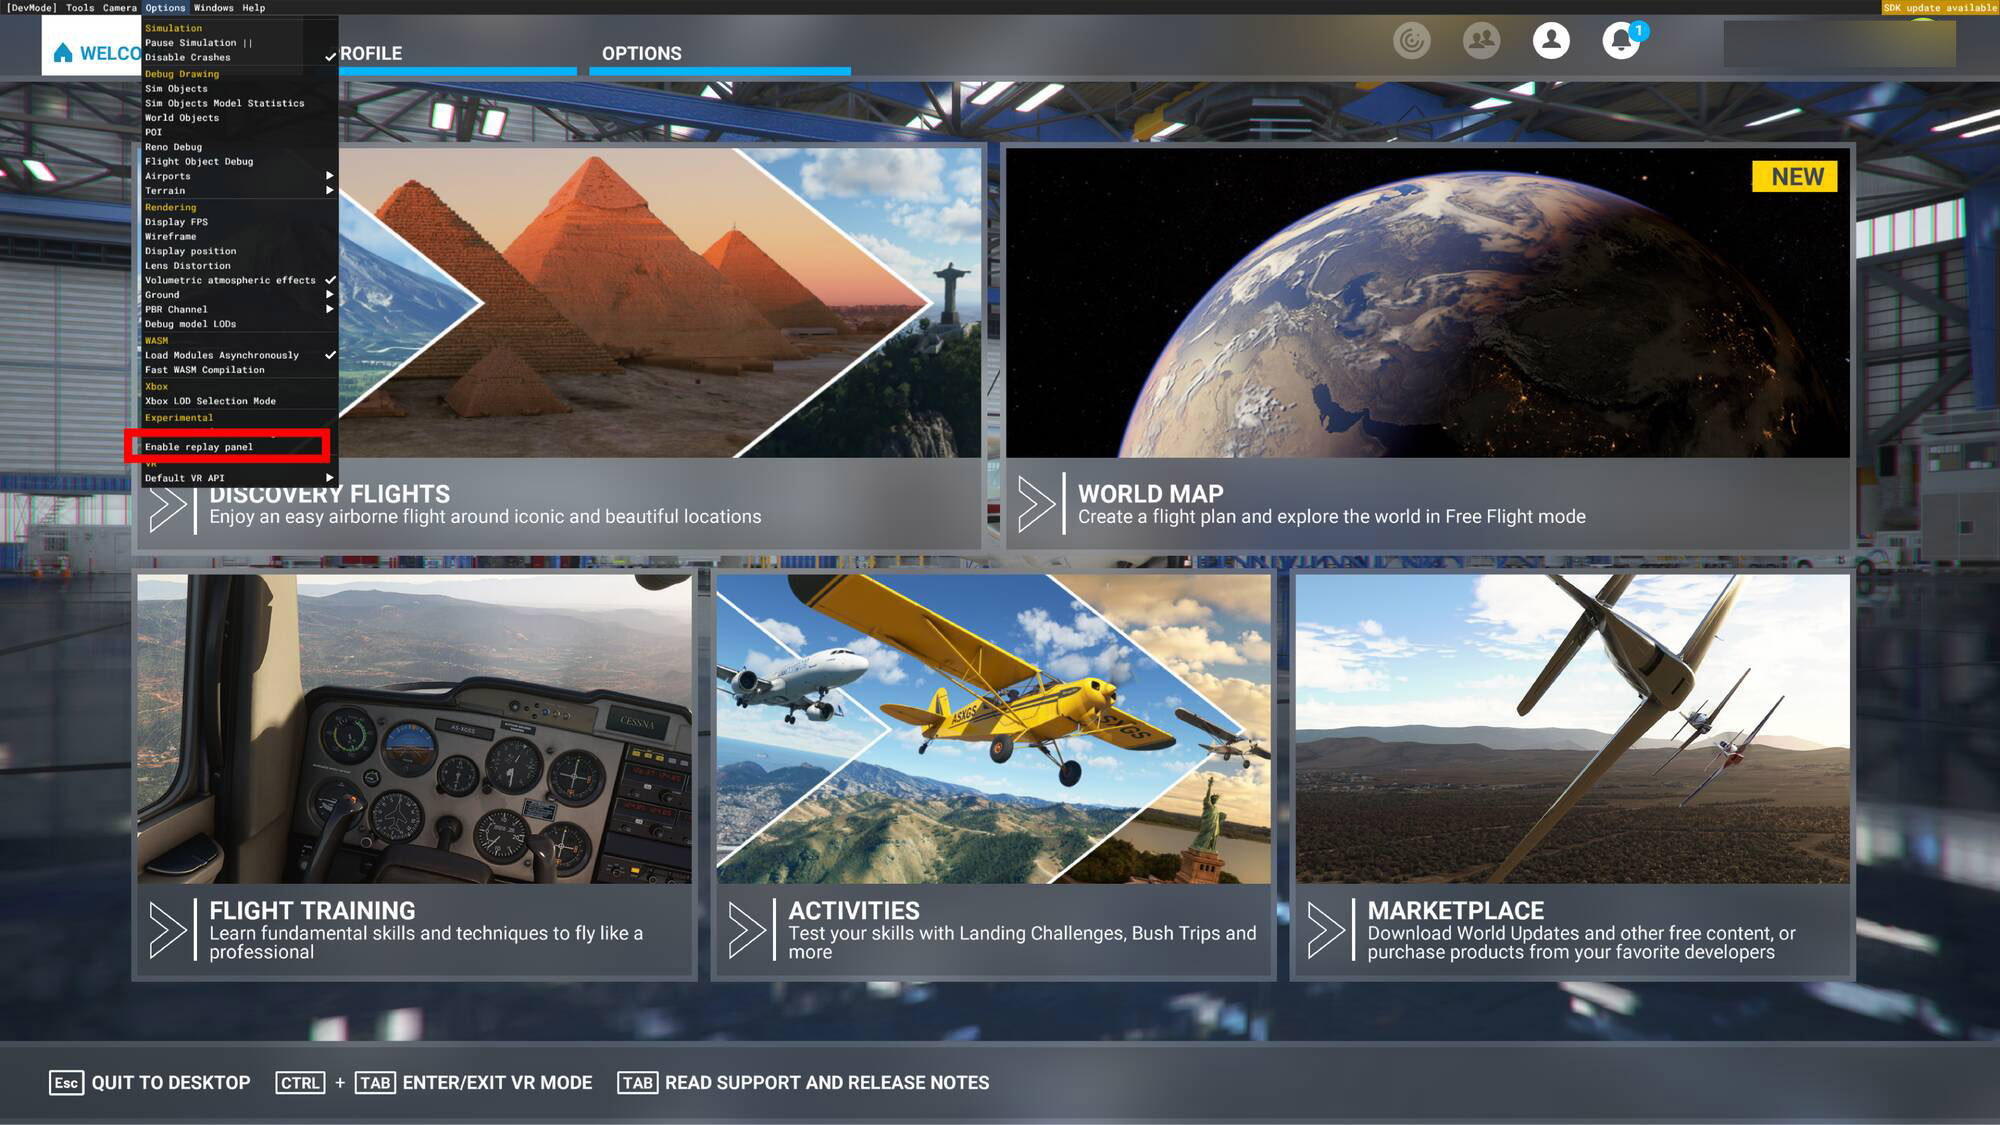
Once your replay tool is activated you’ll see a little check icon next to it.
You’re close to having access to the replay panel, all you have to do now is to start a flight session as usual.
1.3 - Display the Replay tool panel during a flight session
BE CAREFUL, THE REPLAY PANEL IS NOT AVAILABLE IN DISCOVERY FLIGHT SESSIONS.
Within a flight session, move the mouse to the top of the screen to reveal the Toolbar menu, and then click on the Replay icon to display the replay panel.
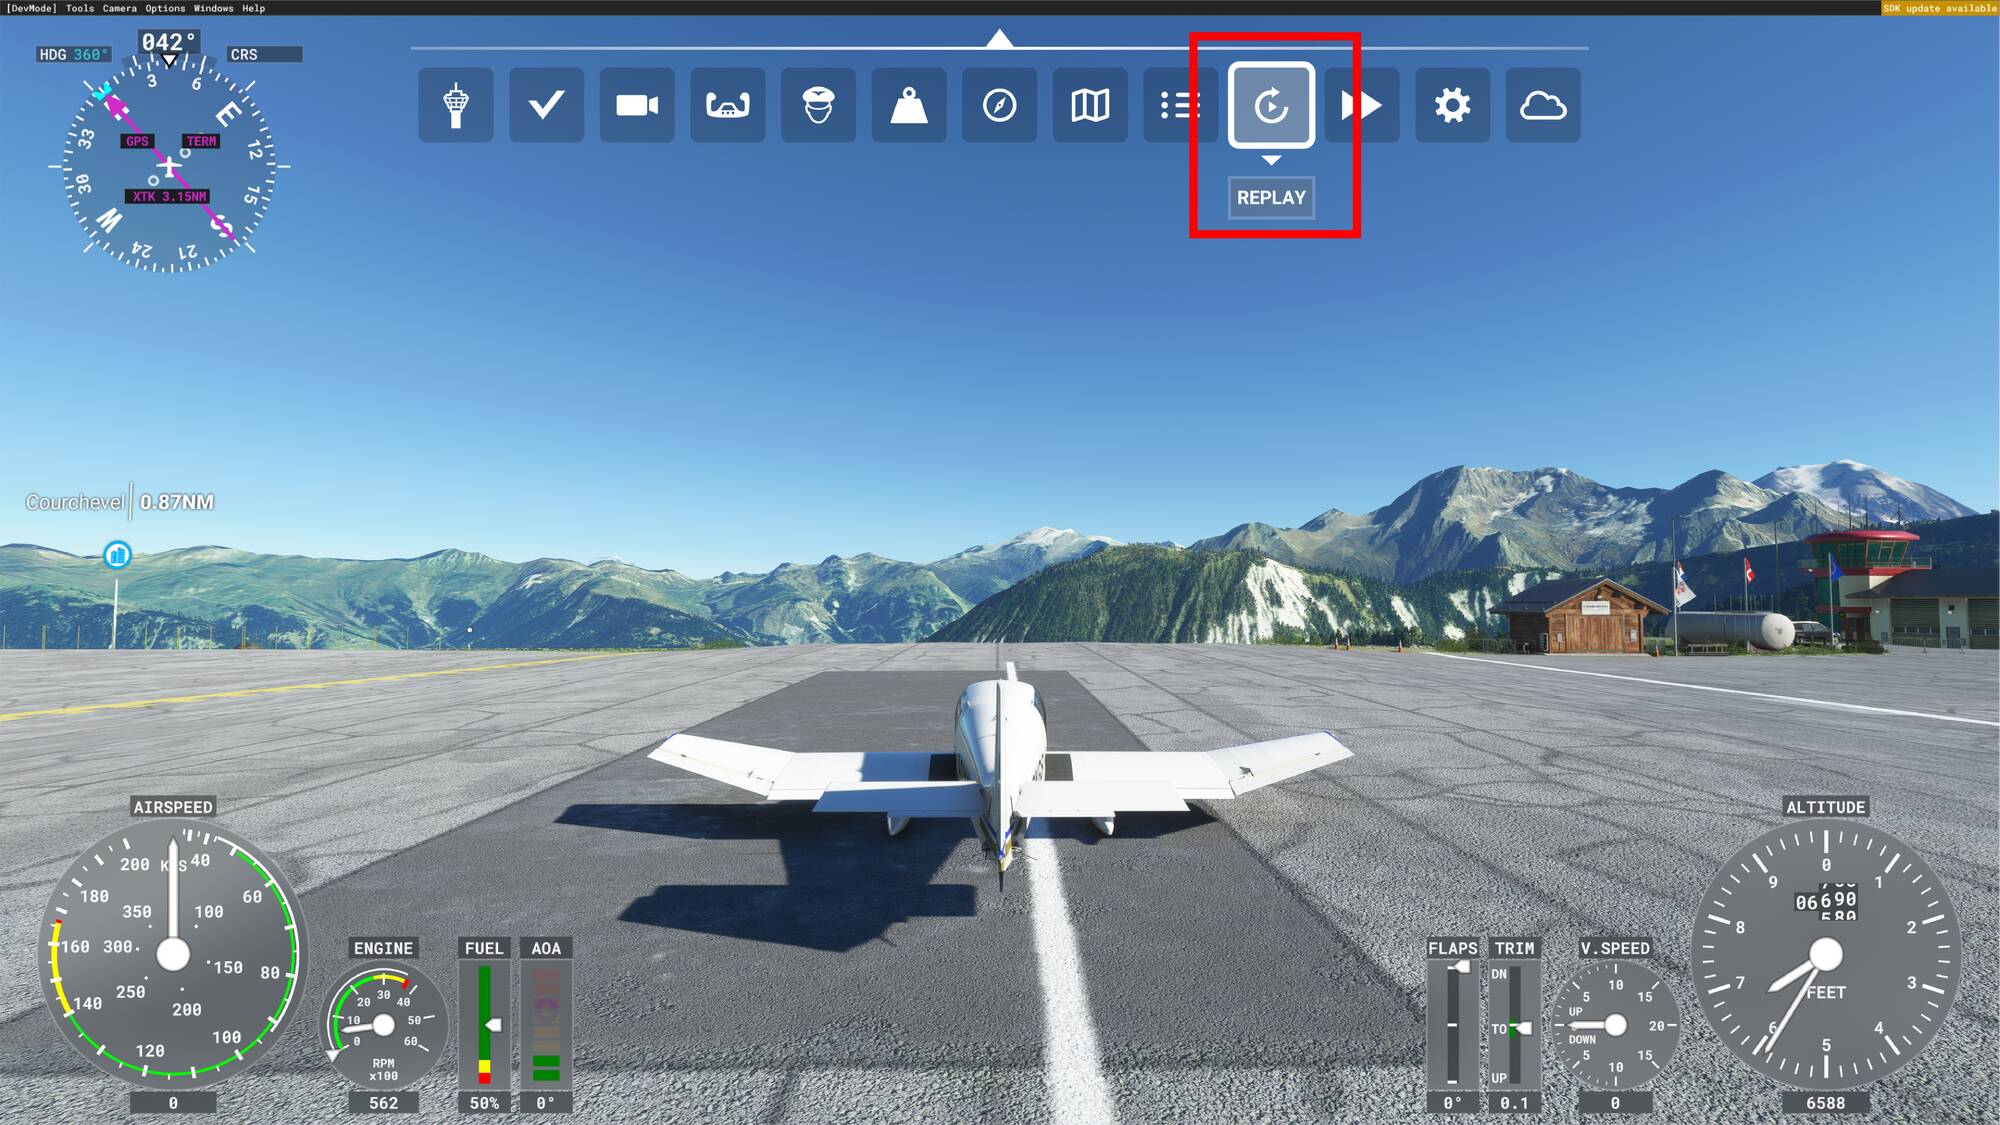
Well done! You are now ready to discover the different functionalities offered by this tool.
2 - Sequence recording
Now that you have the replay panel open, you’ll have to record a sequence to start to work on it. This section explains the concept of sequences and how to record one.
2.1 - Start recording a sequence
What is a sequence? A sequence is a record of a flight session. It records your flight path, your aircraft, and your camera at this moment. It will be the basis of your work to edit and explore a flight you have made. You can record several sequences during the same flight session and edit each one of them, from modifying their names, changing their location, adding cameras, and changing weather conditions
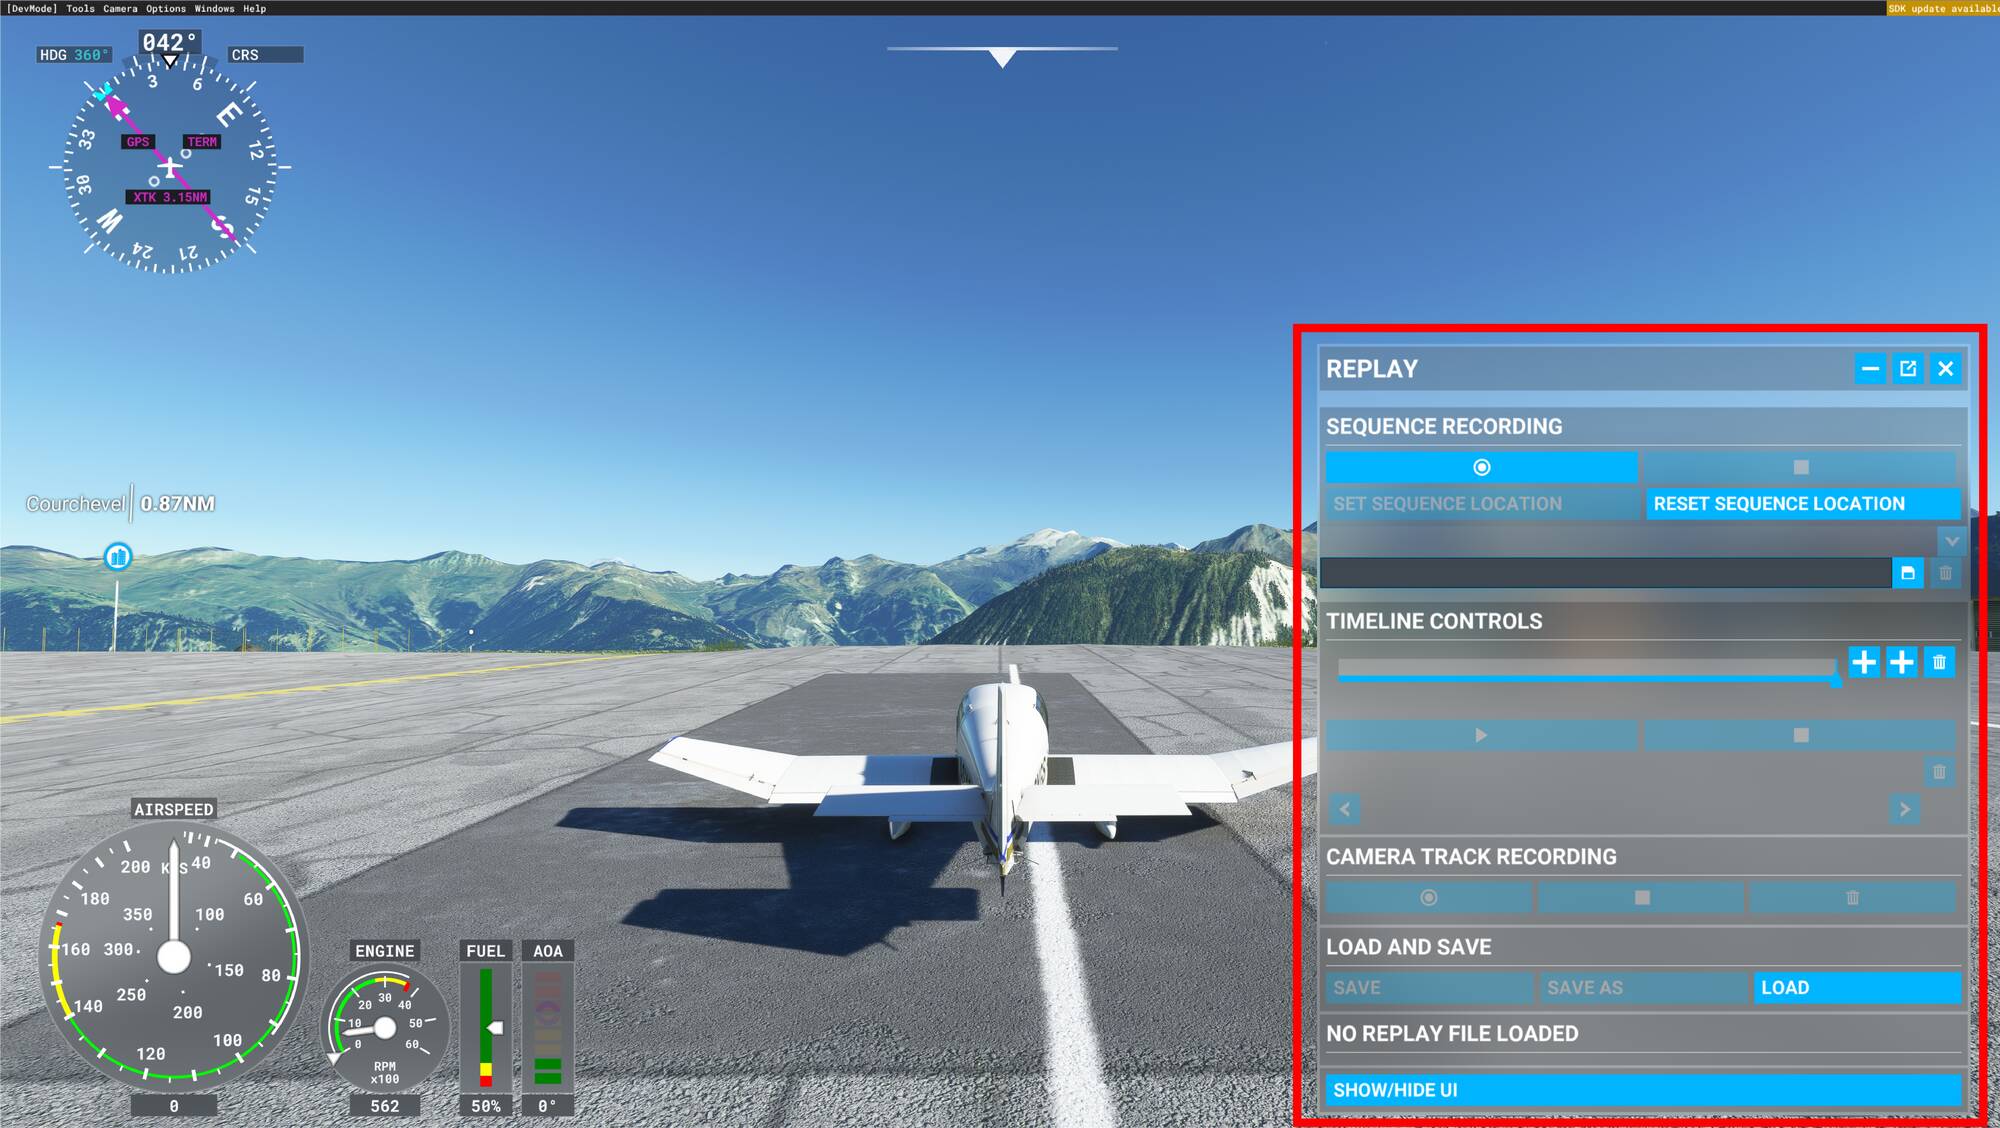
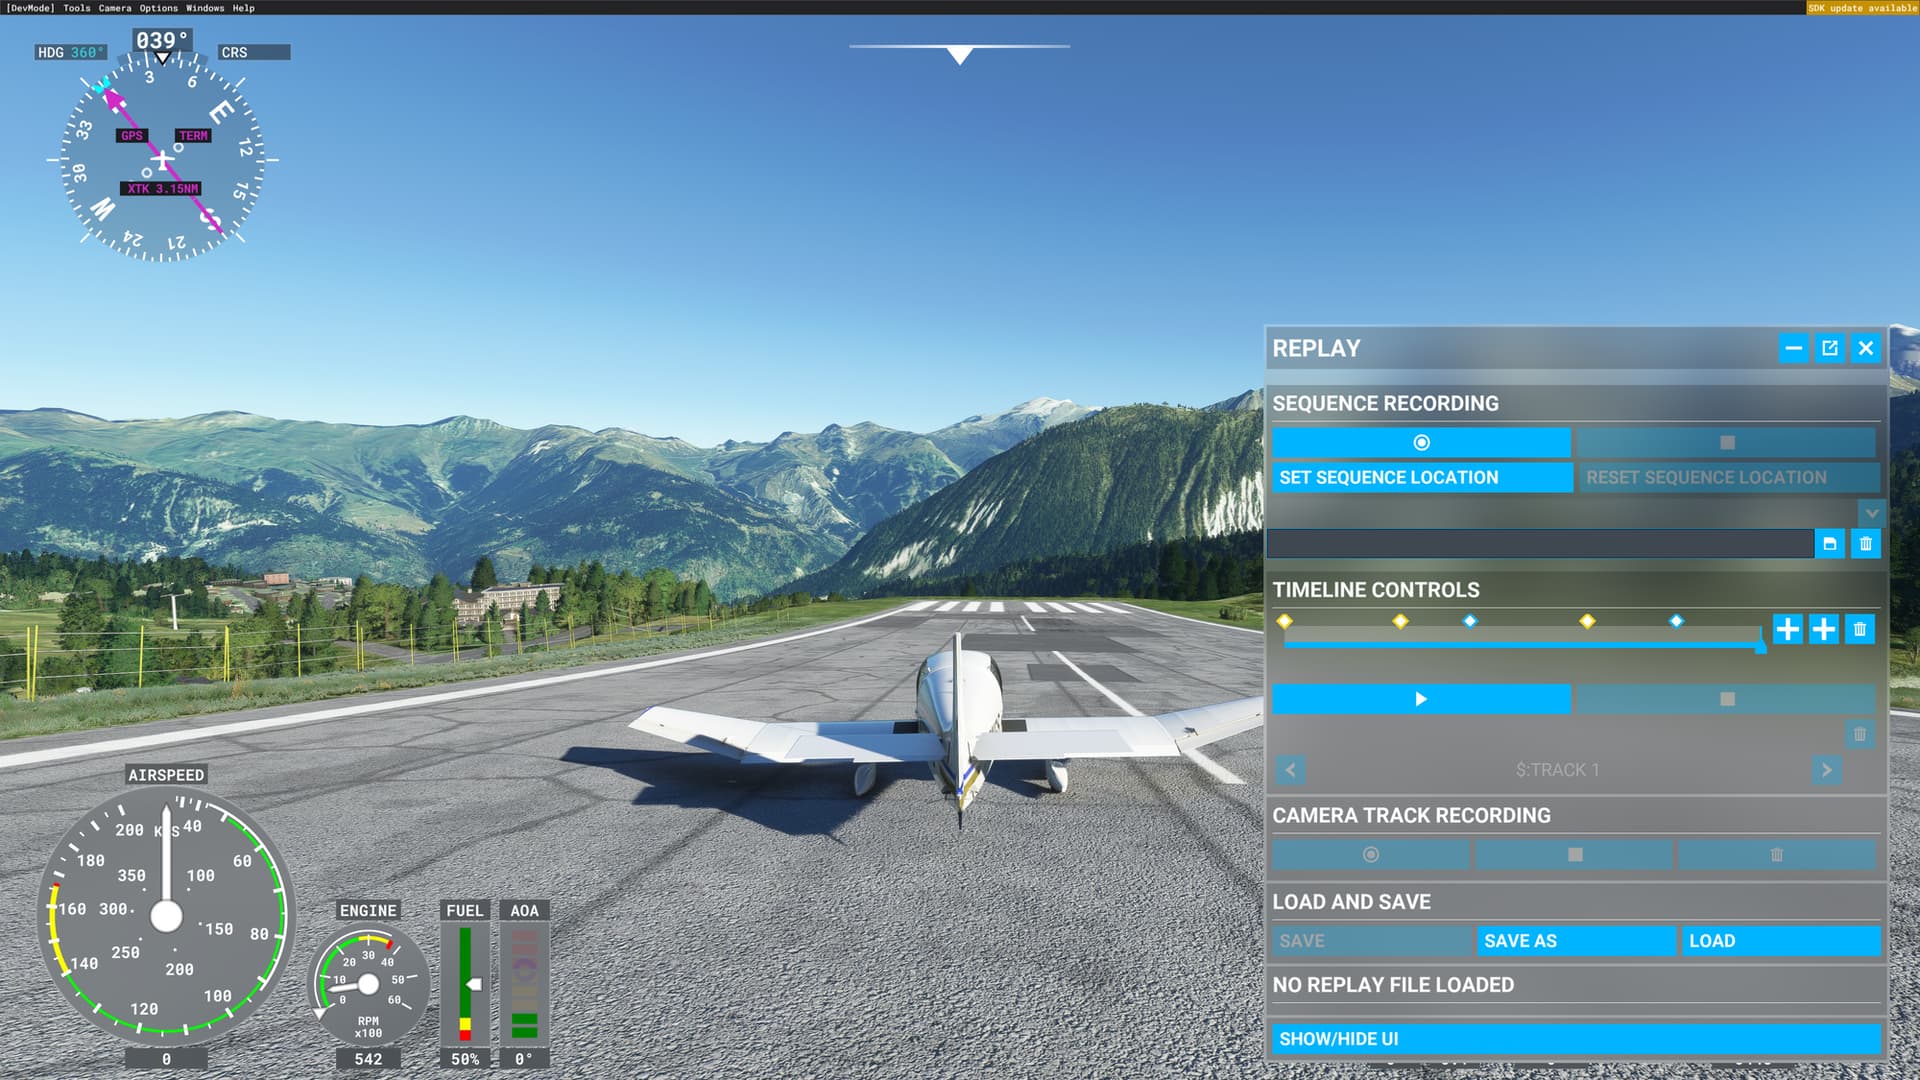
Once the Replay panel has appeared, the first thing you will have to do is to press the sequence recording button to start recording your flight.
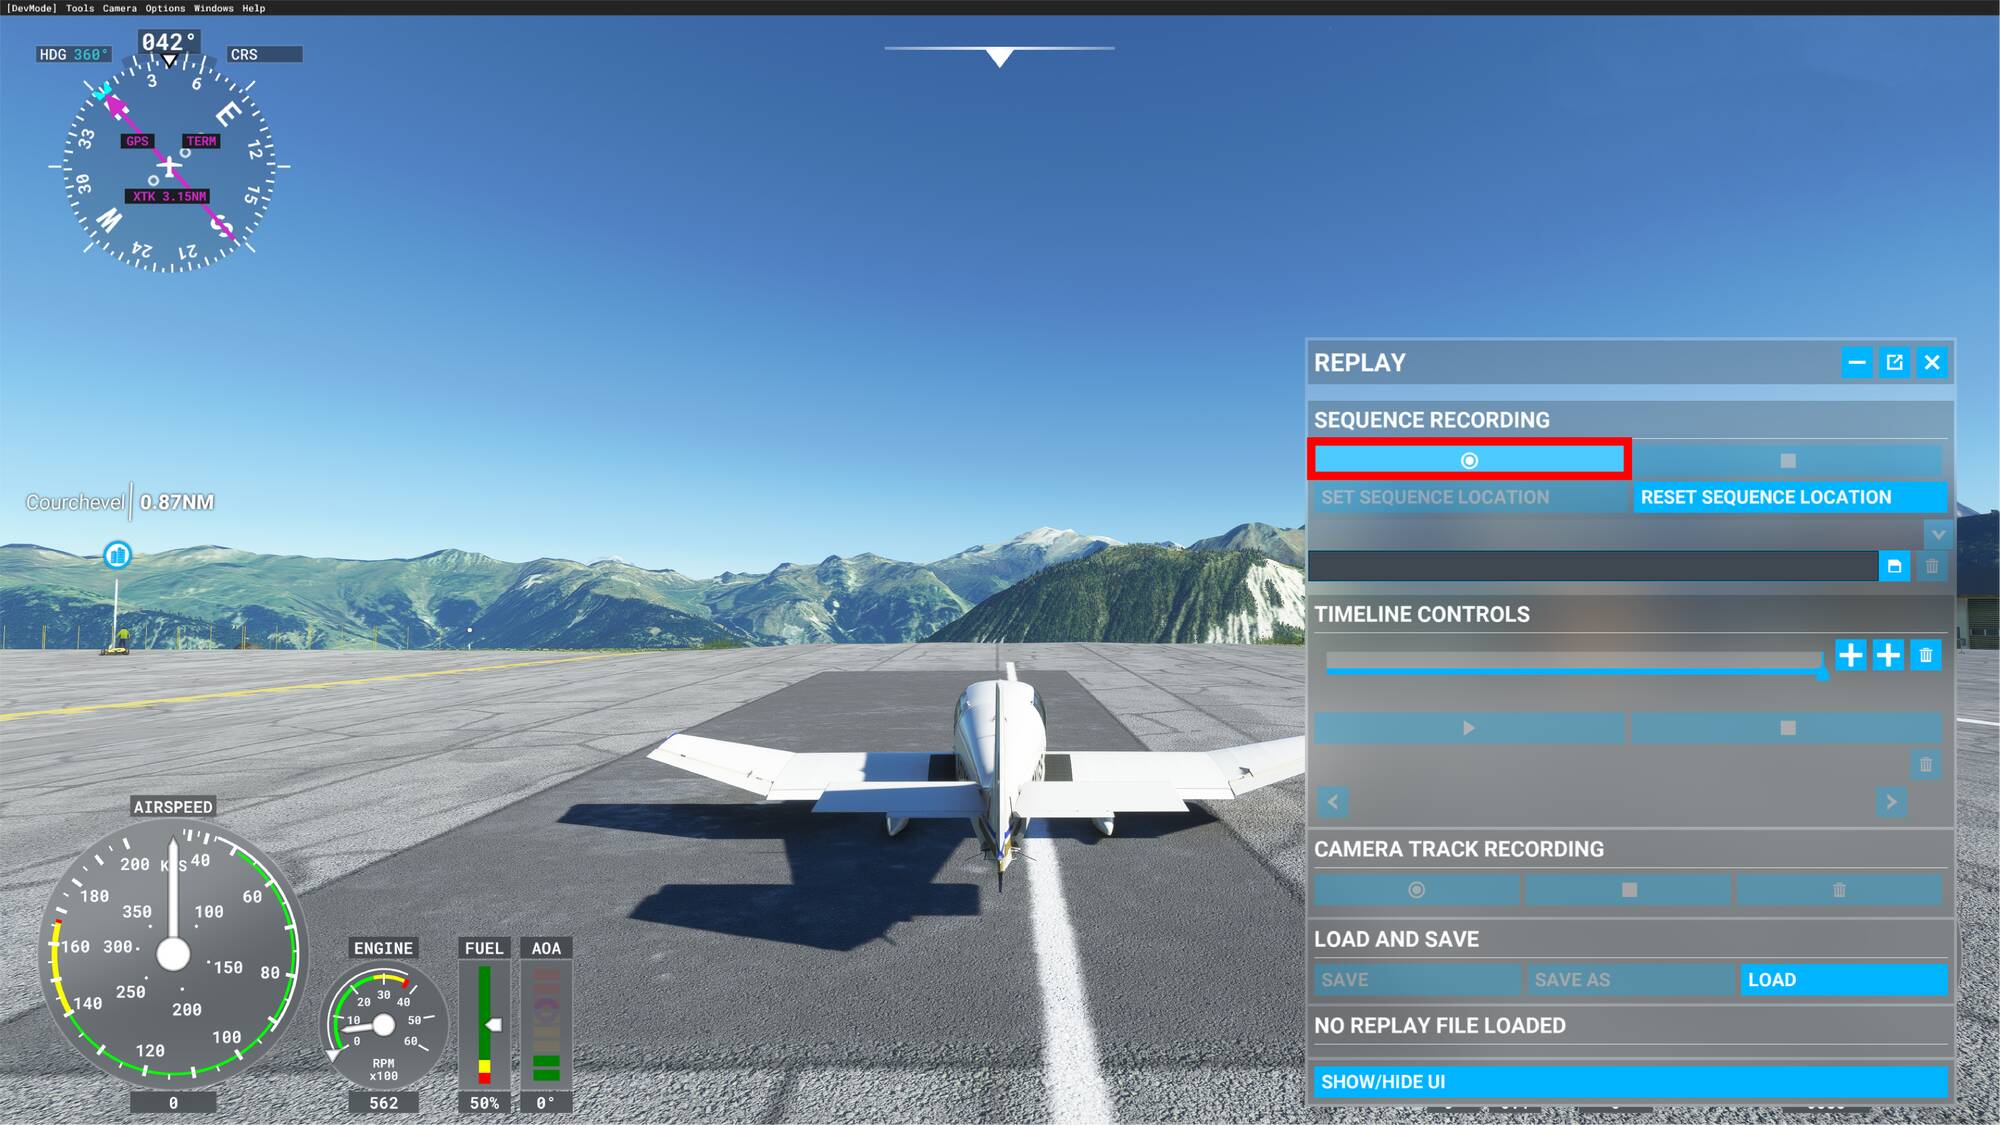
Your flight is now recording, you will have a confirmation via the sequence recording button becoming unusable.
2.2 - Stop recording a sequence
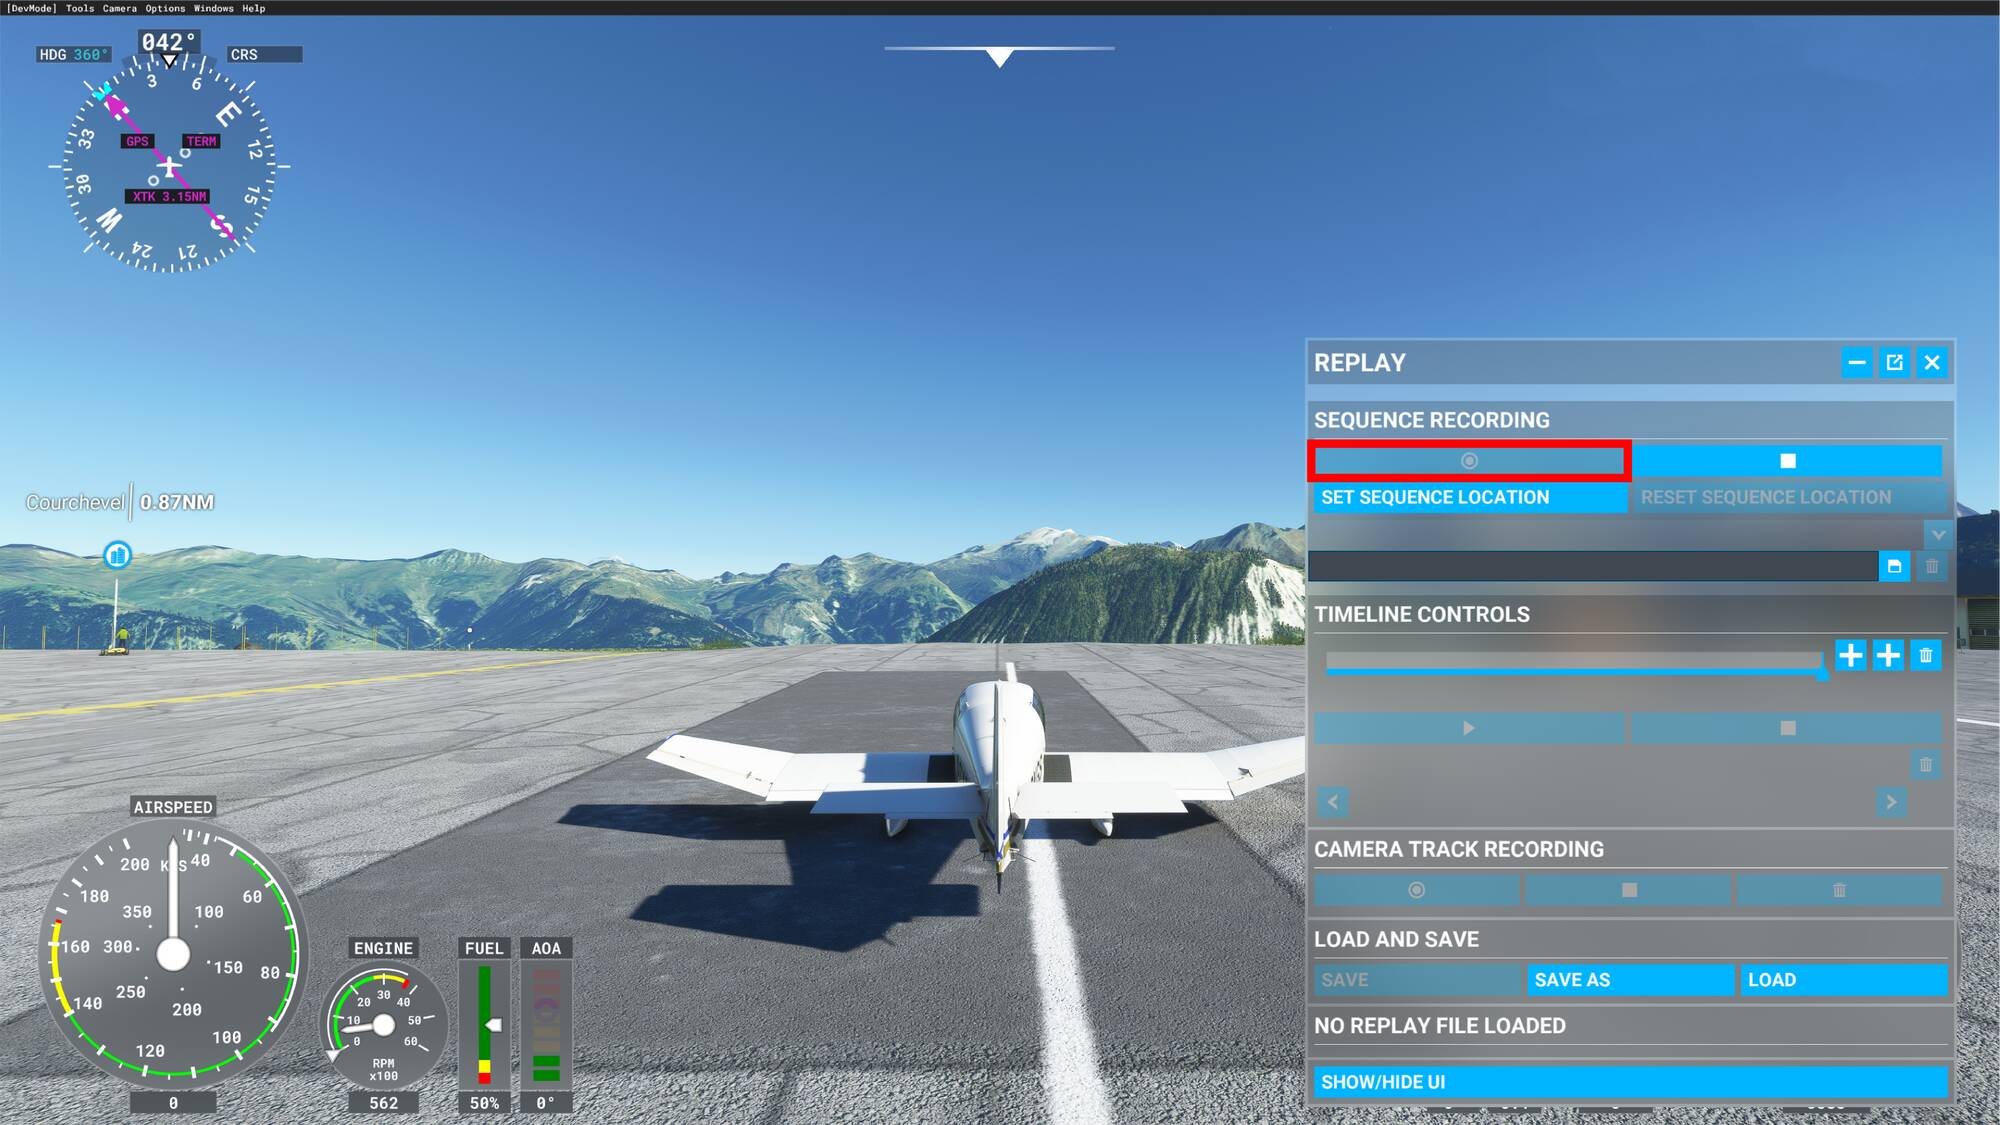
When you want to stop the recording, you just have to click on the Stop record button next to the Record button

Congratulations, you have recorded your first sequence! But be careful, a recorded sequence does not mean a saved sequence! A recorded sequence means that you can start editing it, not that it is saved on your PC.
2.3 - Save a recorded sequence
Now we advise you to save your recorded sequence, to do so, just click at the bottom of the panel on Save or Save as to define the name and location in your PC of your replay save.

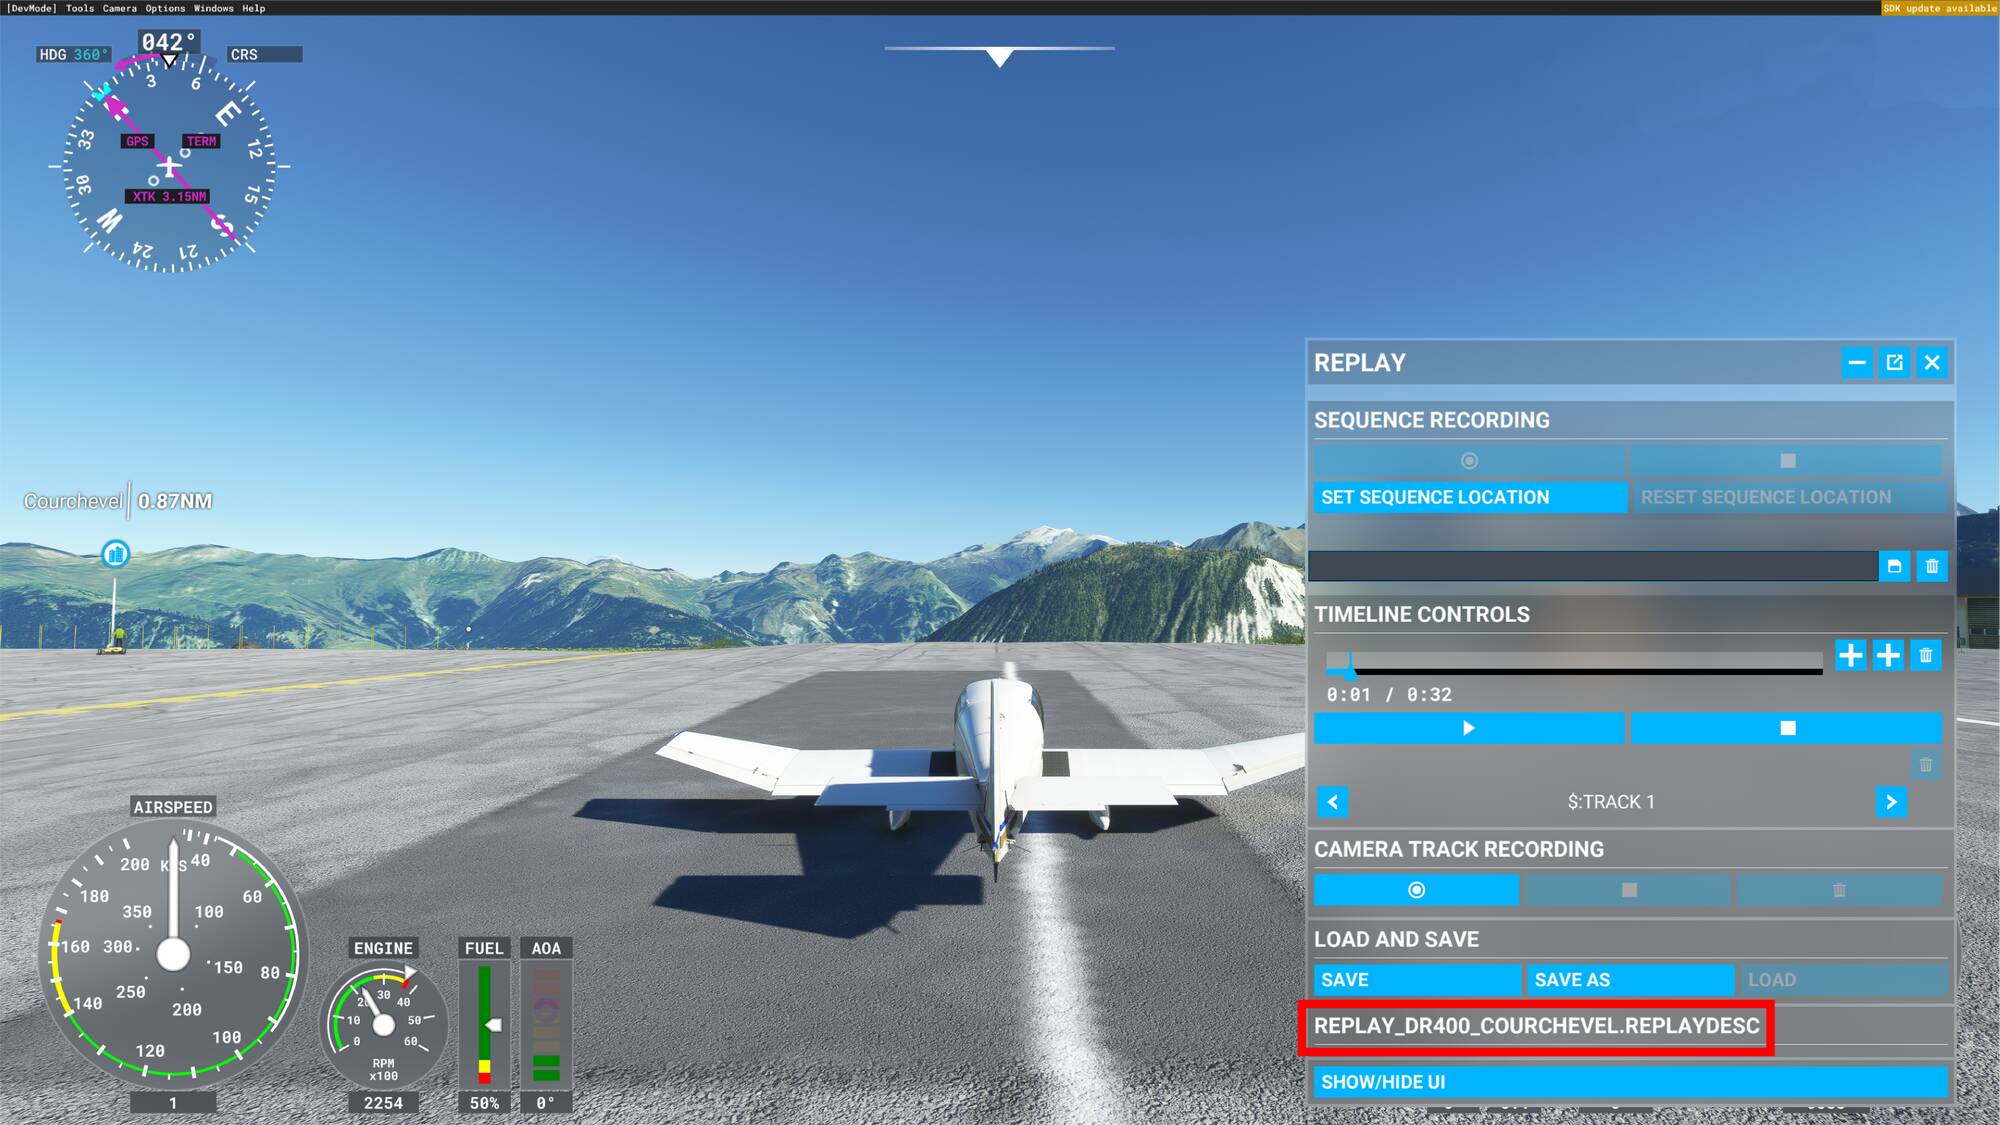
Once the save is finished, you can see the name of your replay file appear at the bottom of the replay panel
2.4 - Load an old replay file
To open a previous recorded sequence, you just have to click on the Load button next to the Save as button at the bottom of the replay panel.

3 - Edit a recorded sequence
Editing a recorded sequence allows you to organise and adapt your replay file, it’s a huge help to use properly the replay tool. In this tutorial part you’ll see how to record an other sequence, name and select it.
3.1 - Record a second sequence
KNOWN ISSUE: WHEN YOU CREATE ONLY ONE RECORDED SEQUENCE, ITS NAME DOESN’T APPEAR ON THE TOOLBAR NAME. HOWEVER, YOU CAN STILL EDIT THE NAME.
YOU HAVE TO RECORD ANOTHER SEQUENCE TO HAVE THE POSSIBILITY TO SEE THEIR NAMES.
To add a new sequence to your replay file you just have to click again on the record sequence button as you did before. When you stop the recording, a second sequence will be automatically created and added to your recorded sequence list.
3.2 - Name editing & sequence selection
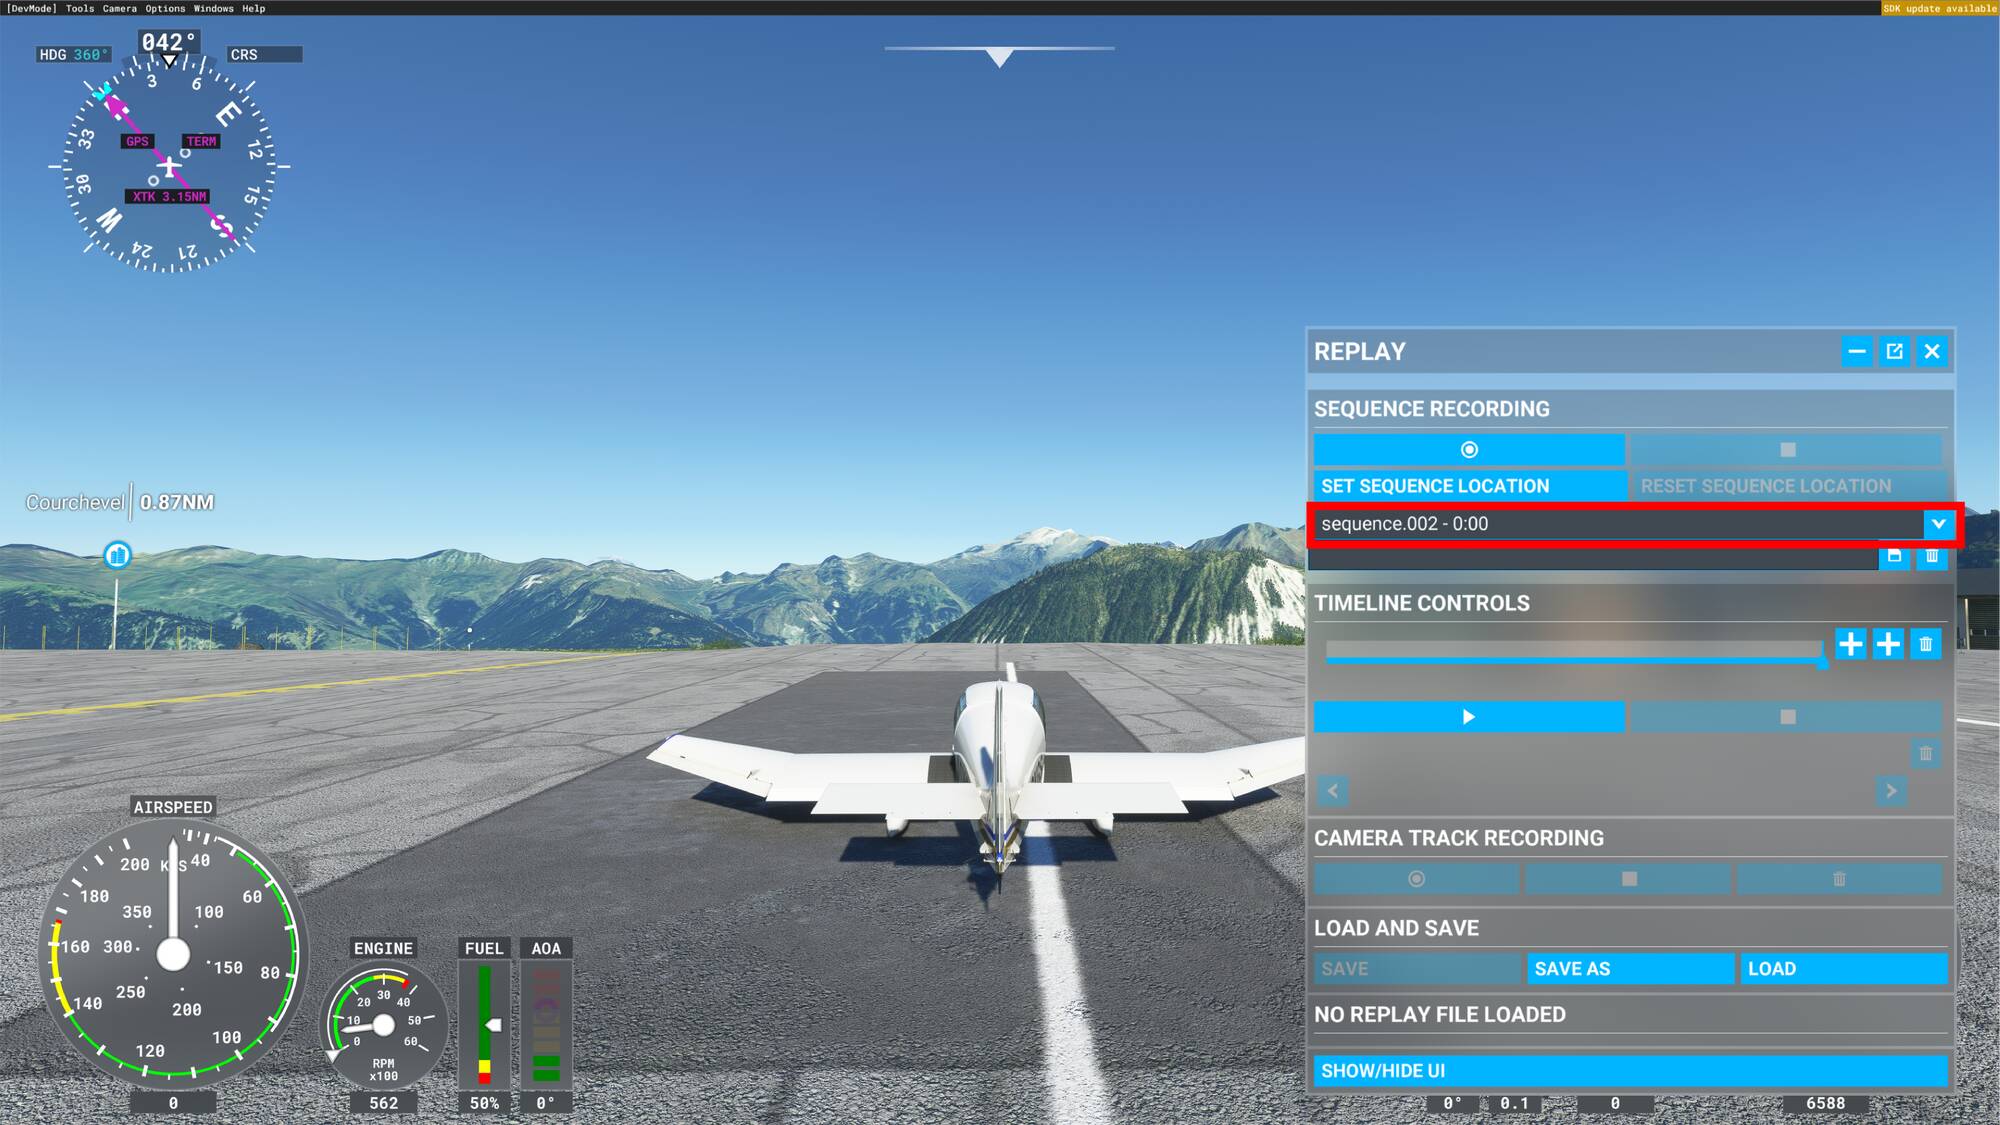
To explore the sequence list and choose the sequence you want to work on, you will need to click on the list of recorded sequences dropdown.

You will see the list of sequences that you have recorded, to select one click on it.
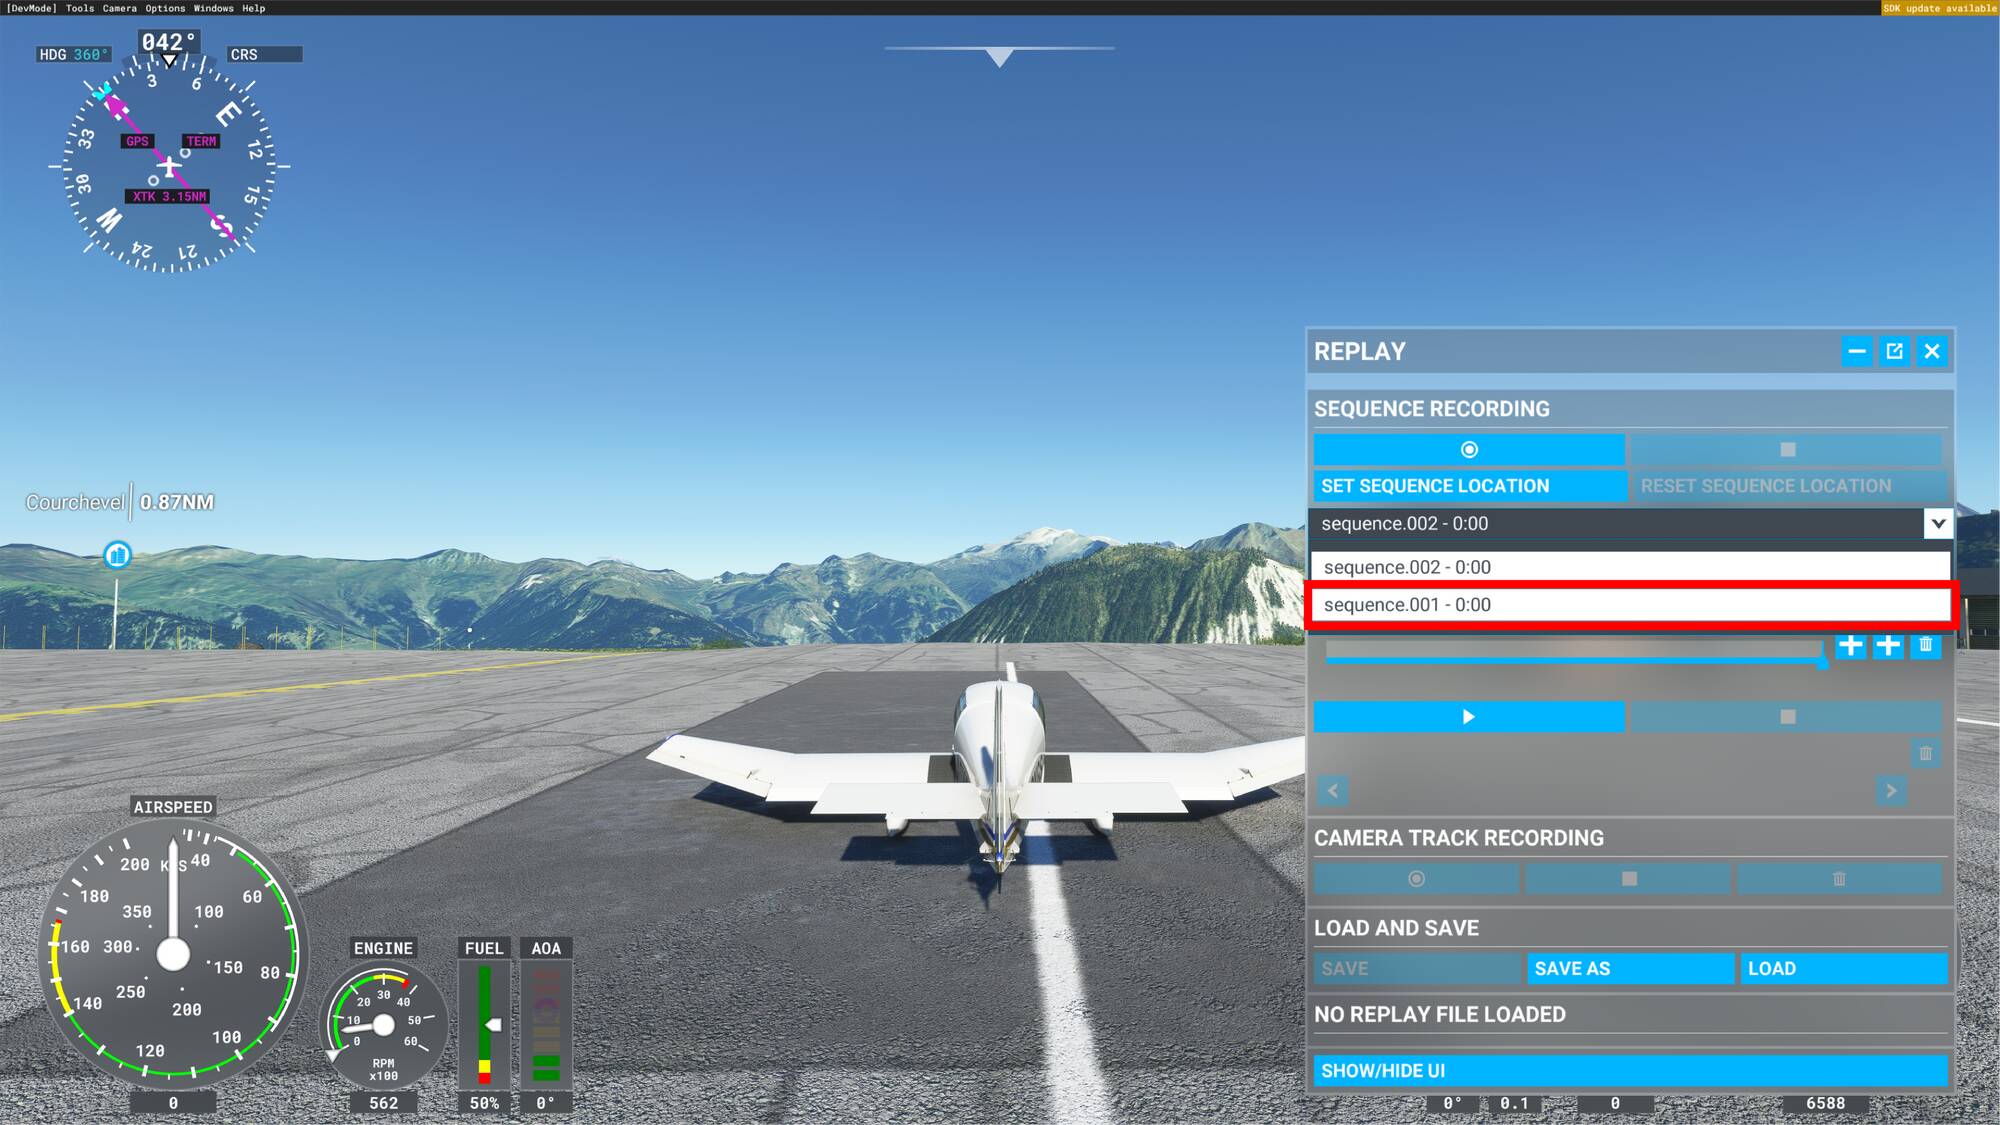
The name of the selected sequence appears in the sequence name bar, to modify it, click inside the bar.

Then type the name you have chosen for this sequence. When it’s done, save the modification by clicking on the save button placed next to the sequence name bar.

To delete a sequence, select it in the sequence list and click on the erase button (trash icon) placed next to the sequence name bar.

KNOWN ISSUE: WHEN YOU DELETE A SEQUENCE, YOUR REPLAY FILE NAME IS REPLACED BY “NO REPLAY FILE LOADED”, DON’T WORRY, YOUR REPLAY FILE IS STILL THERE, CLICK ON SAVE TO MAKE ITS NAME APPEARS AGAIN.
4 - Navigate on the timeline
Once you have recorded a sequence a timeline is associated to it, this timeline is the feature which will allow you navigate through your sequence, play it to check its quality and even modify it.
4.1 Play the sequence
The first thing that you can do is to review the sequence you’ve recorded. To do so, click on the play button placed under the Timeline.
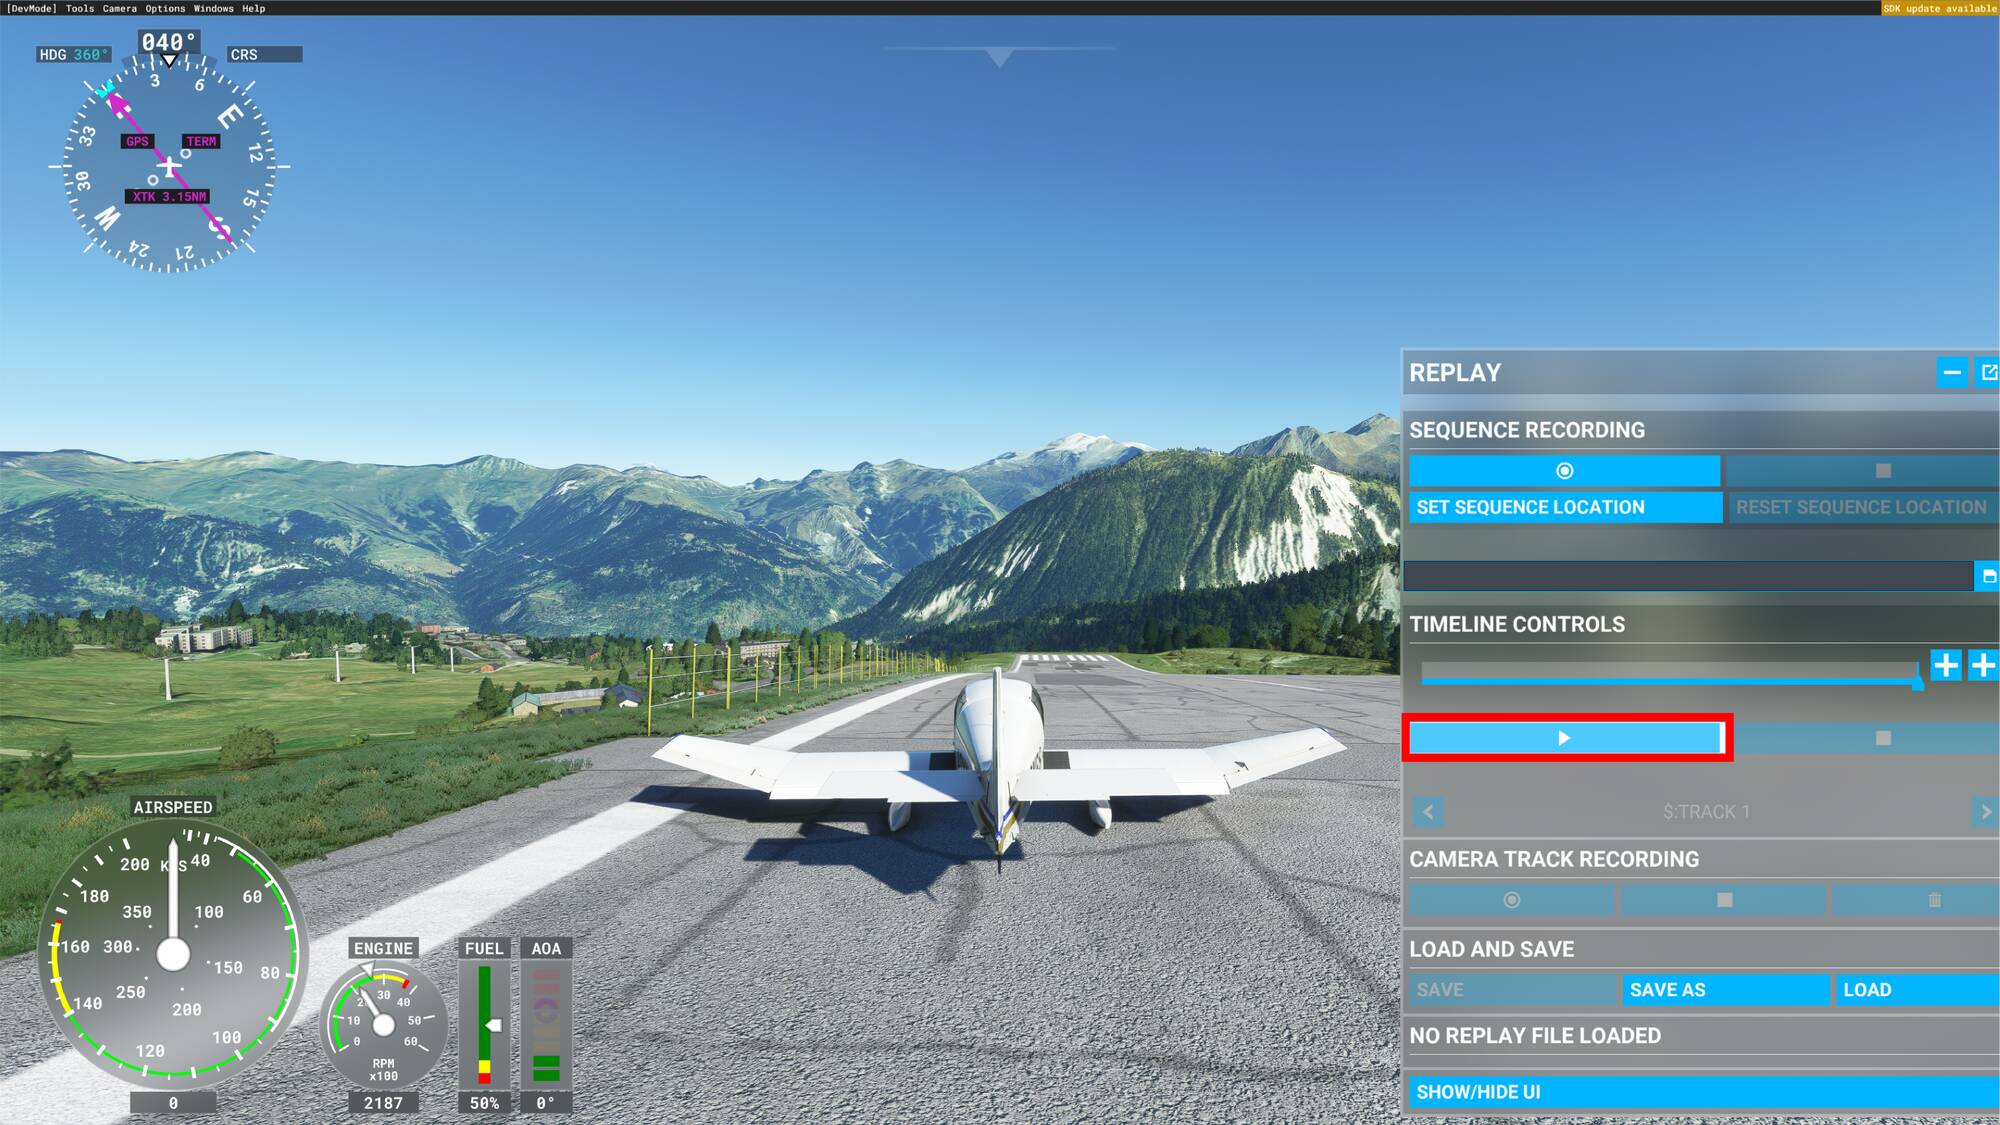
This will launch the video of your sequence and allow you to check its quality for example.
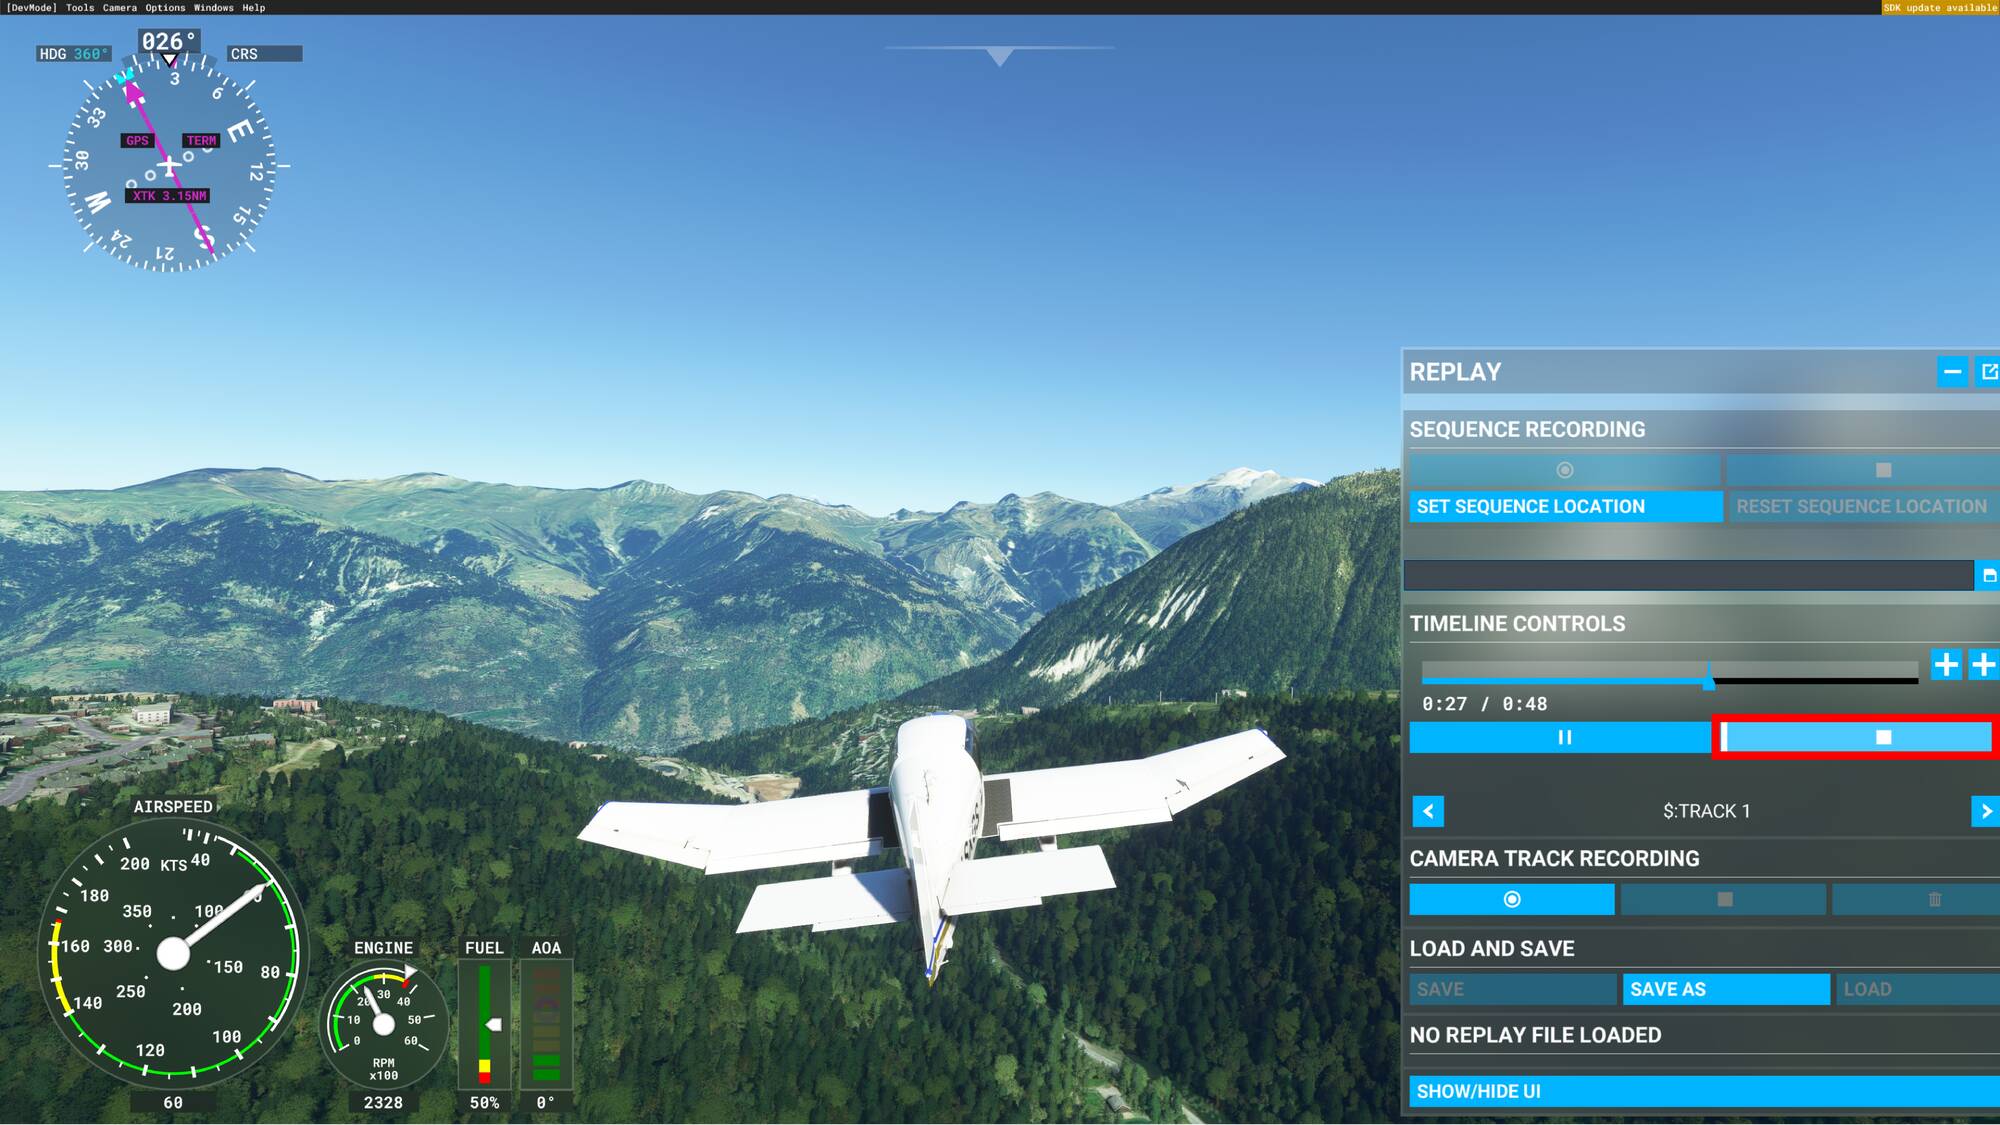
4.2 Stop the sequence
If you want to stop viewing your recorded sequence, click on the stop button placed next to the play button.
- 4.3 Navigate inside a recorded sequence
If you want to jump to a specific time code in your recorded sequence, you can click directly on the timeline, precisely on the cursor and drag it at the desired timecode.
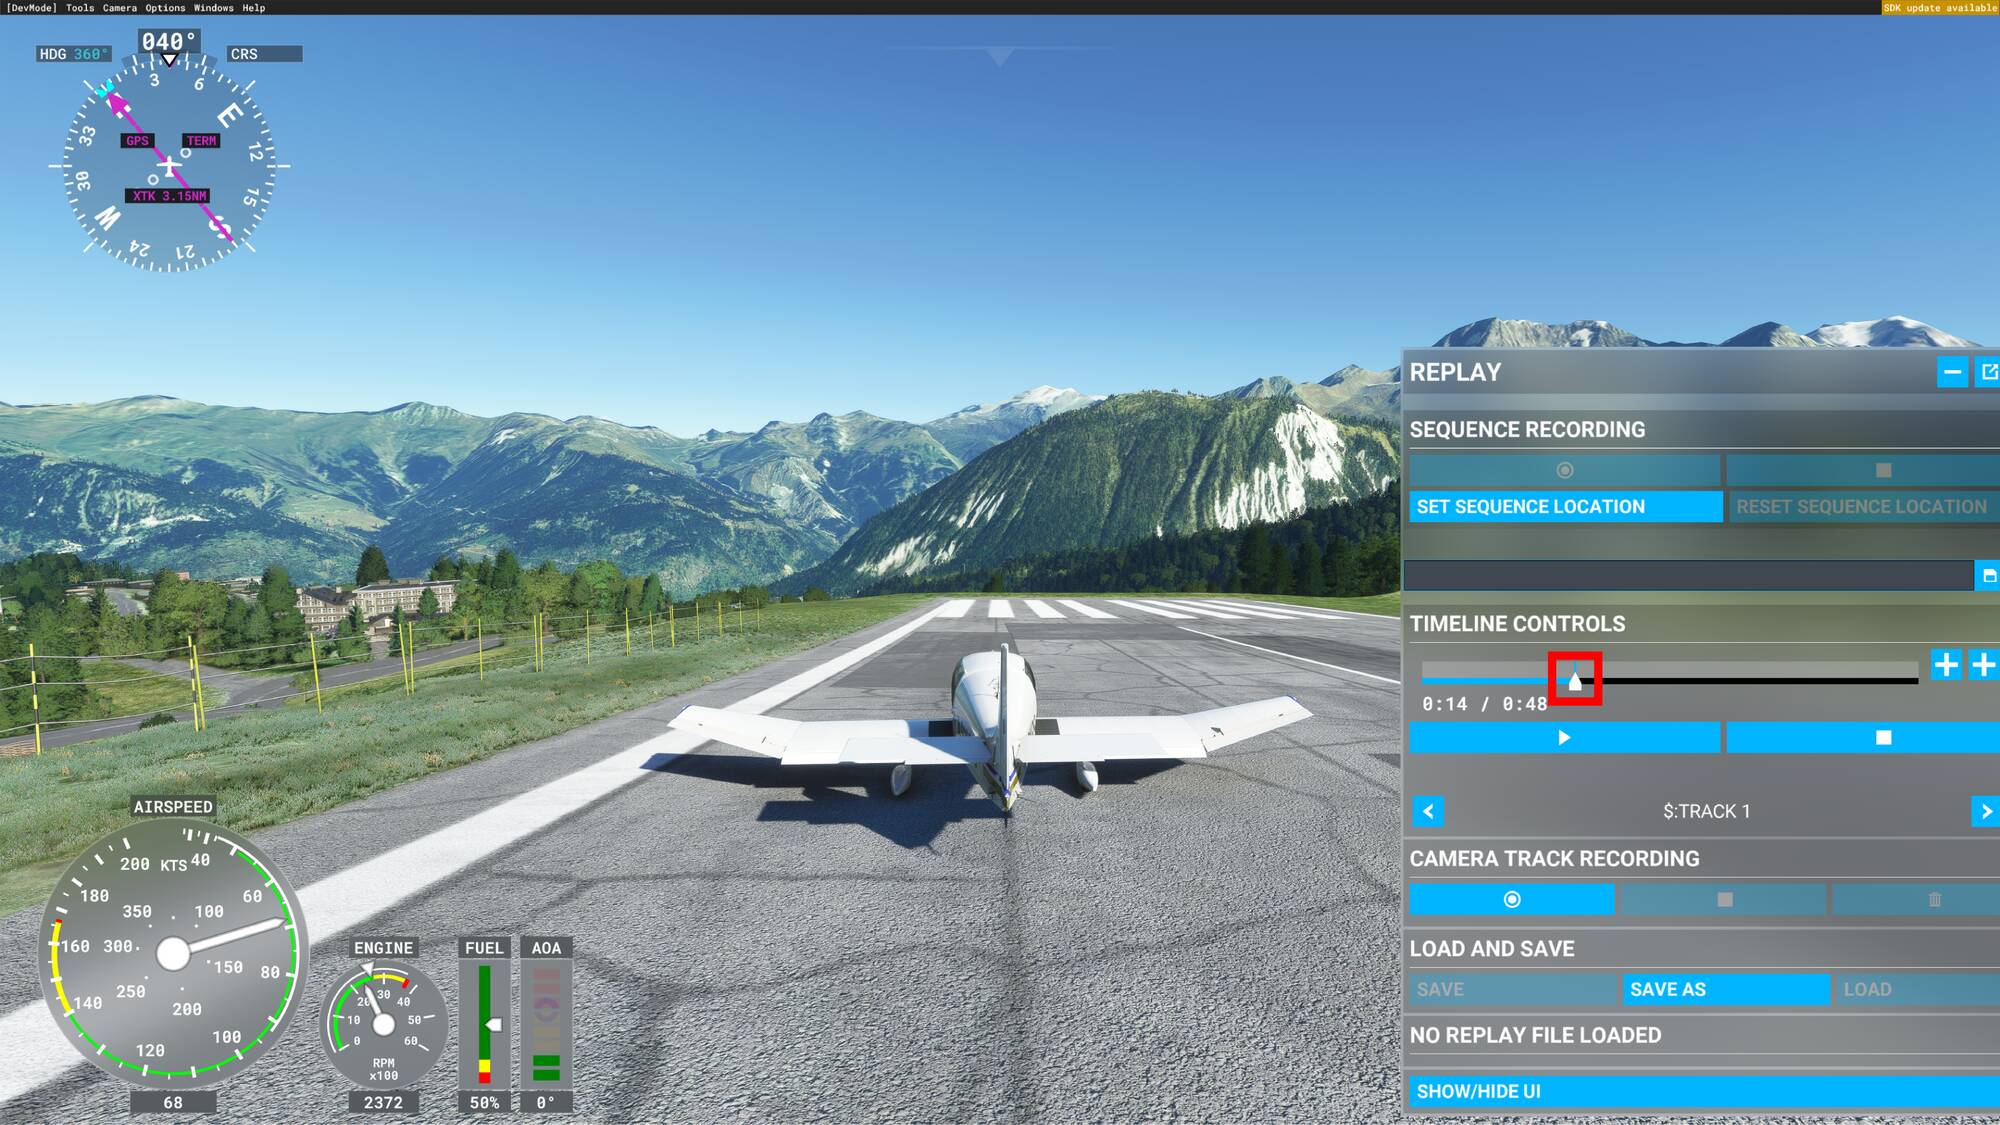
The cursor will be placed at the desired moment, then click on the play button to review your sequence from that point on.
5 - Record a Camera track
The replay tool allows you to record new cameras on a recorded sequence, thanks to this feature you have the possibility to create a unique flight sequence by adding new views and switch between them.
GOOD TO KNOW : XBOX CONTROLLER IS NEEDED TO MODIFY CAMERA POSITION, YOU CAN’T DO IT WITH YOUR KEYBOARD
5.1 Start the recording
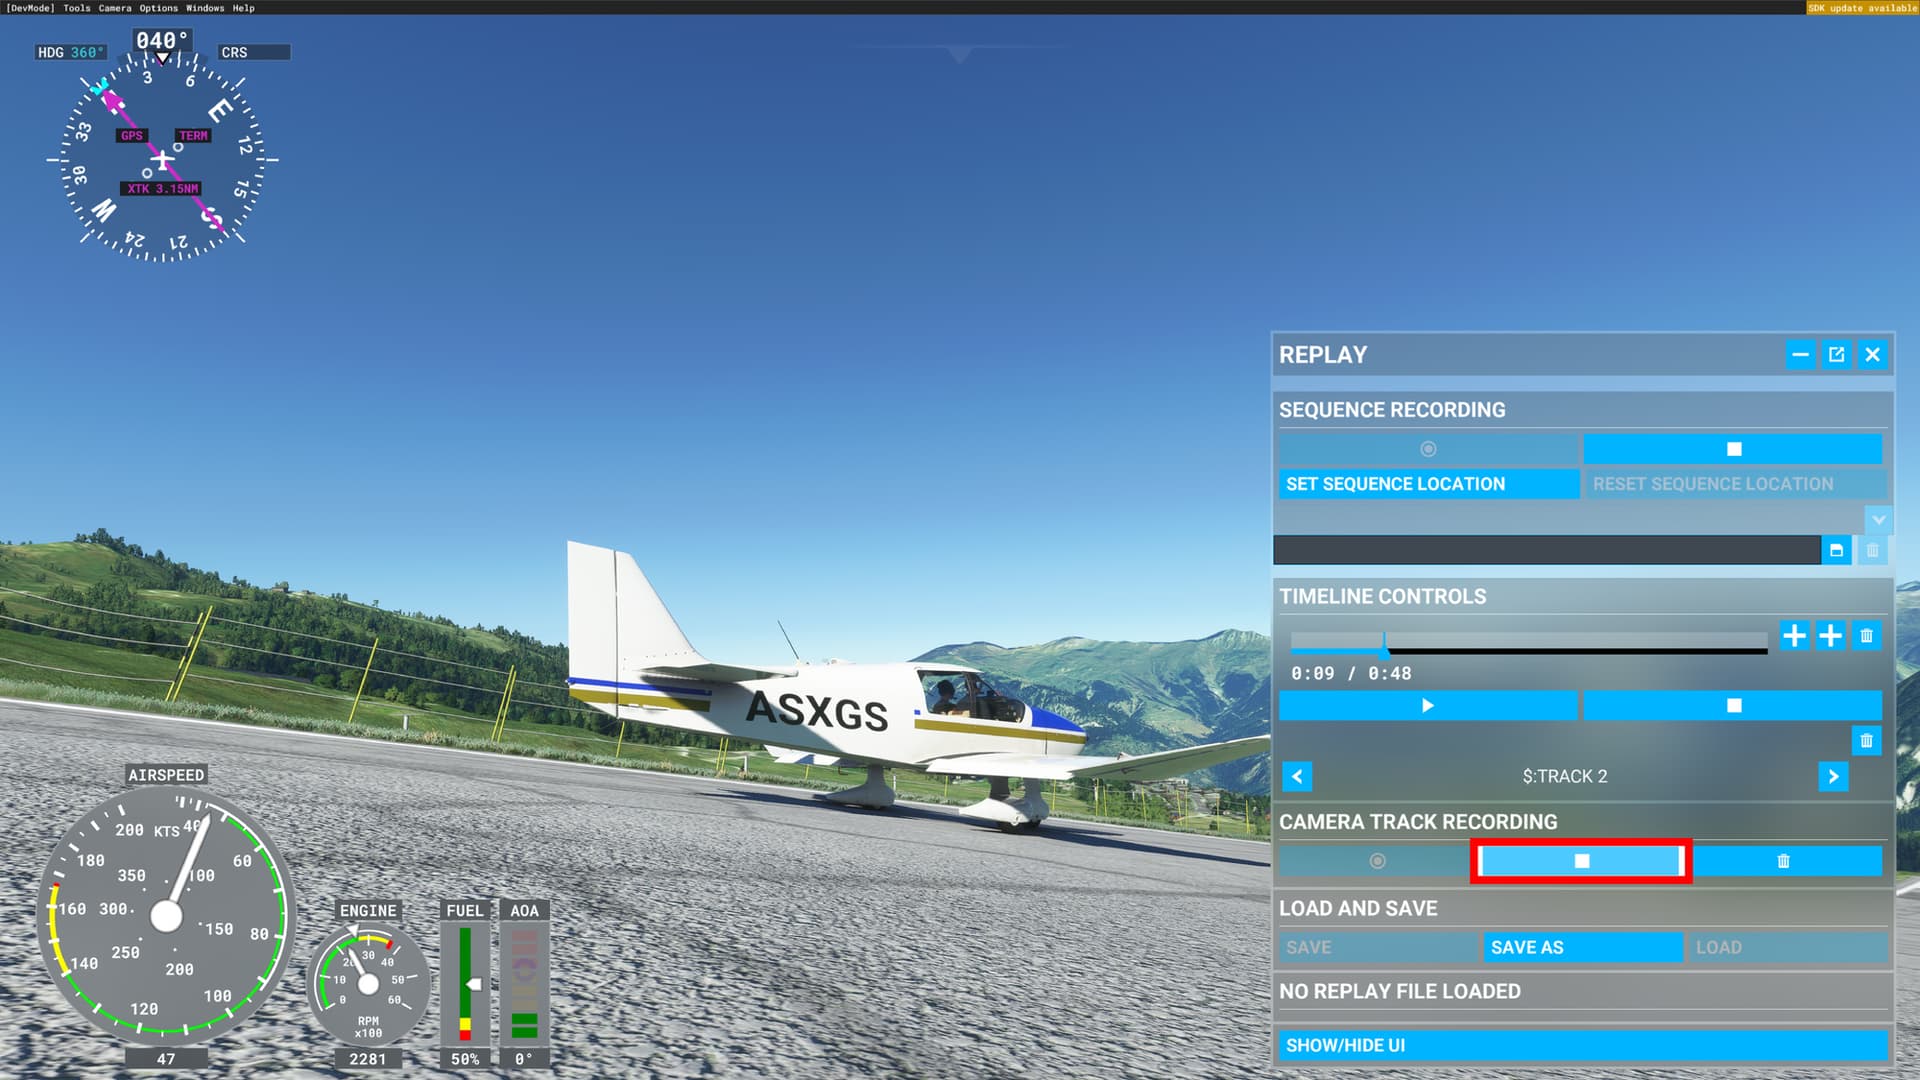
Once you have a recorded sequence in your replay tool you must click on the camera track recording button. At this moment your sequence is played from the beginning.

This is the moment where you can move the camera around your aircraft and create a new path, or see your sequence from another angle.

5.2 Stop the recording
Once you are happy with your new camera track recording, click on the stop button to end the recording of this new camera.
Once you click on this button, a new camera is automatically added to your panel.
Good to know, you can create as many new cameras as you like.
KNOWN ISSUE: YOU CAN’T MODIFY A CAMERA TRACK NAME
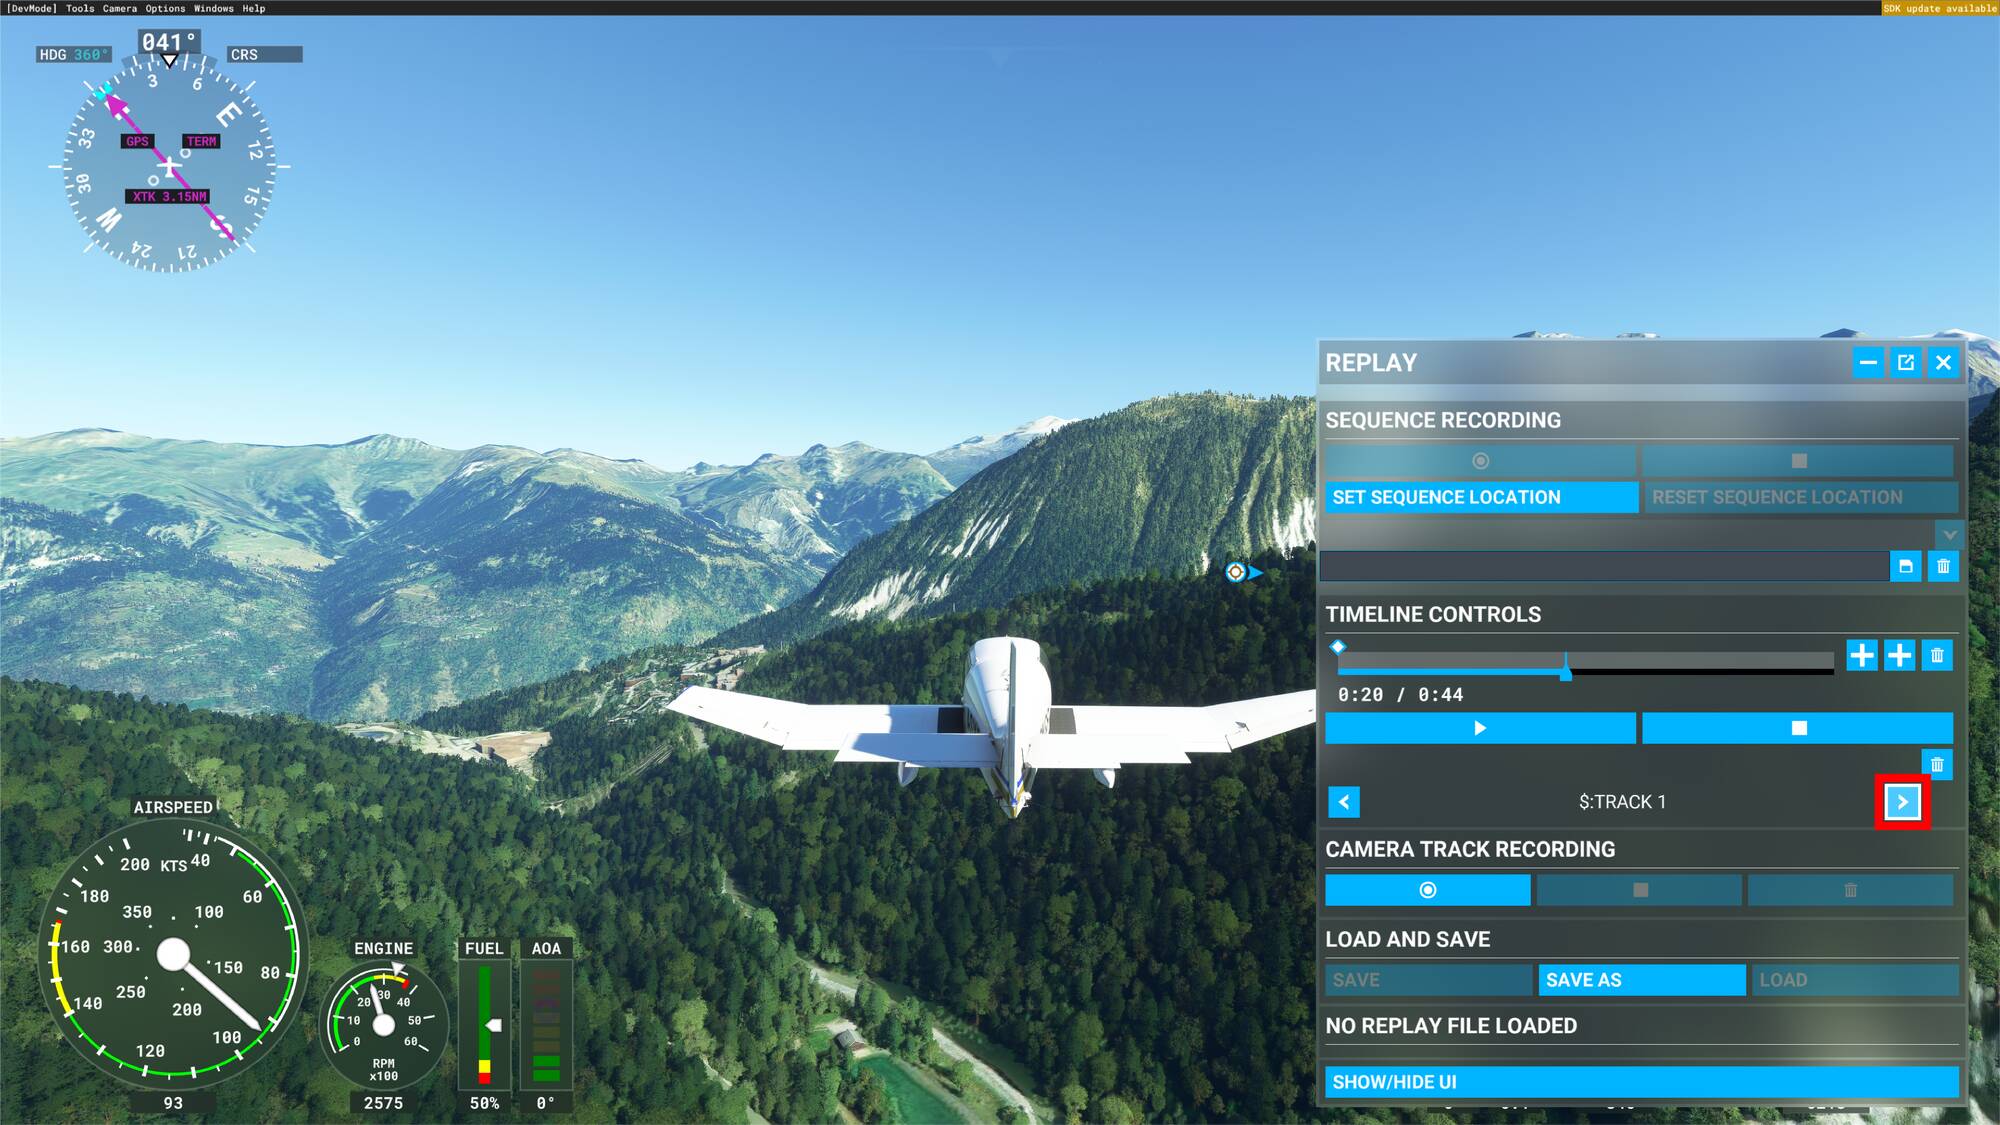
5.3 Change the camera track on the recorded sequence
To change the camera track of your recorded sequence, click on the right and left arrow button placed on either side of the camera track name (camera track 1 here).
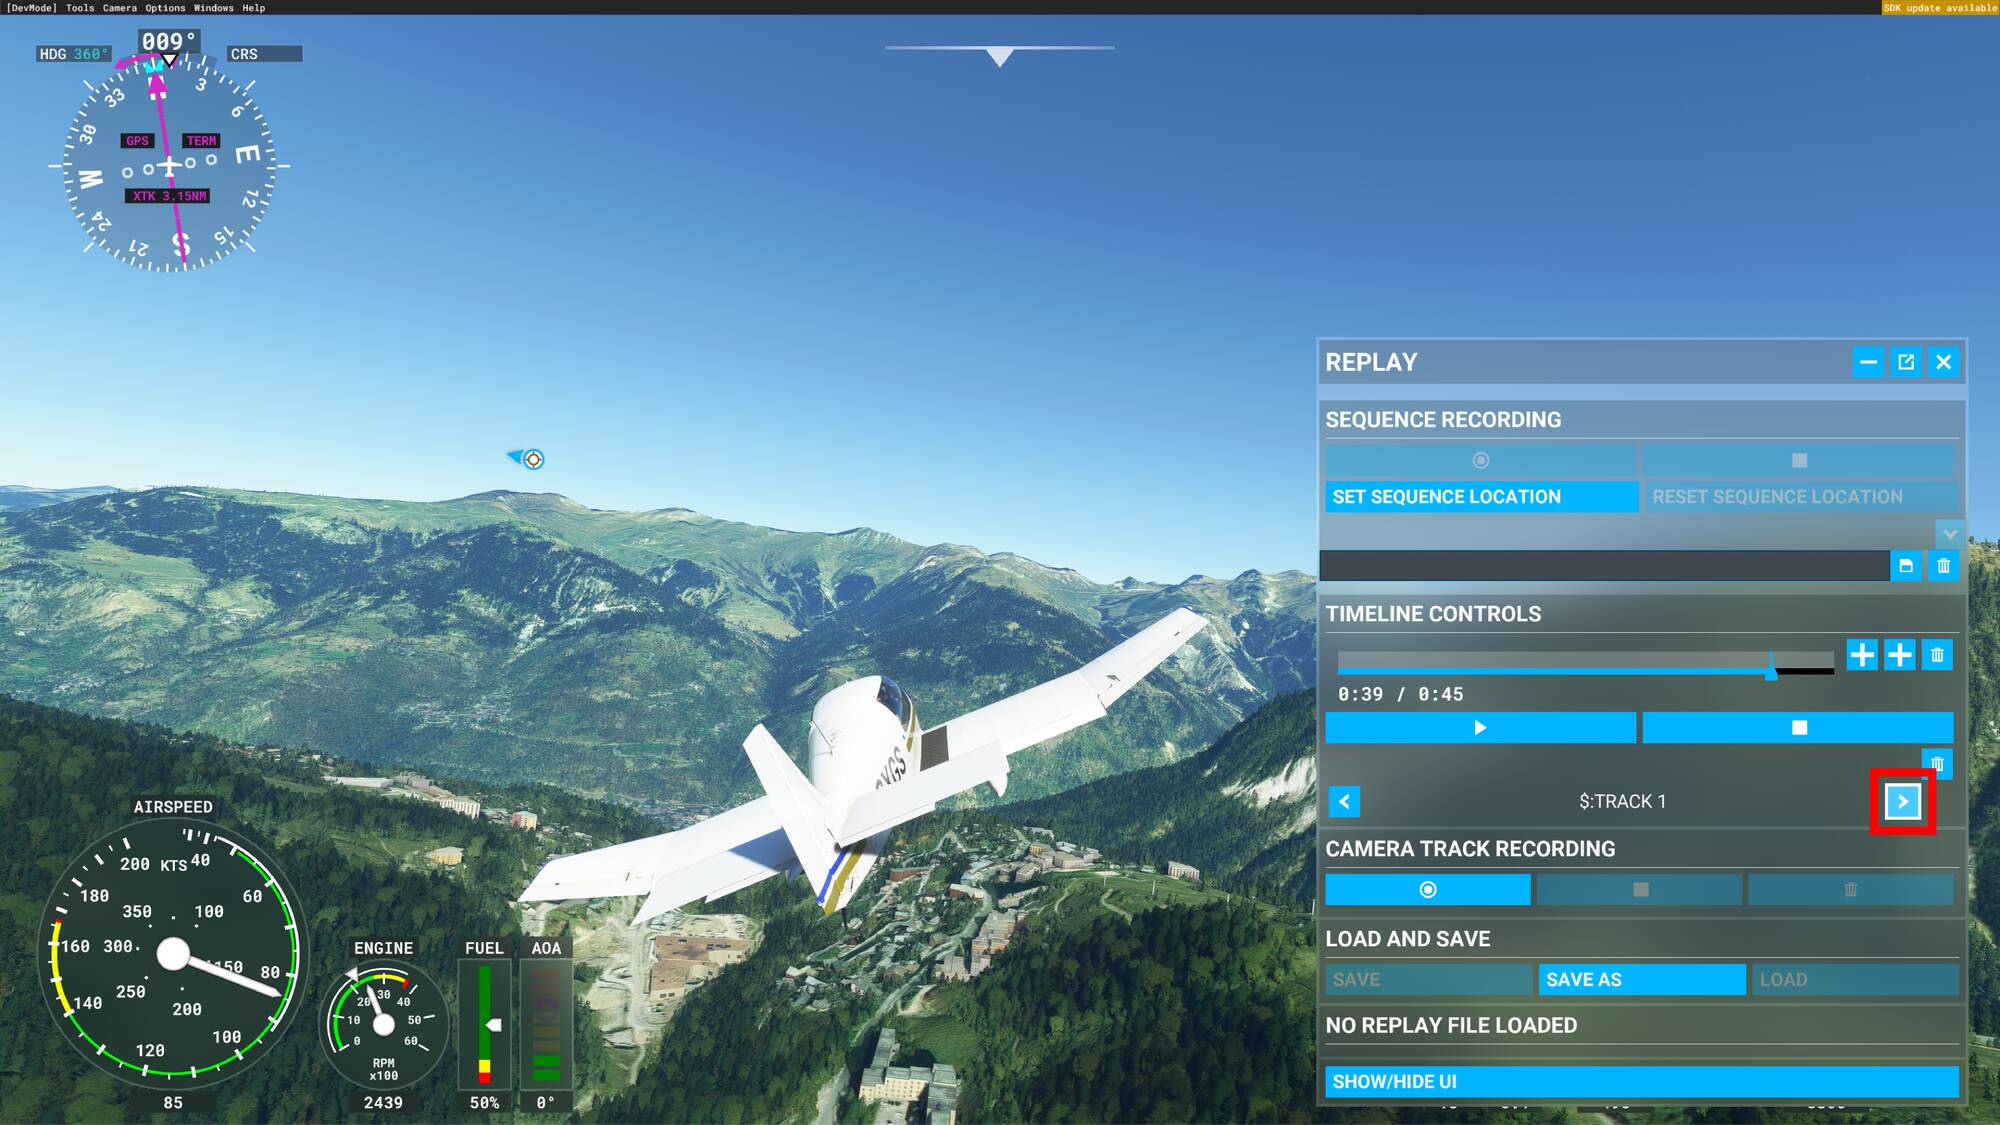
This allows you to check the quality of your different camera tracks by selecting them and clicking on the play button placed under the sequence timeline.

5.4 Cancel a camera recording
The cancel camera recording button represented by a trash icon is placed next to the camera track recording stop button,
If you are recording a new camera track and you are not happy with what you have done, clicking the cancel camera recording button will automatically stop recording the current camera and delete it.

This allows you to avoid storing a “failed” camera track if you know during the recording that it is not the one you want.
5.5 Delete a camera track
Once you have recorded several camera tracks, you will see that some of them are better than others. How to delete the less interesting camera tracks?
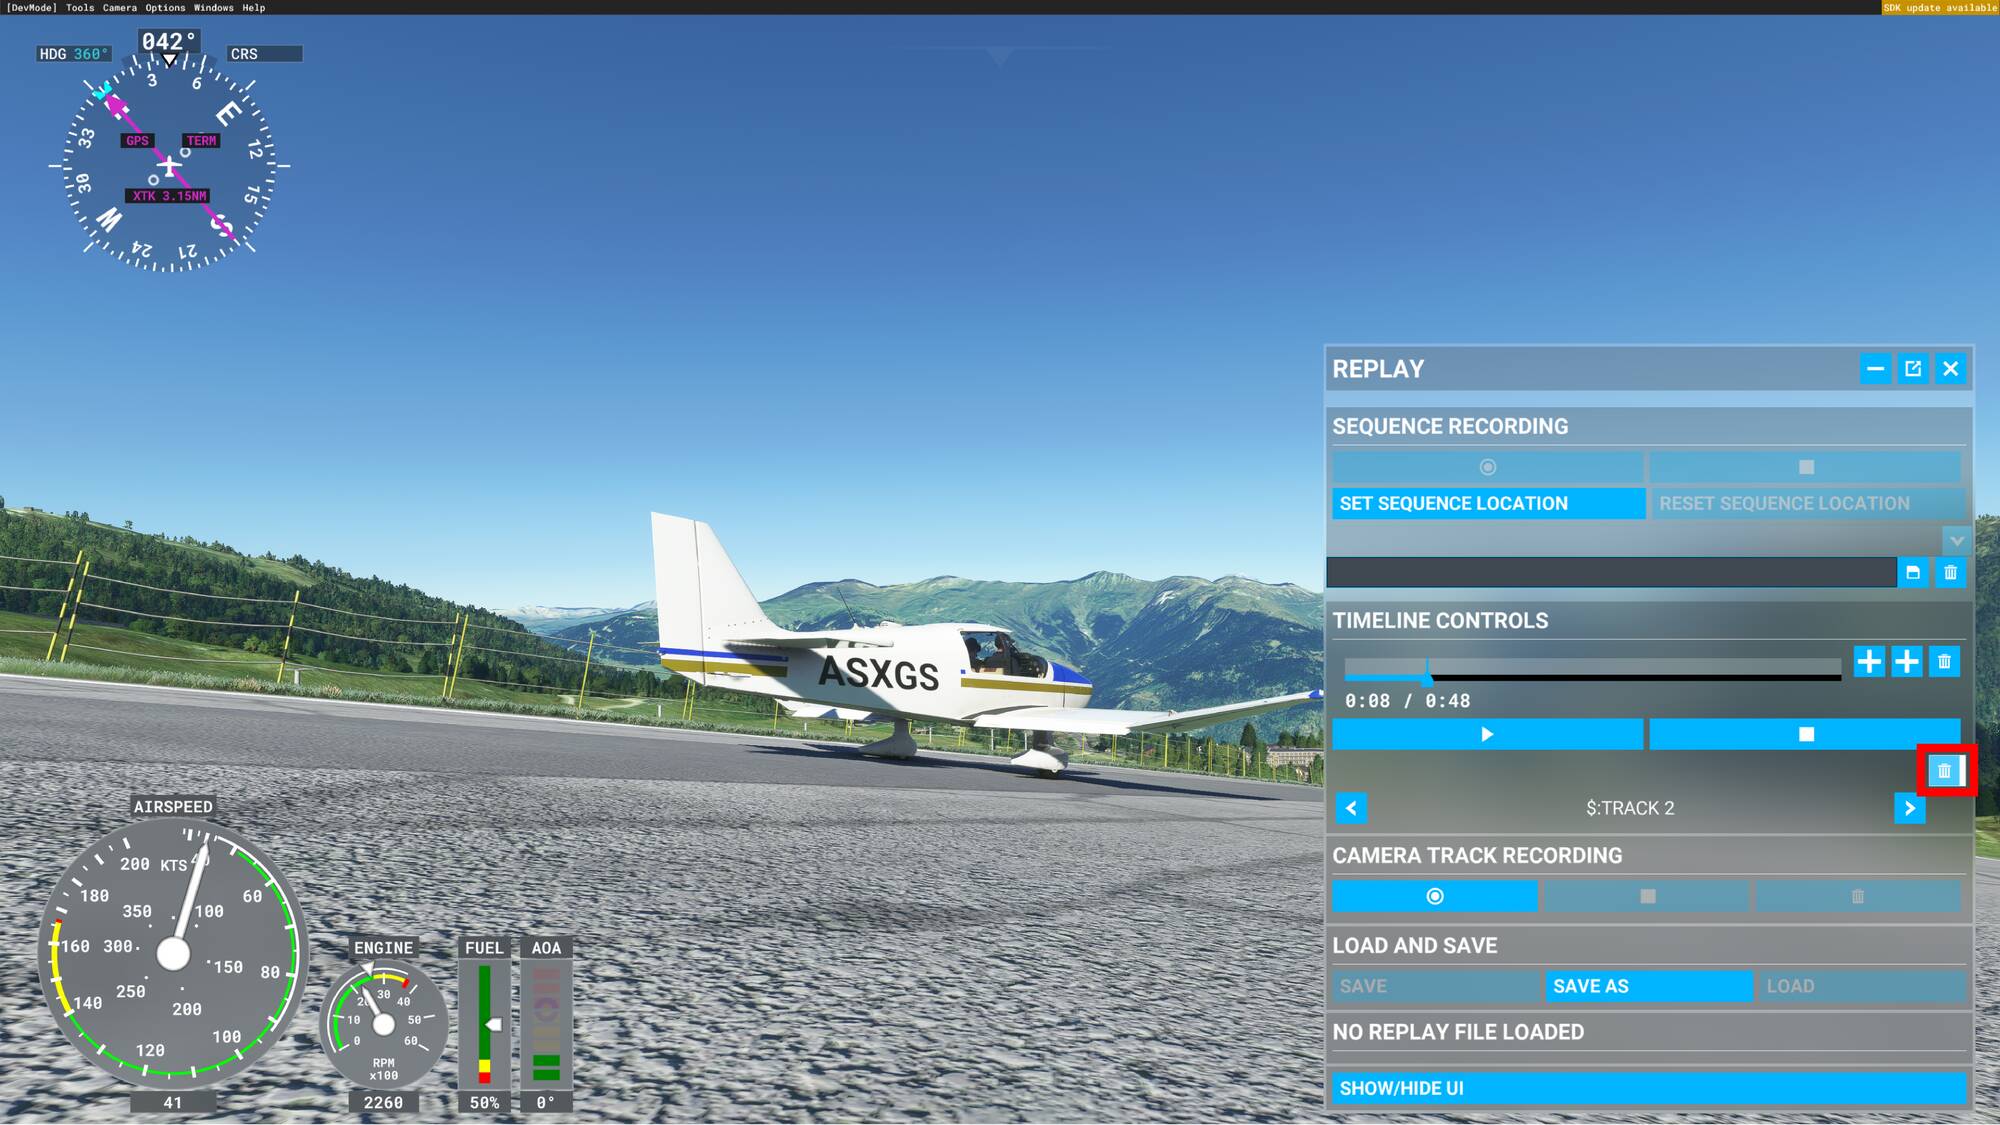
To delete a recorded camera track, simply click on the delete camera track button placed above the camera track name.
First select the camera track you wish to delete by clicking on the arrows on either side of the camera name,

then click on the button with the trash icon placed just above it and the selected camera track will be deleted.
6 - Play with keyframes
The keyframe tool feature allows you to edit a recorded sequence by changing the camera track or the weather at a precise moment.
6.1 Add a Camera keyframe
Once you have recorded several camera tracks you have the possibility to add them to your sequence. To do so, there is a precise order to follow.
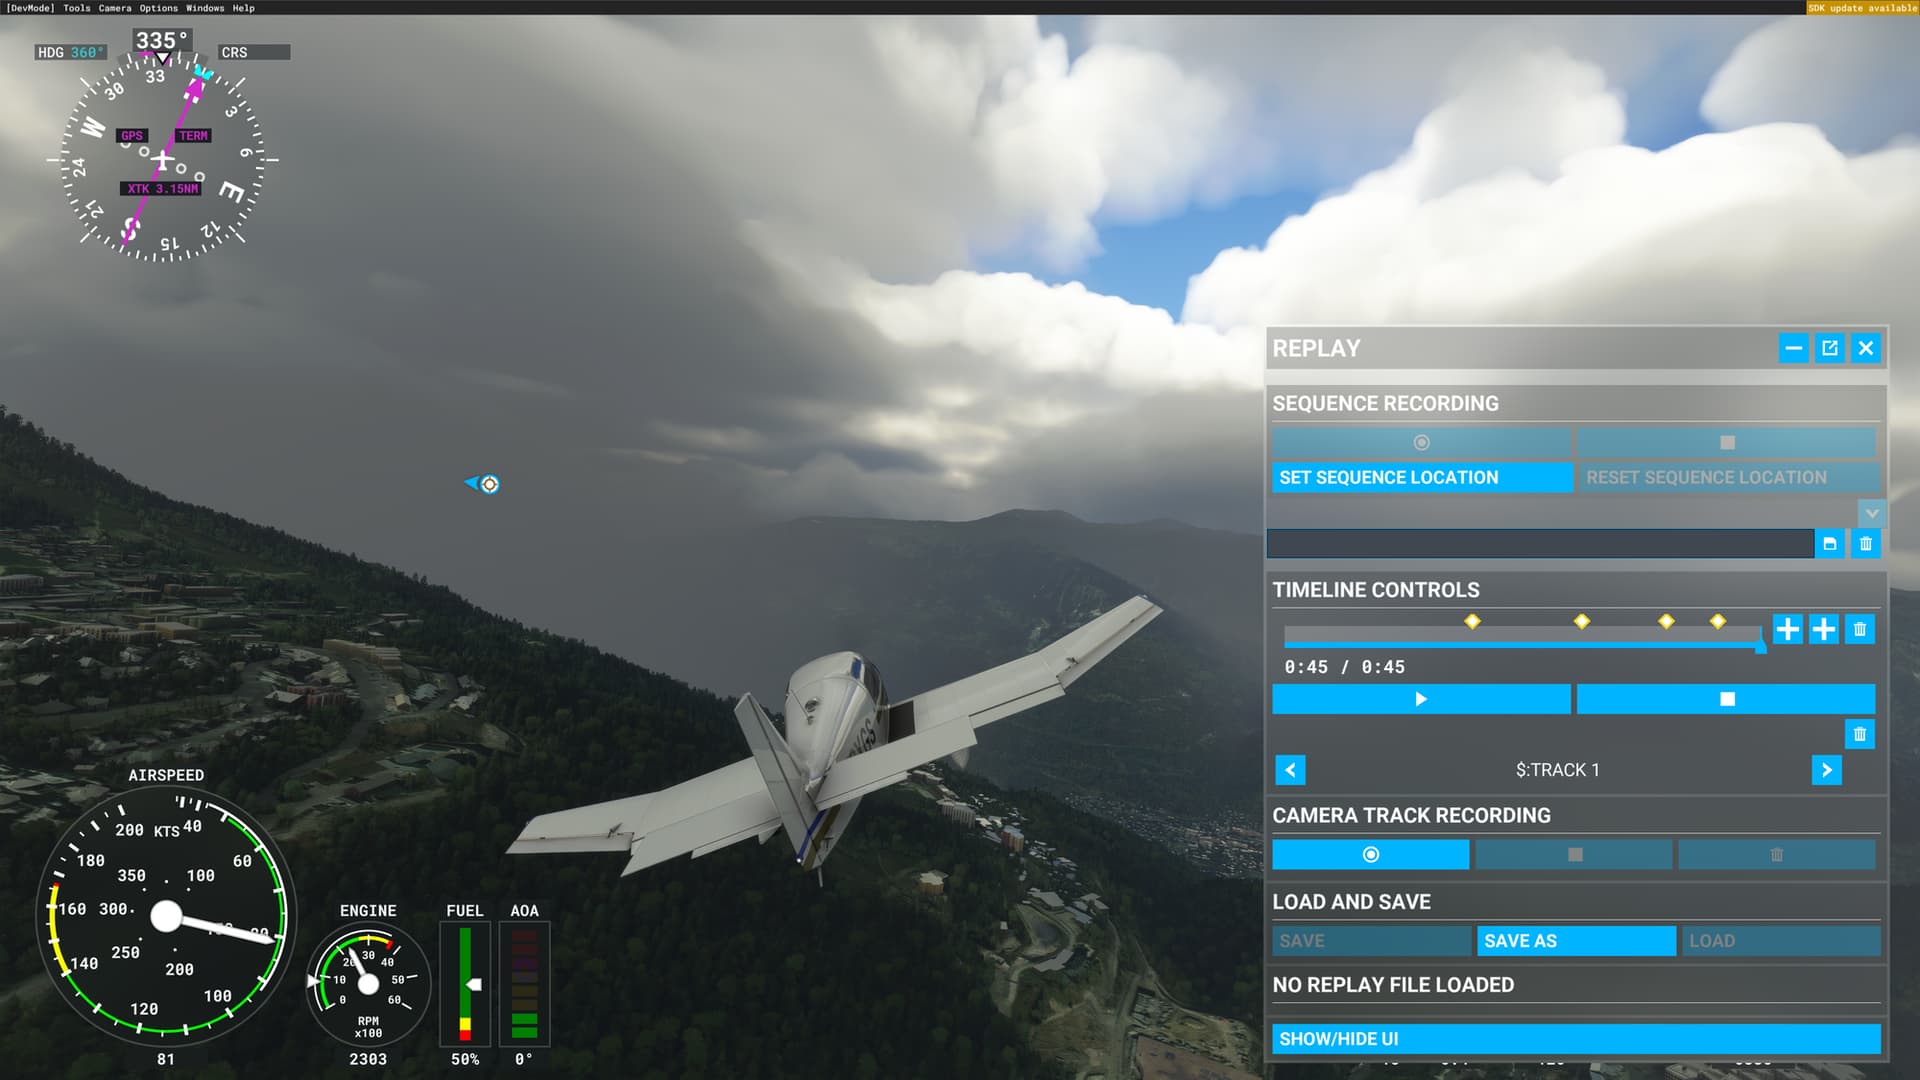
First, select the camera track you want to add to your sequence. Then, click on the camera keyframe button placed next to the timeline.
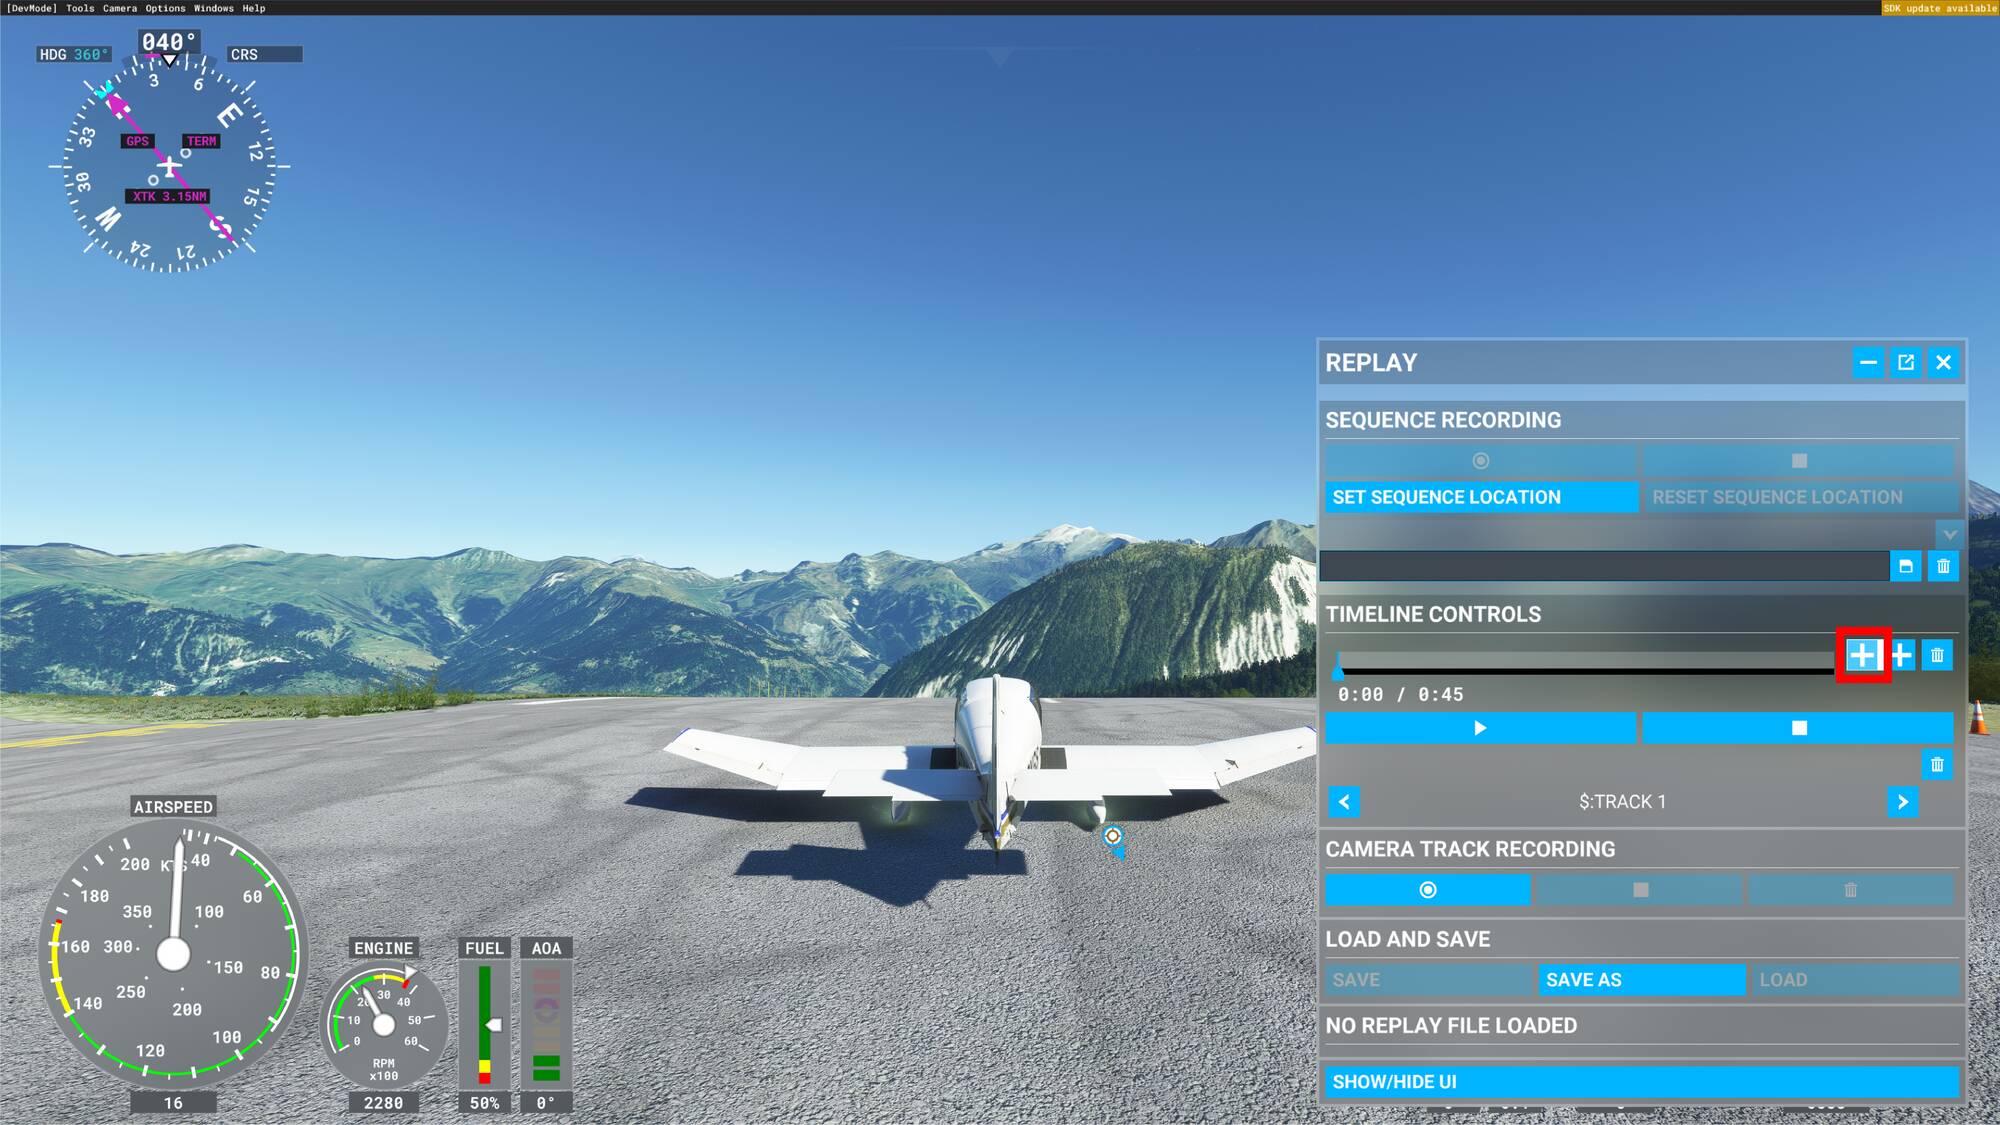
By clicking on it you’ll add the camera that you want to see for the beginning of your sequence.

If you don’t add any other camera keyframe it will be the only camera track played in your sequence.
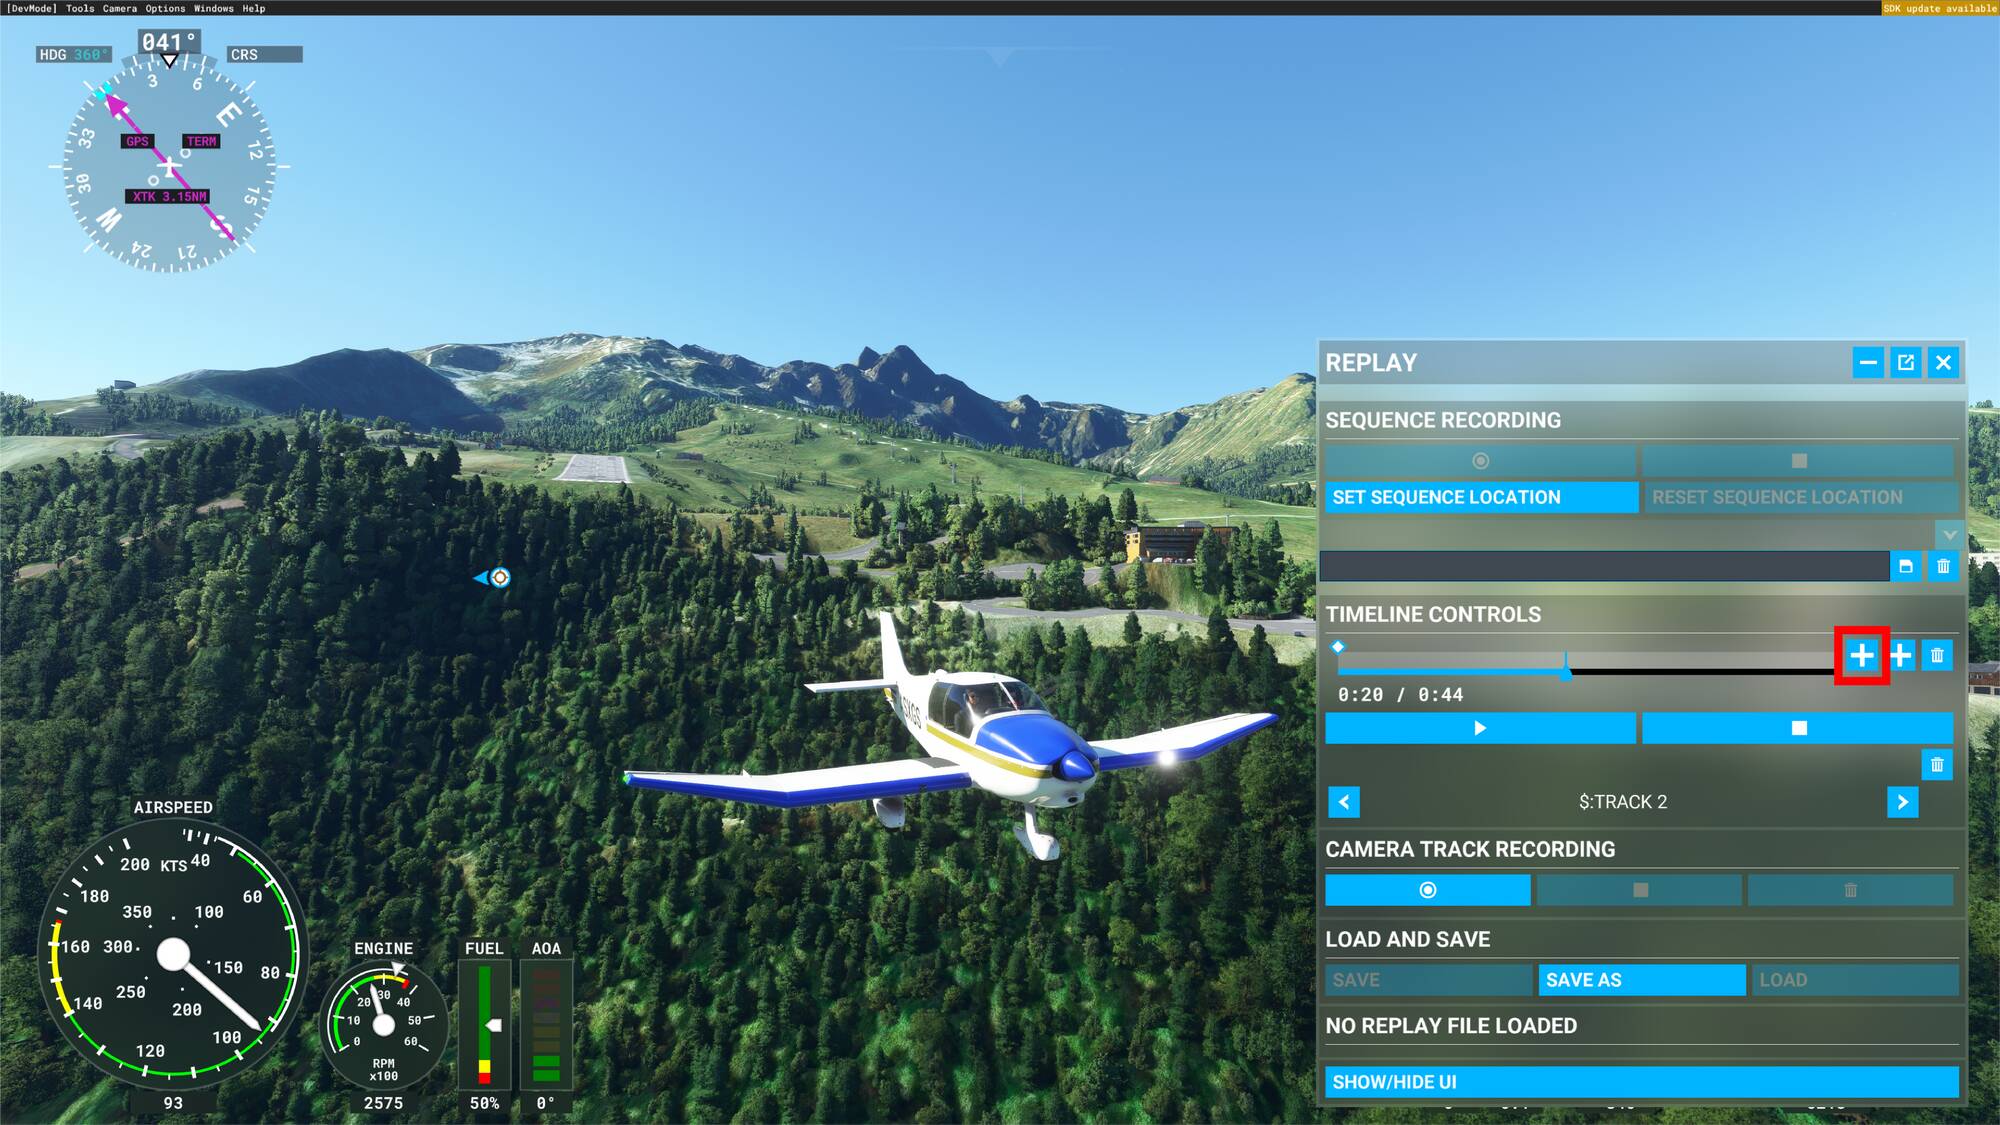
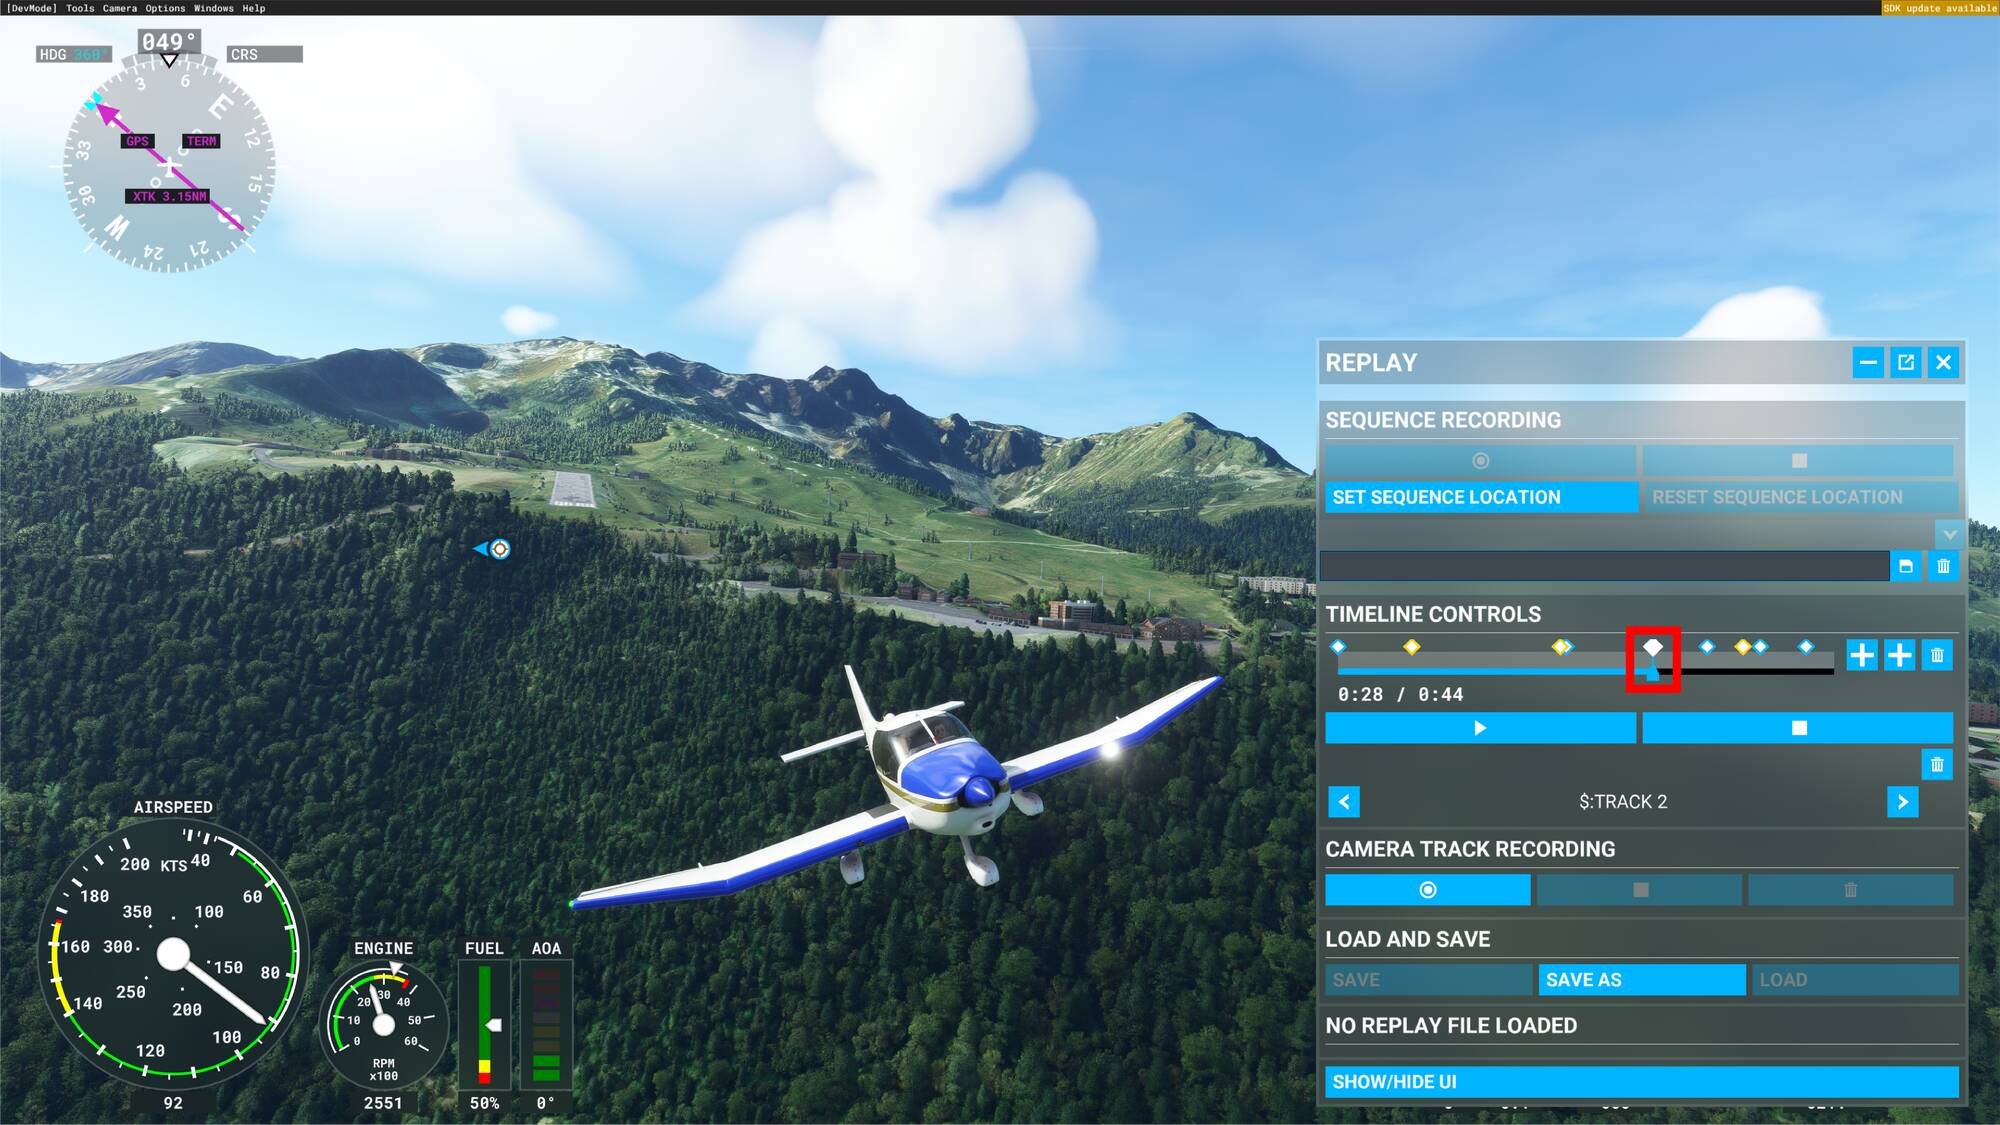
To add another camera track to your sequence, click directly on the timeline and drag the cursor to the precise moment you want to make the camera change.

To change the camera track during the sequence, select the second camera track you want to add.
Once you’ve selected the camera track and the moment to make the change, click on the camera keyframe button to add a new keyframe and change the camera track played at this moment of your sequence.
You’ll see a blue keyframe appeared on your timeline, this means that the camera track change has been taken into account in your sequence.
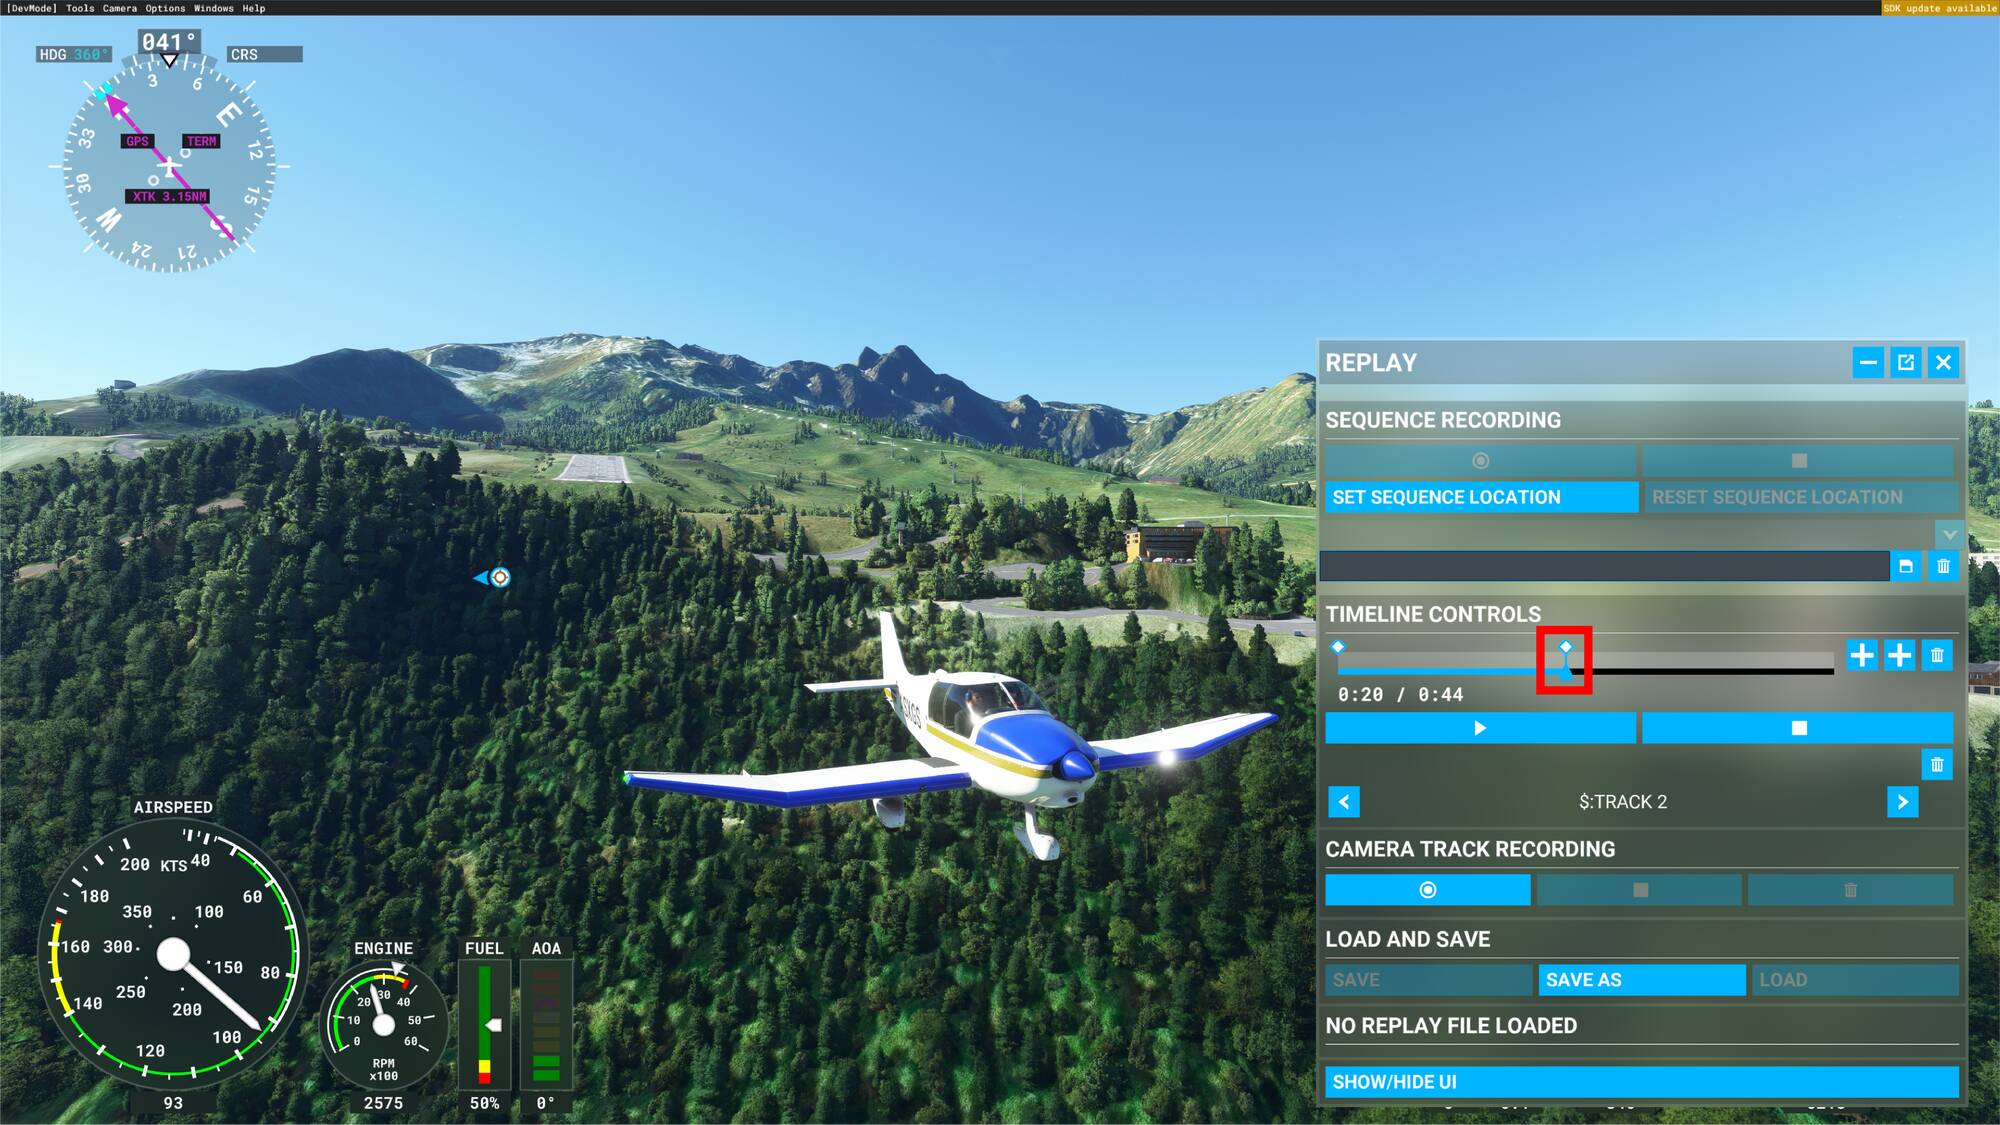
You can repeat this manipulation as much as you want.
S6.2 Add a Weather keyframe
Next to the camera track keyframe button you have another keyframe button dedicated to the weather. It allows you to change the weather or the time of day in your recorded sequence.
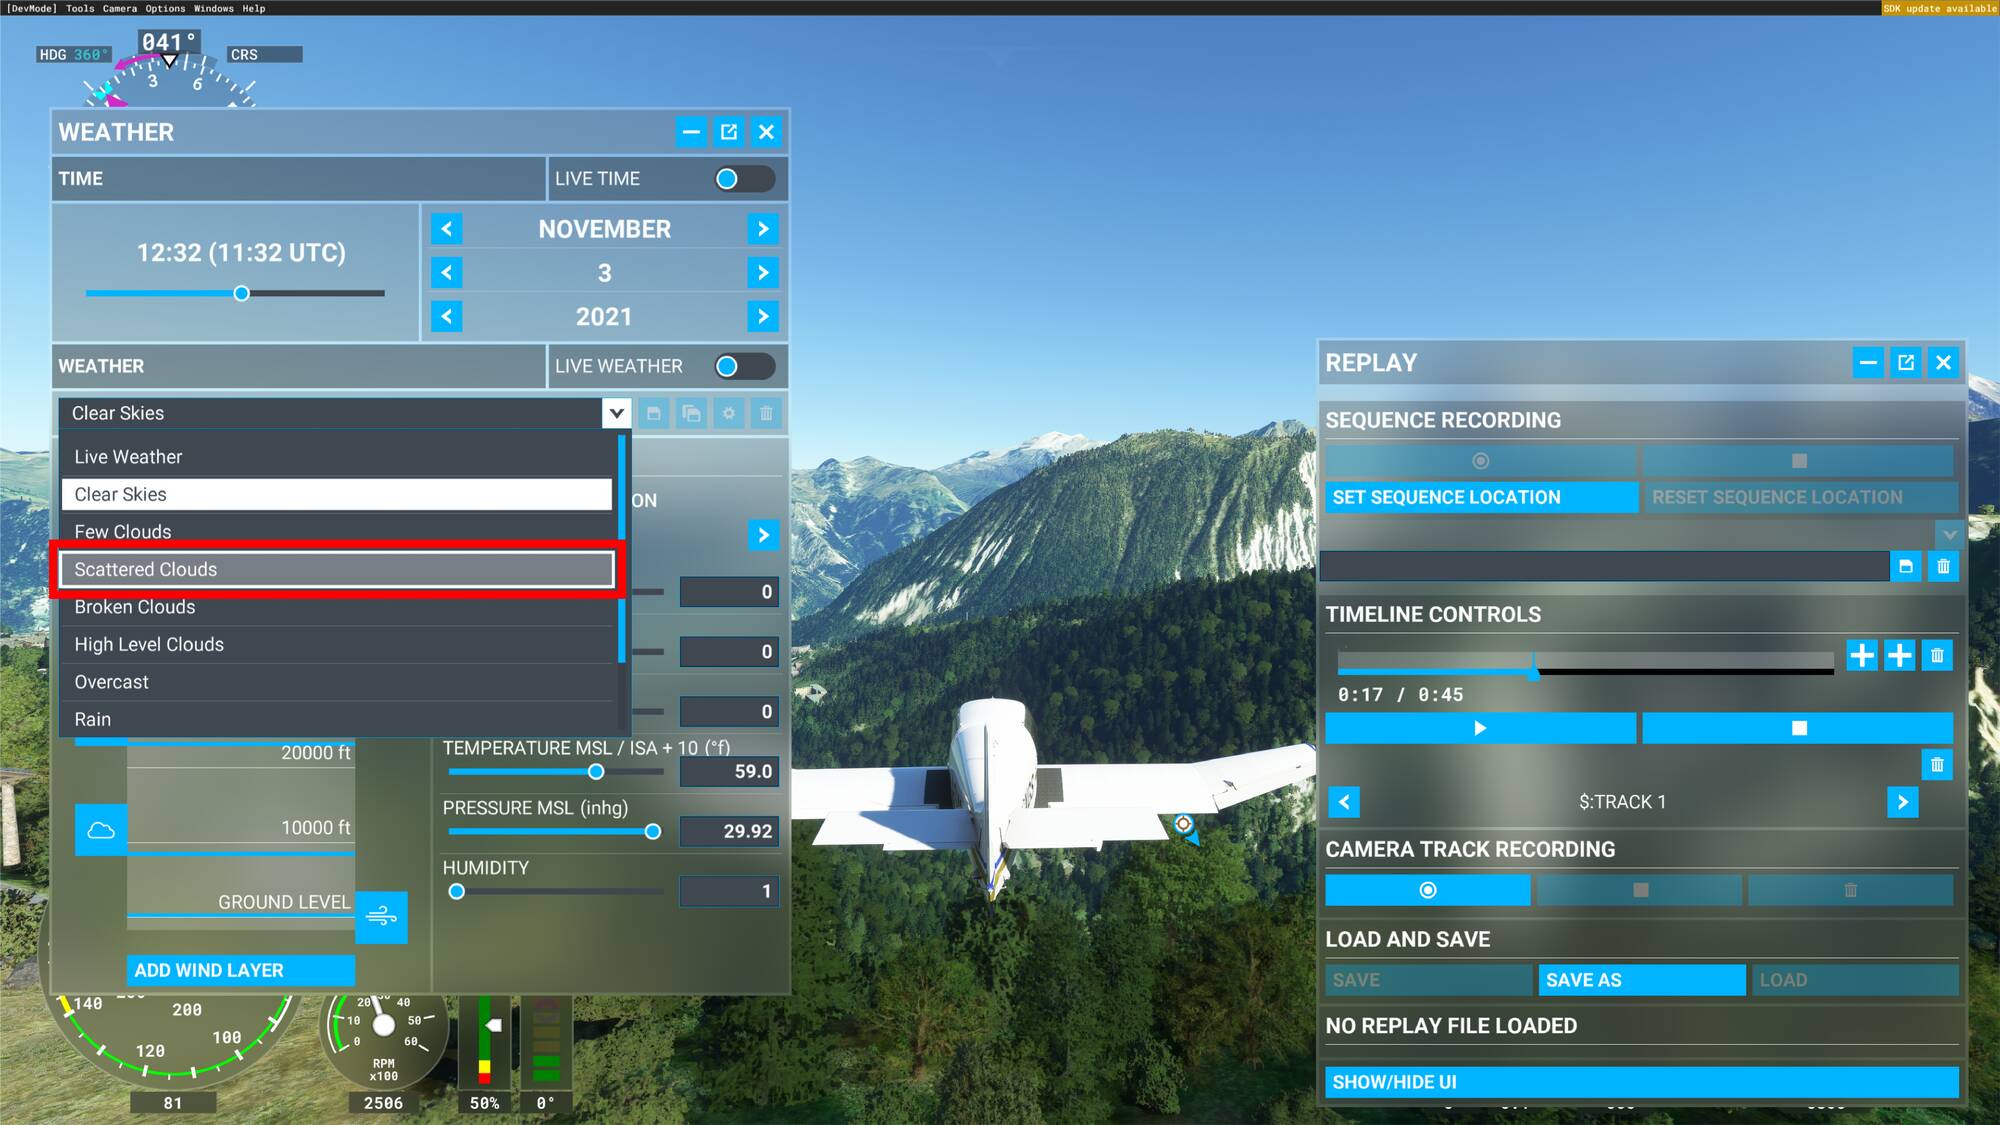
First you have to display the weather panel, to do so, go in the top game toolbar and click on the cloud icon.

Now you see the weather panel on your screen.

The weather keyframe has the same logic as the camera keyframe, which means that first you’ll have to select the weather parameters you want to add to your sequence and then when it’s done, add the keyframe to your sequence timeline.
First, select the timecode you want for the weather change in your timeline.

Then, in the weather panel select the parameters you want.
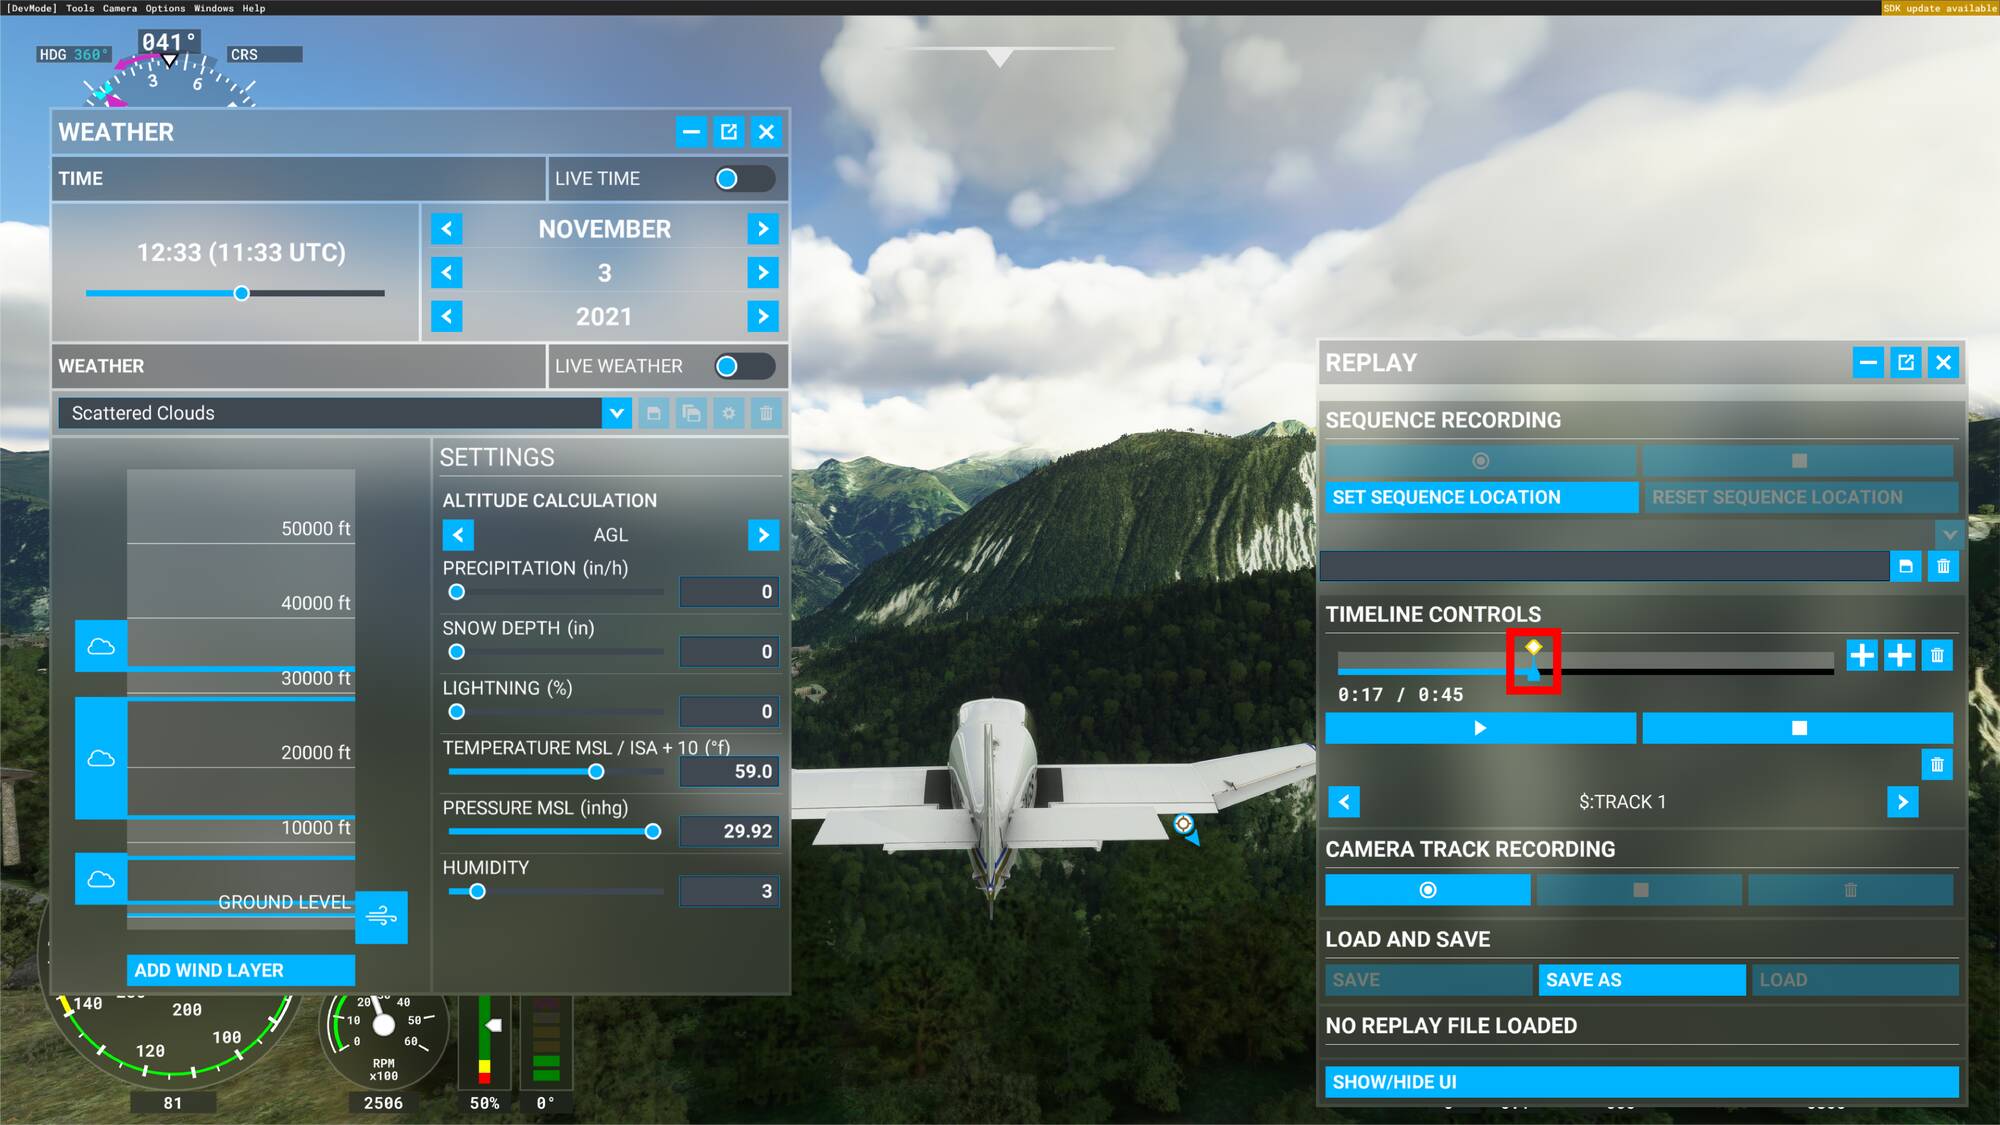
Now that you have the weather conditions and timecode to make the change, click on the weather keyframe to add a new key frame and change the weather conditions at this moment of your sequence.

You’ll see a yellow keyframe appeared on your timeline, this means that the weather change has been taken into account in your sequence.
You can repeat this manipulation as much as you want.
KNOWN ISSUE : Sometimes the weather keyframes don’t work, in this case delete all your weather keyframes and replace them, this should fix the problem.
KNOWN ISSUE : the day’s schedule is not taken into account by the weather keyframe
6.3 Delete a keyframe

If you want to delete a keyframe that you’ve added to your sequence timeline you have to first select it.
Then, click on the delete keyframe button placed on the right of the weather keyframe button.
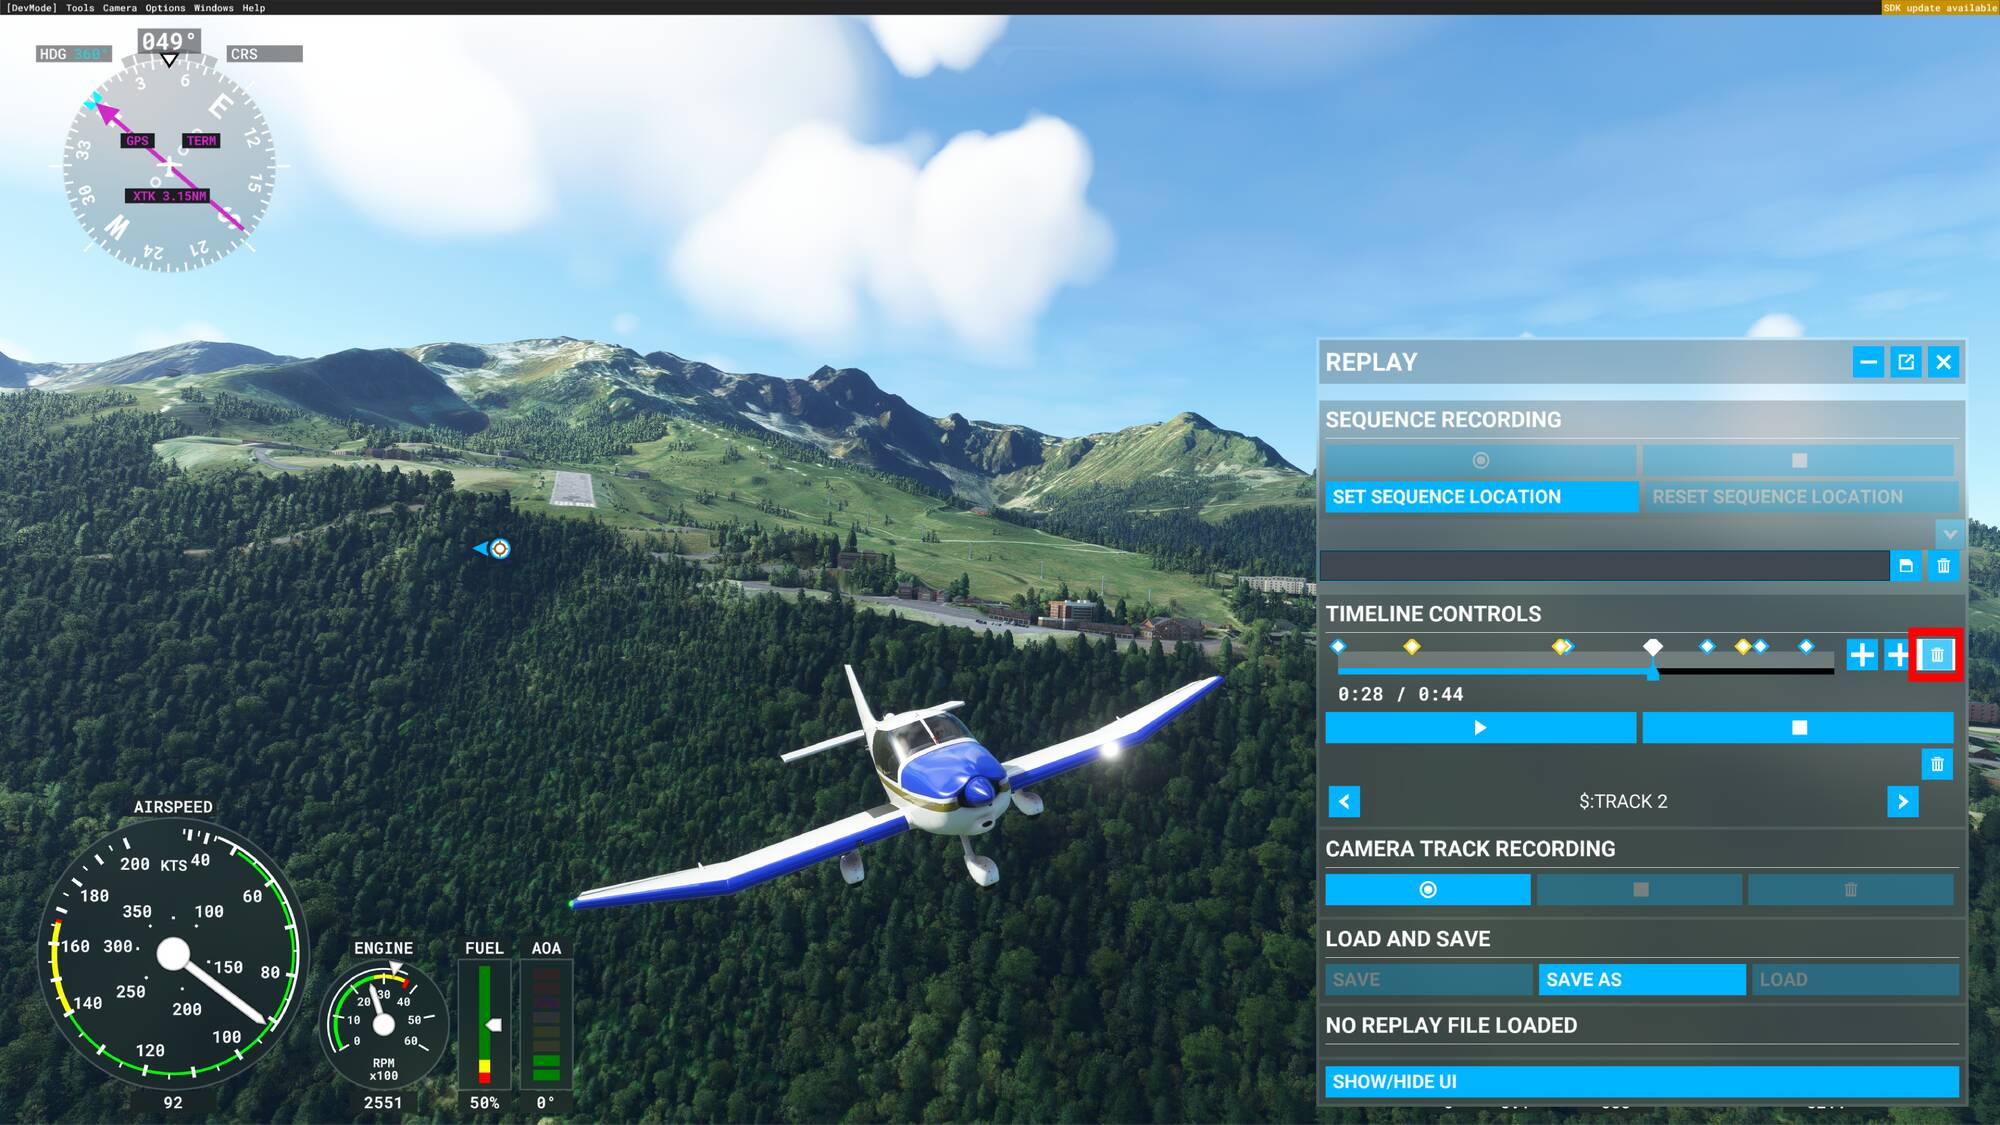
You will see the keyframe disappear from your sequence timeline, this means that the change has been implemented.

Weather keyframes or camera keyframes behave in the same way, you just have to select the keyframe you want to delete.
7 - Sequence Location editing
As previously stated, the sequence records your flight, your aircraft, and the camera used at the time, it does not take into account the geographic position of your aircraft. This means you can change the location during a recorded sequence.
GOOD TO KNOW : AN XBOX CONTROLLER IS NEEDED TO MODIFY YOUR PLANE POSITION IN SLEW MODE
7.1 Change the sequence location
Once you have your recorded sequence (with or without keyframe), you can modify the position of your flight. To do so, you’ll have to activate the slew mode. This is a useful mode for quickly re-positioning your plane.
Pressing Y on your keyboard activates slew mode. This allow you to quickly reposition your plane.
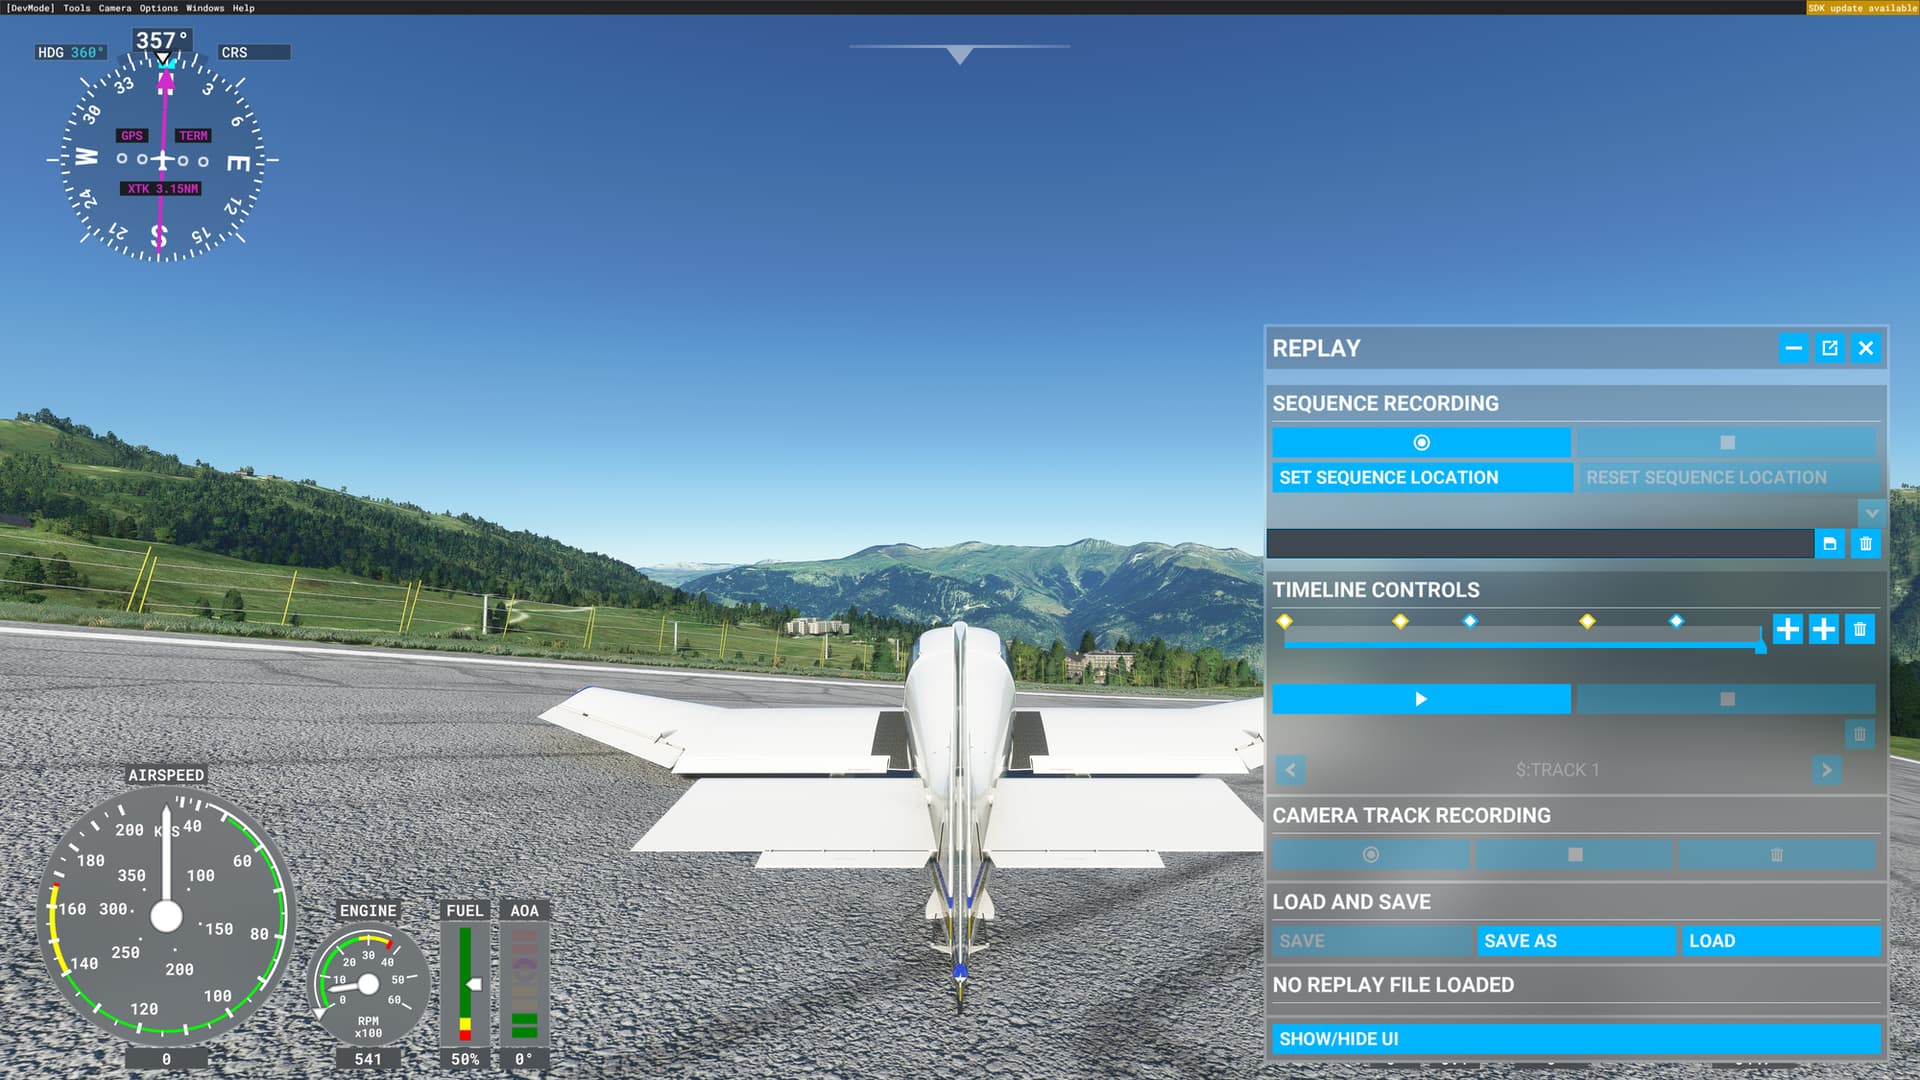
Once the slew mode is activated begin by pressing the left joystick to realign your plane.
Then, use joysticks and the left and right trigger to place your plane in the desired location

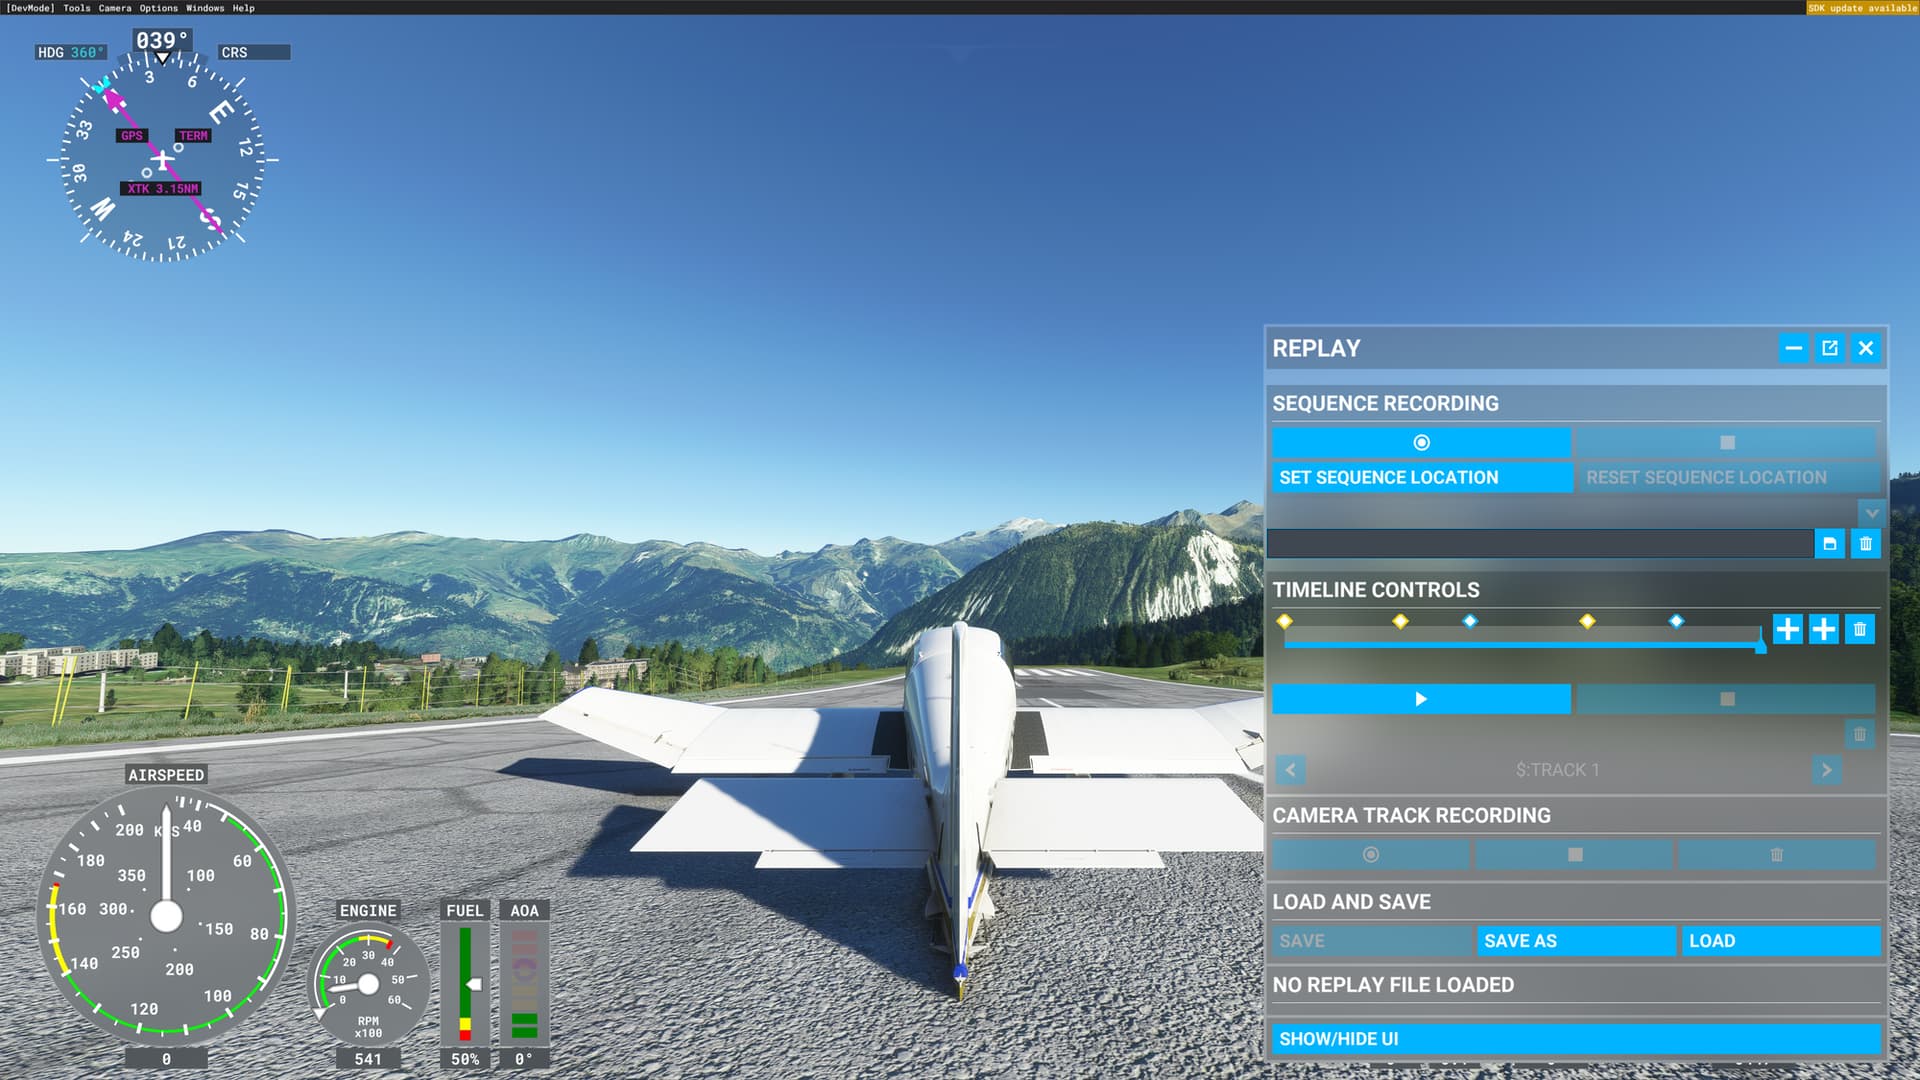
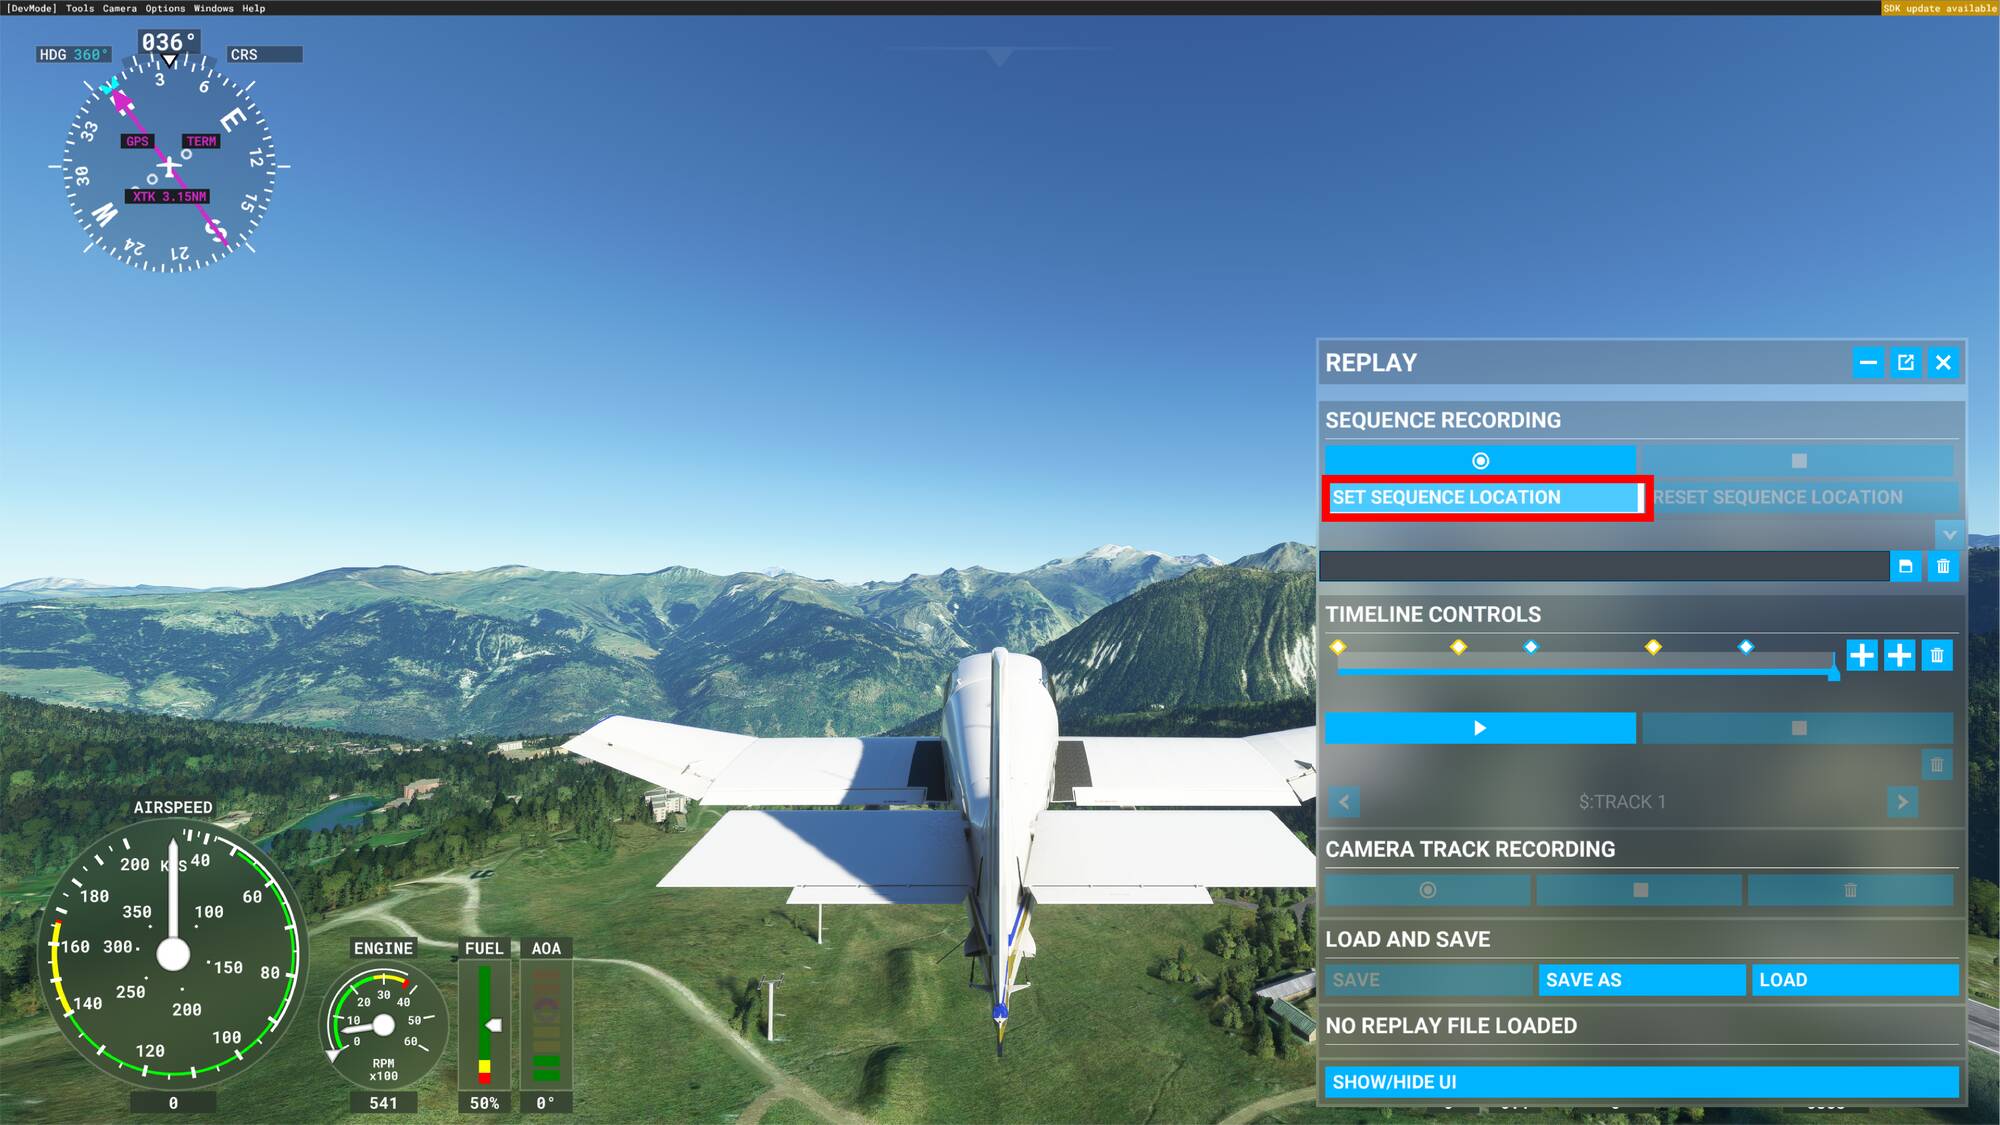
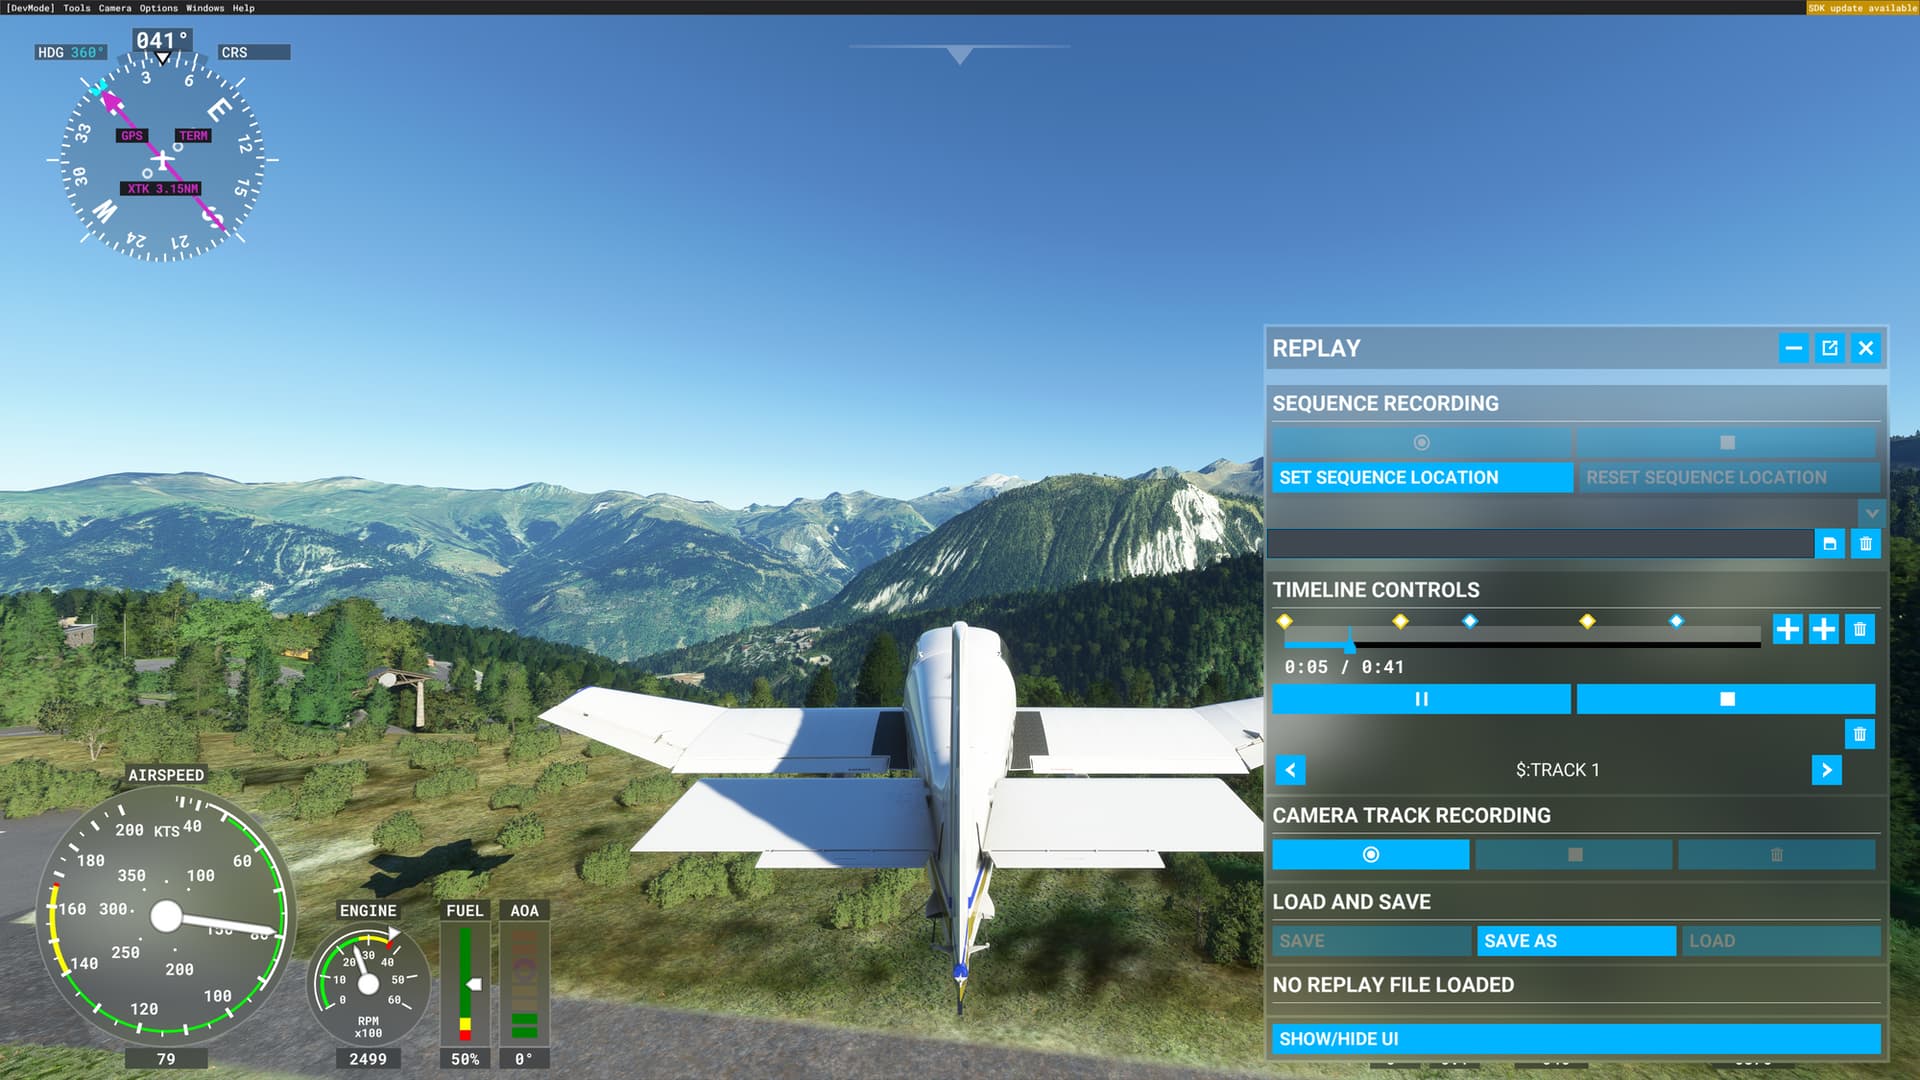
Once you have found the correct position, click on the "set sequence location" button. This position will automatically be set as the new starting position of your recorded sequence.
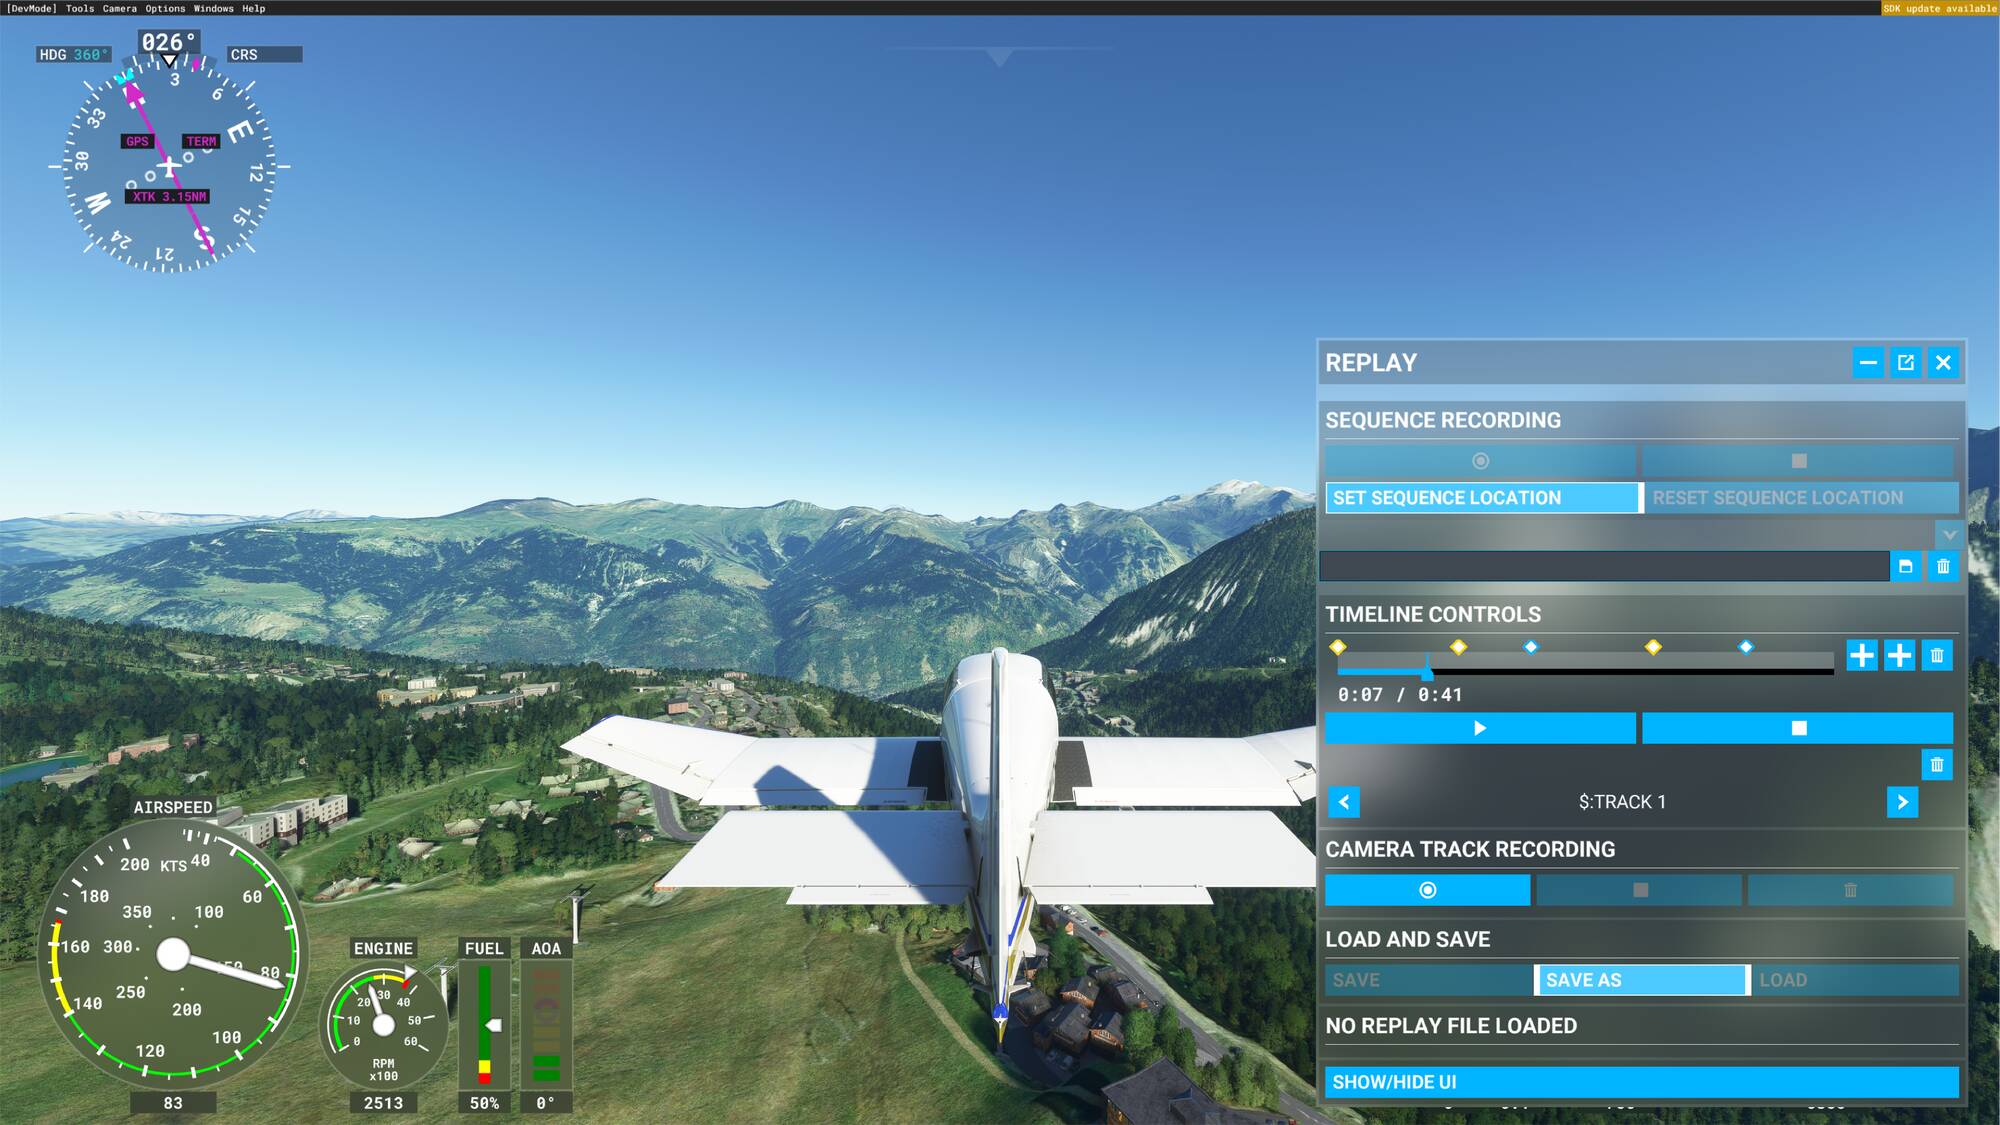
Once this is done, you can click on the play sequence button below the timeline to see how your sequence has been modified. The aircraft trajectory, keyframes, and sequence editing will be retained.
If you want to return to the original location of your sequence, click on the “reset sequence location”.

It will automatically take your plane to its first position.
original location of the plane in the recorded sequence
7.2 Change the sequence location
Previously you saw how to change the sequence location on a short scale, now you are going to see how to change it on a world scale.
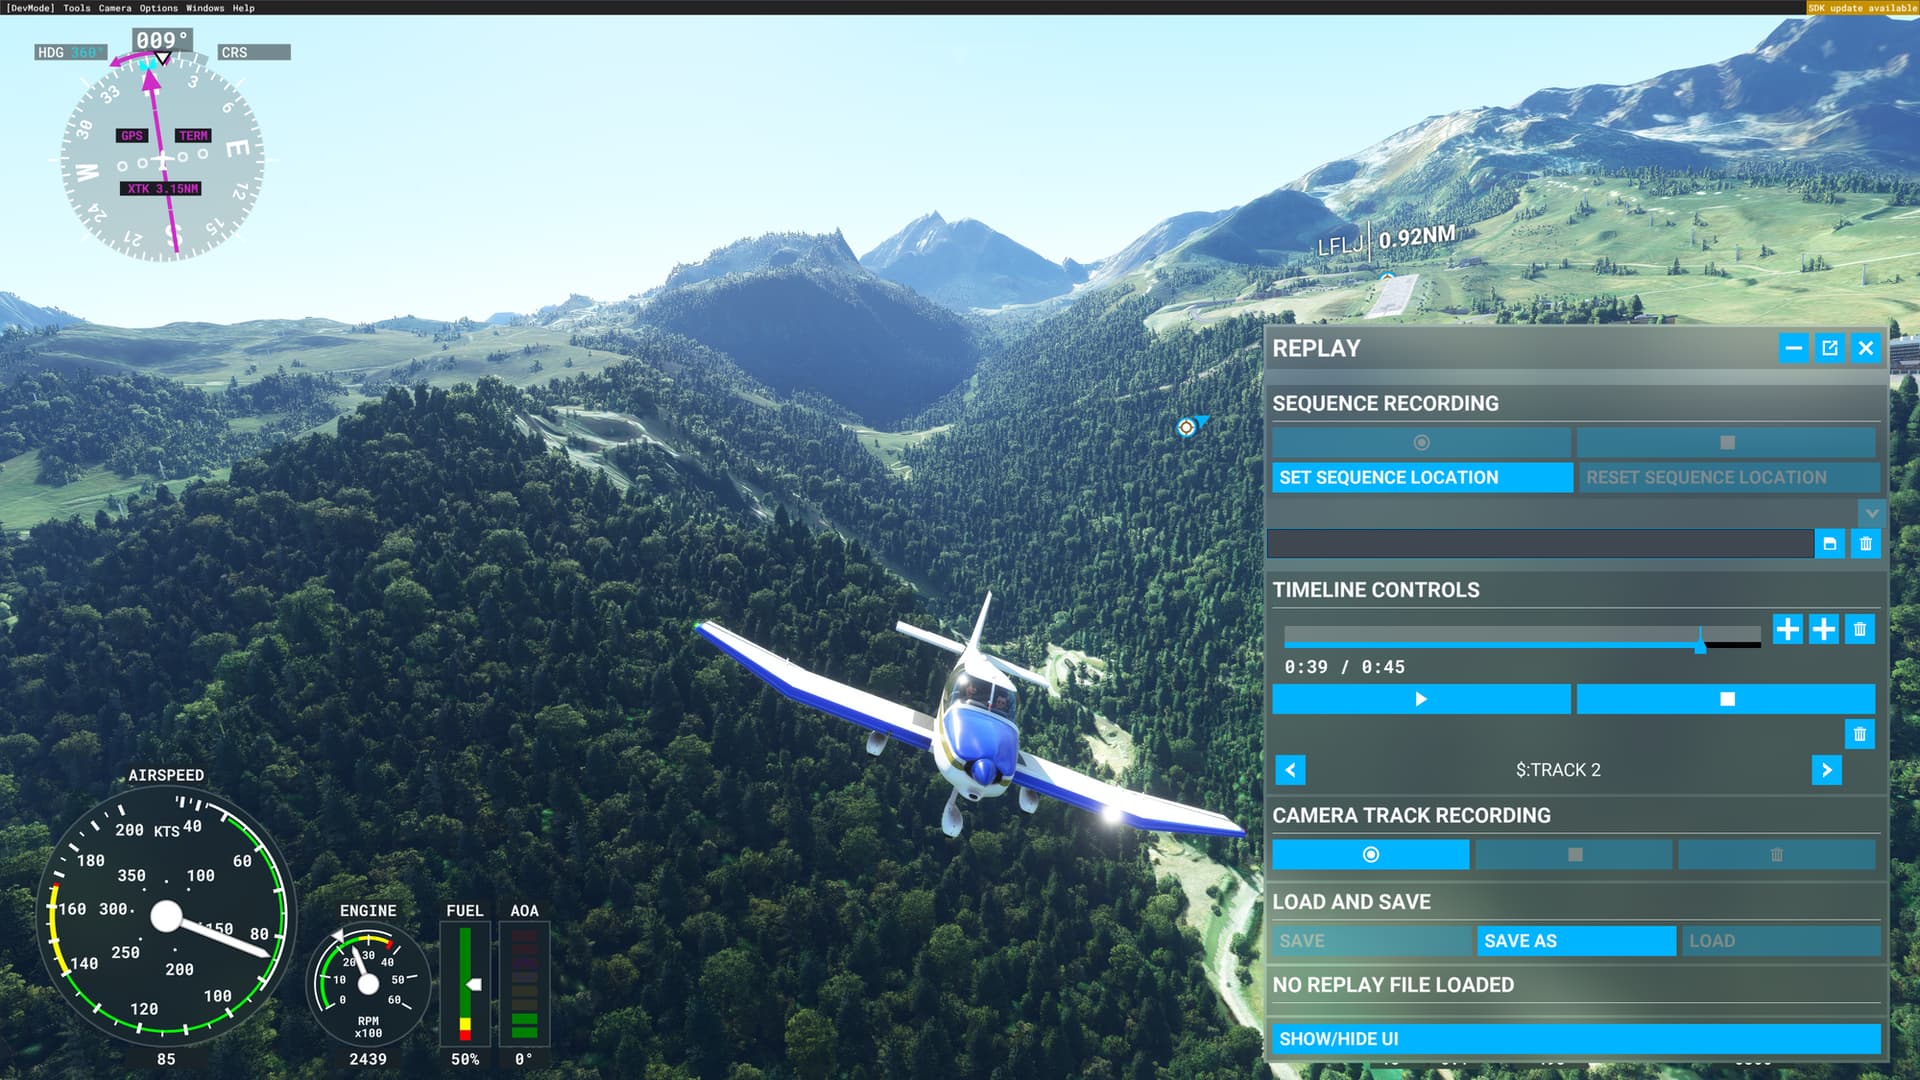
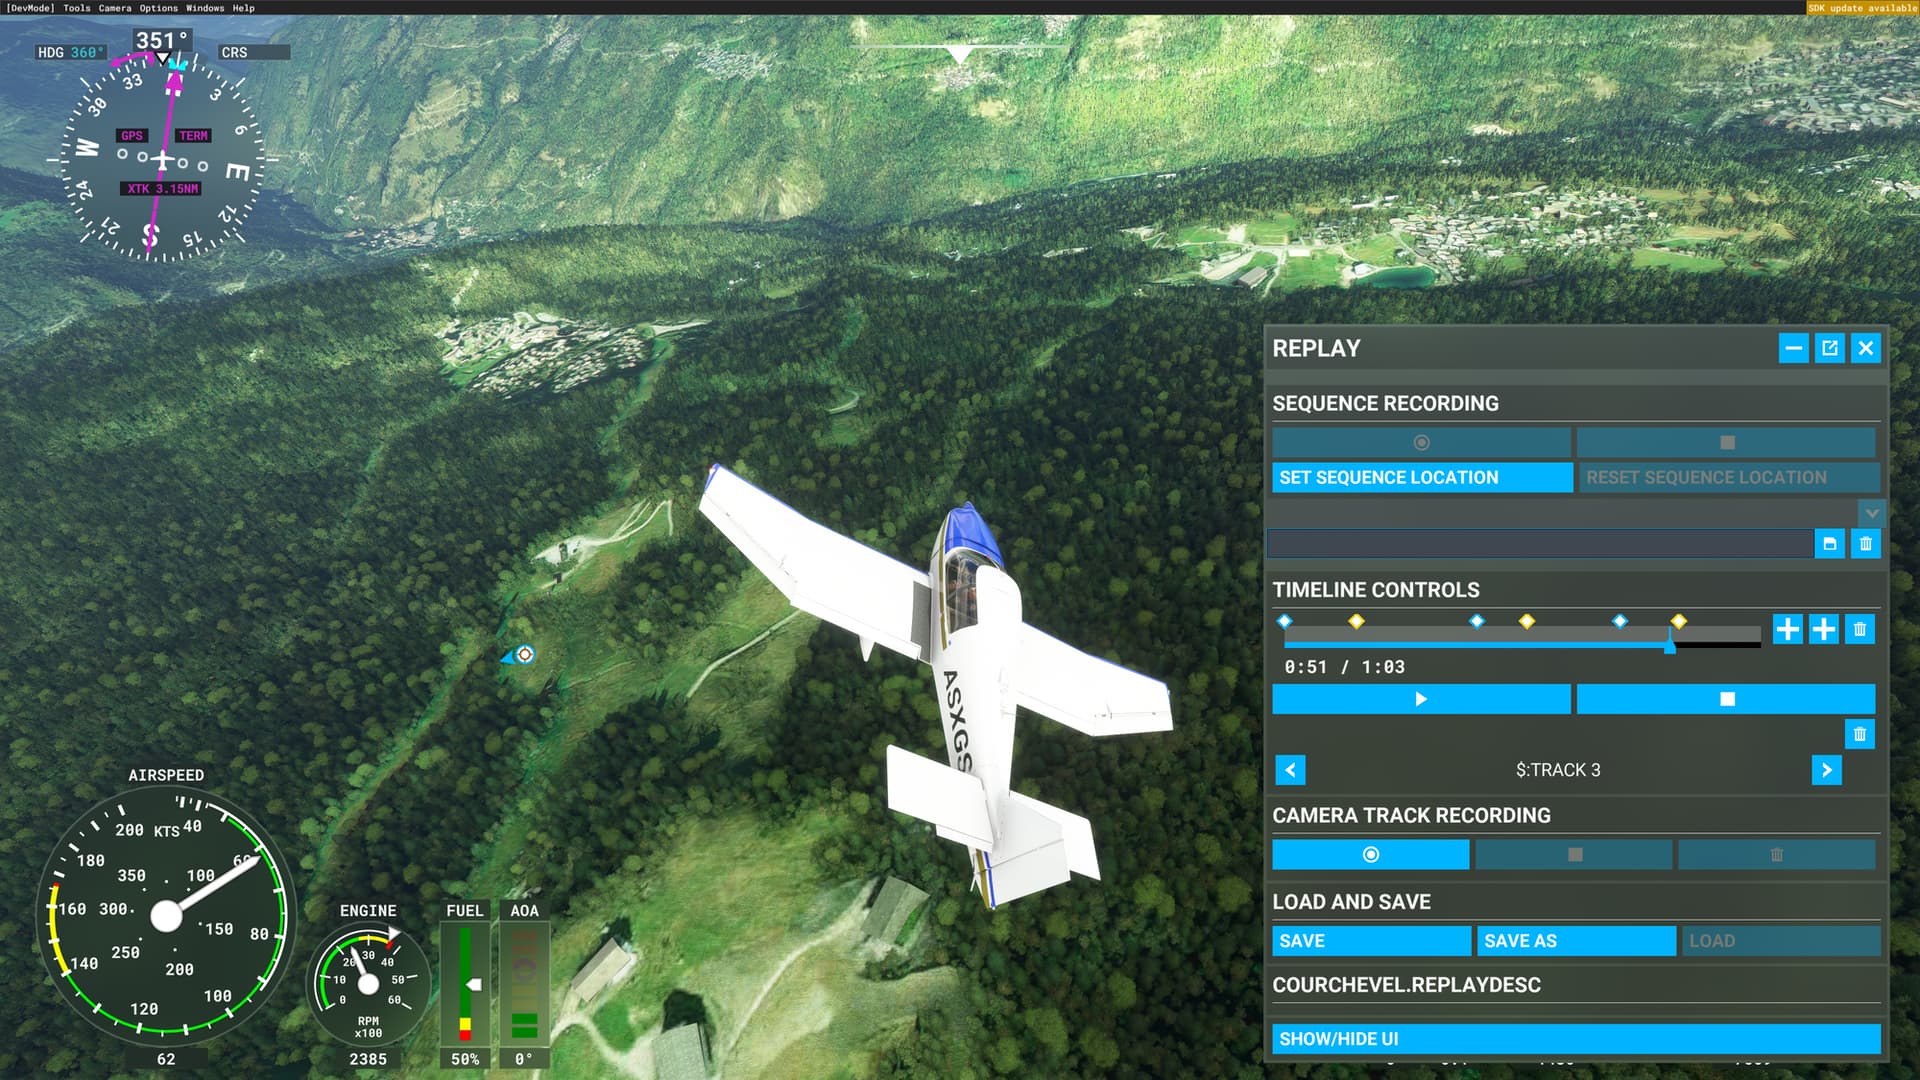
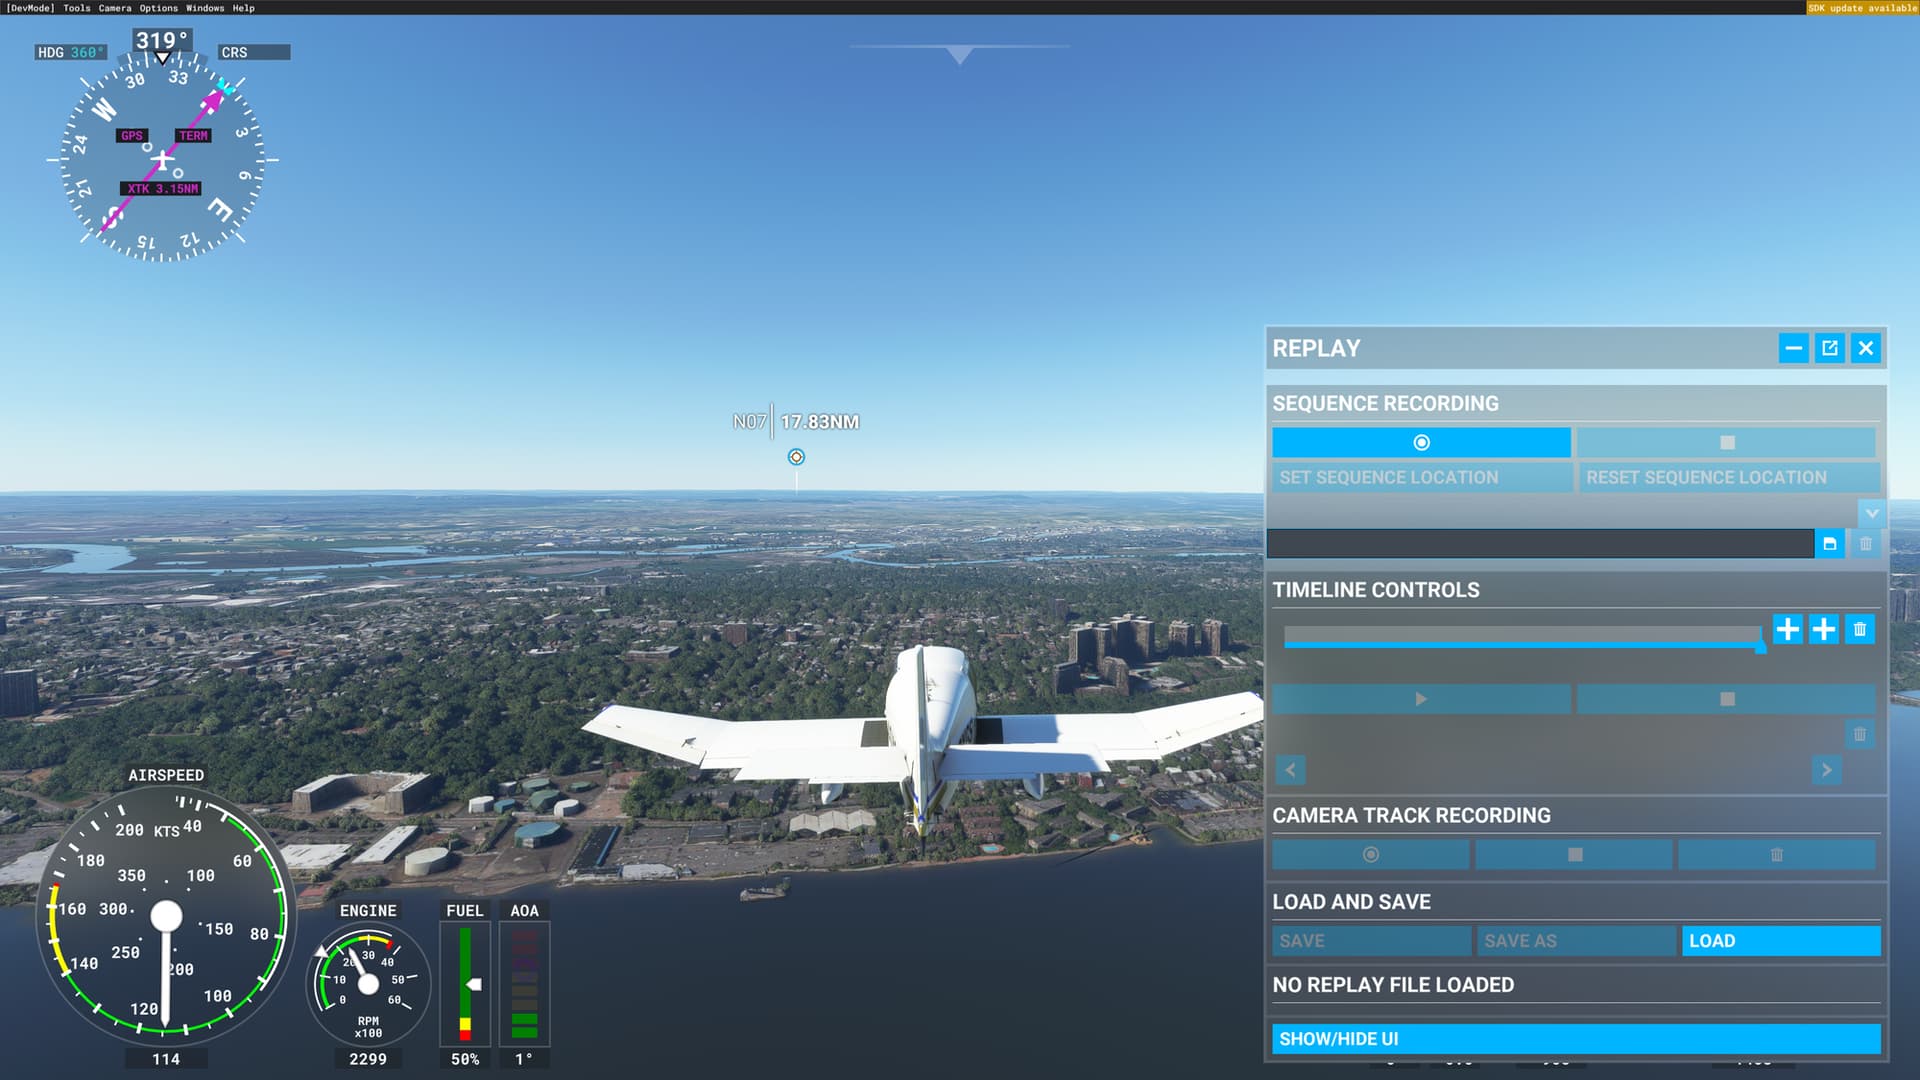
First record a first sequence somewhere (here near Courchevel airport), then edit it, modify it etc, do all modifications you want on it.
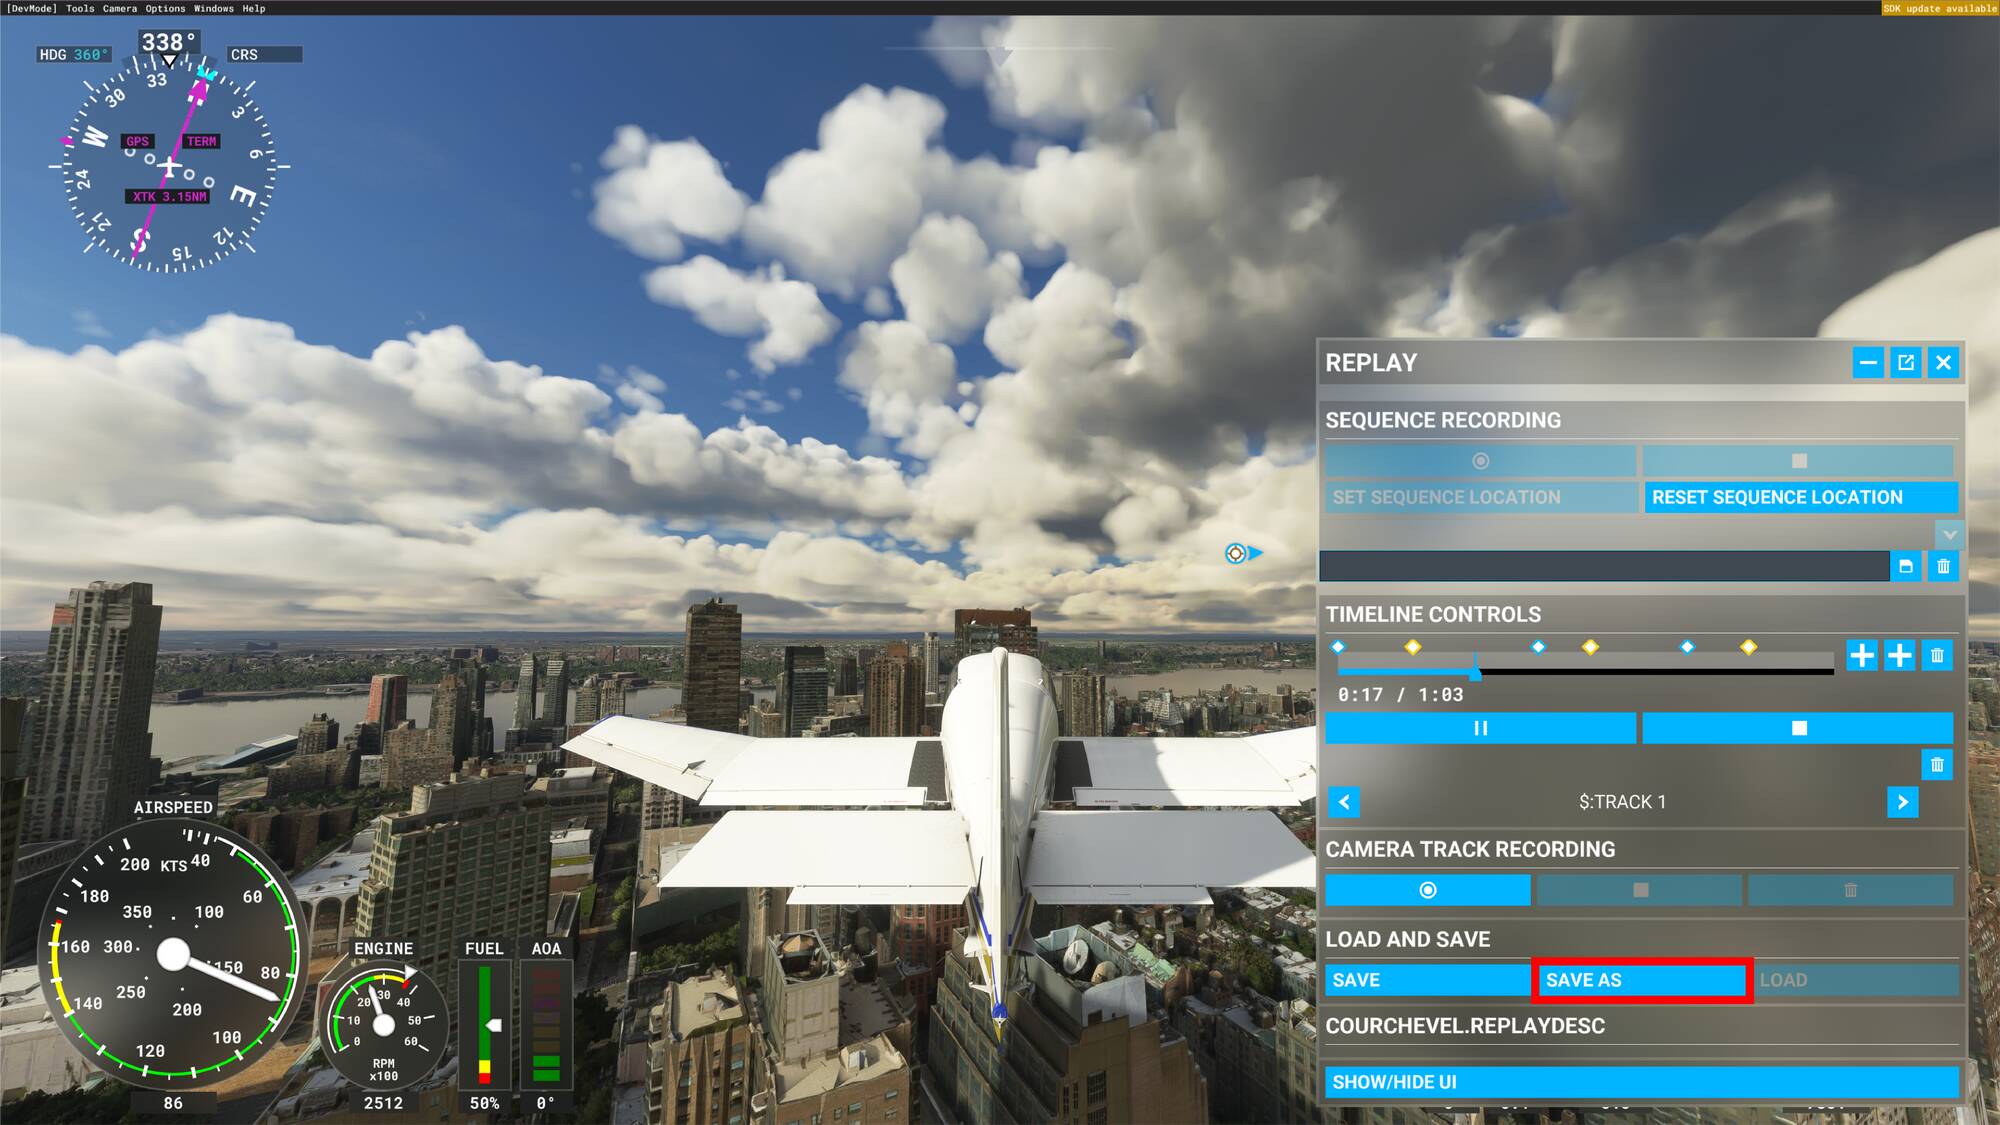
Save this replay file by clicking on the save as button and name your file (hear courchevel replay).
Once this part is down, leave your current flight session and launch a new one in a new location (here New York) but with the same aircraft model.
Then, on the replay panel click on the “load” button, select the previous replay file you just saved before this flight session and load it.

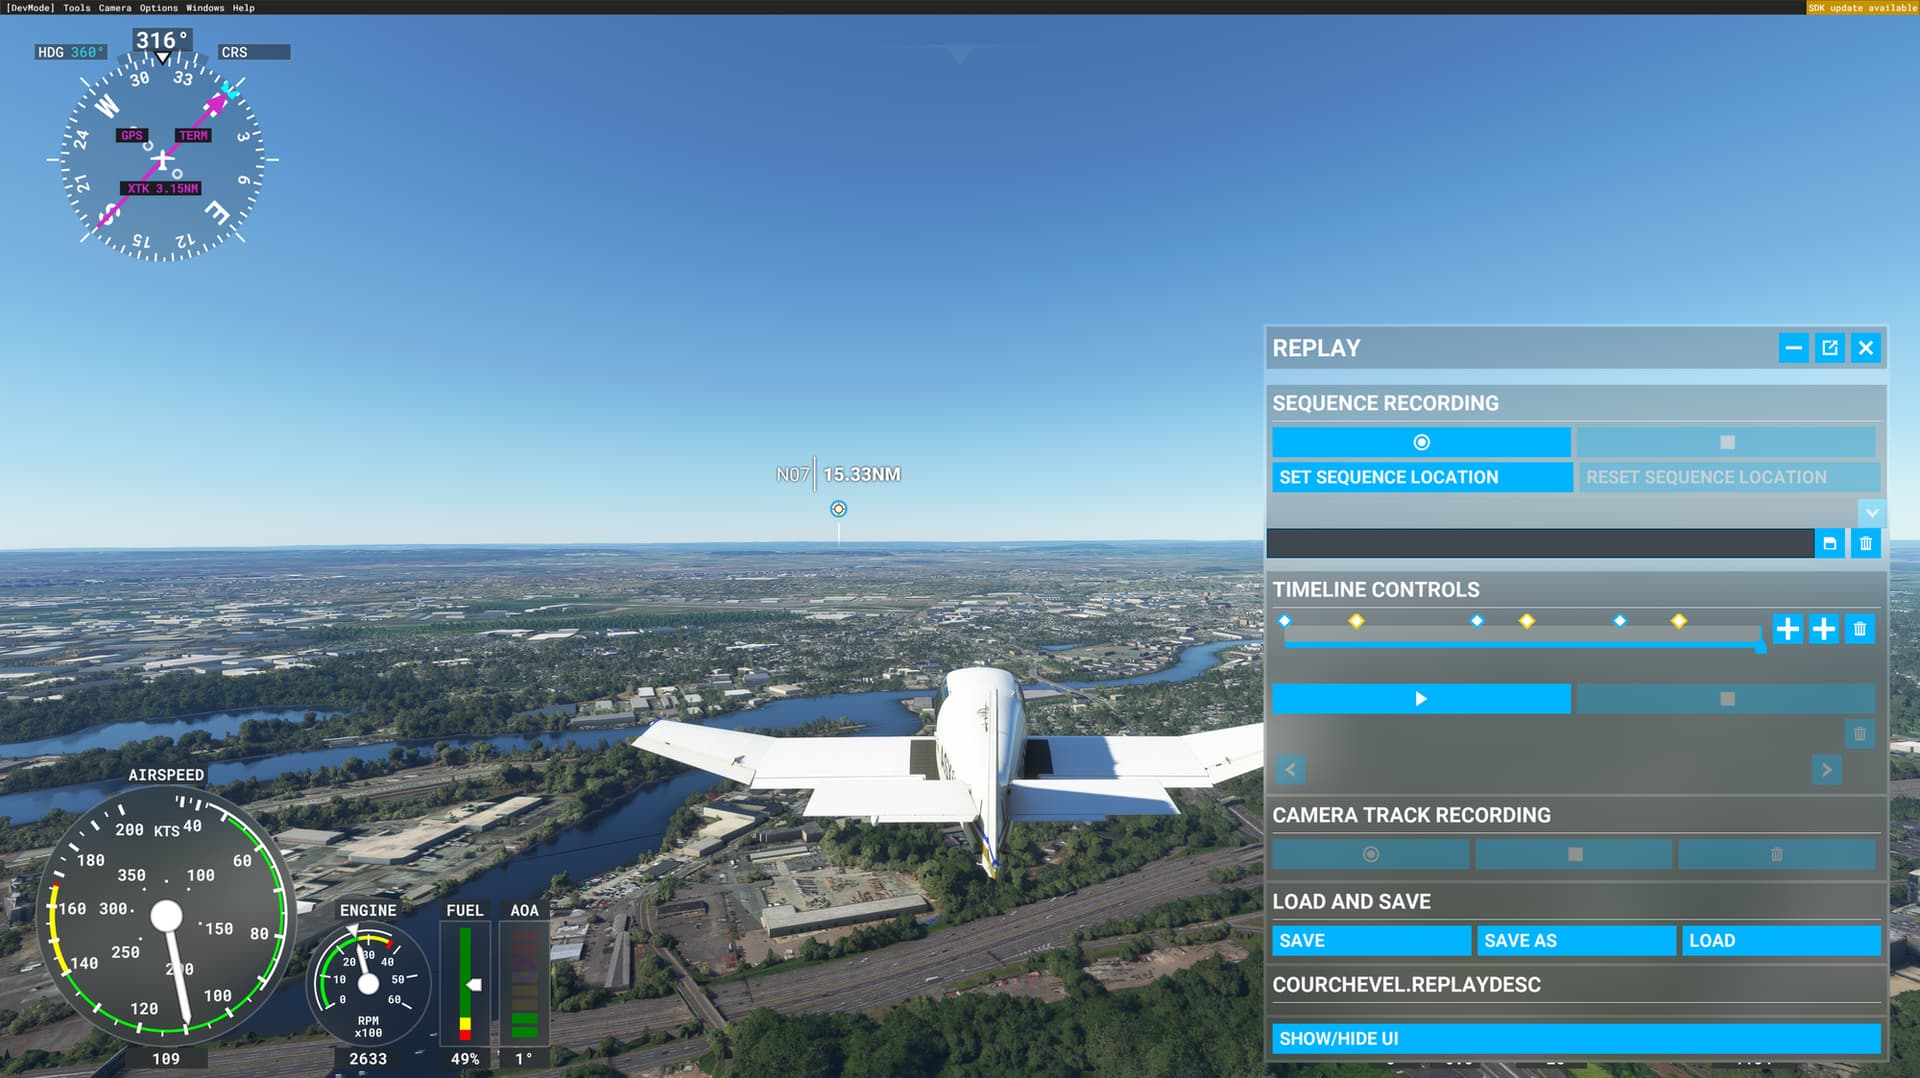
you find your keyframes editing and plane trajectory from the original file (Courchevel_replaydesc)
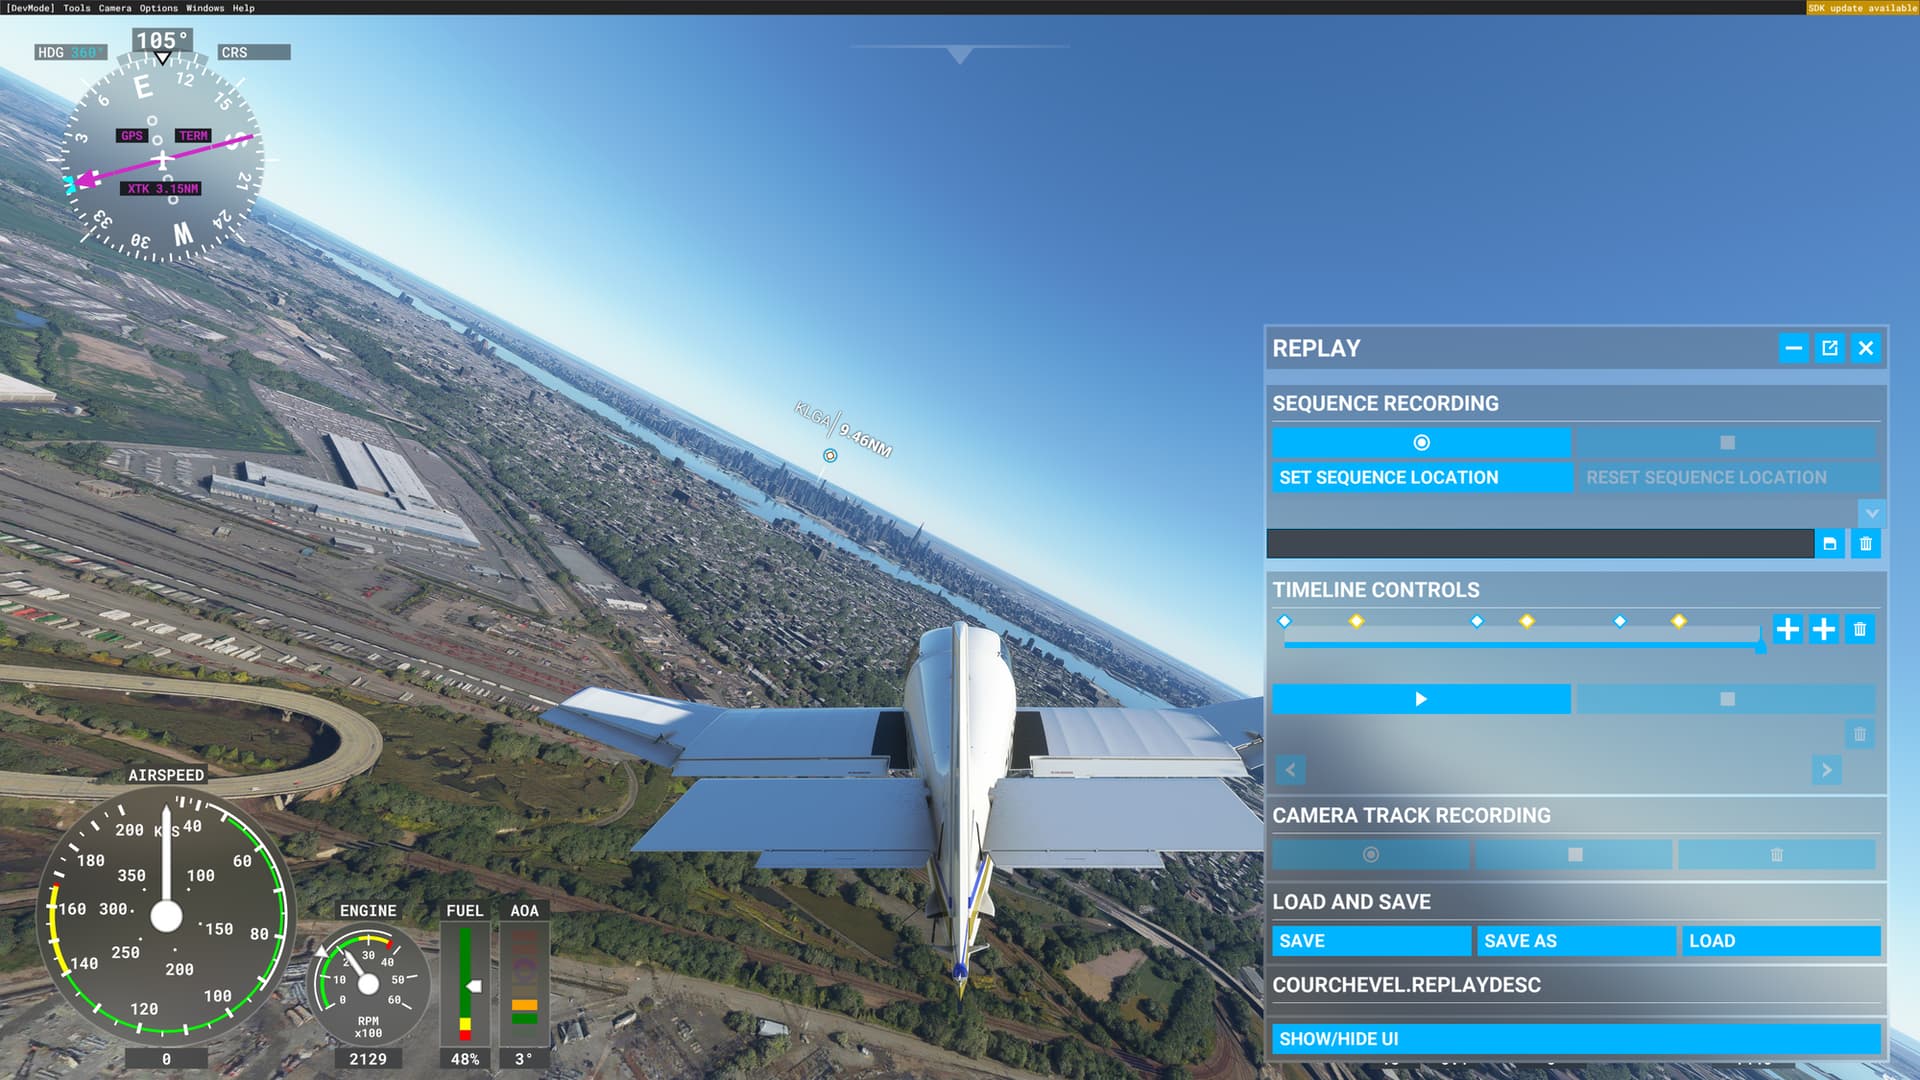
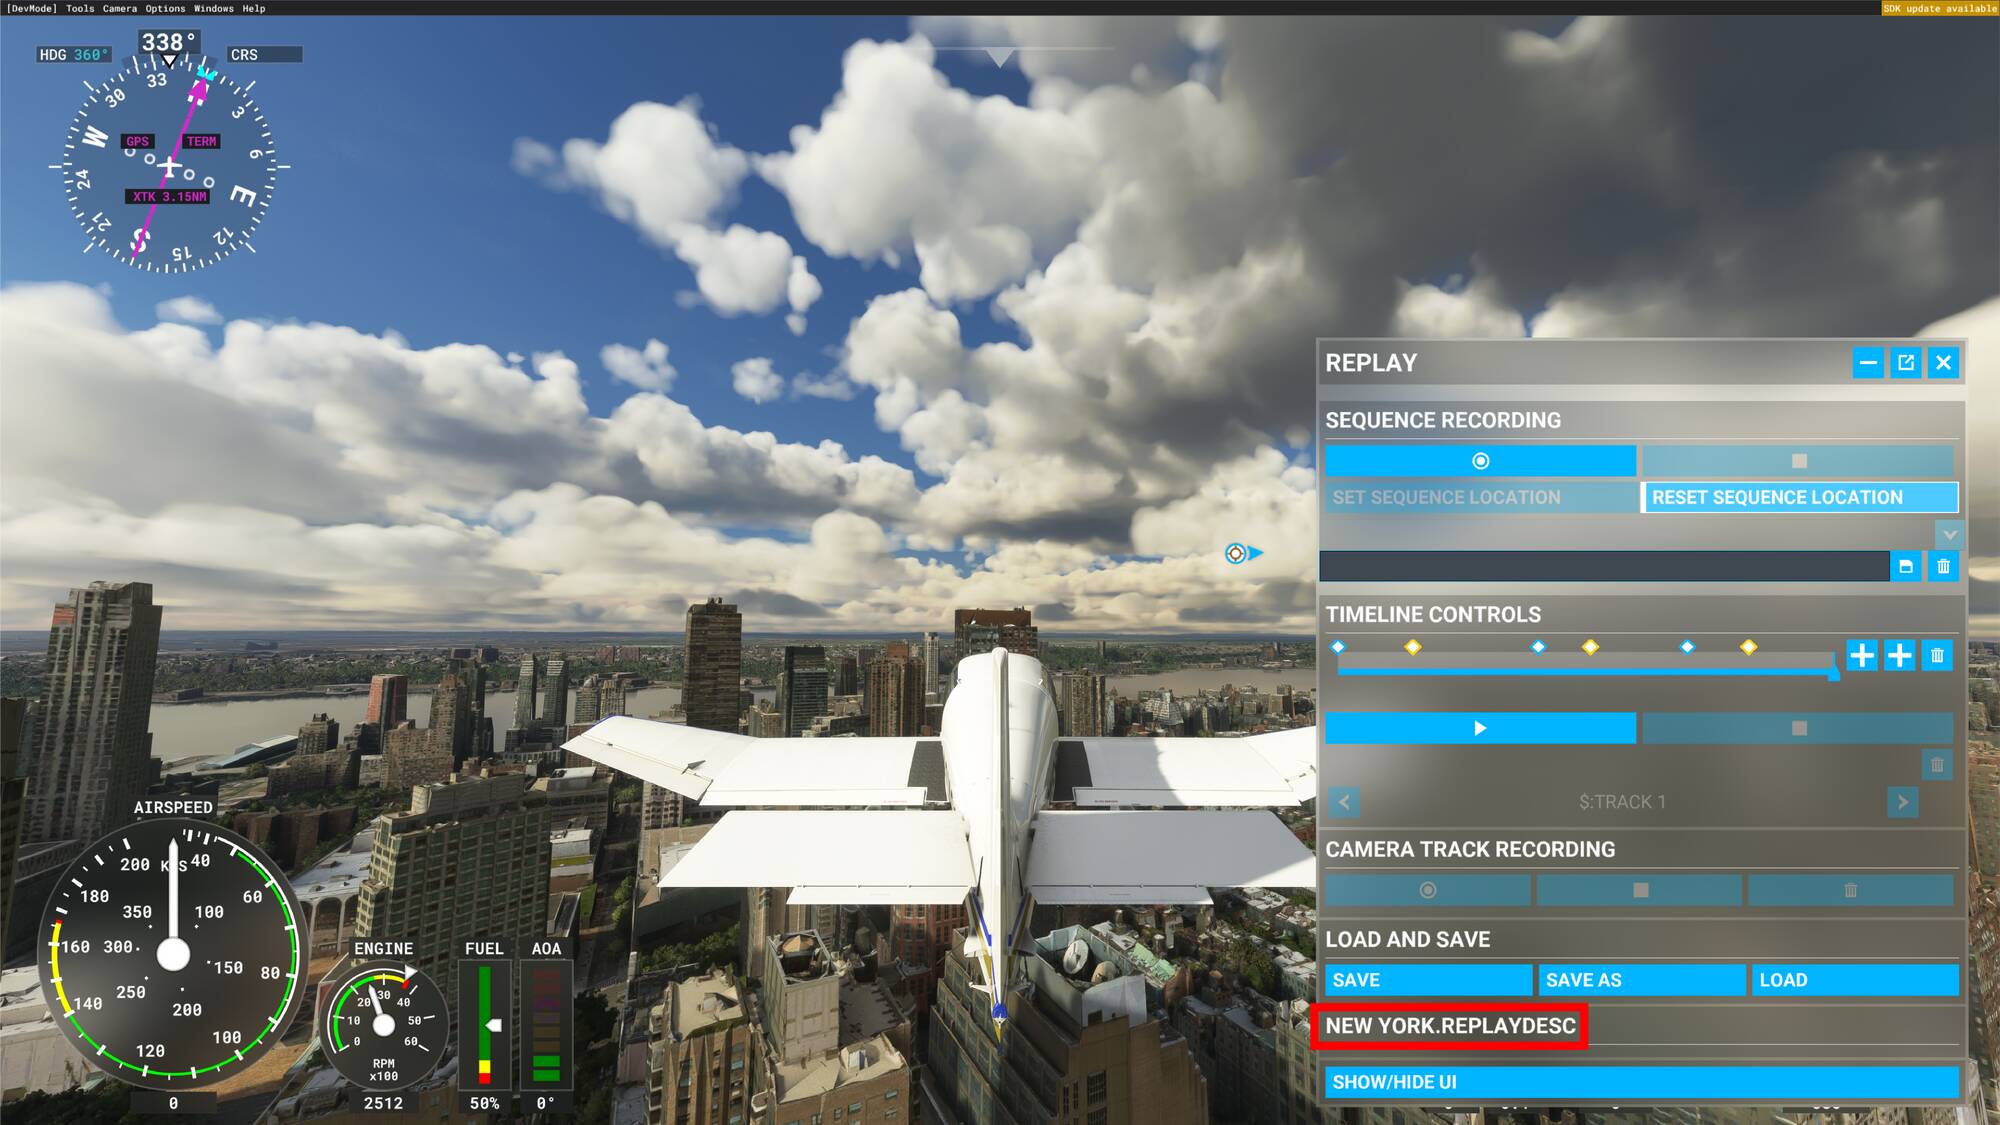
when it’s loaded DON’T CLICK ON THE SEQUENCE PLAY BUTTON ! (or you’ll be back to the original sequence location, here Courchevel)
Press Y to activate the slewmode.
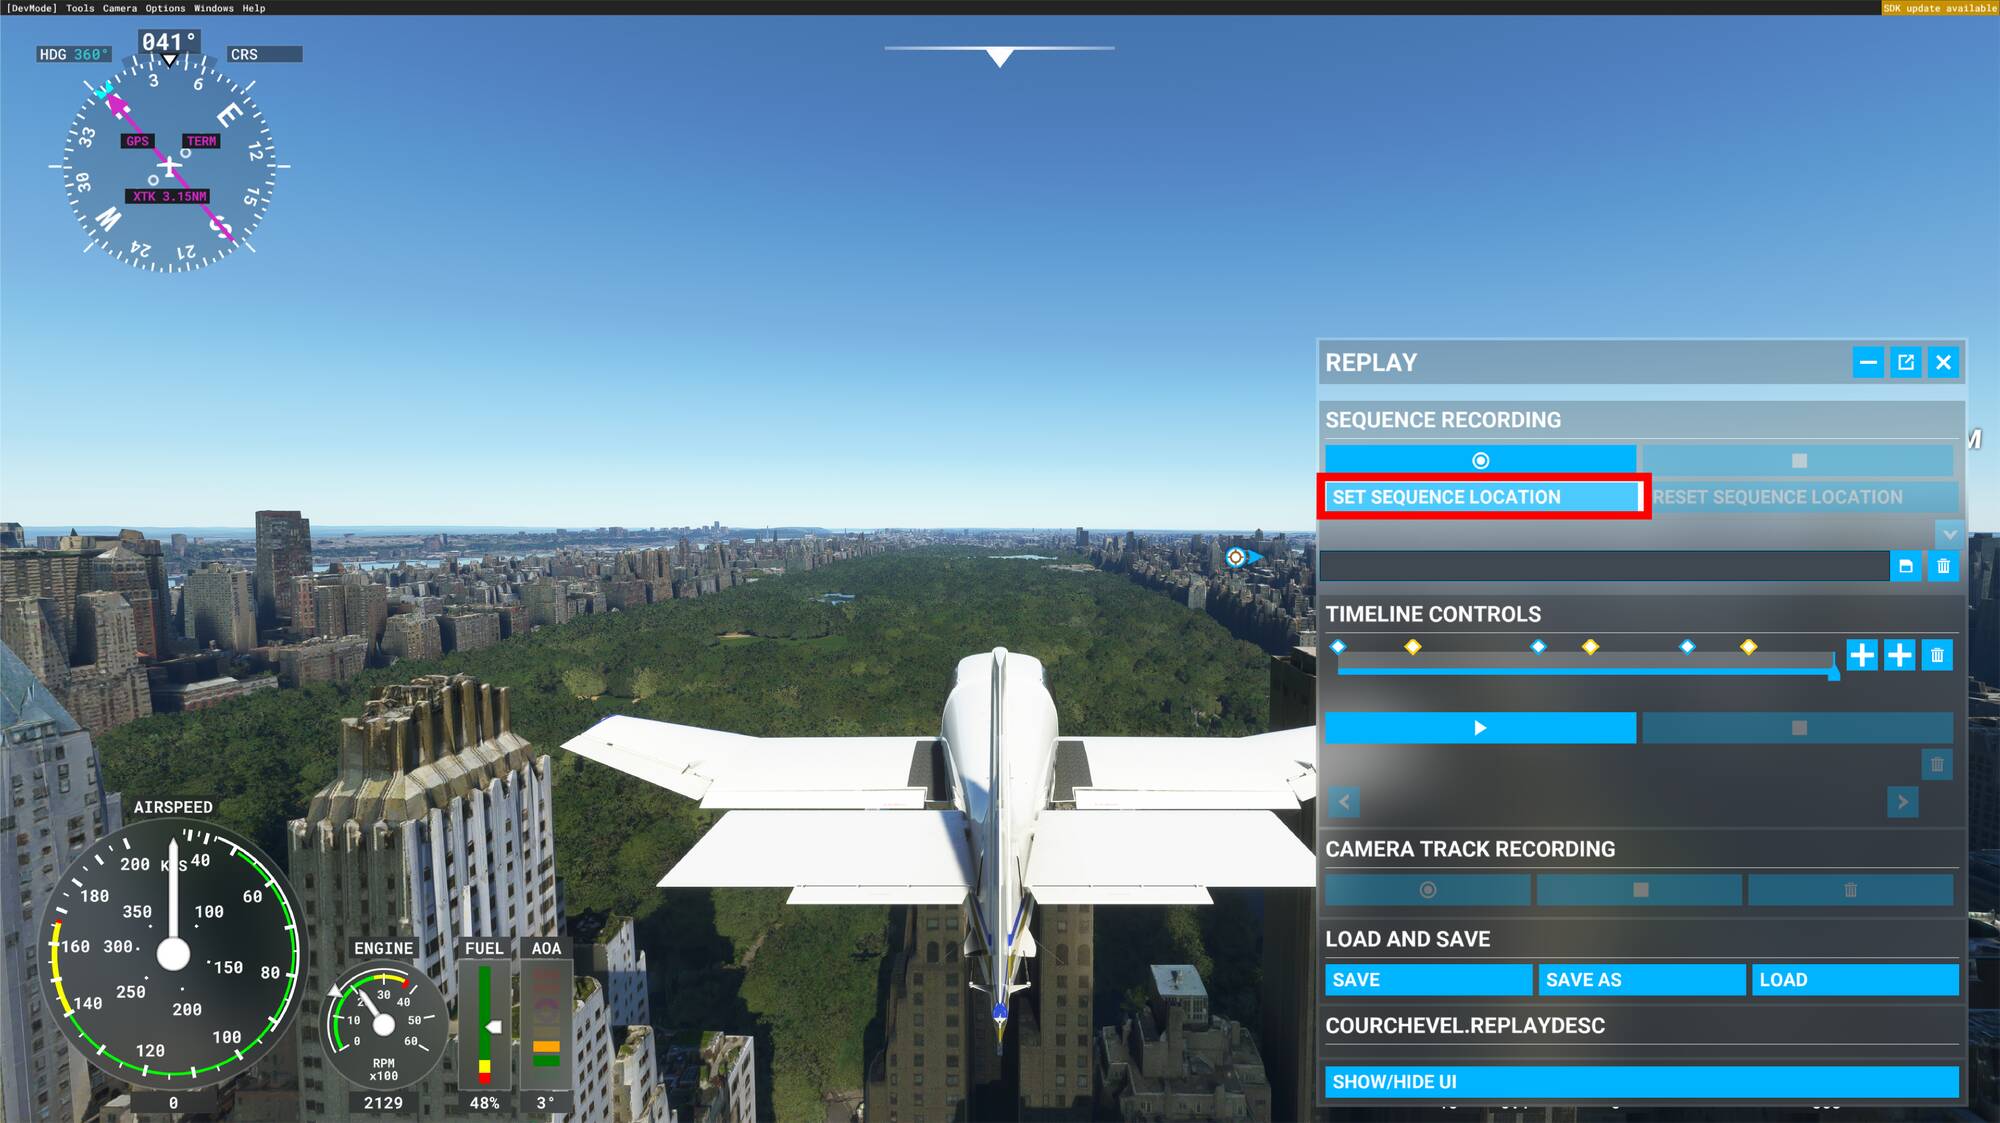
Then press your left stick to realign your plane and place it to the desired starting position.
Once it’s done, click on the “set location button” to set this position as the new starting position of your recorded sequence.
Your sequence location has been moved from Courchevel to New York; your plane trajectory and all the editing part has been conserved.
You can now click on the play sequence button below the timeline to see how your sequence has been modified.
Finally, save this new replay file by clicking on the “save as” button.
A new replay file has been created with the editing and the plane trajectory from the original replay (courchevel) in a new location.
KNOWN ISSUE : The location feature is unstable for the moment and can block your replay tool (especially the timeline player and cameras keyframes)
8 - Known issues
8 - Known issues
- The name of a recorded sequence doesn’t appear and can’t be edited if it’s the only one.
cf part 3.1 of the tutorial
- When you delete a sequence, your replay file name is replaced by “NO LOADED REPLAY FILE”
cf part 3.2 of this tutorial
- You can’t modify a camera track name
cf part 4.2 of this tutorial
- Sometimes the weather keyframes don’t work, in this case delete all your weather keyframes and replace them, this should fix the problem.
cf part 6.2 of this tutorial
- The day’s schedule is not taken into account by the weather keyframe
cf part 6.2 of this tutorial
- The location feature is unstable for the moment and can block your replay tool.
cf part 7 of this tutorial
-
No camera recording in VR mode
-
The replay tool on a multiplayer flight session isn’t stable for the moment (plane trajectories can move etc), it will be fixed soon.